

Why Regular Oil Changes Matter for Lawn Mowers
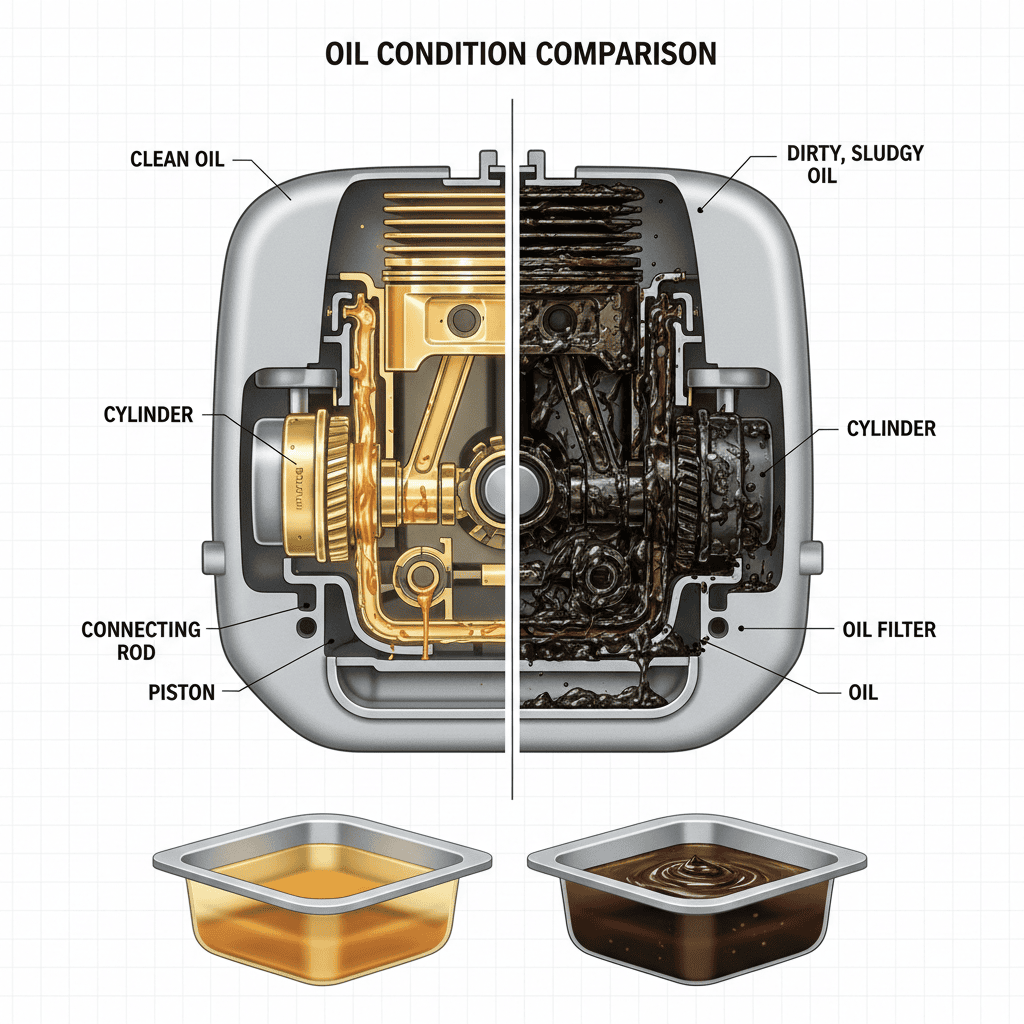
Oil is the lifeblood of your lawn mower’s small engine. It lubricates moving parts, reduces friction, dissipates heat, and protects against rust and corrosion. Over time, oil breaks down from heat and contamination, losing its ability to protect the engine. Fresh oil ensures smooth operation, extends engine life, and prevents costly repairs.
Most lawn mower manufacturers recommend oil changes every 50-100 operating hours, roughly every 1-2 weeks during regular mowing season for residential use. Neglecting oil changes leads to engine sludge buildup, increased wear on cylinders and pistons, and eventual engine failure. A simple 15-minute maintenance task now can save hundreds in repairs later.
Safety Precautions Before Starting
Never attempt an oil change on a hot engine. Drain oil from a warm—not hot—engine by running it for 30 seconds, then turning it off and waiting 2-3 minutes for the temperature to drop safely. Hot oil can cause severe burns, and a warm engine drains oil more completely than a cold one.
- Turn off the engine and remove the spark plug wire to prevent accidental starting
- Wear work gloves to protect your hands from oil and sharp edges
- Use eye protection if working on ride-on or zero-turn mowers with elevated drain plugs
- Work on level ground to ensure accurate dipstick readings and prevent tipping
- Place cardboard or a mat underneath to catch spills and simplify cleanup
- Ensure proper ventilation if working in a garage or enclosed space
Tools and Materials You’ll Need
Gather these items before beginning to avoid interruptions:
- Socket wrench or adjustable wrench (size depends on your drain plug, typically 10-17mm)
- Oil filter wrench (if your mower has a filter)
- Oil drain pan (at least 1.5-2 quart capacity for most push mowers)
- Fresh oil in the correct type and viscosity for your model
- New oil filter (if equipped)
- Rags or shop towels for cleanup
- Owner’s manual to confirm oil type, capacity, and drain plug location
Oil type matters significantly. Check your owner’s manual for the correct SAE grade—common options include SAE 30 for warm climates and SAE 10W-30 or 5W-30 for colder regions. Capacity typically ranges from 0.5 to 2 quarts depending on mower size. Using the wrong oil or overfilling can damage your engine.
How to Drain Old Oil from Your Lawn Mower
Step 1: Locate the drain plug. On push mowers, the drain plug is usually under the mower deck near the engine base. On ride-on and zero-turn mowers, it’s typically on the side of the engine or underneath the chassis. Consult your owner’s manual if you cannot locate it immediately.
Step 2: Position the drain pan. Place your drain pan directly under the drain plug to catch all oil. Oil spills are messy and environmentally harmful, so position the pan carefully.
Step 3: Remove the drain plug. Use your wrench to loosen the plug by turning counterclockwise. Once loose enough, unscrew it by hand (carefully—it may still be warm). Oil will begin draining immediately. Let all old oil drain completely, which typically takes 2-3 minutes.
Step 4: Clean and reinstall the drain plug. Wipe the drain plug clean with a rag. Inspect the plug and surrounding area for damage or cracks. Reinstall the plug by hand, then tighten with your wrench. Do not over-tighten, as this can strip the threads or crack the plug.
Step 5: Dispose of used oil properly. Used oil is hazardous waste and should never be poured down drains or onto soil. Take it to a local recycling center, auto parts store, or quick-lube facility that accepts used oil. Most accept it free of charge. Many communities require proper disposal under environmental regulations.
Replacing the Oil Filter (If Your Mower Has One)
Not all lawn mowers have oil filters. Small push mowers typically have no filter, while many ride-on and zero-turn mowers do. Check your manual to confirm whether your model has one.
If your mower has a filter:
- Locate the filter, usually a cylindrical canister mounted on the engine side
- Place a rag under it to catch residual oil during removal
- Use an oil filter wrench to turn the filter counterclockwise until loose, then unscrew by hand
- Clean the filter mounting surface with a rag to remove old gasket material and debris
- Apply a thin layer of new oil to the rubber gasket of the replacement filter
- Hand-tighten the new filter until the gasket contacts the mounting surface, then turn an additional 3/4 turn. Do not use a filter wrench to tighten—hand-tightening is sufficient and prevents over-tightening damage
Adding Fresh Oil and Checking the Level
Step 1: Locate the oil filler cap. Usually labeled “OIL” or marked with an oil can symbol, the filler cap is on top of the engine. Remove it by twisting counterclockwise.
Step 2: Pour in new oil slowly. Start with approximately 75% of the recommended capacity. Pouring slowly prevents splashing and allows you to stop before overfilling. Refer to your manual for exact capacity—typically 0.5-2 quarts for residential mowers.
Step 3: Check the oil level with the dipstick. Most mowers have a dipstick attached to the underside of the filler cap. Insert the dipstick all the way into the oil reservoir without screwing it in, then pull it out and observe the level. The oil should reach the “FULL” mark on the stick.
Step 4: Adjust if necessary. If the level is below “FULL,” add oil in small increments (about 1/4 cup at a time) and recheck. If overfilled, remove excess oil carefully with a syringe or turkey baster into your drain pan. Overfilled oil can cause white smoke during operation, fouled spark plugs, and engine damage.
Step 5: Replace the filler cap and start the engine briefly (10-15 seconds) to circulate fresh oil through the engine. Stop and wait 1-2 minutes, then check the dipstick again to verify the level remains correct. This final check ensures accurate reading after oil circulation.
Differences for Push Mowers, Ride-On Mowers, and Zero-Turn Models
Push Mowers
Push mowers have the simplest oil change process. The drain plug is easily accessible underneath the deck, and most models lack an oil filter. Capacity is typically 0.5-1 quart. These mowers can be tilted on their side during draining if necessary, but keep the spark plug side facing upward to prevent oil from running into the carburetor. Check your manual before tilting—some models have fuel tanks that may leak.
Ride-On Mowers
Ride-on mowers hold more oil (1-2 quarts) and often have oil filters. The drain plug is located on the side of the engine or underneath the chassis, requiring you to work under the mower with a drain pan. Many ride-on models have a dipstick with separate “COLD” and “HOT” marks—use the “HOT” mark for readings taken after a brief warm-up. Always verify your model’s specifications, as oil capacity and drain plug locations vary significantly between manufacturers.
Zero-Turn Mowers
Zero-turn models use larger engines similar to ride-on mowers and follow the same basic oil change procedure. However, their lower chassis can make accessing the drain plug challenging. Some zero-turn mowers have multiple engines (two-engine models for dual hydrostatic transmissions), requiring separate oil changes for each engine. Always consult your manual to identify how many engines your model has and their individual capacities.
Troubleshooting Common Oil Change Issues
The drain plug won’t budge. If the plug is stuck, apply penetrating oil (like WD-40) and wait 15 minutes. Use a larger wrench or breaker bar for added leverage. If still stuck, gently tap the wrench with a rubber mallet to free corrosion or debris. Never force it violently, as you risk stripping threads or breaking the plug.
Oil is leaking after refilling. This usually indicates an over-tightened or improperly installed drain plug. Turn off the engine immediately, allow it to cool, and tighten the drain plug snugly—not excessively. If leaking continues, the drain plug gasket may be damaged and require replacement. For filter leaks, ensure the gasket is properly seated and the filter is hand-tightened correctly (gasket touching surface, then 3/4 additional turn).
You accidentally overfilled the oil. Stop using the mower immediately. Overfilled oil will be expelled from the engine’s breather vent, potentially damaging internal components. Allow the engine to cool, then remove excess oil with a syringe or baster into your drain pan. Recheck the level frequently during removal to avoid underfilling.
White smoke appears during operation after an oil change. This indicates oil has entered the combustion chamber, usually from overfilling or a cracked filter seal. Stop the engine, let it cool, verify the oil level, and correct any overfilling. If the problem persists after adjustment, the filter gasket may need replacement.
Frequently Asked Questions
How often should I change my lawn mower’s oil?
Most manufacturers recommend an oil change every 50-100 operating hours. For residential users mowing weekly during the season, this typically means once every 1-2 weeks. New mowers may require an oil change after the first 5 hours of operation. Check your owner’s manual for your specific model’s recommendations, as intervals vary by manufacturer and engine type.
Can I use the same oil type year-round, or do I need to change it seasonally?
Oil viscosity should match your climate. SAE 30 works well in warm climates but becomes thick in cold weather, making starting difficult. SAE 10W-30 or 5W-30 multi-viscosity oils are better for regions with temperature variations, as they flow easily in cold conditions and maintain protection when warm. If you store your mower over winter, consult your manual—some manufacturers recommend specific pre-storage procedures involving fresh oil.
What happens if I use the wrong oil type in my mower?
Using oil with incorrect viscosity can damage your engine. Oil that’s too thick won’t flow properly to lubricate components, causing excessive wear and hard starting. Oil that’s too thin won’t provide adequate protection under load, increasing friction and heat. Always match the SAE grade specified in your owner’s manual—this is not an area for experimentation.
Do I need to change the oil if I haven’t used my mower much this season?
Yes. Oil degrades over time even when the engine isn’t running, and moisture can accumulate in stored oil, promoting rust inside the engine. If your mower sat unused for 3+ months, change the oil before the next mowing season regardless of hour meter readings. This is especially important for mowers winterized without fresh oil.
Final Reminders
Regular oil changes are one of the simplest and most important maintenance tasks for lawn mower longevity. Mark your calendar based on your mowing schedule and the manufacturer’s recommended intervals. Keep receipts for oil and filter purchases, and maintain a log of service dates to track maintenance history. With consistent care, your mower will deliver reliable performance for years to come.
