How to Repair the Pull Cord: Direct Answer
To repair a broken pull cord on a lawn mower, start by disconnecting the spark plug wire so the engine cannot accidentally fire. Then remove the starter assembly, which is usually held by two or three bolts on top of the engine, and pull the broken cord out through the starter housing. Inspect the recoil spring and pulley for damage, thread a new rope of the same length and diameter through the pulley and housing, tie a secure knot at the handle end, and preload the recoil spring by winding the pulley several turns before reinstalling the assembly. Always test the pull action slowly before starting the engine, and refer to your owner’s manual for model-specific torque and routing details.
In most cases the repair takes under an hour, requires only basic hand tools, and costs just a few dollars for a replacement rope or pull cord kit.
Understanding How a Lawn Mower Pull Cord Works
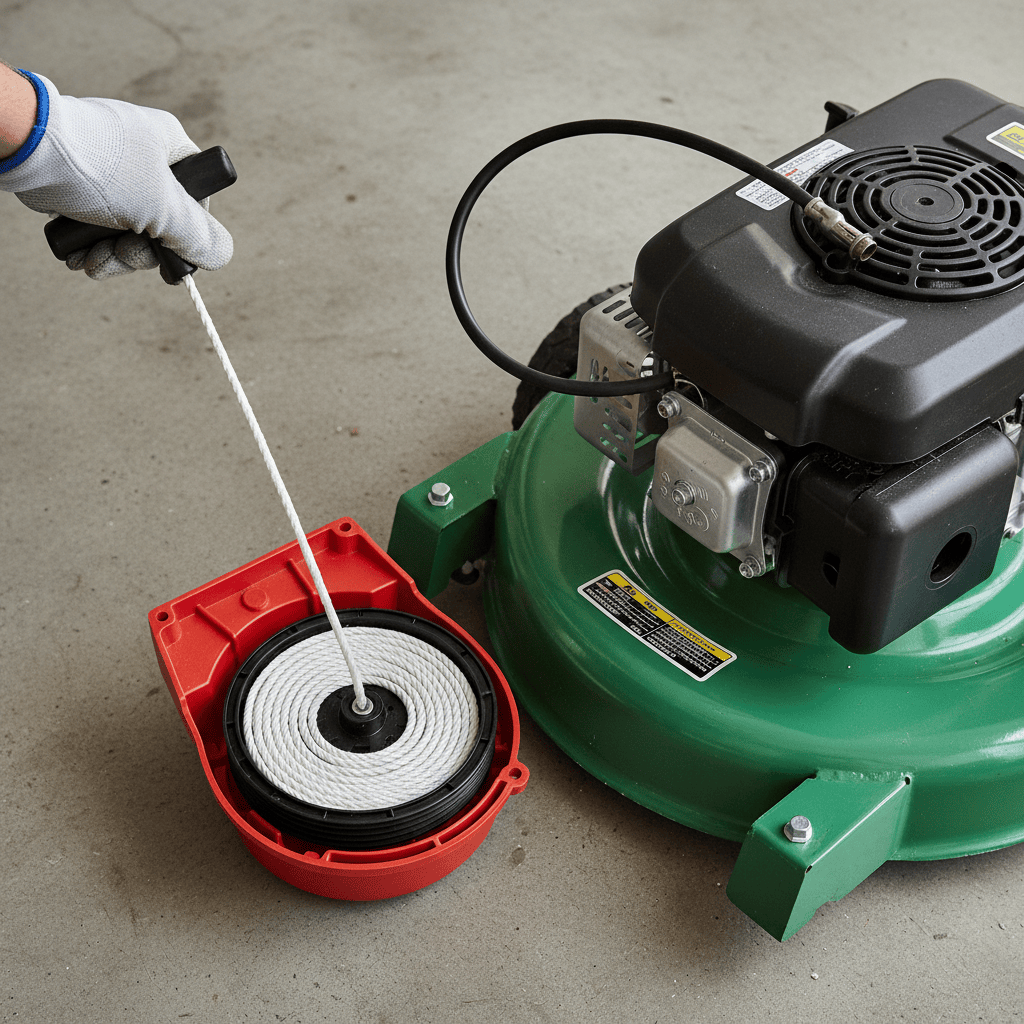
Before you cut into anything, it helps to understand what you are working on. The pull cord system on a walk-behind lawn mower is called a recoil starter. It is the mechanism that lets you spin the engine’s flywheel by hand fast enough to start combustion. When you yank the handle, the cord unwinds from a pulley, which spins a small hub that engages the flywheel. As the engine catches, the pulley is released, and a flat coiled recoil spring inside the housing rewinds the rope automatically. That is why your cord snaps back into place after every pull.
Main Parts of a Recoil Starter
- Starter housing: the plastic or metal cover that holds everything together and bolts to the top of the engine.
- Starter pulley: the wheel the cord winds around; it transfers motion to the flywheel.
- Recoil spring: a flat, coiled spring that stores energy as you pull and rewinds the cord when you release it.
- Pull cord (starter rope): the braided nylon rope you grip and yank.
- Handle: the plastic or rubber grip at the end of the rope.
- Pawl and spring assembly: small pivoting dogs that catch the flywheel when you pull and release it when the engine starts.
How to Tell Whether the Cord, Spring, or Pulley Is the Problem
Diagnosing the actual failure saves you time and money. If the cord snaps when you pull it, and the remaining piece is frayed, the rope itself is the problem. If the cord will not retract but is intact, the recoil spring has likely broken or slipped off its anchor. If the cord pulls out but does not engage the engine at all, or feels loose and spongy, the pulley, pawl, or spring hub is damaged. If you see a snapped spring inside the housing when you open it, or part of the spring poking through the housing, replace the recoil spring as well as the cord. When the pulley teeth are chipped or the housing is cracked, the smartest move is to replace the entire starter assembly.
Safety Steps Before You Begin
Working on a small engine is not dangerous if you follow a few simple rules. The single most important step is disconnecting the spark plug wire: the metal clip that snaps onto the spark plug near the front of the engine. Pull the rubber boot off the plug and move the wire away so it cannot touch the terminal. This removes any chance of the engine firing while your hands are near the flywheel and starter. Even when the mower is off, the blade and flywheel can cause serious injury if something unexpectedly turns the crankshaft.
Place the mower on a flat, firm surface such as a garage floor or driveway. Tip the mower only if required, and never tip it with the carburetor or air filter side down if it has been running recently, because oil and fuel can leak. Let the engine cool completely before starting. This is especially important because the starter housing sits directly above the exhaust and muffler on many models. Finally, set the mower’s blade brake or stop lever, if it has one, and chock the wheels so the machine cannot roll while you work.
Tools and Materials Needed
Nearly every pull cord repair uses the same short list of tools, most of which are already in a basic household toolkit. Gather everything before you remove the first bolt so you are not hunting for a wrench while the housing is half-open.
| Tool or Material | Why You Need It |
|---|---|
| Socket set or wrench (usually 10 mm, 12 mm, or 1/2-inch) | Removing the starter mounting bolts from the top of the engine |
| Phillips or flathead screwdriver | Removing screws holding the starter housing together |
| Needlenose pliers | Fishing broken rope out of the pulley and handling small springs |
| Replacement pull cord (3/16” or 5 mm nylon rope, about 6–7 feet / 1.8–2.1 m) | The new rope you will thread through the pulley and housing |
| Utility knife or scissors | Cutting the rope cleanly so it passes through the guide bushing |
| Lighter (optional) | Sealing and tapering the rope end so it threads easily |
| A small container for screws and bolts | Keeping small parts organized so nothing gets lost |
| Owner’s manual (or smartphone for reference) | Model-specific bolt sizes, rope routing, and spring preload instructions |
For most standard walk-behind lawn mowers, a 3/16-inch (about 5 mm) braided nylon replacement rope works well. You can buy a universal pull cord repair kit that includes rope, a handle, and sometimes a pre-wound spring. Avoid using clothesline or cheap twisted rope: they stretch, fray, and fail quickly inside the housing. If your mower has an unusual starter, measure the old rope’s diameter before buying a replacement.
Step-by-Step Pull Cord Repair Process
The following universal procedure works for most standard walk-behind lawn mowers. Yours may differ slightly in bolt placement or housing design, but the logic is identical. Work slowly, keep track of every screw, and take a photo with your phone before disassembly so you remember how the parts sit.
Step 1: Disconnect the Spark Plug Wire
Locate the spark plug on the front of the engine and pull the rubber boot straight off the terminal. Move the boot away so it cannot contact the plug again while you work. This is a non-negotiable safety step. Even if the mower’s blade is stopped, accidentally bumping the plug wire into place while you turn the flywheel could start the engine.
Step 2: Remove the Starter Assembly
Look at the top of the engine for the starter housing, a round cover with a slot where the cord exits. On most mowers there are two or three bolts or screws holding it to the engine block or to a metal cup over the flywheel. Remove them with your socket or screwdriver and lift the housing straight up. The housing may be tight against a rubber gasket or a center bolt, so wiggle it gently. Do not pry hard, because the recoil spring is under tension and the housing is often thin plastic.
If your mower uses a center bolt underneath a plastic cap, pop the cap off first with a flathead screwdriver, then remove that bolt. Some models have the starter mounted to the side of the engine instead of the top; the same removal logic applies. Once the housing is free, set it aside on a clean surface with the pulley facing up.
Step 3: Remove the Broken Cord from the Pulley and Housing
With the housing on your workbench, remove the knot from the bottom of the pulley. Usually there is a small hole in the pulley flange with a knot on the underside; push the knot out with a screwdriver or pull it through with needlenose pliers. Then pull the remaining rope out through the cord guide bushing on the side of the housing. If the cord broke inside the housing, fish the loose piece out with pliers. Now you can inspect the pulley and the spring housing. If the spring is intact, leave it in place; there is no need to remove it during a simple cord replacement, and removing it without experience is how springs get launched across the garage.
Step 4: Thread and Knot the New Cord Correctly
Cut a new rope about 6–7 feet (1.8–2.1 m) long, or match the length of the original if you measured it. Melt one end briefly with a lighter and taper it with your fingers; this keeps the rope from fraying and makes it easier to thread through the guide bushing. Feed the tapered end through the guide bushing on the outside of the housing, then out through the hole in the pulley flange. Pull about 6 inches (15 cm) through, tie a secure knot such as a simple overhand or figure-eight knot on the outside of the pulley, and tug it firmly to make sure it seats against the pulley. Trim any excess tail. On the other end, thread the rope through the handle and tie another knot so the handle cannot slip off. Many handles have a molded slot where the knot sits; check that your cord’s handle is oriented so you can grip it comfortably.
Step 5: Rewind the Cord and Preload the Recoil Spring
You need the cord to wind neatly onto the pulley in the recoil direction, then add tension so the first pull snaps the cord back. Identify the rotation direction: on nearly all walk-behind mowers, the cord winds onto the pulley counterclockwise when viewed from the top, so that pulling it rotates the crank clockwise. Turn the pulley by hand counterclockwise while feeding the rope into the groove, keeping the windings neat and in one even layer. Stop when you have only about 8–10 inches (20–25 cm) of rope left outside the housing. Now continue rotating the pulley a few more turns in the same direction to preload the recoil spring. Two or three additional turns is usually correct; if you are not sure, rotate until there is noticeable but not straining resistance. If you wind the wrong direction, the rope will not retract and the spring will feel loose. With your thumb holding the pulley so it cannot unwind, guide the rope out through the bushing and let the handle rest against the housing. Release the pulley slowly and confirm the cord retracts cleanly.
Step 6: Reassemble and Test Safely
Lower the starter assembly back onto the engine, lining up the pulleys and any alignment tabs. Install and tighten the mounting bolts evenly, but follow the owner’s manual for torque values; over-tightening cracks plastic housings. Reconnect the spark plug wire only when you are ready to test, or leave it disconnected until the mower is fully reassembled. To test, pull the handle out slowly a few inches first, then let it retract to confirm smooth rewind. If it retracts, do a full, firm pull. The engine should turn over normally. If the cord will not retract or jams, open the housing again and check your winding direction and spring engagement. After testing, start the engine once and let it idle briefly to confirm the starter does not bind under load.
Common Pitfalls and Troubleshooting
Even a straightforward cord repair can go wrong in predictable ways. Knowing these pitfalls will save you from repeating the job.
Winding the Spring the Wrong Direction
The most common mistake is preloading the recoil spring in the wrong direction. If you wind the pulley against the spring’s natural direction, the cord will not retract, or worse, the spring may unwind violently. Rule of thumb: the cord must wind onto the pulley in the same direction the pulley rotates when you pull it. When in doubt, look at the old rope’s wear marks on the pulley groove, or check the groove’s spiral direction. A few turns of preload means the cord snaps back, but too many turns can break the spring or make the pull dangerously stiff.
Why the Cord Keeps Snapping After Replacement
If you replace the rope and it breaks again quickly, the problem is rarely the rope itself. A frayed or rough cord guide bushing can cut the rope every time you pull, which is common on older mowers: smooth the bushing with fine sandpaper or replace the housing. A worn or slipping recoil spring will yank the cord back with a violent snap, chafing the rope. And if the pulley is cracked or the pawls are sticking, the starter will bind and strain the rope. Repeated breakage usually means the spring or pulley needs replacement. In that case, a complete recoil starter replacement, which costs roughly $15–$40 for most push mowers and includes a pre-wound spring, is more reliable than a $5 rope on a worn mechanism.
Springs That Fly Out of the Housing
If you decide to remove or replace the recoil spring, do it carefully. The spring is under strong tension even inside the housing. Wear safety glasses and use pliers to lift it out of its channel slowly, letting it uncoil in a controlled way. To reinstall, wind it back into the channel in the correct direction, hook the inner end onto the pulley hub and the outer end into the housing slot. Many people replace the whole starter assembly precisely to avoid this fiddly and painful step.
When to Call a Professional or Replace the Whole Assembly
You do not need professional help for a simple rope swap. But if you find a cracked housing, badly chipped pulley teeth, a rusted or welded spring, or a bent starter hub, stop and replace the entire assembly. Likewise, if the engine is hard to turn even with a healthy starter, the problem is inside the engine, not the cord. Know your limits: a working pull start is a small part of the lawn mower, and a failed repair that leaves the starter jammed will cost more than a pre-assembled replacement part.
Frequently Asked Questions
Do I need to remove the whole engine or lawn mower deck to fix the pull cord?
No. On virtually all walk-behind mowers, the starter assembly is mounted on top of the engine and is accessible without removing the deck, the blade, or the engine. You only need enough clearance to reach the top of the engine and work with a socket or screwdriver. If the housing is stuck, remove the center bolt or retaining screws and gently rock the housing; do not pry against the plastic.
What size pull cord does a standard lawn mower use?
Most standard walk-behind lawn mowers use a 3/16-inch (about 5 mm) braided nylon starter rope, and a 6–7 foot (1.8–2.1 m) length is enough for the typical mower. If you have the old cord, measure its diameter with calipers or hold it against a ruler. For a variable-speed or larger-engine mower, check the owner’s manual, because some require slightly thicker or longer rope to fit the pulley and guide bushing.
Why won’t my new pull cord retract after I reinstalled the starter?
The most likely cause is that you preloaded the recoil spring in the wrong direction or did not add enough preload turns. Remove the housing, rewind the rope onto the pulley in the direction of pull, then rotate the pulley two or three extra turns counterclockwise before feeding the rope out through the bushing. Also confirm the spring’s inner hook is seated on the pulley hub; a slipped spring will leave the rewind dead.
My cord is fine but the engine won’t start when I pull. What’s wrong?
If the cord pulls and retracts normally but the engine does not turn over or catch, the failure is not the cord. Check the starter pawls, which may be stuck or worn, and verify the flywheel key is not sheared. Then move on to routine starting problems: a full fuel tank, a clean air filter, a fresh spark plug with the wire connected, and the blade brake or stop lever engaged. If the recoil mechanism spins freely without engaging the flywheel, replace the starter pawl or the whole assembly.