How Do You Make a Mulch Bed?
To make a mulch bed, first define the area and prepare the soil by clearing weeds and debris. Choose an appropriate mulch material, such as wood chips, shredded bark, or straw. Apply a 2-4 inch layer of mulch evenly over the prepared soil, keeping it a few inches away from plant stems or tree trunks to prevent rot. Maintain the bed by replenishing mulch as it decomposes and ensuring proper moisture levels.
Understanding Mulch Beds and Their Benefits
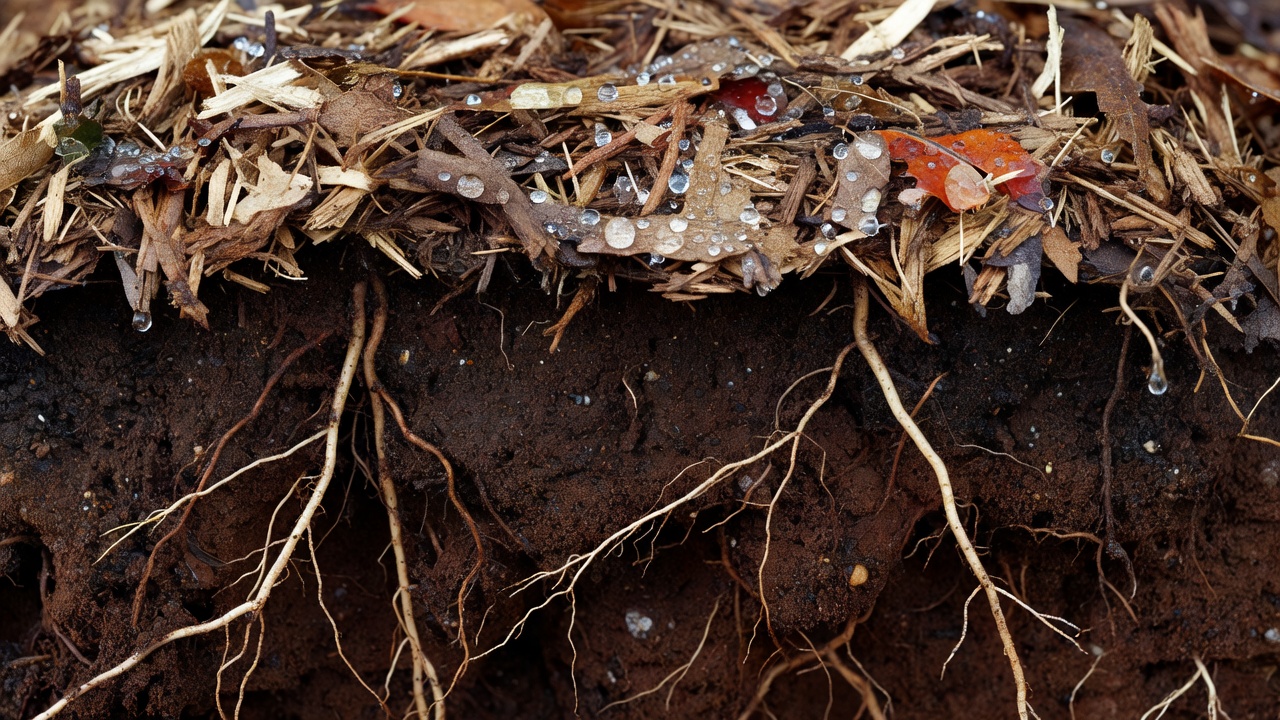
A mulch bed is a designated area in your garden or landscape covered with a layer of material, known as mulch. This layer serves multiple purposes beyond simple decoration. The primary benefits of creating a mulch bed include:
- Moisture Retention: Mulch acts as a protective blanket, reducing water evaporation from the soil surface. This means you’ll need to water less frequently, conserving water and keeping plants healthier during dry spells.
- Weed Suppression: A thick layer of mulch blocks sunlight from reaching weed seeds in the soil, preventing them from germinating and competing with your plants for nutrients and water.
- Soil Temperature Regulation: Mulch insulates the soil, keeping it cooler in the summer and warmer in the winter. This creates a more stable environment for plant roots.
- Soil Improvement: Organic mulches like wood chips or compost break down over time, adding valuable organic matter to the soil. This improves soil structure, drainage, and nutrient content.
- Erosion Control: The mulch layer protects the soil from being washed away by heavy rain or blown away by wind.
- Aesthetic Appeal: Mulch provides a clean, uniform look to garden beds, defining edges and creating a tidy, well-maintained appearance.
Key Factors to Consider Before Creating a Mulch Bed
Before you begin, careful planning will ensure your mulch bed is effective and long-lasting.
How Do I Choose the Right Type of Mulch?
Mulch types are generally categorized as organic or inorganic. Your choice depends on your goals, budget, and the look you want to achieve.
- Organic Mulches: These are made from natural materials that decompose over time. They are excellent for improving soil health.
- Wood Chips & Shredded Bark: Long-lasting and attractive. Ideal for perennial beds, trees, and shrubs. They decompose slowly.
- Straw or Pine Needles: Lightweight and easy to apply. Great for vegetable gardens and acid-loving plants. They decompose faster.
- Compost or Aged Manure: Break down very quickly, providing a direct nutrient boost. Best used as a soil amendment before applying a slower-decomposing mulch on top.
- Inorganic Mulches: These materials do not decompose and do not improve the soil.
- Gravel or Stone: Very long-lasting and good for drainage. Ideal for pathways, succulent gardens, or areas where you don’t want plant growth. They do not retain moisture as well as organic mulches.
- Landscape Fabric: Often used under other mulches to suppress weeds. It can impede water and air movement to the soil over time.
What Factors Affect Mulch Bed Location and Size?
Consider the following when laying out your bed:
- Plant Needs: Group plants with similar water and sun requirements together in the same mulch bed.
- Accessibility: Ensure you can easily reach plants for pruning, harvesting, or maintenance without stepping on and compacting the mulched soil.
- Existing Features: Define the bed around trees, shrubs, or garden structures. Ensure mulch does not touch siding or fences, as it can retain moisture and cause rot.
- Bed Shape: Curved, flowing edges often look more natural than straight lines. Use a garden hose or rope to outline the desired shape before you start digging.
Step-by-Step Guide to Creating a Mulch Bed
Follow these steps for a professional-looking and functional mulch bed.
Step 1: Define the Area and Clear the Site
Use a garden hose, rope, or landscape paint to mark the outline of your bed. Once defined, thoroughly clear the area of all existing grass, weeds, rocks, and debris. You can do this by:
- Smothering: Lay down cardboard or several layers of newspaper over the grass/weeds, wet it down, and cover with mulch. This method takes several months to kill the vegetation underneath.
- Manual Removal: Use a spade or sod cutter to remove the top layer of grass and weeds. This is more labor-intensive but provides immediate results.
- Herbicide: Apply a non-selective herbicide according to label instructions and wait the required time before proceeding. This is an option for large, heavily weeded areas.
Step 2: Prepare the Soil
After clearing the area, it’s beneficial to prepare the soil for your plants:
- Amend the Soil: Spread a 2-3 inch layer of compost or well-rotted manure over the bed. This adds nutrients and improves soil structure.
- Loosen the Soil: Use a garden fork or tiller to gently incorporate the compost into the top 6-8 inches of soil. This helps roots establish more easily.
- Level the Bed: Rake the soil surface smooth, creating a slight crown or mound in the center if the bed is wide. This helps with water drainage.
Step 3: Install Edging (Optional but Recommended)
Edging provides a clean, defined border between the mulch bed and your lawn or pathway. It also helps contain the mulch and prevents grass from creeping in. Options include metal, plastic, stone, or brick edging. Install it according to the manufacturer’s instructions, ensuring it is level and secure.
Step 4: Apply the Mulch
This is the final and most visible step. Follow these best practices for application:
- Apply Evenly: Dump piles of mulch around the bed and use a rake or garden fork to spread it into a uniform layer.
- Maintain Proper Depth: For most organic mulches, a 2-4 inch layer is ideal. This depth is sufficient to suppress weeds and retain moisture without suffocating plant roots or trapping too much moisture against stems.
- Keep Mulch Away from Plants: This is critical. Leave a 2-3 inch gap between the mulch and the stems of flowers, vegetables, or shrubs. For trees, create a wider 3-6 inch gap around the trunk. Piling mulch against stems or trunks (“volcano mulching”) traps moisture and can lead to bark rot, fungal diseases, and pest infestations.
- Water After Application: Lightly water the newly mulched bed to help settle the mulch and begin the moisture-retention process.
Maintenance Tips for a Long-Lasting Mulch Bed
A mulch bed is not a “set it and forget it” feature. Regular maintenance will keep it effective and attractive.
How Often Should I Replenish Mulch?
Organic mulches decompose over time. You will typically need to add a fresh layer once a year, often in the spring. Before adding new mulch, gently rake the existing layer to break up any compacted mat and improve air circulation. You don’t need to remove the old mulch; simply top it up to maintain the recommended 2-4 inch depth.
What Common Mistakes Should I Avoid?
- Mulch Volcanoes: As mentioned, piling mulch against tree trunks or plant stems is harmful. Always maintain the proper gap.
- Applying Too Thick: A layer deeper than 4 inches can prevent water and oxygen from reaching the soil, suffocate plant roots, and create a habitat for pests like rodents.
- Using Uncomposted Material: Fresh wood chips or manure can temporarily tie up nitrogen in the soil as they decompose, potentially starving plants. Use aged or composted materials, or apply them only to non-planted areas.
- Ignoring Weeds: While mulch suppresses weeds, some will still appear. Pull them by hand as soon as they are visible, before they establish deep roots.
- Forgetting to Edge: Without proper edging, mulch can spill onto lawns and pathways, and grass can invade the bed.
Frequently Asked Questions
Can I use grass clippings as mulch?
Yes, grass clippings can be used as mulch, but with caution. Apply them in thin layers (no more than 1-2 inches) and allow them to dry slightly first. Thick, wet layers of grass clippings can become slimy, compact, and create an odor as they anaerobically decompose. They are best used in vegetable gardens or annual beds where they will break down quickly.
Is it better to mulch before or after planting?
For new gardens, it’s often easier to prepare the soil, install edging, and lay down the mulch before planting. You can then cut holes in the mulch layer to plant your flowers or vegetables. For established gardens, you will mulch after planting and weeding. The key is to ensure the mulch does not touch the plant stems.
How do I prevent mulch from washing away?
Proper installation is key. Ensure the bed has good drainage and a slight slope away from structures. Applying mulch in the correct depth (2-4 inches) helps it stay in place. For slopes or areas prone to heavy runoff, consider using a heavier mulch like wood chips or stone, or installing landscape staples or a biodegradable netting over the mulch until it settles.
Can I put mulch over landscape fabric?
You can, but it’s not always necessary or beneficial. Landscape fabric is designed to suppress weeds, but it can also block water and air from reaching the soil, and it breaks down over time, becoming difficult to remove. For most garden beds, a thick layer of organic mulch alone is sufficient for weed control and offers the added benefit of improving soil health as it decomposes.