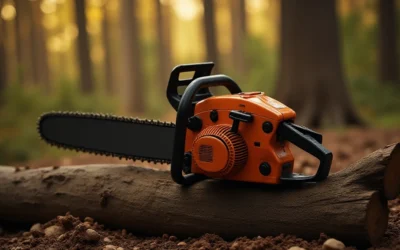
Quick Answer: How to Sharpen a Chainsaw Chain
Secure the chainsaw in a vise with the chain brake engaged and the spark plug disconnected (gas) or battery removed (electric). Select the correct diameter round file for your chain pitch, position a file guide at the manufacturer-specified angle (typically 25–35°), and file each cutter tooth with smooth forward strokes. After sharpening all cutters, use a flat file and depth gauge tool to lower any rakers that exceed the recommended clearance — usually 0.025 in (0.635 mm).

Pros
- Supports a wide range of chainsaw chains up to .404 pitch
- Includes both chain grinding wheels and a depth-gauge maintenance disc
- Can be mounted on a bench or wall for flexible workspace setup
- Built for frequent sharpening tasks rather than occasional use
Cons
- May be more machine than needed for casual users who sharpen chains only occasionally
- Requires mounting and workshop space, so it is less portable than handheld sharpeners
- Compatibility is limited to chains up to .404 pitch
Overview: The Oregon 520-120 is a professional 120-volt chainsaw chain sharpener designed for frequent, high-volume use. It can be mounted on a bench or wall, making it a practical fit for a garage, workshop, or service area.
Performance and Features: This universal sharpener handles chains up to .404 pitch and is intended to work with many popular chain brands, including Oregon, Stihl, and Husqvarna. Multiple adjustment points support more accurate sharpening, while the built-in light helps improve visibility during detailed grinding work.
Drawbacks and Considerations: Its professional focus means it may be more capable than many casual users need. It also requires a mounting setup and dedicated space, so it is not as portable as simpler chain sharpeners. Chains larger than .404 pitch are not supported.
Verdict: The Oregon 520-120 is best suited to professional users or serious property owners who sharpen chains regularly and want a more controlled, workshop-style solution. If you need a durable sharpener for repeated use and value adjustment precision, this model is a strong fit.

Pros
- Space-saving alternative to a full-size chain sharpener.
- Wide chain compatibility up to .404 inch pitch.
- Includes useful setup and maintenance accessories.
- Bench mounting with included bolts adds stability in a workshop or garage.
Cons
- Best suited to occasional use rather than high-volume sharpening.
- Requires a bench or fixed work surface for installation.
- No customer review details are available in the provided data, so long-term performance feedback is limited.
Overview & Design: The Oregon Professional Compact 120-Volt Bench Chain Grinder is a small bench-mounted chain sharpener built for home workshops and garages. Its compact footprint makes it a practical choice for users who want a dedicated sharpening tool without the size of a full professional machine.
Performance & Key Features: This grinder is designed to sharpen chains up to .404 inch pitch, which covers many common chainsaw chains from brands such as Oregon, Stihl, and Husqvarna. It includes a manual chain clamping vice, one-way motor rotation for added safety, two grinding wheels, a dressing brick, and a profile guide.
Drawbacks & Considerations: The main limitation is that it is aimed at occasional users rather than heavy-duty shop use. It also needs to be bolted to a bench, so it is not a portable sharpener. Since no customer review details were provided, there is limited real-world feedback to judge long-term durability.
Verdict: For homeowners, property owners, and light-duty users who want an affordable and space-saving way to maintain saw chains, this Oregon grinder is a sensible option. It offers the core features needed for basic sharpening while staying compact and straightforward.
Pros
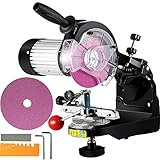
- Electric sharpener with a 230W rating listed in the title
- Designed for saw chain and blade sharpening per title
Cons
- Chain size compatibility is not stated in supplied data
Pros
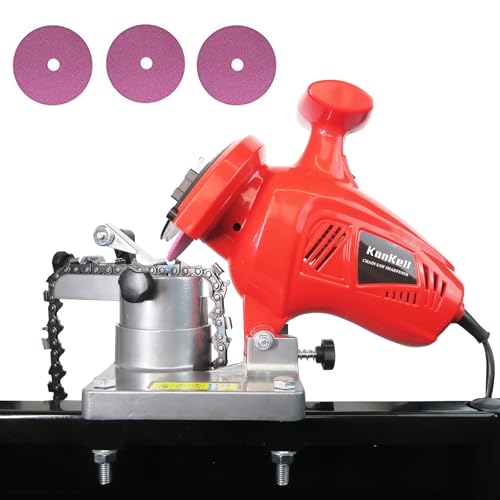
- High-speed 8400 RPM operation supports efficient sharpening.
- Adjustable angle adds flexibility for different chain types.
- Stable mountable base can improve control during use.
- Lightweight and compact compared with many bench-style sharpeners.
Cons
- Best suited to chains between 1/4" and 3/8" pitch, so it is not a universal solution for every chain size.
- Mountable setup is less portable than a fully handheld sharpener.
- No included accessory list or detailed specs were provided in the source data, so buyers may need to confirm what comes in the box.
Overview: The KonKell Electric Chainsaw Sharpener is a 250W bench-style chain grinder designed to restore cutting edges quickly and with more consistency than manual filing. Its heavy-duty build and compact 1.55 kg design make it a practical option for garages, workshops, and on-site maintenance.
Performance and Features: With an 8400 RPM motor and adjustable grinding angle, this sharpener is built for efficient, repeatable sharpening on chains from 1/4" to 3/8" pitch. The mountable base adds stability, which can help improve accuracy and reduce movement during operation. That makes it a strong fit for users who want a more controlled sharpening process.
Drawbacks and Considerations: The sharpening range is limited to specific chain pitches, so it will not fit every chainsaw chain. Because it is designed to be mounted, it is less convenient for fully portable use than a handheld tool. The provided product data also does not include a full accessory list, so buyers may want to confirm what is included before purchasing.
Verdict: This sharpener makes the most sense for DIY owners, homeowners, and professionals who regularly maintain compatible chains and want a stable, power-driven sharpening solution. If you value speed, adjustability, and a more precise setup, it is a sensible choice.
Why Chainsaw Chain Sharpness Matters
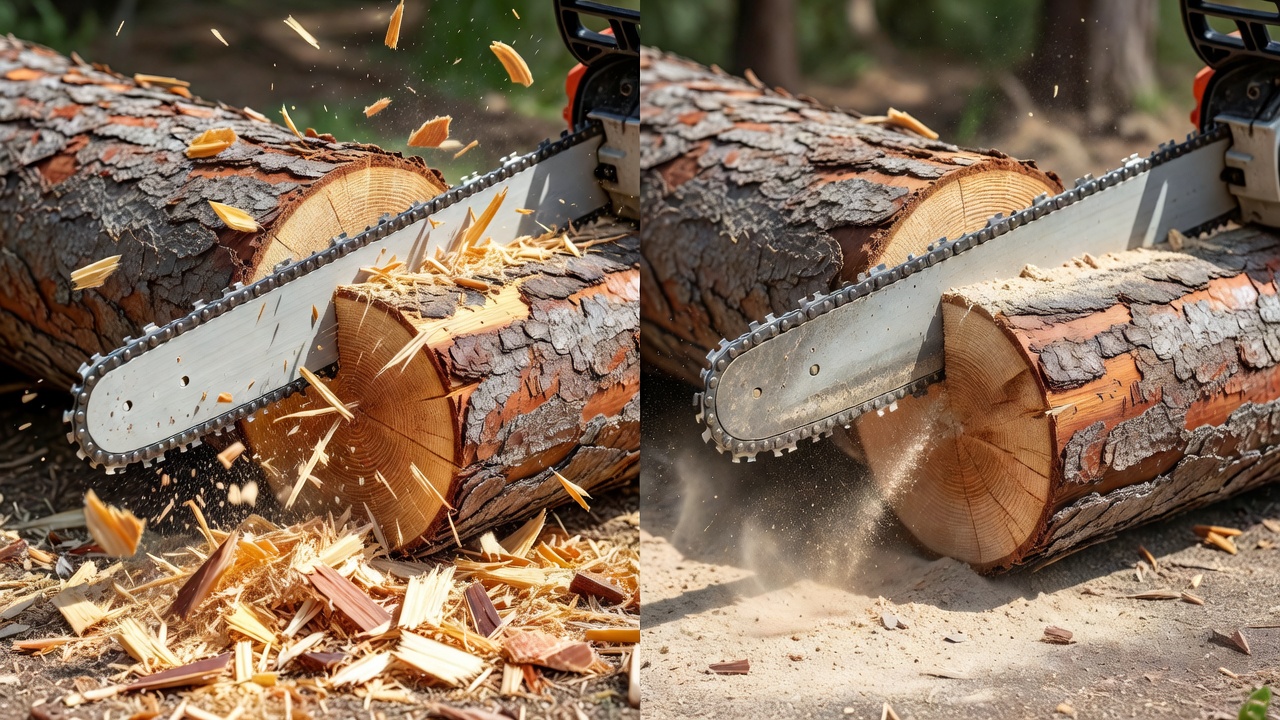
A sharp chainsaw chain cuts efficiently, safely, and with minimal operator effort. A dull chain forces you to apply extra downward pressure, which increases fatigue, reduces control, and raises the risk of kickback — a leading cause of chainsaw injuries. Beyond safety, a dull chain makes the engine work harder, accelerating wear on the bar, sprocket, and drive links while burning more fuel.
Signs Your Chainsaw Chain Is Dull
- The saw produces fine dust instead of coarse wood chips
- You must force the bar into the wood rather than letting the chain pull itself through
- The cut drifts to one side (often signals uneven cutter lengths)
- The chain smokes even with adequate bar and chain oil lubrication
- Visible rounded or shiny edges on the cutter teeth
How Often Should You Sharpen?
Sharpen the chain after every 2–3 tanks of fuel during active use, or immediately after hitting soil, rocks, or metal fasteners. Professional arborists typically touch up the chain every time they refuel. A chain used exclusively on clean softwood lasts longer between sharpenings than one cutting dirty or sandy logs. Users looking for related component recommendations can explore our jbl partybox club 120 vs sony srs xv500 breakdown.
Tools and Materials Needed
Gather every item before starting. Using the wrong file diameter is the single most common sharpening error. Users looking for related component recommendations can explore our jbl partybox club 120 vs sony srs xv500 breakdown.
| Tool | Purpose | Specification Note |
|---|---|---|
| Round file | Sharpens cutter teeth | Diameter must match chain pitch: 3/8 in low-profile pitch → 5/32 in (4.0 mm) file; .325 in pitch → 3/16 in (4.8 mm) file; 3/8 in standard pitch → 7/32 in (5.5 mm) file |
| File guide | Maintains consistent filing angle and depth | Set to chain manufacturer’s specified top-plate angle, usually 25–35° |
| Flat file | Lowers depth gauges (rakers) | Any standard mill bastard flat file |
| Depth gauge tool (raker gauge) | Measures raker height above cutter | Match to chain spec, typically 0.025 in clearance |
| Bench vise or bar clamp | Secures the chainsaw bar during filing | Padded jaws recommended to avoid bar damage |
| Work gloves (cut-resistant) | Hand protection from cutter teeth | ANSI A4 cut level minimum |
| Safety glasses | Eye protection from metal filings | ANSI Z87.1 rated |
An electric chainsaw sharpener is an optional alternative covered in its own section below. For occasional home users, a hand file kit is sufficient and more portable. Before finalizing equipment decisions, refer to our comprehensive z890 vs x870e motherboard comparison.
Understanding Chainsaw Chain Anatomy
Filing correctly requires knowing exactly what you are filing.
Key Chain Components
- Cutter tooth (left and right): The shaped links that actually cut wood. Each cutter has a top plate (horizontal cutting surface) and a side plate (vertical cutting face). Cutters alternate left-hand and right-hand orientation around the chain.
- Depth gauge (raker): The curved hook in front of each cutter that limits how deep the tooth bites into wood per pass. Too high = slow cutting; too low = aggressive cutting and elevated kickback risk.
- Drive link: The bottom link that fits into the bar groove and is driven by the sprocket. Drive links are not sharpened.
- Chain pitch: The distance between drive links, determining which file diameter you need.
Filing Angles
Two angles govern every cutter tooth: Before finalizing equipment decisions, refer to our comprehensive z890 vs x870e motherboard comparison.
- Top-plate angle: The horizontal angle at which the file crosses the cutter, measured from a line perpendicular to the bar. Manufacturers specify 25–35° depending on chain type. Full-chisel chains typically use 30–35°; semi-chisel and low-kickback chains often use 25–30°. Always check your chain manufacturer’s documentation — Oregon, Stihl, Husqvarna, and other brands publish these specs in their chain guides.
- Side-plate angle (filing angle from horizontal): Usually 0–10° downward tilt on the file, also specified by the manufacturer.
A file guide removes the guesswork by holding both angles simultaneously.
Safety Precautions Before You Start
These steps are non-negotiable before any file touches the chain. For broader ecosystem context, read through our operational guide on marshall stanmore iii vs harman kardon onyx studio 8.
- Turn the chainsaw off completely. For gas saws, disconnect the spark plug wire. For battery-powered saws, remove the battery pack. For corded electric saws, unplug the power cord.
- Engage the chain brake. Push the front hand guard forward until it locks. This locks the chain and prevents it from rotating unexpectedly while you work.
- Secure the bar in a vise. Clamp the bar (not the engine housing) horizontally in a bench vise. The chain should hang free on both sides of the bar for easy rotation.
- Put on cut-resistant gloves and safety glasses before handling the chain or files.
- Inspect the chain first. Check for broken or bent cutters, cracked drive links, or stretched chain. A damaged chain should be replaced, not sharpened.
You do not need to remove the chain from the bar to sharpen it by hand. Filing on the bar is standard practice.
How to Sharpen a Chainsaw Chain by Hand: Step-by-Step
- Mark the starting tooth. Use a permanent marker or small piece of tape to mark the first cutter you will sharpen. This prevents you from filing the same tooth twice or missing teeth.
- Position the file guide on the first cutter. Lay the round file in the notch of the cutter tooth. Slide the file guide over the file so it rests flat on the top of the cutter and depth gauge. Confirm the guide is set to your chain’s specified top-plate angle (check the guide’s markings against the manufacturer’s spec — commonly 30° for most homeowner chains).
- File the cutter with forward strokes only. Push the file across the cutter from the inside of the tooth outward in a single smooth motion. Lift the file on the return stroke — dragging it backward dulls the file and does not sharpen the tooth. Apply light, consistent pressure.
- Count your strokes and maintain consistency. Use the same number of strokes on every cutter — typically 3–6 strokes per tooth depending on dullness. Consistency is more important than total stroke count. The goal is to produce a uniform bright edge on the top plate and side plate without removing more metal than necessary.
- Check the cutter angle frequently. After every 2–3 teeth, visually verify the file guide remains at the correct angle. A wandering angle produces uneven cutters that cause the chain to pull sideways.
- Advance the chain to the next same-side cutter. Release the chain brake momentarily to rotate the chain forward, then re-engage the brake. File the next left-hand (or right-hand) cutter with the same number of strokes.
- File all cutters on one side first. Work through every cutter of the same orientation before switching sides. This keeps your body position and filing angle consistent.
- Flip your position and file the opposing cutters. Move to the other side of the vise (or reposition the saw) so you can maintain the same ergonomic filing motion on the opposite-hand cutters. Repeat steps 2–6 for all remaining cutters.
- Verify uniform cutter length. Look along the chain from the tip of the bar. All cutter teeth should be the same height and the same length from front to back. If one tooth is visibly shorter, it was filed more aggressively than the others — you must bring all other teeth down to match its length on the next pass.
How to Adjust Depth Gauges on a Chainsaw Chain
Depth gauge adjustment is a separate step that many beginners skip. Skipping it progressively reduces cutting performance as the cutters wear shorter and the rakers sit relatively higher, eventually preventing the cutters from engaging the wood at all. Incorrectly low depth gauges increase kickback risk. For troubleshooting and reliability insights, consult our in-depth dyson v8 cyclone vs bissell featherweight stick report.
Step-by-Step Depth Gauge Filing
- Place the depth gauge tool (raker gauge) over a cutter and its raker. The tool bridges the raker and cutter. If the raker protrudes above the tool’s slot, it is too high and must be filed down.
- File the raker flush with the tool’s surface using a flat file. Use straight, forward strokes along the top of the raker. Remove only enough metal so the raker is level with the gauge slot.
- Round the front of the raker slightly with the flat file after lowering it. This maintains the raker’s original profile and prevents it from grabbing the wood.
- Check every depth gauge around the chain. Depth gauges typically need adjustment after every third or fourth full sharpening, not after every touch-up. The standard clearance between the top of the raker and the top of the adjacent cutter is 0.025 in (0.635 mm) — confirm this against your chain manufacturer’s specification, as some chains specify 0.020–0.030 in depending on application.
How to Sharpen a Chainsaw Chain with an Electric Sharpener
Electric chainsaw sharpeners (also called bench-mounted chainsaw grinders) use a rotating abrasive disc to grind cutter teeth to a precise angle. They are faster than hand filing and produce very consistent results, but they remove significantly more metal per session than hand filing — shortening chain life if used too aggressively or too frequently.
When to Use an Electric Sharpener
- The chain is severely dull or has been damaged by hitting dirt, rocks, or metal
- You need to re-profile the chain to a different angle
- Cutter lengths have become uneven and need to be equalized quickly
How to Use an Electric Sharpener
- Mount the sharpener on a stable workbench. Most models clamp to the bench edge.
- Set the grinding wheel angle to match your chain’s top-plate angle (25–35° depending on chain type). Consult the chain manufacturer’s specification. The sharpener’s angle indicator must match this value precisely.
- Set the depth stop on the sharpener so the wheel removes only a thin, consistent layer from each cutter. This is the most critical adjustment — removing too much metal per tooth shortens chain life rapidly.
- Mount the chain bar in the sharpener’s guide. Position the first cutter under the grinding wheel.
- Lower the grinding wheel onto the cutter with a brief, controlled plunge — typically 1–2 seconds of contact. Do not hold the wheel on the cutter longer than needed.
- Advance the chain and repeat for each same-side cutter, then adjust the angle setting to the mirror angle for opposite-side cutters.
- Adjust depth gauges manually with a flat file after electric sharpening, using the same raker gauge method described above. Electric sharpeners do not adjust depth gauges.
For beginners who sharpen infrequently, hand filing is more forgiving — it removes less metal and is easier to control. Electric sharpening is the better choice for professionals or users who need to restore a heavily damaged chain quickly. Readers comparing setup options can review our technical analysis on bissell crosswave hydrosteam vs shark stainforce.
Common Chainsaw Chain Sharpening Mistakes and How to Avoid Them
- Wrong file diameter: Using an oversized file rides on top of the cutter rather than seating in the gullet, producing a flat edge instead of a sharp one. Match file diameter to chain pitch exactly using the manufacturer’s file size chart.
- Inconsistent stroke count: Filing some teeth 4 strokes and others 7 strokes produces uneven cutter lengths. Uneven cutters cause the chain to track to one side during cutting. Use the same count on every tooth.
- Incorrect top-plate angle: Filing at the wrong angle — even by 5° — reduces cutting efficiency. Always use a file guide rather than freehanding the angle, especially on full-chisel chains where angle precision matters most.
- Filing on the back stroke: The file only cuts on the forward push stroke. Dragging it back wears the file without sharpening the cutter.
- Skipping depth gauge adjustment: After multiple sharpenings, rakers that are never filed become relatively taller and eventually prevent the cutters from biting the wood. File the depth gauges every 3–4 full sharpenings.
- Filing with a worn-out round file: A dull file requires more strokes and produces inconsistent results. Round files are inexpensive — replace them after every 2–3 full chain sharpenings.
- Not marking the starting tooth: Without a marker, it is easy to lose track of where you started, resulting in some teeth being filed twice and others being missed.
When to Replace a Chainsaw Chain Instead of Sharpening It
Sharpening has limits. Filing away metal shortens the cutter teeth progressively, and every chain has a minimum safe cutter length. Most manufacturers mark a wear line on the side plate of the cutter — when the cutter is filed back to that line, the chain must be replaced. Oregon, Stihl, and Husqvarna all publish minimum cutter length specifications in their respective chain documentation.
Replace the Chain When You Observe:
- Cutters worn to the manufacturer’s minimum length (wear indicator line reached)
- Cracked, broken, or bent cutter teeth or drive links — structural damage cannot be filed away safely
- Depth gauges worn so low they cannot be brought back to specification without removing excessive cutter metal
- Chain stretch causing the drive links to ride out of the bar groove even at maximum tensioner extension — stretched chain indicates worn drive links and should not be reused
- Missing or chipped carbide tips on carbide-tipped chains — these require professional grinding equipment and are typically uneconomical to regrind for homeowner use
A new chain costs less than bar repair caused by running a worn or damaged chain. When in doubt, replace.
Buyer FAQs: How To Sharpen A Chain On A Chainsaw Solved
What size round file do I need to sharpen my chainsaw chain?
File diameter depends on chain pitch. Common pairings: 3/8 in low-profile (picco) pitch uses a 5/32 in (4.0 mm) round file; .325 in pitch uses a 3/16 in (4.8 mm) file; standard 3/8 in pitch uses a 7/32 in (5.5 mm) file; .404 in pitch uses a 7/32 in (5.5 mm) file. Check the chain packaging or manufacturer’s documentation — pitch is usually stamped on the drive links or listed on the bar.
Do I need to remove the chain from the bar to sharpen it?
No. Hand filing is performed with the chain on the bar. Clamp the bar in a vise, engage the chain brake, and rotate the chain forward by hand between each tooth. Removing the chain is unnecessary for routine sharpening and adds reinstallation time.
Why does my chainsaw pull to one side after sharpening?
Side-tracking almost always means the cutter teeth on one side of the chain are longer or filed at a different angle than those on the other side. Measure the cutter lengths visually — the shorter-side cutters must be brought down to match. Re-file the longer side using fewer strokes until both sides are equal. Using a file guide eliminates angle variation that causes this problem.
How many times can a chainsaw chain be sharpened before it needs replacing?
A chain can typically be sharpened 8–10 times before the cutters reach minimum length, though this varies by how much metal is removed each session. Hand filing removes less metal per sharpening than electric grinding, so hand-filed chains generally last more total sharpenings. Check the wear indicator line on the cutter side plate — that is the definitive end-of-life marker, not a fixed number of sharpenings.
For more hands-on benchmarks and buying recommendations, consult our guides on residential zero-turn lawn mower guide, as well as high-CFM commercial leaf blower guide, as well as durable ride-on lawn tractor guide.
Mechanical safety standards, operational tolerances, and protective gear guidelines align with benchmark specifications established by the American National Standards Institute (ANSI).