Quick Answer
To change a belt on a riding lawn mower, disconnect the spark plug wires for safety, identify whether you need to replace the deck belt (cuts grass) or drive belt (powers wheels), locate the belt routing diagram under your seat or on the deck, remove the old belt by loosening pulleys or fasteners, thread the new belt following the diagram, adjust tension so it deflects about half an inch under pressure, and reconnect the spark plugs. Most belt replacements take 30–60 minutes depending on your mower model.
Understanding Riding Mower Belts: Deck Belt vs. Drive Belt
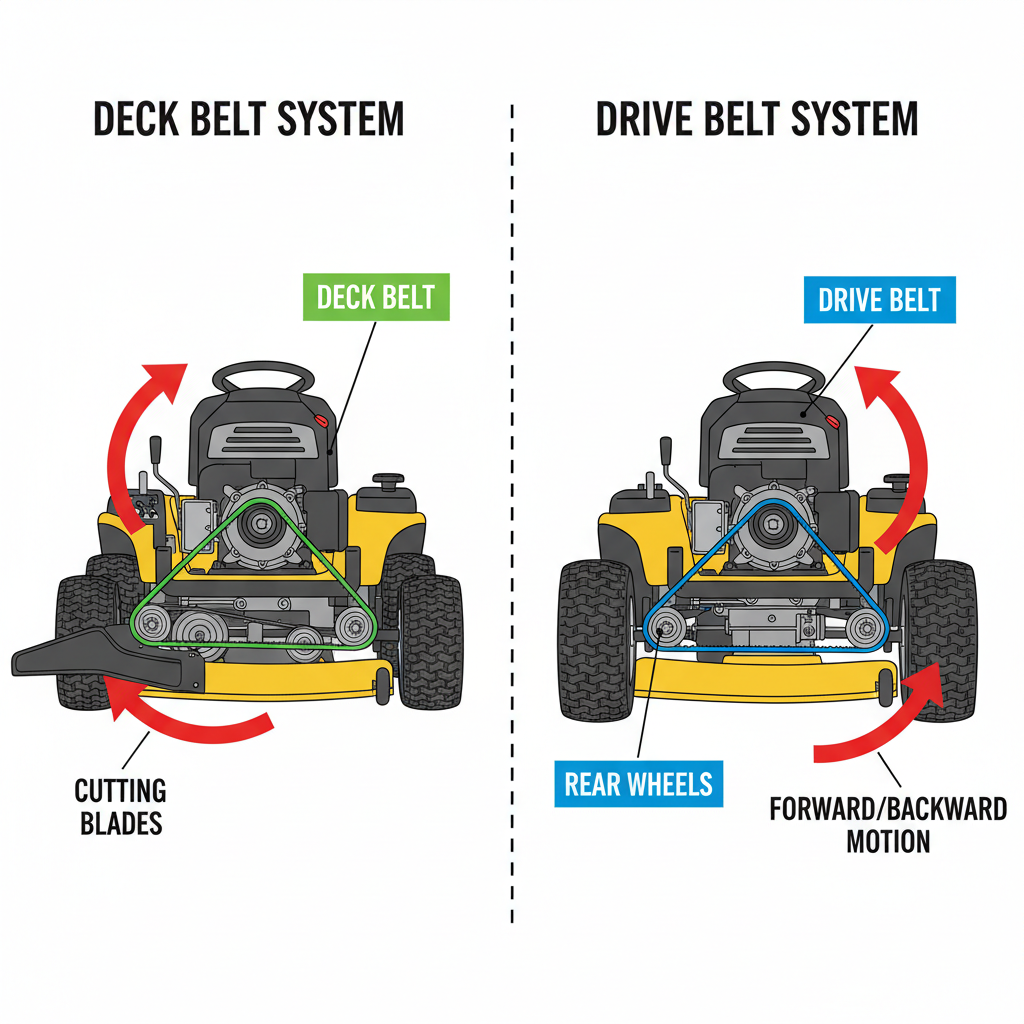
Riding lawn mowers use two main types of belts, and identifying which one needs replacement is your first step. Each serves a different function and may require slightly different removal and installation procedures.
What Is a Deck Belt?
The deck belt (also called a blade belt or cutting belt) connects the engine to the mower deck and drives the blades that cut grass. This belt sits on pulleys attached to the deck assembly, typically located beneath the mower’s body. When the deck engagement lever is engaged, power transfers through this belt to spin the cutting blades at high speed.
What Is a Drive Belt?
The drive belt (or transmission belt) connects the engine to the transmission or axles and powers the wheels, allowing the mower to move forward and backward. This belt is usually larger and more visible than the deck belt, often routed across the rear of the engine compartment.
How to Tell Which Belt Is Damaged
Signs of a worn deck belt include reduced cutting power, uneven blade engagement, or visible fraying and cracking. A failing drive belt may cause the mower to move sluggishly, slip under load, or not move at all despite engine running. Visually inspect both belts for cracks, splits, glazing (shiny spots), or excessive wear. A severely worn belt may show bare cords or severe thinning.
Safety Precautions Before Starting
Working on your mower safely prevents serious injury and protects your equipment.
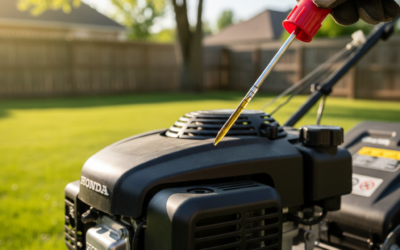
- Disconnect spark plug wires: Always remove both spark plug wires from the plugs before working on your mower. This prevents accidental engine startup if the starter is engaged.
- Work on level ground: Park your mower on flat, level ground to prevent rolling or tipping.
- Allow the engine to cool: Wait at least 15–20 minutes after running before touching engine components.
- Do not lift the mower without support: If you need to access belts from underneath, use jack stands or concrete blocks to safely support the mower. Never rely on a jack alone.
- Wear appropriate clothing: Remove loose jewelry and tie back long hair to prevent entanglement in pulleys or belt systems.
- Have a helper nearby: For larger mowers or complex procedures, having someone present is safer.
Tools and Materials You’ll Need
Gather these items before beginning your belt replacement:
| Item | Purpose |
|---|---|
| Socket set and wrenches | Loosen and tighten pulley bolts and fasteners |
| Screwdrivers (flathead and Phillips) | Remove covers, panels, or fasteners blocking belt access |
| Belt tension gauge (optional) | Measure deflection to ensure proper tension |
| Replacement belt | The new belt matching your mower’s specifications |
| Mower manual or belt routing diagram | Reference for correct belt path and tension settings |
| Work gloves | Protect hands while handling belts and pulleys |
| Shop rag or brush | Clean pulley surfaces before installing the new belt |
Finding the Right Replacement Belt
Your mower’s model and serial numbers determine the correct belt size and type. Check your owner’s manual or look for a label on the mower frame, seat area, or near the engine. Note the belt part number and cross-reference it with your mower manufacturer’s parts catalog or a lawn equipment supplier. Ordering the exact replacement belt prevents installation headaches and ensures proper fit and performance.
How to Remove the Old Belt
Step 1: Locate and Diagram the Belt Path
Before removing anything, identify where your belt routes around pulleys. Most riding mowers have a belt routing diagram printed on the underside of the seat, inside the mower deck cover, or in your owner’s manual. Take a photo or sketch the diagram so you remember the exact path for reinstallation. This simple step prevents confusion and installation errors.
Step 2: Access the Belt
For deck belts, you may need to remove a cover panel or guards to reach the belt and pulleys. For drive belts, locate the belt routing and identify fasteners holding idler pulleys or belt guides. Remove covers or fasteners as needed, setting them aside in a safe location where you won’t lose small bolts.
Step 3: Release Tension on the Old Belt
Most mowers use an adjustable idler pulley or spring-loaded tensioner to maintain belt tension. Loosen the bolt or fastener securing the idler pulley and slide it to reduce tension on the old belt. Some mowers require loosening a secondary pulley; consult your manual for exact locations. Once tension is released, the old belt should slip off the pulleys easily.
Step 4: Remove the Old Belt
Carefully guide the old belt off each pulley following the reverse path of your diagram. Work slowly to avoid snagging or damaging pulleys. Once free, set the old belt aside. Now is a good time to inspect pulleys for cracks, rust, or debris and clean them with a brush or rag before installing the new belt.
Installing the New Belt
Step 1: Route the New Belt
Following your diagram or manual, carefully thread the new belt onto the pulleys in the correct sequence. Start from the engine pulley and work outward, ensuring the belt sits centered on each pulley groove. For deck belts, this often means routing around the engine pulley, idler pulleys, and blade pulleys. For drive belts, the path typically includes the engine pulley, transmission pulley, and rear axle pulleys.
Step 2: Engage the Idler Pulley
Once the belt is routed around all pulleys, engage the idler pulley by tightening its fastener. The tension should be snug enough to prevent slipping but not so tight that you crush the belt. Your manual will specify exact torque values if available. If no torque specification exists, aim for firm hand-tight pressure plus a quarter turn with a wrench.
Step 3: Check for Proper Seating
Rotate the mower’s engine pulley by hand (with spark plugs disconnected) two or three full turns to ensure the belt tracks smoothly around all pulleys without slipping or rubbing against guides or covers. If the belt jumps off or binds, stop and recheck your routing against the diagram.
Adjusting Belt Tension and Final Checks
Proper Belt Tension Method
Belt tension affects performance and longevity. If tension is too loose, the belt slips and the mower loses power or fails to move. If too tight, you stress the belt, bearings, and pulleys, shortening belt life and increasing wear on other components.
The standard tension test is the deflection method: Apply firm thumb pressure (about 10 pounds of force) to the belt midway between two pulleys. The belt should deflect approximately half an inch (0.5 inches or 12–13 mm). If your mower manual specifies a different deflection value, follow that instead. Use a belt tension gauge for more precise measurement if available.
Adjusting Tension
If the belt is too loose, tighten the idler pulley fastener slightly and retest. If too tight, loosen the fastener incrementally until deflection is correct. Make small adjustments—quarter-turn increments—because small changes significantly affect tension. Retest after each adjustment.
Final Checks Before Restarting
- Ensure all bolts and fasteners are tight and secure.
- Verify all covers and guards are reinstalled correctly.
- Reconnect both spark plug wires firmly to their plugs.
- Check that no tools, rags, or debris remain under the mower or near pulleys.
- Start the engine and listen for unusual noises, squeaking, or slipping sounds.
- Engage the deck or transmission carefully and watch for smooth, consistent operation.
Common Issues and Troubleshooting
New Belt Squeaking After Installation
Squeaking usually indicates insufficient tension or misalignment. Check the tension first using the deflection test and tighten the idler pulley if needed. Ensure the belt tracks straight on all pulleys without rubbing against guides or covers. Squeaking often subsides after a few minutes of normal operation as the belt settles into pulley grooves, but persistent squeaking suggests a tension or alignment problem needing adjustment.
Belt Slipping Under Load
If the mower loses power or the deck doesn’t engage smoothly, the belt is likely too loose. Increase tension incrementally and retest. If tension is correct but slipping persists, inspect pulleys for glazing, cracks, or debris. A contaminated pulley surface reduces belt grip; clean pulleys thoroughly with a dry rag or brush.
Belt Still Visible Inside Covers
Ensure the belt is fully routed under all pulleys and guides per your diagram. Belts that are not fully seated may rub against covers or misalign, causing noise or premature wear.
Mower Still Won’t Move or Cut After Belt Replacement
Double-check your belt routing against the diagram. A single misrouted pulley prevents proper power transfer. Verify spark plugs are reconnected securely. Check that you engaged the correct fasteners and belt is not slipping due to low tension.
Model-Specific Variations
Zero-Turn Radius Mowers
Zero-turn mowers may have more complex belt systems with multiple drive belts controlling each wheel independently. Belt replacement procedures are similar, but consult your specific manual because pulley layouts and tensioning methods differ from traditional riding mowers. Some models use spring-loaded tensioners that operate differently than manually adjusted idlers.
Older vs. Newer Mowers
Older mowers often have simpler, more accessible belt designs, whereas newer models may feature covered belt systems, sealed bearings, and integrated tensioning. Modern mowers sometimes require removing the entire deck or engine cover for belt access. Always consult your mower’s specific owner’s manual for the exact procedure and any model-specific warnings.
Finding Your Mower’s Manual
Most mower manufacturers provide manuals online through their websites. Search for your brand and model number. If unavailable online, contact the manufacturer directly or check with local lawn equipment dealers who service that brand.
Frequently Asked Questions
How often should I replace my mower belt?
Riding mower belts typically last 3–5 years or 300–500 hours of operation, depending on mowing frequency, usage conditions, and maintenance. Belts exposed to dust, moisture, or extreme temperatures wear faster. Inspect your belt annually during spring maintenance; replace it if you notice cracks, fraying, severe glazing, or if it begins slipping.
Can I reuse the old belt or drive it until it breaks?
A severely worn or broken belt should be replaced immediately. Continuing to operate with a failing belt risks further damage to pulleys, bearings, or the transmission. A broken deck belt means no cutting; a broken drive belt strands your mower. Replacing the belt proactively before failure is safer and cheaper than emergency repairs.
Do I need to replace both belts at the same time?
No, replace only the belt that is worn or damaged. However, if both belts are old and show similar wear, replacing both together may be economical since you’ll need to do the work anyway. Consult your mower’s maintenance schedule and inspect both belts closely before deciding.
What if I don’t have the belt routing diagram?
Check your owner’s manual or download one from the manufacturer’s website using your mower’s model and serial number. If unavailable, take detailed photos or video of the belt path before removal, or contact the manufacturer’s customer service for a diagram. Many lawn equipment retailers can also provide routing information for common mower models.
Key Takeaways
Replacing a riding mower belt is a manageable DIY task that saves money and extends your mower’s life. Always prioritize safety by disconnecting spark plugs and allowing the engine to cool. Take time to identify which belt needs replacement, locate the correct routing diagram, and carefully remove the old belt while noting pulley positions. Install the new belt following the diagram precisely, then adjust tension to the proper deflection—approximately half an inch under thumb pressure. Test the mower carefully before returning to full operation. Regular inspection and timely belt replacement keep your mower performing reliably for years to come.