Quick Answer: How to Sharpen a Chainsaw with a Guide
Identify your chain pitch, then select the matching round file and filing guide. Engage the chain brake, clamp the bar in a vise, and seat the guide on each cutter tooth at the correct side-plate angle (typically 25–35°) and top-plate angle (0–10°). Push the file forward across the tooth using 3–5 smooth strokes — the same count on every tooth. File all cutters on one side, rotate the saw 180°, repeat on the other side. Finish by using a flat file and depth-gauge raker tool to bring any protruding rakers flush with the gauge slot.

Pros
- Supports a wide range of chainsaw chains up to .404 pitch
- Includes both chain grinding wheels and a depth-gauge maintenance disc
- Can be mounted on a bench or wall for flexible workspace setup
- Built for frequent sharpening tasks rather than occasional use
Cons
- May be more machine than needed for casual users who sharpen chains only occasionally
- Requires mounting and workshop space, so it is less portable than handheld sharpeners
- Compatibility is limited to chains up to .404 pitch
Overview: The Oregon 520-120 is a professional 120-volt chainsaw chain sharpener designed for frequent, high-volume use. It can be mounted on a bench or wall, making it a practical fit for a garage, workshop, or service area.
Performance and Features: This universal sharpener handles chains up to .404 pitch and is intended to work with many popular chain brands, including Oregon, Stihl, and Husqvarna. Multiple adjustment points support more accurate sharpening, while the built-in light helps improve visibility during detailed grinding work.
Drawbacks and Considerations: Its professional focus means it may be more capable than many casual users need. It also requires a mounting setup and dedicated space, so it is not as portable as simpler chain sharpeners. Chains larger than .404 pitch are not supported.
Verdict: The Oregon 520-120 is best suited to professional users or serious property owners who sharpen chains regularly and want a more controlled, workshop-style solution. If you need a durable sharpener for repeated use and value adjustment precision, this model is a strong fit.

Pros
- Space-saving alternative to a full-size chain sharpener.
- Wide chain compatibility up to .404 inch pitch.
- Includes useful setup and maintenance accessories.
- Bench mounting with included bolts adds stability in a workshop or garage.
Cons
- Best suited to occasional use rather than high-volume sharpening.
- Requires a bench or fixed work surface for installation.
- No customer review details are available in the provided data, so long-term performance feedback is limited.
Overview & Design: The Oregon Professional Compact 120-Volt Bench Chain Grinder is a small bench-mounted chain sharpener built for home workshops and garages. Its compact footprint makes it a practical choice for users who want a dedicated sharpening tool without the size of a full professional machine.
Performance & Key Features: This grinder is designed to sharpen chains up to .404 inch pitch, which covers many common chainsaw chains from brands such as Oregon, Stihl, and Husqvarna. It includes a manual chain clamping vice, one-way motor rotation for added safety, two grinding wheels, a dressing brick, and a profile guide.
Drawbacks & Considerations: The main limitation is that it is aimed at occasional users rather than heavy-duty shop use. It also needs to be bolted to a bench, so it is not a portable sharpener. Since no customer review details were provided, there is limited real-world feedback to judge long-term durability.
Verdict: For homeowners, property owners, and light-duty users who want an affordable and space-saving way to maintain saw chains, this Oregon grinder is a sensible option. It offers the core features needed for basic sharpening while staying compact and straightforward.

Pros
- Electric sharpener with a 230W rating listed in the title
- Designed for saw chain and blade sharpening per title
Cons
- Chain size compatibility is not stated in supplied data
Pros
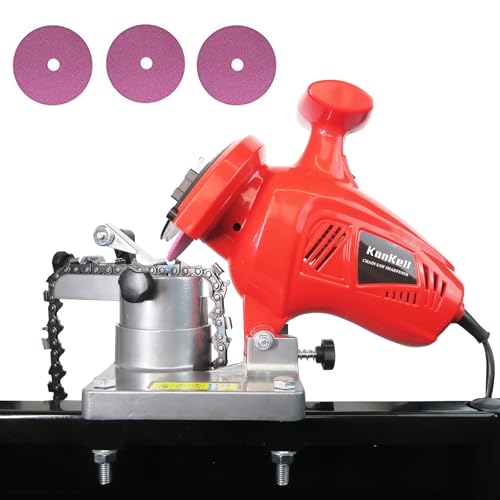
- High-speed 8400 RPM operation supports efficient sharpening.
- Adjustable angle adds flexibility for different chain types.
- Stable mountable base can improve control during use.
- Lightweight and compact compared with many bench-style sharpeners.
Cons
- Best suited to chains between 1/4" and 3/8" pitch, so it is not a universal solution for every chain size.
- Mountable setup is less portable than a fully handheld sharpener.
- No included accessory list or detailed specs were provided in the source data, so buyers may need to confirm what comes in the box.
Overview: The KonKell Electric Chainsaw Sharpener is a 250W bench-style chain grinder designed to restore cutting edges quickly and with more consistency than manual filing. Its heavy-duty build and compact 1.55 kg design make it a practical option for garages, workshops, and on-site maintenance.
Performance and Features: With an 8400 RPM motor and adjustable grinding angle, this sharpener is built for efficient, repeatable sharpening on chains from 1/4" to 3/8" pitch. The mountable base adds stability, which can help improve accuracy and reduce movement during operation. That makes it a strong fit for users who want a more controlled sharpening process.
Drawbacks and Considerations: The sharpening range is limited to specific chain pitches, so it will not fit every chainsaw chain. Because it is designed to be mounted, it is less convenient for fully portable use than a handheld tool. The provided product data also does not include a full accessory list, so buyers may want to confirm what is included before purchasing.
Verdict: This sharpener makes the most sense for DIY owners, homeowners, and professionals who regularly maintain compatible chains and want a stable, power-driven sharpening solution. If you value speed, adjustability, and a more precise setup, it is a sensible choice.
What Does “Sharpen a Chainsaw with a Guide” Actually Mean?
The word guide carries two meanings in this context, and confusing them leads to the wrong outcome.
- A physical filing-guide tool is a small metal or plastic bracket that clamps over the round file and sits on the cutter tooth. It holds the file at a preset or adjustable angle so every stroke lands at exactly the same geometry. Popular examples include the Oregon 30° filing guide, the Stihl 2-in-1 filing guide, and the Husqvarna filing aid.
- A written instructional guide — which is what this article is — walks you through the entire sharpening process.
This article covers both: it is the written guide that teaches you how to use the physical tool. The method described here is manual round-file sharpening with a filing guide — the highest-volume, most accessible approach for homeowners and small-acreage users. Two alternative methods (electric bench-grinder guide and Dremel-style rotary guide) deliver faster results on severely damaged chains but require separate equipment and technique; those are covered in dedicated articles to keep the scope clean.
Identify Your Chain Pitch Before You Buy a File
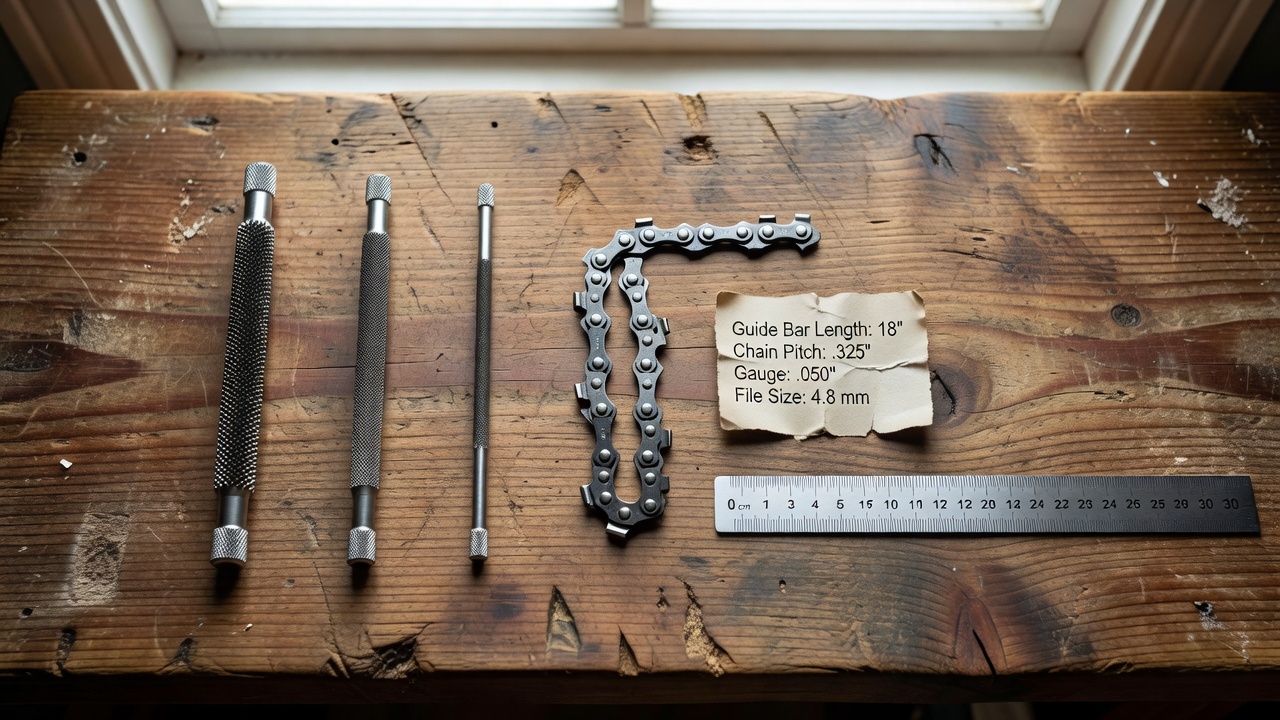
Chain pitch determines cutter-tooth size, which determines the round file diameter you need. Using the wrong file diameter leaves the tooth geometry incorrect even if your angles are perfect — the most common beginner mistake. For broader ecosystem context, read through our operational guide on jbl partybox club 120 vs sony srs xv500.
How to find your chain pitch: For broader ecosystem context, read through our operational guide on jbl partybox club 120 vs sony srs xv500.
- Check the label on the guide bar — most bars print pitch and gauge directly on the body.
- Look at the stamp on the chain’s drive links — a number such as .325, 3/8, or .404 is the pitch.
- Consult the chainsaw owner’s manual or the manufacturer’s spec sheet for your model.
Once you have the pitch, use the table below to select the correct round file: For troubleshooting and reliability insights, consult our in-depth z890 vs x870e motherboard report.
| Chain Pitch | Round File Diameter | Common Chain Examples |
|---|---|---|
| 1/4″ | 3/32″ (2.4 mm) | Light-duty and pole-saw chains |
| 0.325″ | 3/16″ (4.8 mm) | Oregon 91, Stihl 26RS, many mid-range saws |
| 3/8″ (standard) | 7/32″ (5.5 mm) | Oregon 72LPX, Husqvarna H42, Stihl 36RS — the most common pitch for homeowner and prosumer saws |
| 3/8″ low-profile | 5/32″ (4.0 mm) | Oregon 90PX, Stihl 63PM — smaller saws and electric models |
| 0.404″ | 13/64″ (5.2 mm) | Professional logging chains, high-displacement saws |
File diameter matters because the file must contact the curved gullet of the cutter tooth at its widest point. A file that is too small rides inside the gullet and rounds the cutting edge; one that is too large sits above the gullet and fails to sharpen the inside of the cutter at all. Manufacturer documentation from Oregon, Stihl, and Husqvarna all specify file diameter by pitch — always verify against your chain’s spec sheet before purchasing consumables.
Tools and Safety Setup Before You Start
What You Need
- Round file — diameter matched to chain pitch (see table above)
- Filing guide (sharpening guide) — holds the file at the correct angle; choose a model compatible with your file diameter
- Flat file — for depth-gauge adjustment
- Depth-gauge raker tool — a stamped metal plate with a slot that sets the correct raker height
- Bar clamp or bench vise — secures the guide bar during filing
- Cut-resistant gloves — cutter teeth are razor-sharp even when dull
- Safety glasses — metal filings travel at eye level during forward strokes
- Permanent marker — marks the starting tooth so you complete a full revolution without doubling back
Mandatory Safety Steps
- Engage the chain brake. Push the front hand guard forward until it locks. This immobilizes the chain during filing and is non-negotiable.
- Disconnect the ignition or battery. Pull the spark plug wire on gas saws; remove the battery pack on battery-powered models. Prevents accidental starts.
- Clamp the bar in a vise. A bar that shifts mid-stroke changes the file angle with it. Clamping the bar — not the saw body — at the front of the bar near the tip gives the most stable platform. A dedicated chainsaw bar vise positions the bar at working height; a standard bench vise with jaw pads works equally well.
- Put on gloves and glasses before touching the chain.
How to Set Up and Position the Filing Guide Correctly
The filing guide’s sole job is to hold the round file at two angles simultaneously: the side-plate angle (the horizontal angle of the file relative to the chain) and the top-plate angle (the downward tilt of the file). Confusing these two is the second most common beginner error. For troubleshooting and reliability insights, consult our in-depth z890 vs x870e motherboard report.
- Side-plate angle determines the direction the cutting edge faces along the chain. Viewed from above, this is the angle between the file and the bar. The standard range is 25–35°. Stihl specifies 30° for most of its chains; Oregon semi-chisel chains typically call for 35°; full-chisel chains commonly use 25–30°. Check your chain’s spec sheet — the number is always printed there.
- Top-plate angle is the downward tilt of the file into the tooth, viewed from the front. Most chains call for 0–10°, with 0° being flat (horizontal) and common on full-chisel chains. Some semi-chisel chains specify a slight downward angle. Many entry-level filing guides preset this at 0° and do not allow adjustment, which is correct for the majority of chains.
Positioning the Guide Step by Step
- Thread the round file through the filing guide’s roller or collar so the file extends evenly on both sides.
- Locate a cutter tooth. Place the guide on top of the tooth so the file sits in the tooth’s gullet — the curved inner face of the cutter where material is removed.
- Read the angle markings stamped or printed on the guide body. Rotate the guide until the side-plate angle marker aligns with the centerline of the chain bar. On guides with preset stops (common on Stihl 2-in-1 and Oregon guides), you will feel or hear a positive stop at the correct angle.
- Confirm the file is contacting the gullet at its full diameter — roughly one-fifth of the file’s diameter should sit above the top of the cutter tooth. If the file sits below the tooth top, the file is too small; if it sits well above, it is too large.
- Hold the guide firmly against the side of the tooth with your non-dominant hand while your dominant hand grips the file handle. Keep both wrists locked — the guide does the angle work; your job is consistent forward pressure.
Step-by-Step: Filing the Cutter Teeth
- Mark the starting tooth with a permanent marker. Chainsaw chains have no natural start point; the mark prevents you from filing the same tooth twice and missing others.
- File the first tooth. Apply firm, even forward pressure — file on the push stroke only; lifting the file on the return stroke prevents dulling the file against the tooth on the back edge. Use 3–5 smooth strokes for a chain in normal maintenance condition. Chains with chipped or rolled cutters from rock or soil contact may need 7–10 strokes to restore the edge — but use the same count on every tooth in that session.
- Advance the chain. Release the chain brake momentarily, pull the chain forward by hand to expose the next cutter tooth, re-engage the brake, and repeat. Never disengage the brake without your hand clear of the cutters.
- Complete all cutters on one side. Work around the chain, filing every tooth that faces the same direction. On a standard alternating-cutter chain, that is every other tooth.
- Rotate the saw 180° in the vise so the opposite side of the bar faces you. File all remaining cutters using the same stroke count and guide angle setting (mirror the side-plate angle to match the opposite cutter direction — many guides have dual angle markings for this).
- Inspect the chain. Each cutter tooth should have a bright, uniform shiny edge along the top plate and a clean hook shape when viewed from the side. Uneven brightness indicates uneven stroke count — re-file the dull spots with 1–2 additional strokes.
Why equal stroke counts matter: Each stroke removes a small amount of metal from the cutter. If one tooth receives four strokes and the next receives six, the chain becomes unbalanced — the longer teeth take deeper bites, the shorter teeth coast, and the saw pulls to one side during cutting. Consistent stroke count per tooth is the single biggest factor in a smooth-running chain after sharpening.
How to Check and File the Depth Gauges (Rakers)
What depth gauges do: Each cutter tooth sits ahead of a small rounded projection called the depth gauge or raker. The height difference between the raker and the top of the cutting edge controls how deep each cutter bites into wood per chain revolution. Too high and the chain barely cuts; too low and each cutter takes an overly aggressive bite, which increases kickback risk and stresses the drive system. Readers comparing setup options can review our technical analysis on marshall stanmore iii vs harman kardon onyx studio 8.
The standard depth-gauge clearance for most homeowner and prosumer chains is 0.025″–0.030″ (approximately 0.6–0.75 mm). Manufacturer service specifications for Oregon, Stihl, and Husqvarna chains all fall within this range for typical cutting conditions; some aggressive professional chains specify up to 0.035″. Always verify your chain’s spec before filing rakers.
Depth-Gauge Filing Procedure
- Lay the depth-gauge raker tool flat across the chain over a raker. The tool has a slot machined to the target clearance height.
- If the raker tip protrudes above the slot, it needs filing. If it sits flush or below, move to the next raker.
- Draw a flat file across the top of the protruding raker — one or two light strokes — until it sits flush with the slot surface.
- Move to every raker around the chain and repeat. Do not guess; always use the gauge tool.
- Do not over-file. Rakers that are too low increase kickback severity. If a raker is accidentally filed below the tool slot, the chain should be replaced or the depth rechecked with a micrometer against the manufacturer’s minimum specification.
Depth gauges do not need adjustment every sharpening cycle. Check them every third or fourth sharpening — each filing session removes a small amount of metal from the cutter top plate, gradually reducing the height differential. Over several sessions, rakers that were once correct become relatively too tall. For complementary field maintenance guidelines, examine our breakdown of dyson v8 cyclone vs bissell featherweight stick.
How to Know When Your Chainsaw Chain Needs Sharpening Again
A sharp chain cuts by producing chips — recognizable curled or chunky wood pieces in the kerf and on the ground. A dull chain produces fine dust and requires noticeably more downward pressure to advance the cut. When you are pushing rather than guiding, the chain is dull.
Practical sharpening indicators: To evaluate matched hardware tolerances, consult our detailed overview of bissell crosswave hydrosteam vs shark stainforce.
- The saw produces dust instead of chips
- You must apply downward force — a sharp chain feeds itself
- The bar pulls to one side, indicating uneven cutter heights
- Cutting speed slows noticeably for the same wood species and diameter
- Immediately after the chain contacts soil, rock, wire, or any mineral material — even a single contact event damages cutter edges enough to require sharpening
Frequency rule of thumb: Sharpen after every 2–3 hours of active cutting time under normal conditions (clean wood, no ground contact). Professional forestry guidance and manufacturer maintenance schedules consistently cite this range as the threshold where sharpening takes fewer strokes per tooth and chain life is maximized. Filing a slightly dull chain takes 3–5 strokes per tooth; waiting until the chain is severely dull requires 8–12 strokes and removes significantly more metal per session, shortening chain service life.
A filing guide makes in-field touch-up sharpening practical: the entire process takes under 10 minutes on a chain in routine maintenance condition, and the guide fits in a shirt pocket. There is no reason to wait until the chain is severely dull.
Common Questions on How To Sharpen Chainsaw With Guide Answered
What size file do I need to sharpen a 3/8″ pitch chainsaw chain?
A 7/32″ (5.5 mm) round file is correct for standard 3/8″ pitch chains — the most common pitch on homeowner and prosumer saws. Note that 3/8″ low-profile chains (found on smaller and electric models) require a smaller 5/32″ (4.0 mm) file. The pitch and profile designation are stamped on the drive links or printed on the guide bar; confirm before purchasing files.
Do I need a special filing guide, or can I file freehand?
Freehand filing is possible for experienced users with a strong sense of angle, but a filing guide is recommended for anyone who sharpens fewer than a few chains per week. Without a guide, angle deviation of even 5° produces uneven cutter heights and a chain that pulls to one side. A filing guide eliminates the angle variable entirely — setup takes 30 seconds, and the results are measurably more consistent. Entry-level guides from Oregon, Stihl, and Husqvarna cost under $15 and last for years of occasional use.
How many strokes should I use per tooth?
Use 3–5 forward strokes for a chain sharpened on a regular maintenance schedule (every 2–3 hours of cutting, no rock contact). Use 6–10 strokes for a chain that has contacted soil or rock, or one that has not been sharpened in several sessions. The exact number matters less than consistency: whatever count you use on the first tooth, apply to every subsequent tooth. Inconsistent stroke counts produce unequal cutter heights, which cause the bar to pull and accelerate drive-link wear.
What happens if I skip the depth-gauge step after sharpening?
Each sharpening session removes metal from the cutter top plate, which gradually reduces the height of the cutting edge relative to the raker. Over several sharpening cycles, the rakers become proportionally too tall — they limit how deep the cutters can bite, so the chain cuts slowly and feels dull even though the edges are sharp. Checking and correcting depth gauges every three to four sharpening sessions restores full cutting performance and prevents premature chain replacement.
For more hands-on benchmarks and buying recommendations, consult our guides on high-CFM commercial leaf blower guide, as well as durable ride-on lawn tractor guide.
Mechanical safety standards, operational tolerances, and protective gear guidelines align with benchmark specifications established by the American National Standards Institute (ANSI).