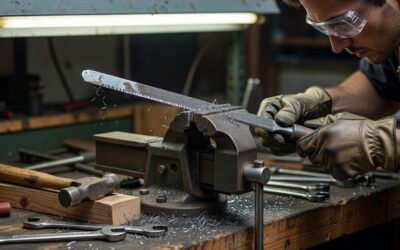
To sharpen your lawn mower blade yourself, first disconnect the spark plug and remove the blade from the mower deck. Secure the blade in a vise and use a metal file or angle grinder to restore the original cutting angle on both ends. It is critical to remove an equal amount of material from both sides to maintain blade balance. Finally, reinstall the blade in the correct orientation and tighten it to the manufacturer’s specified torque.
Maintaining a sharp blade is essential for lawn health. A dull blade tears the grass rather than cutting it, leaving ragged edges that can lead to disease and browning. By following a systematic approach to sharpening, you can extend the life of your equipment and achieve a professional-looking lawn.
Why and When Should You Sharpen Your Lawn Mower Blade?
Regular maintenance is the key to a well-manicured yard. While many homeowners focus on engine oil and fuel, the blade is the part of the machine that directly impacts the aesthetic and biological health of your grass.
What are the signs of a dull lawn mower blade?
You may notice several indicators that your blade has lost its edge. Common signs include:
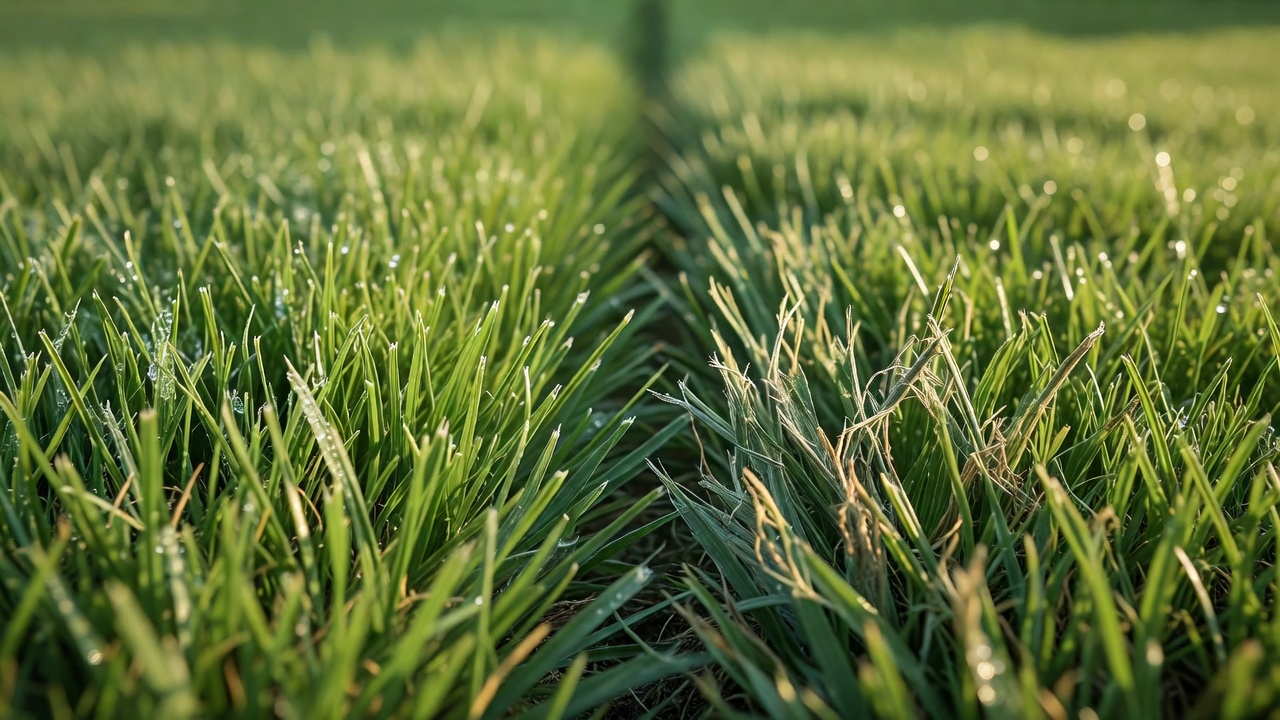
- Ragged Grass Tips: If the ends of your grass look torn or white/brown rather than cleanly sliced, the blade is likely dull.
- Increased Clumping: A dull blade struggles to lift and cut grass efficiently, often leaving clumps of clippings on the lawn.
- Engine Strain: You might notice the mower engine working harder or requiring more throttle to move through thick patches of grass.
- Uneven Growth: If the mower seems to be leaving patches of longer grass despite a consistent pass, the cutting edge may be compromised.
How does a sharp blade benefit lawn health?
A sharp blade performs a clean, surgical cut. This minimizes trauma to the grass plant, allowing it to heal quickly. Conversely, a dull blade creates a jagged wound that exposes the inner tissue of the grass to moisture loss, pests, and fungal diseases. A clean cut also promotes more vigorous, lateral growth, leading to a thicker, greener lawn.
How often should you sharpen your mower blade?
The frequency of sharpening depends heavily on your specific lawn conditions. If you mow frequently, deal with heavy clay soil that kicks up grit, or mow through tall, thick weeds, you will need to sharpen more often. As a general rule of thumb, many professionals recommend inspecting the blade for sharpness at the beginning of every mowing season and performing maintenance as needed throughout the year.
What Tools and Safety Gear Do You Need?
Before you begin, gather all necessary equipment to avoid interruptions during the process. Safety should be your primary concern when working with heavy metal components and rotating machinery.
Common tools for sharpening a lawn mower blade
Depending on your comfort level and the tools you own, you will need one of the following combinations:
- Manual Method: A high-quality metal file (often a mill file) and a vise to hold the blade steady.
- Power Method: An angle grinder with a grinding disc or a dedicated blade sharpening kit.
- Cleaning Tools: A wire brush to remove dried grass, dirt, and rust from the blade surface.
- Measurement Tools: A ruler or calipers to ensure you are maintaining consistent dimensions.
Critical safety precautions
Working with lawn mower blades involves heavy, sharp objects and, if using power tools, high-speed rotation. Always follow these precautions:
- Disconnect Power: Always remove the spark plug wire from the spark plug before touching the blade. This prevents the engine from accidentally starting if the blade is turned.
- Work in a Stable Area: Ensure you have a flat, stable surface and a secure vise.
- Eye and Hand Protection: Wear safety glasses to protect against flying metal shards and heavy-duty work gloves to prevent cuts.
Recommended Personal Protective Equipment (PPE)
Beyond basic safety, proper PPE ensures you can work confidently. Use ear protection if you are using an angle grinder, as the noise levels can be damaging over time. Sturdy, closed-toe shoes are also highly recommended to protect your feet in case a heavy blade is dropped.
How to Remove the Lawn Mower Blade Safely
Accessing the blade is the first major step in the maintenance process. This must be done carefully to avoid damaging the mower deck or injuring yourself.
The first step to ensure safety
The most important step is to ensure the mower cannot start. For gas-powered mowers, pull the spark plug wire off the plug. For electric mowers, remove the battery or unplug the power cord. This is a non-negotiable safety requirement.
How to properly remove the blade
- Tip the Mower Correctly: If using a walk-behind mower, tilt the mower on its side. Important: Always tilt the mower with the air filter and carburetor facing upward. If you tilt it with the air filter downward, oil may leak into the carburetor, causing engine issues.
- Loosen the Bolt: Use a socket wrench or a specialized blade wrench to loosen the center bolt. Some mowers may require you to hold the blade in place with a block of wood to prevent it from spinning while you turn the bolt.
- Remove the Blade: Once the bolt is removed, carefully lift the blade away from the spindle.
Handling and storing the blade
Once removed, clean the blade with a wire brush to remove debris. This makes it easier to see the actual edge and any nicks or chips. Store the blade in a safe place where it cannot be accidentally stepped on or handled by children before you are ready to sharpen it.
How to Sharpen the Blade: Step-by-Step Methods
Sharpening is about restoring the original cutting angle. While different mower models may vary slightly, the goal is a consistent, clean edge.
Sharpening a blade using a metal file
The manual method is slower but offers the most control, which is ideal for beginners.
- Secure the Blade: Clamp the blade firmly in a vise.
- Identify the Angle: Locate the original bevel (the angled edge) of the blade.
- File the Edge: Move the file along the edge in a consistent direction, following the existing angle. Use long, smooth strokes.
- Work Both Sides: If your blade has a double-bevel edge, you must file both sides. Ensure you are removing an equal amount of metal from each side to prevent the blade from becoming lopsided.
Sharpening a blade using an angle grinder
An angle grinder is much faster but requires a steady hand to avoid removing too much material.
- Set the Speed: Use a low speed if your grinder allows, to prevent overheating the metal.
- Maintain the Angle: Hold the grinder at the same angle as the original bevel.
- Light Passes: Use light, controlled passes. Do not press too hard, as excessive heat can temper the steel, making it soft and unable to hold an edge.
- Check Progress: Frequently stop to check the edge and ensure you are maintaining symmetry.
The correct angle to follow
Most residential lawn mower blades feature a specific cutting angle, often ranging between 30 and 45 degrees. You should aim to replicate the factory bevel. If you are unsure of the exact angle, look at the existing edge of the blade and follow that slope. If the blade is heavily damaged, consult your owner’s manual for specific guidance.
How to Reinstall and Balance the Blade
The job is not finished once the edge is sharp. Reinstallation and balancing are critical to prevent vibration that can damage your mower’s engine and spindle.
Why blade balance is important
When you sharpen a blade, you remove metal. If you remove more metal from one end or one side than the other, the blade becomes unbalanced. An unbalanced blade causes significant vibration during operation, which can lead to premature wear on the crankshaft, bearings, and mounting hardware.
How to check if the blade is balanced
You can perform a simple balance test using a specialized blade balancer or a DIY method:
- The Hanger Method: Hang the blade by its center hole on a nail or a thin rod.
- Observe the Movement: If the blade stays in place, it is balanced. If one end always rotates toward the ground, that side is heavier.
- Correcting Imbalance: If the blade is heavy on one side, use a file to carefully remove a small amount of metal from the *trailing edge* (the blunt side) of the heavy end until it hangs level. Never remove metal from the cutting edge to balance it.
The procedure for reinstalling the blade
- Position the Blade: Place the blade back onto the spindle. Ensure it is oriented in the same direction as when it was removed (most blades have markings or specific shapes to indicate the front).
- Replace the Bolt: Thread the bolt back on by hand to ensure it is not cross-threaded.
- Tighten to Torque: Use a wrench to tighten the bolt securely. It is vital to follow the manufacturer’s specified torque settings found in your owner’s manual. Over-tightening can damage the threads, while under-tightening can cause the blade to fly off during use.
- Final Check: Reconnect the spark plug and perform a brief test run to ensure there is no excessive vibration.