Understanding Your Weed Wacker’s Spool System
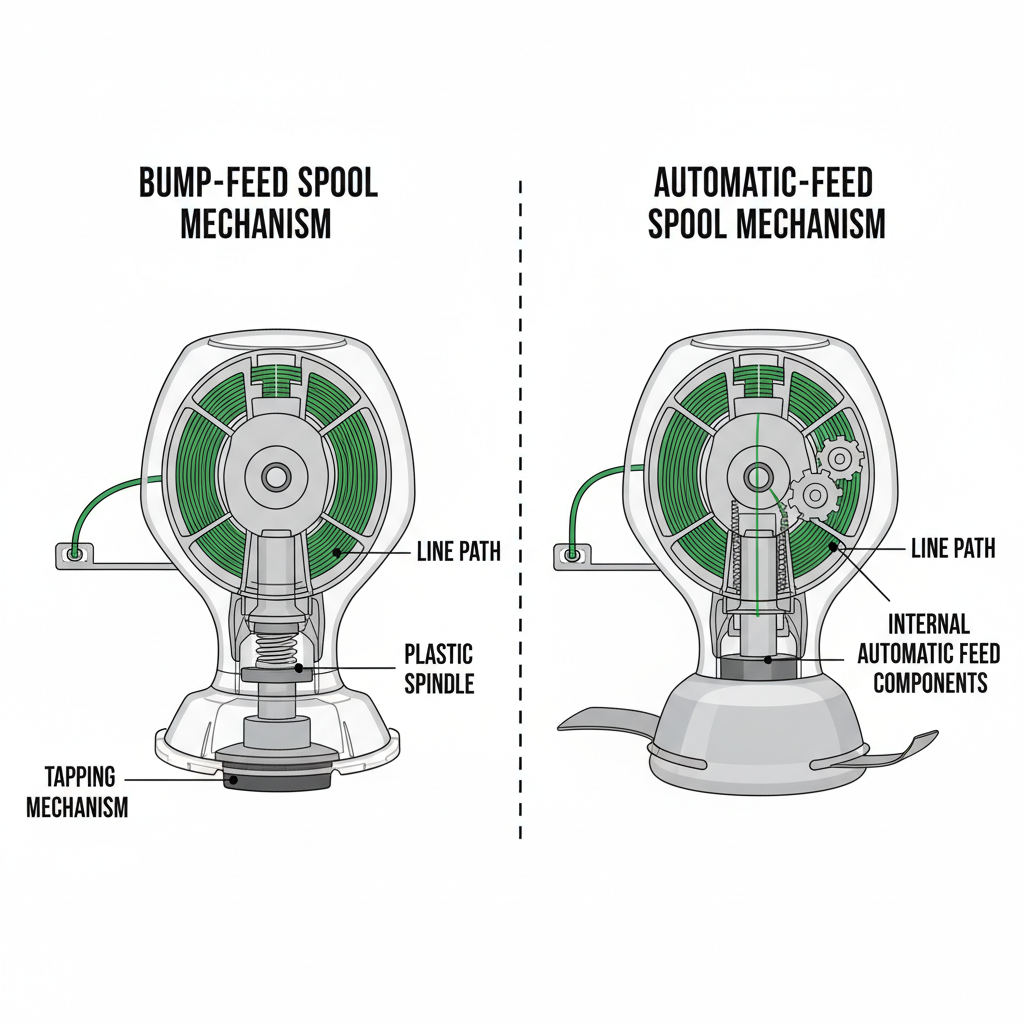
Before you begin threading your trimmer, it helps to understand how the spool works. The spool is a plastic spindle that holds and dispenses cutting line as you use the trimmer. Most residential weed wackers use one of two spool designs: bump-feed or automatic-feed.
Bump-feed spools are the most common type. You manually advance the line by tapping the spool head on the ground while the trimmer is running. This action triggers a mechanism inside the head that feeds out a small amount of fresh line. Bump-feed designs are simple, reliable, and inexpensive to replace.
Automatic-feed spools advance line continuously as the trimmer runs, without requiring you to tap the head. These are convenient but slightly more complex to thread correctly, since improper winding can cause the line to feed too quickly or jam.
The spool is typically located inside the trimmer head—the round housing at the end of the trimmer shaft. You access it by removing the spool cap or cover, which usually twists off by hand or is held by a single bolt or clip.
Tools and Materials You’ll Need
Gathering the right supplies before you start makes the job faster and easier:
- Replacement trimmer line: Buy a spool or coil of line that matches your trimmer’s specifications. Most residential trimmers use 0.065″ to 0.095″ diameter line; check your trimmer’s manual or the spool housing for the correct gauge.
- Scissors or line cutter: A sharp pair of scissors or a utility knife works well for cutting line to length.
- Measuring tape: To measure the correct line length (typically 15–17 feet depending on your model).
- Small flathead screwdriver (optional): Helpful for gently prying off stubborn spool caps or removing old line fragments.
- Clean cloth or brush: For removing debris and old line fragments from inside the trimmer head.
Check your trimmer’s manual to confirm the recommended line gauge and maximum length—using the wrong size can affect performance or damage the trimmer head.
How to Remove the Old Trimmer Line
Step 1: Unplug or disconnect the trimmer. Safety first—if your trimmer is electric, unplug it. If it’s cordless, remove the battery. If it’s gas-powered, disconnect the spark plug wire.
Step 2: Access the spool. Locate the spool cap or cover on the trimmer head. Most caps twist counterclockwise by hand; some are held by a single bolt or clip. Gently remove the cap and set it aside in a safe place.
Step 3: Remove the spool. The spool itself may lift straight out, or it may require a slight twist. Remove it completely and place it on a clean work surface.
Step 4: Clear old line. Pull out any remaining line from the spool and discard it. Use your fingers or a small tool to gently pick out stubborn fragments. Wipe the spool with a clean cloth to remove dust and debris.
Step 5: Inspect and clean. Check inside the trimmer head for any old line pieces, dried grass, or debris. A quick wipe with a cloth keeps everything clean and helps the new line feed smoothly.
Cutting and Preparing New Trimmer Line
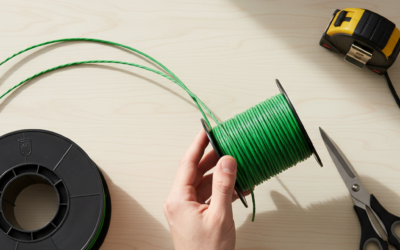
Getting the line length right is important for proper feeding and performance. The standard length for most residential weed wackers is 15–17 feet; however, always check your trimmer’s manual for the specific recommendation.
To measure and cut line:
- Unroll your new trimmer line and measure out the recommended length using a measuring tape.
- Mark the line with a pen or directly cut at that point using sharp scissors or a utility knife.
- Cut cleanly—ragged edges can make winding more difficult. If you cut a slightly longer piece (a few inches over), you can trim it during installation.
Line gauge matters. Trimmer line comes in different diameters: common sizes are 0.065″, 0.080″, and 0.095″. Thicker line (0.095″) handles tougher weeds and brush but requires more engine power. Thinner line (0.065″) is lighter and works well for light grass but breaks more easily in thick weeds. Always match the gauge specified in your trimmer’s manual—using the wrong size can reduce cutting efficiency or strain the motor.
Winding Line onto the Spool: Step-by-Step
This is the most critical part of threading. Improper winding causes the line to feed incorrectly or jam inside the head.
Step 1: Locate the winding direction. Look at the spool for an arrow or directional indicator printed or embossed on its surface. This arrow shows the direction in which you should wind the line. Always wind against the direction of rotation of the trimmer head—this counterintuitive rule ensures that centrifugal force pulls the line outward as it feeds.
Step 2: Insert the line into the notch. Most spools have a small notch or hook at the edge where you insert the end of the line. Thread the line end into this notch and hold it secure with your finger.
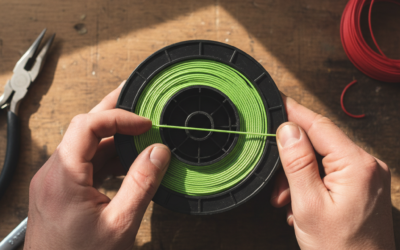
Step 3: Wind the line evenly. Rotate the spool in the direction indicated by the arrow, wrapping the line neatly and tightly around the spool. Keep the line under slight tension to prevent loose or uneven wraps. Wind slowly and deliberately—rushing creates tangles and overlaps.
Step 4: Leave the final 6 inches free. As you near the edge of the spool, stop winding and leave approximately 6 inches of line extending outward. This free section will feed into the trimmer head and ensure continuous cutting.
Step 5: Thread the free end into the exit port. Most spool designs have a small slot or port on the side where the line exits into the trimmer head. Insert the free 6-inch end into this port. Some designs require you to push the line through a small hole in the spool cap; check your manual for specifics.
For dual-line spools: If your trimmer uses two lines (common on many models), repeat the above process with a second length of line, winding it in the same direction on the opposite side of the spool or in a separate chamber. Ensure both ends exit through the proper ports before reinstalling the spool.
Reinstalling the Spool and Testing
Step 1: Place the spool back into the trimmer head. Align the spool with the shaft inside the trimmer head and gently lower it into place. It should sit flush with the interior of the head.
Step 2: Reinstall the spool cap. Twist the cap back onto the head clockwise until it is snug. Do not overtighten—just firm enough that it won’t come loose during use. Some caps lock with a specific click or stop; listen or feel for that signal.
Step 3: Verify line position. Check that both line ends (for dual-line designs) are visible and extending outward from the trimmer head. If line is trapped under the cap, remove the cap and adjust the line position.
Step 4: Test without power. Manually rotate the trimmer head to ensure the line moves freely inside the head and does not bind or catch. Listen for any grinding or scraping sounds that would indicate misalignment.
Step 5: Power up and test. Reconnect the trimmer (plug in, reattach the battery, or reconnect the spark plug wire). Start the trimmer and let it run for 10–15 seconds at idle. The line should feed smoothly and steadily. If it does not feed or feeds unevenly, stop and check your winding direction and line positioning.
Variations by Weed Wacker Type
Automatic-feed weed wackers: The threading process is the same, but winding must be even and tight. Loose or lumpy winding causes the line to feed too quickly or jam. Pay extra attention to keeping the line under tension as you wind, and ensure the free end is properly inserted into the exit port.
Corded electric trimers: Threading is identical to cordless models. The only difference is power source, which does not affect the spool mechanism.
Gas-powered trimmers: Gas trimmers often have heavier-duty spools and may use thicker line (0.095″ or larger). The threading process is the same, but make sure you use line rated for gas-engine trimmers, as it must withstand higher centrifugal forces.
Fixed-spool designs: Some older or commercial trimmers have spools that do not come out. In these cases, you wind new line directly onto the fixed spool without removing it. The winding direction and process remain the same; simply access the spool from the exterior and wind carefully.
Troubleshooting Common Threading Problems
Line won’t feed after threading: This usually means the line is wound in the wrong direction or the free end is not properly inserted into the exit port. Remove the spool cap, check the directional arrow, and verify the line path. Rewind if necessary.
Line breaks frequently: Broken line during operation often indicates the line is too thin for the job, you’re hitting hard objects like rocks or roots, or the line was not wound evenly. For thick weeds, use a heavier gauge (0.095″). For thin vegetation, 0.065″ or 0.080″ is fine. Ensure even winding to prevent weak spots.
Line is tangled or wound unevenly: This happens when winding too fast or with uneven tension. Remove the spool and carefully unwind the tangled line. Rewind slowly and deliberately, keeping the line under steady tension. Take your time—rushing is the most common cause of tangles.
Trimmer head is making grinding sounds: A grinding or scraping noise suggests the line is rubbing inside the head or wound too tight on the spool. Remove the spool cap and inspect the line path. Ensure the spool sits flush and the line is not bunched or overlapping. Reposition or rewind if needed.
Line feeds too quickly (on automatic-feed models): Overly loose winding or incorrect spool installation causes rapid feeding. Remove the spool, rewind more tightly, and ensure even wraps with no gaps. Reinstall and test.
Frequently Asked Questions
What is the correct trimmer line length?
Most residential weed wackers use 15–17 feet of trimmer line, but the exact length depends on your specific model. Check your trimmer’s manual or the label on the spool housing for the manufacturer’s recommendation. Using too much line can cause feeding issues or strain the motor; too little means the line runs out faster and requires more frequent refills.
Which way do I wind the line onto the spool?
Wind the line in the direction indicated by an arrow printed on the spool. This arrow typically points counterclockwise on most bump-feed designs. The rule: wind against the direction the trimmer head rotates. This ensures centrifugal force pulls the line outward as it feeds, keeping tension on the line and ensuring smooth operation.
Can I use any trimmer line, or does it have to match my trimmer brand?
You don’t need to use the exact brand, but you must use the correct gauge (diameter). Trimmer line is a universal consumable—a 0.080″ line from Brand A works the same as a 0.080″ line from Brand B. Always match the gauge specified in your manual. Buying generic or aftermarket line at a hardware store is fine as long as the diameter matches.
How often should I replace my trimmer line?
Line breaks and wears out during normal use. How often you need to replace it depends on how often you trim and what you’re cutting. Light residential use might mean replacing line every few weeks; heavy use could require refilling every few days. When you notice the line is worn down, frayed, or breaking frequently, it’s time for a fresh spool.