Direct Answer: How to Wind String Trimmer Line
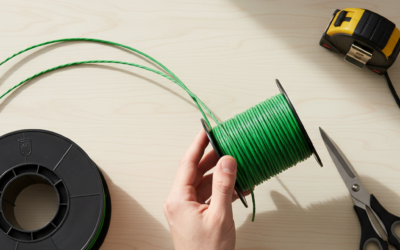
To wind string trimmer line, remove the spool from your trimmer head, cut 20–30 feet of new line, insert one end into the line hole on the spool, and wind the line tightly around the spool in the direction indicated by arrows (usually counterclockwise). Leave 6–8 inches of unwound line, thread the remaining line through the exit slots, and reassemble the spool. The exact process varies by trimmer type—manual-wind, bump-feed, or automatic—so always check your manual for model-specific steps.
Understanding Your Trimmer’s Spool Type
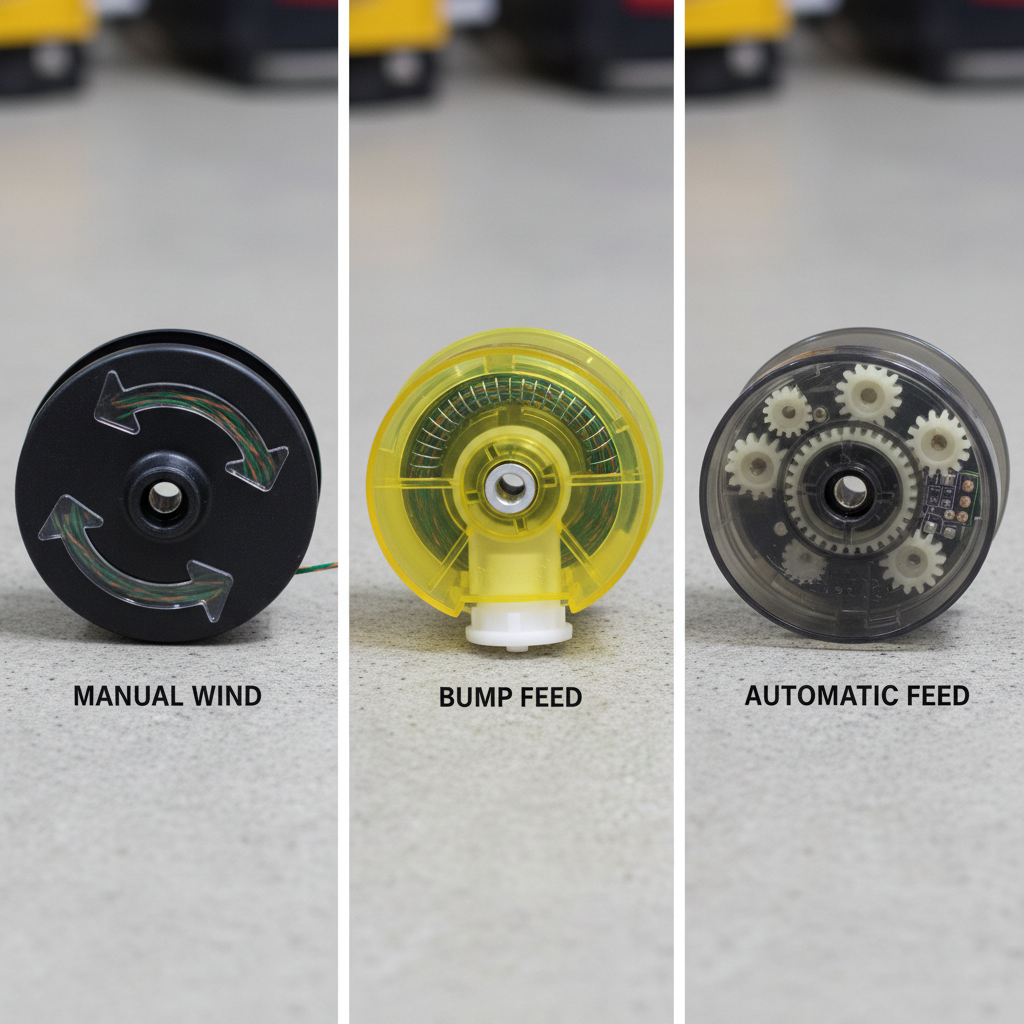
Before you start winding, identify which type of spool your trimmer uses. The mechanism determines how you load and wind the line, and using the wrong method can damage the spool or cause the line to jam.
Manual-Wind Spools
Manual-wind spools are the most common type on residential trimmers. You control the winding entirely by hand. The spool has clearly marked arrows indicating the winding direction, and the line feeds out through two slots on opposite sides of the spool head. This type gives you the most control and is easiest to troubleshoot if something goes wrong.
Bump-Feed Spools
Bump-feed spools automatically advance new line when you tap the trimmer head against the ground. The spool still requires manual winding, but the feeding mechanism is spring-loaded. These spools often have a different winding pattern and may use a fixed amount of line rather than continuous feeding.
Automatic-Feed Spools
Automatic-feed spools advance line as you trim without any action from you. These are less common on residential models but found on some commercial trimmers. The winding process is similar to manual spools, but the internal mechanism is more complex.
Identifying Your Trimmer Type
Check your trimmer’s manual or look for labels on the spool or trimmer head. If you don’t have the manual, search online using your trimmer’s model number (usually found on the motor housing or handle). Watch a video demonstration specific to your brand—the winding direction and line routing can vary significantly between Dewalt, Black+Decker, Ryobi, Echo, and other manufacturers.
Tools and Materials You’ll Need
Trimmer Line Specifications
Trimmer line comes in different gauges, typically ranging from 0.065 inches to 0.155 inches in diameter. Check your trimmer’s manual or the spool itself for the correct gauge—using the wrong size can prevent proper feeding or cause the line to break prematurely. Most residential gas and electric trimmers use 0.080 to 0.095 inch line. You’ll find trimmer line at hardware stores, home improvement centers, and online retailers, often sold in pre-wound spools or bulk coils.
How Much Line Do You Need?
A typical replacement requires 20–30 feet of line for a single-line spool. Dual-line spools may need 30–50 feet total, depending on your trimmer model. When in doubt, buy more than you think you’ll need—leftover line stores indefinitely. Some people wind a full spool from bulk line, while others use pre-wound replacement spools for convenience (though pre-wound spools cost more per foot).
Tools Required
- Screwdriver or wrench: To remove the spool cap or trimmer head (check your manual for the specific tool)
- Trimmer line: Cut to the appropriate length before starting
- Clean cloth or brush: To remove grass and debris from the spool before rewinding
- Your trimmer’s manual: For model-specific winding direction and line routing
Step-by-Step Process for Manual-Wind Spools
Step 1: Remove the Spool from the Trimmer Head
Stop the trimmer and let it cool completely. Locate the cap or fastener holding the spool to the trimmer head—this is usually a plastic cap or a bolt. Use the appropriate tool (typically a screwdriver or wrench) to loosen and remove it. Gently pull the spool straight out of the trimmer head. Some spools twist counterclockwise to release; check your manual if you’re unsure.
Step 2: Clean the Spool and Inspect for Damage
Use a dry cloth or soft brush to remove grass clippings, dirt, and old line fragments from the spool. Inspect the spool for cracks or damage—a damaged spool won’t hold line tension properly and should be replaced. Check that the feed slots (the small openings where line exits) are clear of debris.
Step 3: Cut Your Trimmer Line
Cut a length of new line to the recommended size for your spool, typically 20–30 feet. A straight cut on both ends will feed more smoothly than a jagged or melted edge. Some people cut the line at an angle to make insertion easier, but this isn’t necessary.
Step 4: Insert the Line into the Spool’s Loading Hole
Locate the small hole or slot on the spool labeled as the line insertion point—this is usually marked on the spool or in your manual. Insert about 2–3 inches of one end of the line into this hole. Push it in firmly so it seats in the hole and won’t slip out during winding.
Step 5: Wind the Line Onto the Spool
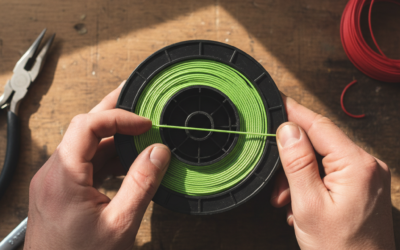
Look for arrows molded into the spool indicating the winding direction—this is usually counterclockwise, but always check. Begin winding the line tightly and evenly around the spool, keeping tension consistent. Wrap the line in neat, overlapping passes without crossing over previous wraps. Wind tightly enough that the line doesn’t slip, but not so tight that you strain the spool.
Wind until you have approximately 6–8 inches of line remaining unwound. This unwound section will be threaded through the exit slots and trimmed to the correct length after reassembly.
Step 6: Thread the Line Through Exit Slots
Most spools have two exit slots on opposite sides. Look for small notches or grooves that guide the line. Insert the unwound end of the line through one exit slot, pulling it all the way through until approximately 3–4 inches extends beyond the slot. Then insert the other end through the second exit slot on the opposite side. Ensure the line sits firmly in both slots and won’t slip out.
Step 7: Reassemble the Spool onto the Trimmer Head
Carefully align the spool with the trimmer head. Insert the spool shaft into the trimmer head’s center hole, ensuring it seats fully. Replace and tighten the cap or bolt to secure the spool. Don’t over-tighten, as this can crack the plastic cap or strip the threads.
Step 8: Trim the Line to Length
Most residential trimmers work best with line extending 6–8 inches from each exit slot. Use scissors or a sharp knife to trim the excess line to this length. Be precise—uneven line lengths will cause vibration and uneven cutting.
Winding Instructions for Bump-Feed and Automatic Spools
Bump-Feed Spool Differences
Bump-feed spools work similarly to manual spools but have a spring-loaded mechanism that feeds new line when you tap the trimmer head on the ground. The winding process is nearly identical to manual spools, with one key difference: bump-feed spools often use a fixed amount of line rather than continuous wrapping. Your manual will specify the exact line length and number of winds required.
When winding a bump-feed spool, follow the same steps as a manual spool but pay close attention to how the line is routed. Some bump-feed designs require the line to be looped through a small pulley or guide inside the spool head—skipping this step will prevent the automatic advance from working.
Automatic-Feed Spool Variations
Automatic-feed spools have internal gears or spring mechanisms that advance line continuously. Winding these spools follows the same general process, but the line routing is often more specific. The line must be positioned precisely in the feed slots or the automatic mechanism won’t engage. Consult your manual carefully, and if you’re unsure, watch a video demonstration for your exact trimmer model.
Common Mistakes and Troubleshooting
Line Wound Too Loosely
If you wind the line too loosely, it will slip during winding or won’t feed smoothly during use. The line may jam or stop feeding entirely. Solution: Rewind the spool, maintaining firm, even tension throughout. The line should feel snug but not painful to wind by hand.
Line Wound Too Tightly
Over-winding can deform the spool or break the line during winding. You may also damage the spool’s internal mechanism if you force it. Solution: Unwind and start over, using moderate tension. If the spool is cracked or deformed, replace it.
Line Not Feeding After Reassembly
This usually means the line isn’t properly seated in the exit slots or the spool wasn’t fully inserted into the trimmer head. Remove the spool, check that the line is firmly in both slots, and ensure the spool is fully seated before reassembling. Test by gently tugging the line—it should resist slightly but pull through when you apply firm pressure.
Tangled or Jammed Line on the Spool
If line crosses over itself during winding, it will jam when you try to feed it out. Solution: Unwind back to the tangle, smooth out the crossed section, and rewind carefully, ensuring each wrap lies flat against the previous one. If the line is severely tangled, cut it out and start fresh.
Line Breaking During Winding
This usually indicates you’re winding too tightly or the line is damaged. Solution: Check the line for nicks or wear before winding. Wind with firm but moderate tension, and if the line breaks during winding, replace it with fresh line.
Reassembly and Testing
Final Assembly Steps
After threading the line through both exit slots and trimming to length, double-check that the line is seated firmly in both slots. Wiggle each line end—it should resist slightly but not pull free. Ensure the spool is fully inserted into the trimmer head and the cap or bolt is tight but not over-tightened.
Pre-Use Inspection
Before starting the trimmer, visually inspect the spool from the front and back. The line should be even on both sides, extending equally from each exit slot. Look for any crossing or tangling visible from the outside. Ensure the spool spins freely when you manually turn it—it shouldn’t feel rough or binding.
Testing the Trimmer
Start the trimmer and run it at low speed for a few seconds. Listen for any grinding or chattering sounds, which indicate line is catching or twisted inside the spool. Bring the trimmer head close to your ear (but safely away from your body) and listen for smooth line feeding sounds. If you hear grinding, stop immediately and rewind the spool.
Test on a small area of grass at low speed. If the line feeds smoothly and cuts grass evenly, you’ve successfully wound the spool. If the line doesn’t feed or feeds unevenly, stop and troubleshoot using the steps above.
Maintenance Tips to Extend Spool Life
Store your trimmer indoors in a cool, dry place. Extreme heat or moisture can warp plastic spools. When not in use, cover the spool to keep dust and debris out. Periodically inspect the spool for wear—if it’s cracked or the feed slots are damaged, replace it. Using the correct line gauge for your trimmer reduces stress on the spool and ensures smooth feeding.
Frequently Asked Questions
Can I wind a spool with the line already attached?
It’s not recommended. Attempting to wind over old line can cause tangling, uneven winding, and poor feeding. Always remove old line completely and wind a fresh spool. If you’re replacing only part of the line because one side ran out, you can extend that side, but it’s better to start fresh for consistency.
What’s the difference between .080 and .095 inch trimmer line?
.080 inch line is thinner and better for light grass and delicate plants—it feeds more smoothly but breaks more easily. .095 inch line is thicker, more durable, and better for thick weeds and brush, but requires more motor power and may jam more easily on some trimmers. Always use the gauge specified in your manual to avoid feeding problems or motor strain.
How long does trimmer line last?
Trimmer line typically lasts 4–8 hours of active cutting, depending on the thickness, line quality, grass type, and how you trim. Thicker line lasts longer. You’ll know it’s time to replace line when you notice uneven cutting, frequent breakage, or the line running out on one side. Always keep spare line on hand.
Can I use any brand of trimmer line on my trimmer?
Yes, as long as it’s the correct gauge for your spool. Generic trimmer line works as well as brand-name line. However, quality varies—cheaper line may be more prone to breaking or jamming. Experiment with different brands to find one that works well with your specific trimmer and cutting conditions.