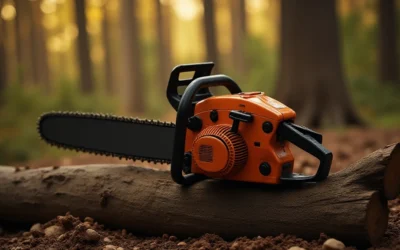
Quick Answer: What Size File for a 3/8 Chainsaw Chain?
A standard 3/8-inch pitch chainsaw chain requires a 13/64-inch (5.2 mm) round file for sharpening full-chisel and semi-chisel cutters. The 3/8 Low Profile (LP) chain — also called Picco — is a separate specification and requires a smaller 5/32-inch (4.0 mm) round file. These two chains share part of the same name but are not interchangeable, and using the wrong file diameter produces uneven, ineffective sharpening.

Pros
- Supports a wide range of chainsaw chains up to .404 pitch
- Includes both chain grinding wheels and a depth-gauge maintenance disc
- Can be mounted on a bench or wall for flexible workspace setup
- Built for frequent sharpening tasks rather than occasional use
Cons
- May be more machine than needed for casual users who sharpen chains only occasionally
- Requires mounting and workshop space, so it is less portable than handheld sharpeners
- Compatibility is limited to chains up to .404 pitch
Overview: The Oregon 520-120 is a professional 120-volt chainsaw chain sharpener designed for frequent, high-volume use. It can be mounted on a bench or wall, making it a practical fit for a garage, workshop, or service area.
Performance and Features: This universal sharpener handles chains up to .404 pitch and is intended to work with many popular chain brands, including Oregon, Stihl, and Husqvarna. Multiple adjustment points support more accurate sharpening, while the built-in light helps improve visibility during detailed grinding work.
Drawbacks and Considerations: Its professional focus means it may be more capable than many casual users need. It also requires a mounting setup and dedicated space, so it is not as portable as simpler chain sharpeners. Chains larger than .404 pitch are not supported.
Verdict: The Oregon 520-120 is best suited to professional users or serious property owners who sharpen chains regularly and want a more controlled, workshop-style solution. If you need a durable sharpener for repeated use and value adjustment precision, this model is a strong fit.

Pros
- Space-saving alternative to a full-size chain sharpener.
- Wide chain compatibility up to .404 inch pitch.
- Includes useful setup and maintenance accessories.
- Bench mounting with included bolts adds stability in a workshop or garage.
Cons
- Best suited to occasional use rather than high-volume sharpening.
- Requires a bench or fixed work surface for installation.
- No customer review details are available in the provided data, so long-term performance feedback is limited.
Overview & Design: The Oregon Professional Compact 120-Volt Bench Chain Grinder is a small bench-mounted chain sharpener built for home workshops and garages. Its compact footprint makes it a practical choice for users who want a dedicated sharpening tool without the size of a full professional machine.
Performance & Key Features: This grinder is designed to sharpen chains up to .404 inch pitch, which covers many common chainsaw chains from brands such as Oregon, Stihl, and Husqvarna. It includes a manual chain clamping vice, one-way motor rotation for added safety, two grinding wheels, a dressing brick, and a profile guide.
Drawbacks & Considerations: The main limitation is that it is aimed at occasional users rather than heavy-duty shop use. It also needs to be bolted to a bench, so it is not a portable sharpener. Since no customer review details were provided, there is limited real-world feedback to judge long-term durability.
Verdict: For homeowners, property owners, and light-duty users who want an affordable and space-saving way to maintain saw chains, this Oregon grinder is a sensible option. It offers the core features needed for basic sharpening while staying compact and straightforward.
Pros
- Electric sharpener with a 230W rating listed in the title
- Designed for saw chain and blade sharpening per title
Cons
- Chain size compatibility is not stated in supplied data
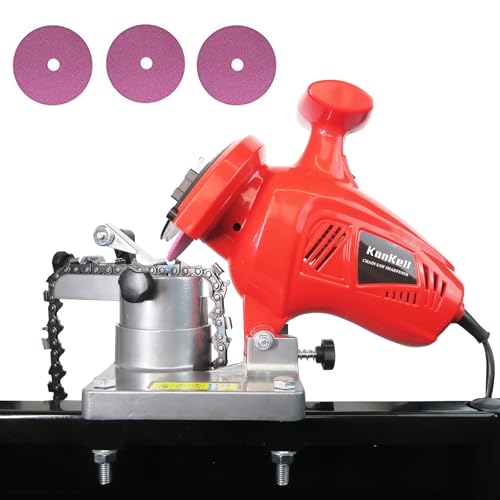
Pros
- High-speed 8400 RPM operation supports efficient sharpening.
- Adjustable angle adds flexibility for different chain types.
- Stable mountable base can improve control during use.
- Lightweight and compact compared with many bench-style sharpeners.
Cons
- Best suited to chains between 1/4" and 3/8" pitch, so it is not a universal solution for every chain size.
- Mountable setup is less portable than a fully handheld sharpener.
- No included accessory list or detailed specs were provided in the source data, so buyers may need to confirm what comes in the box.
Overview: The KonKell Electric Chainsaw Sharpener is a 250W bench-style chain grinder designed to restore cutting edges quickly and with more consistency than manual filing. Its heavy-duty build and compact 1.55 kg design make it a practical option for garages, workshops, and on-site maintenance.
Performance and Features: With an 8400 RPM motor and adjustable grinding angle, this sharpener is built for efficient, repeatable sharpening on chains from 1/4" to 3/8" pitch. The mountable base adds stability, which can help improve accuracy and reduce movement during operation. That makes it a strong fit for users who want a more controlled sharpening process.
Drawbacks and Considerations: The sharpening range is limited to specific chain pitches, so it will not fit every chainsaw chain. Because it is designed to be mounted, it is less convenient for fully portable use than a handheld tool. The provided product data also does not include a full accessory list, so buyers may want to confirm what is included before purchasing.
Verdict: This sharpener makes the most sense for DIY owners, homeowners, and professionals who regularly maintain compatible chains and want a stable, power-driven sharpening solution. If you value speed, adjustability, and a more precise setup, it is a sensible choice.
Before purchasing a file, confirm the exact chain designation stamped on the drive link. The sections below explain how to do that, what the numbers mean, and how to sharpen correctly once you have the right file.
Understanding Chainsaw Chain Pitch and Why It Determines File Size
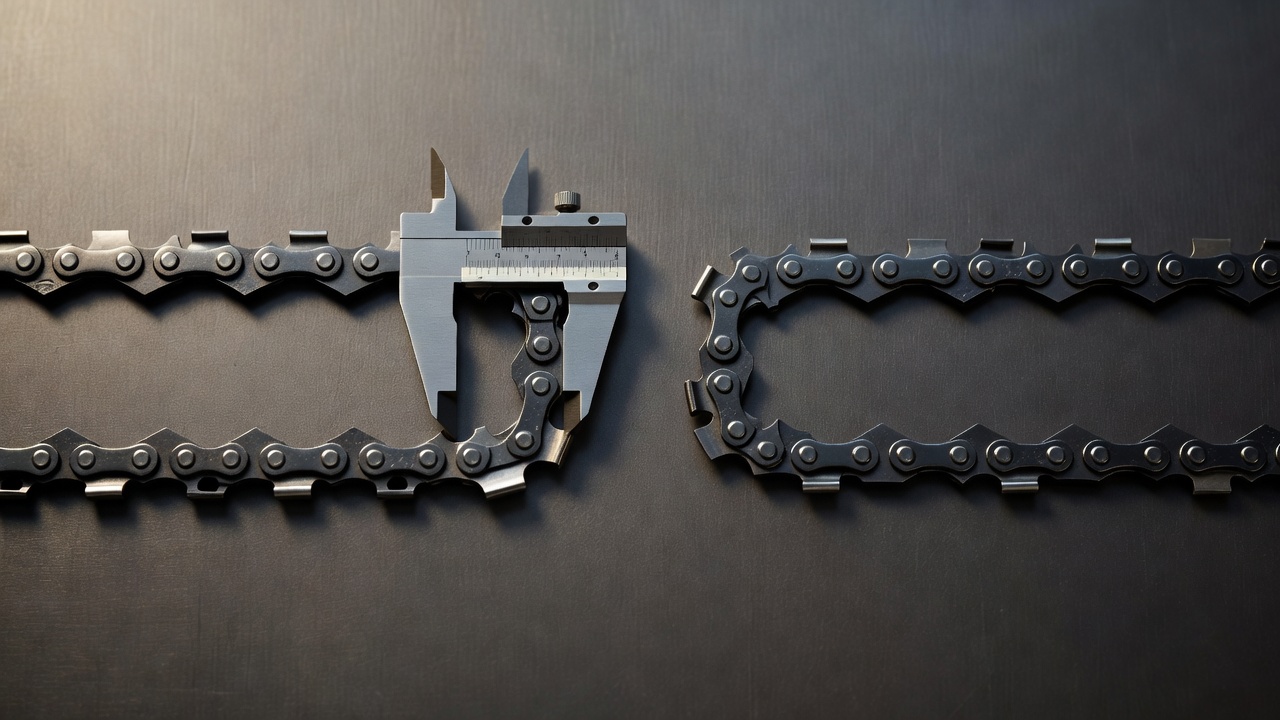
What “3/8 Pitch” Means
Chain pitch is the average distance between any three consecutive rivets divided by two. On a 3/8-inch pitch chain, that measurement equals 0.375 inches. Pitch determines the physical size of each cutter link — specifically the height, curvature, and gullet geometry of the tooth. A round sharpening file must match that geometry precisely: too small and it sits too deep in the tooth and cuts the wrong profile; too large and it rides on top of the cutter and removes too little metal.
Why 3/8 Standard and 3/8 LP Are Different Chains
This is the single most common source of error when selecting a chainsaw file. Both chains carry “3/8” in their name, but they are engineered for different saws and different applications: Users looking for related component recommendations can explore our jbl partybox club 120 vs sony srs xv500 breakdown.
- 3/8-inch pitch (standard): Used on mid- to full-size professional and semi-professional saws. Cutters are physically larger. Requires a 13/64-inch (5.2 mm) round file.
- 3/8-inch Low Profile (LP) / Picco: Designed for lightweight consumer saws, electric saws, and pole saws. Cutters are smaller with a reduced-height design. Requires a 5/32-inch (4.0 mm) round file.
The LP designation is printed or stamped on the drive link and is also reflected in the chain’s Oregon or Stihl part number. If you see “LP,” “Picco,” or a suffix like “33” in the Oregon chain numbering system, you have 3/8 LP — not standard 3/8.
How Pitch Affects Cutter Geometry
A larger pitch means a longer cutter with a wider, taller tooth profile. The round file must fit snugly inside the curved cutting edge (the gullet) so that one-quarter to one-third of the file diameter sits above the top plate of the cutter. If the file is undersized, it sharpens only the bottom of the gullet. If oversized, it rounds off the top plate and destroys the cutting hook angle. File diameter is not a rough guideline — it is a precision match to cutter geometry. Users looking for related component recommendations can explore our jbl partybox club 120 vs sony srs xv500 breakdown.
Chainsaw File Size Chart: Pitch to File Diameter Reference
Use this table to cross-reference your chain pitch with the correct round file diameter. Confirm pitch from the chain itself before relying on this chart. Before finalizing equipment decisions, refer to our comprehensive z890 vs x870e motherboard comparison.
| Chain Pitch | Common Application | Round File Size (inches) | Round File Size (mm) |
|---|---|---|---|
| 1/4-inch | Very small saws, carving bars | 4/32 in (1/8 in) | 4.0 mm |
| 3/8-inch LP (Picco) | Consumer/lightweight saws, electric, pole saws | 5/32 in | 4.0 mm |
| .325-inch | Mid-range semi-pro saws | 3/16 in | 4.8 mm |
| 3/8-inch (standard) | Mid to full-size professional saws | 13/64 in | 5.2 mm |
| .404-inch | High-output professional and milling saws | 7/32 in | 5.5 mm |
Note: A 13/64-inch file and a 5.2 mm file are the same diameter. Manufacturers list both measurements; either specification on the file package is correct for standard 3/8 chain.
How to Confirm Your Chain Specification Before Buying a File
Step 1 — Read the Drive Link Stamp
Turn the chain over and examine the drive link (the tooth that runs in the bar groove). Most chains stamp a code directly into the metal. On Oregon chains, this is typically a two-digit number. On Stihl chains, it is a letter or letter-number combination. Examples: Before finalizing equipment decisions, refer to our comprehensive z890 vs x870e motherboard comparison.
- Oregon code 72 = 3/8-inch standard pitch, .050-inch gauge → requires 13/64-inch (5.2 mm) file
- Oregon code 91 = 3/8 LP Picco, .050-inch gauge → requires 5/32-inch (4.0 mm) file
- Stihl code PM3 = Picco Micro 3, 3/8 LP → requires 4.0 mm file
Cross-reference the stamped code against the Oregon Drive Link Identification Chart or the Stihl chain specifications page on the respective manufacturer’s website.
Step 2 — Check the Guide Bar
Many guide bars have the pitch and gauge laser-etched or stamped near the heel (the end that mounts to the saw body). This confirms the chain pitch the bar is designed for. However, this does not substitute for reading the chain itself, because chains can be swapped. For broader ecosystem context, read through our operational guide on marshall stanmore iii vs harman kardon onyx studio 8.
Step 3 — Consult the Saw’s Owner Manual or Manufacturer Website
Enter your saw’s model number on the Stihl, Husqvarna, or Oregon website to pull the OEM chain specification. This lists pitch, gauge, and the recommended file diameter explicitly. This method is reliable only if the original chain has not been replaced with a different specification.
Step 4 — Measure Pitch Manually
Lay the chain flat on a work surface. Using a caliper or ruler, measure the distance between the centers of three consecutive rivets, then divide by two. A result of approximately 0.375 inches confirms 3/8-inch pitch. This does not distinguish standard from LP — for that, the drive link stamp is essential. For troubleshooting and reliability insights, consult our in-depth dyson v8 cyclone vs bissell featherweight stick report.
How to Sharpen a 3/8 Chainsaw Chain with a Round File
Tools Required
- 13/64-inch (5.2 mm) round file (for standard 3/8 chain)
- File holder / filing guide set to the correct angle
- Flat file for depth gauge (raker) adjustment
- Depth gauge tool (raker gauge)
- Bar vise or bench vise to secure the saw
Step 1 — Secure the Saw and Engage the Chain Brake
Clamp the bar in a vise or use a dedicated bar-mount vise. Engage the chain brake. The chain must be immobile during filing. Wear cut-resistant gloves — cutter teeth are sharp even when dull by performance standards.
Step 2 — Set the Correct Filing Angle
Filing angle requirements for 3/8-inch chain: Readers comparing setup options can review our technical analysis on bissell crosswave hydrosteam vs shark stainforce.
- Top plate filing angle (horizontal): 25–35 degrees, depending on cutter type and manufacturer specification. Full-chisel cutters are typically filed at 30–35 degrees. Semi-chisel cutters are typically filed at 25–30 degrees. Confirm the angle in your chain’s specification sheet.
- File tilt angle (vertical): Hold the file level (0 degrees tilt) for most standard applications, unless the manufacturer specifies a slight downward tilt (typically 10 degrees down) for specific cutter profiles.
A filing guide or angle guide slipped over the file before sharpening removes guesswork and maintains consistency across every tooth. This is strongly recommended for anyone not sharpening chains regularly.
Step 3 — Position the File Correctly in the Cutter
Place the round file in the gullet (curved inside edge) of the cutter so that approximately one-fifth of the file diameter sits above the top plate of the cutter. For a 13/64-inch file, this means roughly 1 mm of the file is above the tooth’s flat top surface. This positioning ensures the file sharpens the correct geometry without lowering the top plate excessively.
Step 4 — File Each Cutter with Consistent Strokes
File in one direction only — push strokes away from the body, lifting the file on the return stroke. Apply light, even pressure. Use 3 to 5 strokes per tooth when maintaining a chain in good condition. Use more strokes only if the cutter is significantly damaged or rounded. Count strokes and keep the number identical for every cutter to maintain uniform tooth length. File all cutters on one side first, then rotate and file the opposite side.
Step 5 — File the Depth Gauges (Rakers)
The depth gauge (raker) is the curved leading edge in front of each cutter. It controls how deeply the cutter bites into wood. If the raker is too tall relative to the cutter, the chain will not cut efficiently even when cutters are sharp. The standard depth gauge clearance for most 3/8-inch chains is 0.025 inches (0.635 mm), though some aggressive cutting profiles use 0.030 inches. Verify the correct clearance in your chain’s specification documentation.
Use a flat depth gauge tool (raker gauge) placed over the chain. If the raker protrudes above the tool’s slot, file it flush using a flat file. Round the front of the raker slightly after filing to restore the original profile and prevent grabbing.
Step 6 — Inspect and Test
After sharpening, all cutters should be equal in length and show a consistent shiny edge on the top plate and face. Reinstall the chain at the correct tension, run the saw briefly at idle, then make a test cut. A properly sharpened 3/8 chain pulls itself into wood with minimal downward pressure and produces uniform chips — not dust — in the kerf.
Signs Your 3/8 Chain Needs Sharpening and When to Replace It Instead
Sharpening Indicators
- The saw requires heavy downward pressure to cut — a sharp chain feeds itself.
- The kerf produces fine sawdust rather than coarse wood chips.
- The cut drifts to one side, indicating uneven cutter lengths (one side filed more than the other over time).
- Visible rounding or light reflection on the cutter face when viewed under direct light.
- Increased vibration during cutting — dull teeth impact rather than slice.
When to Replace Rather Than Sharpen
A 3/8-inch chain can be sharpened multiple times throughout its service life, but each sharpening removes metal and shortens the cutter. Replace the chain when:
- Cutter length has been reduced to 4 mm or less from the front of the tie strap. Most chains have a wear indicator line stamped or molded into the cutter; once the tooth is filed back to that line, the chain is at end of service life.
- Drive links show cracks, bent tangs, or visible stretching — these are structural failures that sharpening cannot correct.
- The chain has contacted soil, rocks, or wire. Embedded grit causes micro-fracturing of the cutter edge that dulls the chain within seconds of resuming cutting. Inspect cutters under magnification; if the edge is jagged rather than smooth, replacement is more efficient than attempting recovery.
- The chain is stretched beyond the tensioner’s adjustment range and cannot be brought to correct tension.
Over-filing — removing excessive metal to compensate for deep nicks in a single sharpening session — dramatically shortens chain life and distorts cutter geometry. When a cutter is deeply damaged, replace the chain rather than grinding it down.
Buyer FAQs: What Size Chainsaw File For 3 8 Chain Solved
Is a 13/64-inch file the same as a 5.2 mm file?
Yes. 13/64 inches converts to approximately 5.156 mm, which manufacturers round to 5.2 mm. Both labels refer to the same file and are correct for standard 3/8-inch pitch chainsaw chain. Purchase either — the physical file is identical.
How do I tell if my chain is 3/8 standard or 3/8 Low Profile (Picco)?
Read the stamp on the drive link. Oregon LP chains typically carry a drive link code of 90, 91, or 95. Stihl LP chains carry a Picco designation in the chain part number (e.g., PMX, PM3). If you see “LP,” “LowPro,” or “Picco” anywhere on the chain packaging or part number, use a 5/32-inch (4.0 mm) file, not the 13/64-inch file for standard 3/8 chain.
What angle do I file a 3/8 chainsaw chain at?
Standard 3/8 full-chisel chain is typically filed at 30–35 degrees horizontal top-plate angle. Semi-chisel chain is typically filed at 25–30 degrees. The exact specification is listed in the chain manufacturer’s sharpening guide and on most filing guide packages. Confirm the angle for your specific chain rather than defaulting to a generic figure.
How often should I sharpen a 3/8 chainsaw chain?
Sharpening frequency depends on material and conditions, not a fixed interval. Sharpen whenever the saw requires downward pressure to feed, produces dust instead of chips, or the cut begins to drift. Many professional operators touch up the chain after every tank of fuel in heavy use. A single contact with soil or rock warrants immediate inspection and sharpening before the next cut.
For more hands-on benchmarks and buying recommendations, consult our guides on residential zero-turn lawn mower guide.
Mechanical safety standards, operational tolerances, and protective gear guidelines align with benchmark specifications established by the American National Standards Institute (ANSI).