Direct Answer: How to Change Weed Eater String
The short version: Turn off the trimmer and disconnect the spark plug (gas models) or remove the battery/unplug electric models. Remove the trimmer head by pressing the tabs and twisting off the cap, take out the old spool, and remove any remaining line. Cut two equal lengths of new trimmer line that match your owner’s manual specification, insert the midpoint of each line into the anchor holes on the spool, wind each line in the direction shown by the arrows on the spool, feed the loose ends through the exit eyelets, and snap the cap back on. Pull each line firmly to release more string, trim the lines to the length indicated on the head (usually 4–6 inches), reassemble, and test the feed mechanism on a safe surface before trimming.
Changing the string on a weed eater—also called a string trimmer—is one of the most common maintenance tasks for lawn care, yet it trips up many homeowners. The good news is that the process is essentially the same across gas, electric, and battery-powered models once you understand how your trimmer head works. This guide walks you through every step, from identifying your head type to troubleshooting feed problems, so you can get back to trimming in minutes.
Understanding Your Weed Eater Head Type
Before you touch the trimmer, you need to know which type of head you have. There are three main designs, and each loads line slightly differently. Identifying yours first will save you time and frustration.
Bump Feed (Tap-and-Go) Heads
The bump feed head is the most common design on consumer trimmers. It has a bump knob on the bottom of the head. When the trimmer is running at operating speed, you tap the bump knob against the ground, and the head releases a small amount of additional line. This head type uses a spool wound with one continuous piece of line that has both ends exiting through two eyelets, or two separate lines anchored in the spool. Most bump feed heads hold between 10 and 25 feet of line total, depending on the model.
Fixed-Line Heads
Fixed-line heads, sometimes called fixed-length or manual-feed heads, do not have a bump knob. Instead, they hold a single, pre-cut length of line that you insert through the head and lock into place. When the line wears down, you stop the trimmer, remove the remaining line, and insert a fresh piece. These heads are common on lightweight electric and battery trimmers because they are simple and inexpensive.
Automatic Feed Heads
Automatic feed heads use a centrifugal mechanism to dispense line automatically as the trimmer reaches operating speed. You do not tap the head to release line; the head feeds itself when the line gets short enough. These heads typically require pre-wound spools or specific refill line, so check your owner’s manual before buying replacement line.
How to Tell Which Head You Have
Look at the bottom of the trimmer head. If there is a visible knob that you can press or tap, you have a bump feed head. If the head is smooth with no knob and the line appears to be a single fixed piece, you have a fixed-line head. If the head has no knob and the line feeds out automatically when you start the engine, you have an automatic feed head. When in doubt, the owner’s manual will state the head type and the exact replacement spool or line part number.
It is also worth noting that gas, electric, and battery trimmers all use the same basic string-changing principles. The only difference is the safety step: gas models require disconnecting the spark plug, while electric and battery models require unplugging or removing the battery.
Key Factors to Consider Before Changing the String
A little preparation goes a long way. Choosing the wrong line or skipping safety steps can damage the trimmer or turn a five-minute job into a frustrating hour.
Find the Correct Line Diameter
The most important factor is line diameter, also called gauge. Common sizes range from 0.065 inches to 0.110 inches. The correct size for your trimmer is printed on the trimmer head or listed in the owner’s manual. Using line that is too thick can overload the trimmer motor and cause premature wear or failure, especially on electric and battery models. Using line that is too thin will cut poorly and break frequently. Match the manufacturer’s specification exactly.
Round vs. Twisted Line
Round line is the most common and works well for general trimming of grass and light weeds. Twisted or serrated line cuts more aggressively and is better for thicker weeds, but it wears faster and can be harder on the motor. For most homeowners, a quality round line in the manufacturer’s recommended diameter is the safest choice. If you use twisted line, keep the diameter within the trimmer’s specification.
How Much Line Do You Need?
The amount of line depends on the spool capacity. Most bump feed spools hold between 10 and 25 feet of line total. If you are using a pre-wound spool, the work is already done for you. If you are winding your own line, cut two equal lengths—for example, two 10-foot pieces for a spool that holds 20 feet. Check the spool or manual for the recommended total length.
Safety Precautions Before You Start
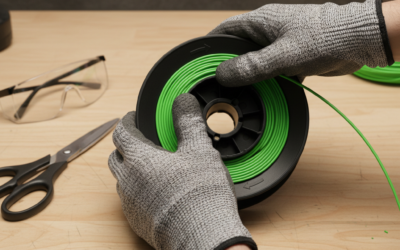
Always turn off the trimmer before servicing. On gas models, disconnect the spark plug wire to prevent accidental starting. On electric models, unplug the trimmer. On battery models, remove the battery pack. Wear work gloves to protect your hands from the cutting line and any debris in the head. Work on a clean, flat surface so small parts like springs and washers do not roll away.
Step-by-Step Guide: How to Change the Weed Eater String
These seven steps work for the vast majority of trimmer heads. Specific details for bump feed and fixed-line heads follow in the next sections.
Step 1: Power Down and Disconnect the Trimmer
Set the trimmer on a flat surface. Turn the switch to the off position. For gas models, disconnect the spark plug wire from the spark plug. For electric models, unplug the power cord. For battery models, press the battery release button and remove the battery pack. This step is not optional—it prevents the trimmer from starting accidentally while your hands are inside the head.
Step 2: Remove the Trimmer Head and Access the Spool
Most trimmer heads have two tabs on the sides of the outer cap. Press both tabs inward and twist the cap counterclockwise to release it. Some models require a tool, such as a flathead screwdriver or the wrench that came with the trimmer, to hold the spool in place while you turn the cap. Once the cap is off, lift out the spool. On some heads, the spool sits inside the cap; on others, it sits on a shaft in the head assembly. Take note of how the parts fit together before you remove anything.
Step 3: Remove the Old String and Clean the Spool
Pull the old line out of the spool and discard it. If the line is tangled or broken, cut it free with scissors or a utility knife. Use a cloth to wipe debris, grass clippings, and dirt from the spool, the cap, and the head housing. Check the exit eyelets for built-up debris and clear them with a small screwdriver or a toothpick. A clean spool feeds line much more reliably.
Step 4: Measure and Cut New Trimmer Line
Check the trimmer head or owner’s manual for the recommended line diameter and total length. Cut two equal lengths of new line. For a typical bump feed spool, two 10-foot pieces is a good starting point. If the spool has a single channel, you may only need one piece. Use sharp scissors or a utility knife so the ends are clean and square.
Step 5: Insert and Wind the Line in the Correct Direction
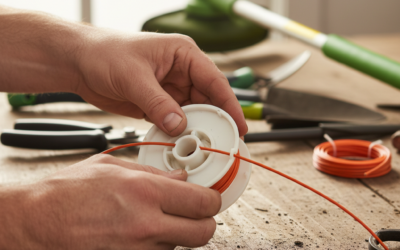
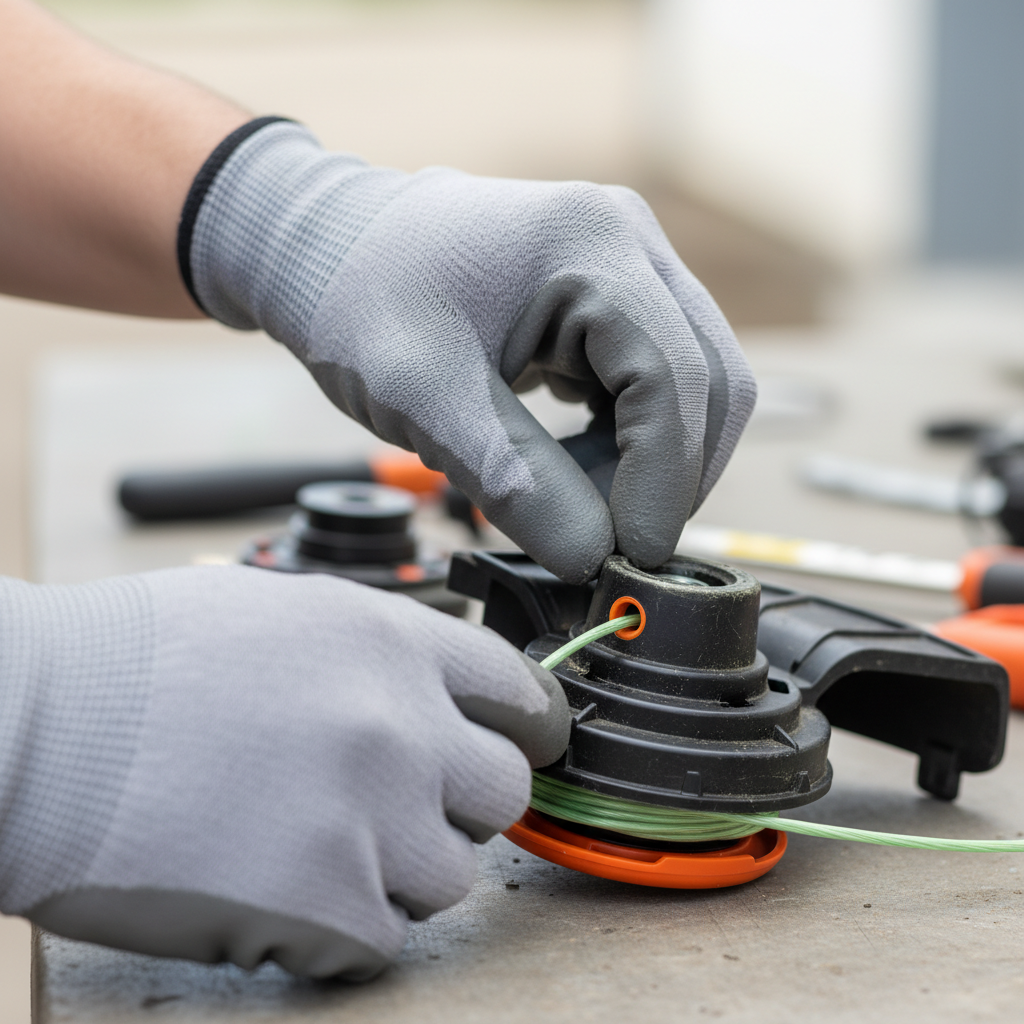
Look at the spool. You will see either arrows indicating the winding direction or a small line slot/anchor hole on each side. Insert the midpoint of each line into the anchor hole or slot, then wind each line in the direction shown by the arrows on the spool. This direction is typically clockwise, opposite the rotation of the head, but always follow the arrows printed on the spool. Winding in the wrong direction will cause the string to fail to feed or to break. Keep tension on the line as you wind so the coils sit tightly and evenly. Leave about 4–6 inches of each line unwound so the ends can be fed through the exit eyelets.
Step 6: Feed the Ends Through the Exit Holes and Reassemble
Thread each loose end through the exit eyelet on the spool or cap, depending on the design. Hold the spool in place and align the eyelets with the openings in the head housing. Press the cap back on and twist it clockwise until the tabs lock into place. Give each line a firm pull to make sure it is seated and that more line can be released.
Step 7: Test the String Feed and Adjust Length
Trim the lines to the length indicated on the head, usually 4–6 inches from the edge of the head. Reconnect the spark plug, plug in the trimmer, or reinstall the battery. Start the trimmer and let it reach operating speed. On a bump feed head, tap the bump knob on the ground to verify that line feeds out. On an automatic feed head, the line should feed itself. Test on a safe, clear surface before trimming grass.
How to Re-Spool a Bump Feed (Tap-and-Go) Head
The bump feed head is the most common, so it deserves a closer look. Here is what you need to know to get it right the first time.
Wind Both Lines at the Same Time or One at a Time?
If your spool has two separate anchor holes, insert the midpoint of each line into its own hole and wind both lines at the same time, keeping them parallel as they wrap around the spool. This keeps the spool balanced and prevents one line from feeding out faster than the other. If the spool has a single anchor slot, insert the midpoint of one continuous line and wind the two halves together in the same direction.
Which Direction Should You Wind the Line?
Always follow the arrows printed on the spool. In most cases, the line winds in the direction opposite the rotation of the head. If you wind it the wrong way, the line will not feed when you tap the head, and it may break or tangle. When in doubt, look for the arrow and match it.
Using a Pre-Wound Replacement Spool
Pre-wound spools are the easiest option. Remove the old spool, drop the new one into the head, and thread the two loose ends through the exit eyelets. There is no measuring, cutting, or winding involved. Just make sure the replacement spool matches your model and line diameter.
Why Does the Bump Feed Head Stop Dispensing After Reloading?
The most common causes are winding in the wrong direction, leaving too little line extending from the head, or failing to pull the line firmly after reassembly so it locks into the feed mechanism. Another cause is overfilling the spool, which prevents the spool from turning freely inside the head. If the spool is too full, remove a few feet of line and try again.
How Long Should the String Extend from the Head?
Most manufacturers recommend 4–6 inches of line extending from the head after loading. Longer line will cut a wider swath but places more strain on the motor and breaks more easily. Shorter line cuts poorly and wastes time. Check the indicator on the head if one is present, then trim the line to the recommended length.
How to Replace String on Fixed-Line and Automatic Feed Heads
Not every trimmer uses a bump feed head. Here is how to handle the other two types.
Fixed-Line Heads
Fixed-line heads hold a single, pre-cut length of line. To replace it, remove the head or open the access door, pull out the old line, and cut a new piece to the length specified in the manual. Insert one end of the new line through the center hole and out through the exit eyelet, then lock it in place according to the head design. Some fixed heads use a small screw or clip to hold the line; others use a friction fit. Align the line with the eyelet before tightening so it exits cleanly. If the string flies out when you start the trimmer, the line was not locked in place or the length was too long for the head.
Automatic Feed Heads
Automatic feed heads dispense line using centrifugal force when the trimmer reaches operating speed. These heads almost always require pre-wound spools or a specific refill line designed for the model. Loading a pre-wound spool is the same as with a bump feed head: remove the old spool, drop in the new one, and thread the ends through the eyelets. Do not try to hand-wind an automatic feed spool unless the manual explicitly says it is allowed, because the internal mechanism is sensitive to tension and direction. After loading, run the trimmer at full speed briefly to confirm the line feeds out on its own.
Troubleshooting Common String Problems
If the trimmer misbehaves after a reload, work through these common issues before taking the head apart again.
String Is Not Advancing
Check the winding direction first. If the line is wound opposite the arrows, it will not feed. Next, confirm that the line ends are pulled firmly through the eyelets and that at least 4 inches extends from the head. On a bump feed head, make sure you are tapping the knob on the ground while the trimmer is running at full speed. Finally, check that the spool is not overfilled or jammed with debris.
String Keeps Breaking or Snapping Off Too Short
This usually means the line diameter is too thin for the job, the line is old and brittle, or the line is striking a hard surface such as concrete or a fence. Use the correct gauge, store line away from sunlight and heat, and avoid hitting hard objects. On some older models, soaking new line in water before loading can improve flexibility and reduce breakage.
String Tangles or Wraps Around the Spool
Tangling is almost always caused by winding the line without keeping tension, winding in the wrong direction, or overfilling the spool. Unwind the spool completely and start over, keeping firm, even tension and leaving the recommended amount of line unwound. Make sure the line passes cleanly through the eyelets with no kinks.
Spool Will Not Snap Back into the Head
If the spool or cap will not seat, the line is likely pinched between the spool and the housing, or the spool is overfilled. Remove the spool, check that the line routes through the eyelets and not around the outside of the spool, and try again. If the tabs are worn or broken, replace the spool or the entire head assembly.
Direct Answer: The Fastest Way to Change Weed Eater String
Here is the quick checklist for experienced users:
- Disconnect power: Remove the spark plug wire, battery, or plug.
- Open the head: Press the tabs and twist off the cap; remove the spool.
- Clean and inspect: Remove old line and clear debris from the eyelets.
- Cut new line: Use the correct diameter; cut two equal lengths totaling the spool capacity.
- Anchor and wind: Insert the midpoints into the anchor holes and wind in the direction of the arrows.
- Thread and reassemble: Feed ends through the eyelets, snap the cap on, and pull the line firmly.
- Trim and test: Cut to 4–6 inches, reconnect power, and test the feed on a safe surface.
The mistakes that waste the most time for beginners are winding in the wrong direction, using the wrong line diameter, and overfilling the spool. Avoid those three and the job takes under ten minutes. Replace the spool itself only if it is cracked, the tabs are broken, or the feed mechanism no longer works after a proper reload.
Frequently Asked Questions
How do I know what size string my weed eater needs?
The correct line diameter is printed on the trimmer head or listed in the owner’s manual. Common sizes range from 0.065 to 0.110 inches. Using line that is too thick can overload the motor, while line that is too thin will break frequently and cut poorly. Always match the manufacturer’s specification.
Do I need to disconnect the spark plug to change the string on a gas trimmer?
Yes. Disconnecting the spark plug wire prevents the engine from starting accidentally while your hands are inside the trimmer head. For electric models, unplug the trimmer; for battery models, remove the battery pack. This is a required safety step before servicing any trimmer.
Why won’t my bump feed head release new string after I reloaded it?
The most common causes are winding the line in the wrong direction, leaving too little line extending from the head, or overfilling the spool. Verify the winding direction matches the arrows on the spool, pull the line firmly through the eyelets, and make sure you tap the bump knob on the ground while the trimmer is running at full speed.
Can I use any trimmer line on my weed eater?
No. The line must match the diameter and total length specified for your trimmer head. Some heads, especially automatic feed models, require pre-wound spools or specific refill line. Using the wrong line can cause poor cutting, frequent breakage, tangling, or motor damage.