Direct Answer: How to Clean a Lawn Mower Carburetor
To clean a lawn mower carburetor, disconnect the spark plug and shut off the fuel valve, then remove the air filter assembly and fuel line. Detach the carburetor from the engine, remove the float bowl, and take out the main jet, pilot jet, and float needle. Spray every passage, port, and jet with carburetor cleaner, clear any blocked orifices with compressed air or a thin wire (never drill or enlarge them), and inspect the float and gaskets for damage. Replace any cracked or hardened gaskets, reassemble the carburetor, reattach it to the engine, reconnect the fuel line and air filter, and test the mower. If the engine still stalls or runs rough after a thorough cleaning, the carburetor may need a rebuild kit or full replacement.
Why Does a Lawn Mower Carburetor Need Cleaning?
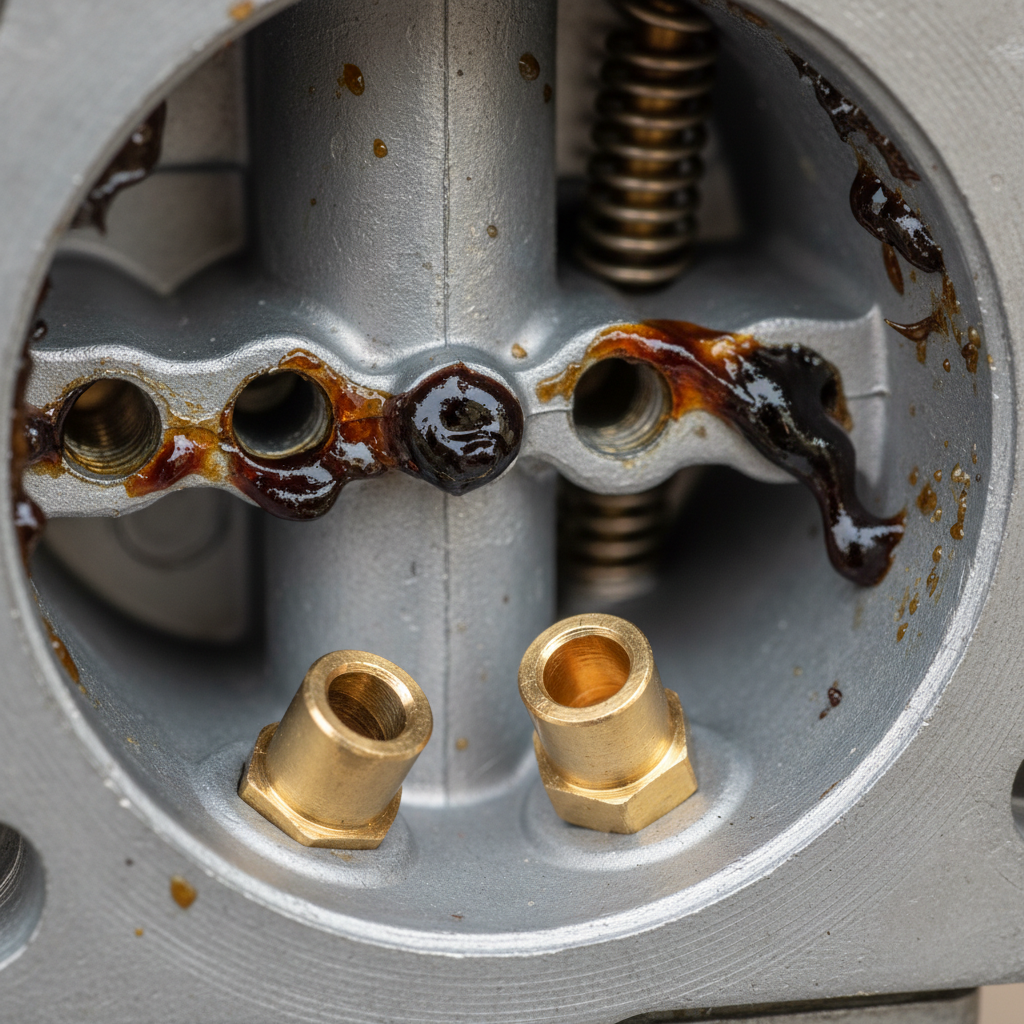
Your lawn mower carburetor has one job: mix the right amount of fuel and air and deliver it to the engine. It does this through a series of tiny passages, ports, and jets that are surprisingly delicate. Because those passages are so small, they are easily clogged by the varnish and gum left behind when gasoline evaporates. Once a jet or passage is blocked, the engine gets too little fuel, too much fuel, or no fuel at all, and the mower will not start or run properly.
Signs of a Dirty Lawn Mower Carburetor
If your mower is showing any of the following symptoms, the carburetor is a likely culprit:
- Hard starting: The engine cranks but will not fire, or it takes many pulls to get it running.
- Rough idle: The engine runs unevenly, surges, or hunts up and down at idle speed.
- Stalling: The mower starts fine but dies when you engage the blades or give it throttle.
- Poor performance: Loss of power, sputtering under load, or smoke from the exhaust.
- Fuel smell or leaks: Gasoline odor around the carburetor, often caused by a stuck float needle or a damaged gasket.
What Causes Carburetor Clogging?
Most carburetor problems trace back to one of three causes:
- Stale fuel: Gasoline begins to break down in as little as 30 days. As it evaporates, it leaves behind a sticky, shellac-like varnish that hardens inside the jets and passages.
- Ethanol-blended fuel: Ethanol attracts moisture, which can cause corrosion and phase separation. It also tends to leave more deposits than pure gasoline. This is why many small-engine owners switch to ethanol-free fuel or add a fuel stabilizer.
- Dirt and debris: A dirty air filter or contaminated fuel can pull particles into the carburetor, where they lodge in the tiny openings.
The good news is that a thorough cleaning resolves the majority of these problems. You do not need to be a professional mechanic to do it, but you do need patience, the right supplies, and a clean workspace.
What You Need Before You Start
Before you pull the carburetor off your mower, gather the tools and supplies below. Having everything ready makes the job faster and reduces the chance of losing small parts.
Tools and Supplies Checklist
| Category | Items |
|---|---|
| Safety gear | Work gloves, safety glasses, well-ventilated area |
| Hand tools | Socket set or wrenches, screwdrivers (flathead and Phillips), needle-nose pliers, small pick set |
| Cleaning supplies | Aerosol carburetor cleaner, compressed air (or a can of compressed air), clean rags, small brush (old toothbrush works) |
| Replacement parts | Carburetor gasket kit or rebuild kit (optional but recommended), new fuel line if cracked |
| Containers | Small parts tray or cups, drain pan for old fuel, sealable container for fuel disposal |
Is Carburetor Cleaner Safe for Plastic and Rubber?
Most aerosol carburetor cleaners are aggressive solvents designed to dissolve varnish and gum quickly. They are safe for metal parts, but they can damage some plastics, rubber seals, and diaphragms if left in contact too long. If your carburetor has plastic components or rubber gaskets, remove them before spraying, or use a cleaner labeled safe for plastic and rubber. When in doubt, test the cleaner on a small, hidden area first.
Do You Need a Rebuild Kit or Just Cleaner?
For a first attempt, you can clean the carburetor with just cleaner and compressed air. However, many DIYers find it worthwhile to buy a carburetor rebuild kit, which typically includes a new gasket, float needle, and sometimes a new float and bowl gasket. These parts are inexpensive, and replacing them while the carburetor is apart is the best way to prevent fuel leaks and repeat failures. If the gasket is cracked, hardened, or deformed, you should absolutely replace it rather than reuse it.
How to Clean the Carburetor Without Removing It
If the mower only has light buildup, you may be able to clean the carburetor in place without removing it from the engine. This is a quick maintenance procedure, not a substitute for a full cleaning when the carburetor is badly clogged.
When In-Place Cleaning Makes Sense
In-place cleaning is worth trying when the mower runs but idles roughly, or when you want to prevent problems after winter storage. It is not enough if the mower will not start at all, if the float bowl is full of varnish, or if a jet is completely blocked.
How to Spray Cleaner Into the Carburetor In Place
- Disconnect the spark plug wire and ground it away from the plug to prevent accidental starting.
- Remove the air filter assembly to expose the carburetor throat.
- Spray carburetor cleaner directly into the throat and through the small passages you can see. Follow the product instructions for how long to let it sit.
- Remove the float bowl drain screw (if your carburetor has one) and drain any old fuel into a pan. Spray cleaner into the bowl area as well.
- Reassemble the air filter, reconnect the spark plug, and try starting the mower.
Some people also use a fuel additive or spray cleaner while the engine is running, but this is less effective than a direct cleaning and can be messy. For a mower that has sat for months with stale fuel, in-place cleaning is rarely enough. You will get far better results by removing the carburetor and cleaning it on a workbench, which is the method described below.
Step-by-Step: Removing and Cleaning the Carburetor
This is the definitive procedure for cleaning a lawn mower carburetor. Work on a clean, flat surface with good lighting, and take photos with your phone before disassembling so you remember how everything goes back together.
Step 1: Prepare the Mower and Work Area
- Disconnect the spark plug wire. This is the single most important safety step. It prevents the engine from firing while you work near the fuel system.
- Shut off the fuel valve if your mower has one. If it does not, clamp the fuel line with a small hose clamp or a clothespin to reduce fuel flow.
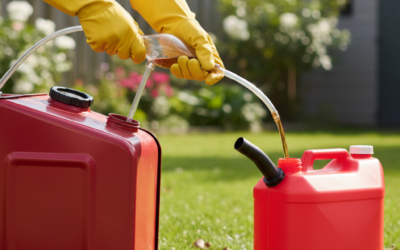
- Drain the fuel tank into an approved container, or run the mower until it is out of gas. This makes the job cleaner and safer.
- Work outside or in a well-ventilated area. Gasoline fumes are flammable, and carburetor cleaner is strong-smelling.
Step 2: Remove the Air Filter and Fuel Line
Remove the air filter cover and the filter element so you can see the carburetor. Next, disconnect the fuel line from the carburetor inlet fitting. On most mowers, the fuel line is held by a small hose clamp or a barbed fitting; squeeze the clamp and pull the line free. Expect a small amount of fuel to spill, so keep your drain pan underneath.
Step 3: Detach the Carburetor from the Engine
The carburetor is usually held to the engine intake by one or two bolts or nuts. Remove them with a socket or wrench, then gently pull the carburetor straight off the intake studs. If it is stuck, do not pry hard against the engine block; tap it lightly with a screwdriver handle to break the gasket seal. Keep the carburetor upright so fuel does not pour out of the float bowl.
Step 4: Disassemble the Float Bowl and Jets
With the carburetor on your workbench, follow these steps:
- Remove the float bowl. It is typically held by a single bolt in the center of the bottom, or by a retaining clip. Place a rag under it to catch residual fuel.
- Inspect the bowl. If you see brown varnish, sand, or water, that confirms why the mower was running poorly.
- Remove the float pin to release the float and the float needle. The float needle is the small rubber-tipped or metal-tipped valve that shuts off fuel flow; it sticks easily when varnish builds up.
- Remove the main jet and pilot jet. These are small brass parts with tiny holes. On many lawn mower carburetors, the main jet is located in the center of the carburetor body or inside the float bowl area. The pilot (idle) jet is smaller and often sits near the throttle bore. Use a properly sized screwdriver or a jet removal tool; do not force them.
- Lay every part in order in a parts tray so you can reassemble in reverse.
Step 5: Clean Every Passage and Jet
This is the heart of the job. The goal is to remove every trace of varnish and debris from the carburetor body and its components.
- Spray carburetor cleaner through every port, passage, and opening you can find. Pay special attention to the small holes in the carburetor throat and the passages behind the jets.
- Soak stubborn parts. If the carburetor is heavily varnished, soak the metal body and jets in a small container of carburetor cleaner or a purpose-made dip cleaner for 30 minutes to a few hours. Do not soak plastic parts, rubber seals, or the diaphragm.
- Clear blocked jets with compressed air. Hold the jet with pliers, spray cleaner through it, and then blow it out with compressed air. You should see a clean stream of air pass through. If air will not pass, the jet is blocked.
- Use a thin wire as a last resort. A single bristle from a wire brush or a dedicated jet-cleaning wire can be pushed through the opening. Never use a drill bit, and never enlarge the hole; the jet size is precisely calibrated for the engine’s fuel mixture.
- Clean the float needle seat. Spray cleaner into the seat where the float needle rests. A small cotton swab can help, but make sure no fibers are left behind.
- Dry everything thoroughly with compressed air and let the parts air out until no cleaner residue remains.
Step 6: Inspect the Float, Gaskets, and Body
Before reassembly, check each part for wear:
- Float: Shake it gently. If you hear liquid inside, the float has a leak and must be replaced. A brass float that is dented or a plastic float that is cracked should also be replaced.
- Float needle: The tip should be smooth and free of grooves. If it is worn, replace it.
- Gaskets: The float bowl gasket and the gasket between the carburetor and engine should be soft and flexible. If they are hard, cracked, or flattened, replace them. A damaged gasket will cause air leaks or fuel leaks after reassembly.
- Carburetor body: Check for warping, cracks, or stripped threads. If the body is damaged, cleaning will not fix it; replacement is the better option.
- Install the jets first. Tighten them snugly, but do not overtighten; they are soft brass and strip easily.
- Install the float needle and float. Make sure the needle seats properly and the float moves freely on its pin.
- Install the float bowl with a new gasket. Make sure the gasket sits evenly in its groove before tightening the bowl bolt. Overtightening can warp the bowl or strip the bolt.
- Attach the carburetor to the engine with a new mounting gasket. Tighten the mounting bolts evenly and to the manufacturer’s torque specification if you have it.
- Reconnect the fuel line and secure it with the clamp. Check that the line is not cracked or leaking.
- Reinstall the air filter and its cover.
- Reconnect the spark plug wire.
- Fresh fuel: If the tank still contains old gasoline, drain it and refill with fresh fuel.
- Air filter: A clogged filter starves the engine of air and mimics carburetor problems.
- Spark plug: A fouled or worn plug can prevent starting even with a clean carburetor.
- Vacuum leaks: A loose carburetor mounting or a cracked intake gasket lets in unmetered air.
- Fuel line and filter: A collapsed line or clogged inline fuel filter restricts fuel delivery.
- Warped carburetor body: If the mounting flange is warped, the carburetor will never seal properly. Place a straightedge across the flange to check for gaps.
- Corroded or pitted passages: Heavy corrosion from water in the fuel cannot be polished away.
- Stripped threads: If the bowl bolt or jet threads will not hold, the carburetor is not worth saving.
- Damaged float: A leaking float cannot be repaired, only replaced. If the replacement float costs nearly as much as a new carburetor, replacement wins.
- Previous cleaning failed: If you have cleaned the carburetor thoroughly and the problem persists, the issue is likely internal wear, not dirt.
- Using a drill bit or wire to enlarge jets. Jet orifices are precision-sized. Enlarging them makes the engine run rich and can cause permanent damage. Use compressed air or a single thin wire bristle only.
- Overtightening jets and bowl bolts. Brass jets and aluminum carburetor bodies strip easily. Snug is enough.
- Soaking plastic and rubber parts in cleaner. Aggressive solvents can swell or dissolve seals and diaphragms. Remove them first.
- Reusing a damaged gasket. A hard or cracked gasket will leak air or fuel and undo all your work.
- Losing small parts. Work over a parts tray and take photos before disassembly so you do not misplace the float pin, needle, or springs.
- Mixing up the jets. The main jet and pilot jet are not interchangeable. Keep them separated and labeled.
Reassembly and Testing
Reassembly is the reverse of disassembly, but a few details make the difference between a mower that runs and one that leaks.
Reassembly Order
Priming and Starting the Mower
Open the fuel valve (if equipped) and wait a few seconds for the float bowl to fill. If your mower has a primer bulb, press it three to five times to draw fuel into the carburetor. Set the choke to the cold-start position and pull the starter rope. The engine should start within a few pulls. Let it run for a minute, then turn off the choke and confirm it idles smoothly and accelerates without sputtering.
What If the Mower Still Runs Rough After Cleaning?
If the mower still stalls, surges, or refuses to start, check these items before assuming the carburetor is at fault:
If all of those check out and the carburetor is definitely clean, the carburetor itself may be worn beyond repair, which brings us to the rebuild-or-replace decision.
When to Rebuild or Replace Instead of Clean
Cleaning is the cheapest fix and works in most cases, but it is not always the right answer. Knowing when to stop cleaning and start replacing will save you time and frustration.
Signs the Carburetor Is Beyond Cleaning
Rebuild vs. Replace: Which Is Cheaper?
A carburetor rebuild kit typically costs $10 to $25 and includes gaskets, a float needle, and sometimes a float and adjustment screws. Rebuilding is a good choice if the carburetor body is in good shape and you are comfortable with small parts. A new aftermarket carburetor for a common push mower often costs $15 to $40 and is a bolt-on replacement with no disassembly required. For many DIYers, replacement is actually the faster and more reliable option, especially on inexpensive mowers where a new carburetor costs about the same as a rebuild kit plus your labor. For riding mowers and premium engines, a genuine OEM carburetor is more expensive, so a rebuild kit is usually the better value.
Common Mistakes and Safety Tips
Most carburetor cleaning failures come down to a handful of avoidable mistakes. Here is what to watch for.
Mistakes That Ruin a Carburetor During Cleaning
Why Disconnecting the Spark Plug Matters
The spark plug wire must be disconnected before you touch anything near the fuel system. If the engine accidentally fires while the fuel line is disconnected or the carburetor is loose, fuel can spray and ignite. Disconnecting the wire removes the ignition source and is the single most important safety step in the entire procedure.
Safe Fuel and Cleaner Disposal
Never pour old gasoline down a drain, onto the ground, or into the trash. Collect it in an approved fuel container and take it to a household hazardous waste collection site or a facility that accepts used fuel. Empty aerosol cans of carburetor cleaner should be disposed of according to local regulations; many recycling programs accept them once they are fully empty. Rags soaked in fuel or cleaner should be spread out to dry in a well-ventilated area before disposal to prevent spontaneous combustion.
Frequently Asked Questions
Can I clean a lawn mower carburetor without removing it?
Yes, for light buildup you can spray carburetor cleaner into the carburetor throat and float bowl drain after removing the air filter. This in-place method works for rough idle or preventive maintenance, but it will not fix a mower that will not start or a carburetor with heavy varnish. For those cases, remove the carburetor and clean it on a workbench.
What is the best way to clear a blocked carburetor jet?
Spray carburetor cleaner through the jet, then blow it out with compressed air. If the jet is still blocked, push a single thin wire bristle through the opening. Never use a drill bit or any tool that enlarges the hole, because the jet size controls the engine’s fuel mixture.
How do I know if I need a rebuild kit or a new carburetor?
If the carburetor body is in good shape but the gaskets, float needle, or float are worn, a rebuild kit is the economical fix. If the body is warped, corroded, or has stripped threads, replace the carburetor. On many push mowers, a new aftermarket carburetor costs about the same as a rebuild kit, so replacement is often the faster choice.
Why does my mower run rough even after I cleaned the carburetor?
Check for stale fuel, a clogged air filter, a fouled spark plug, a vacuum leak at the carburetor mounting, or a blocked fuel line. If all of those are fine and the carburetor is genuinely clean, the carburetor may be worn internally and should be rebuilt or replaced.