Direct Answer: How to Change a Weed Eater Head
To change a weed eater head, first disconnect power by removing the battery or spark plug wire. Locate the retaining bolt or clip at the base of the head where it connects to the shaft. For threaded heads, turn counterclockwise to unscrew; for push-on heads, pull straight off. Install the new head by reversing the process—thread clockwise until snug or push firmly into place. Most replacements take 5–10 minutes using only a wrench or hex key.
Understanding Your Weed Eater Head Type
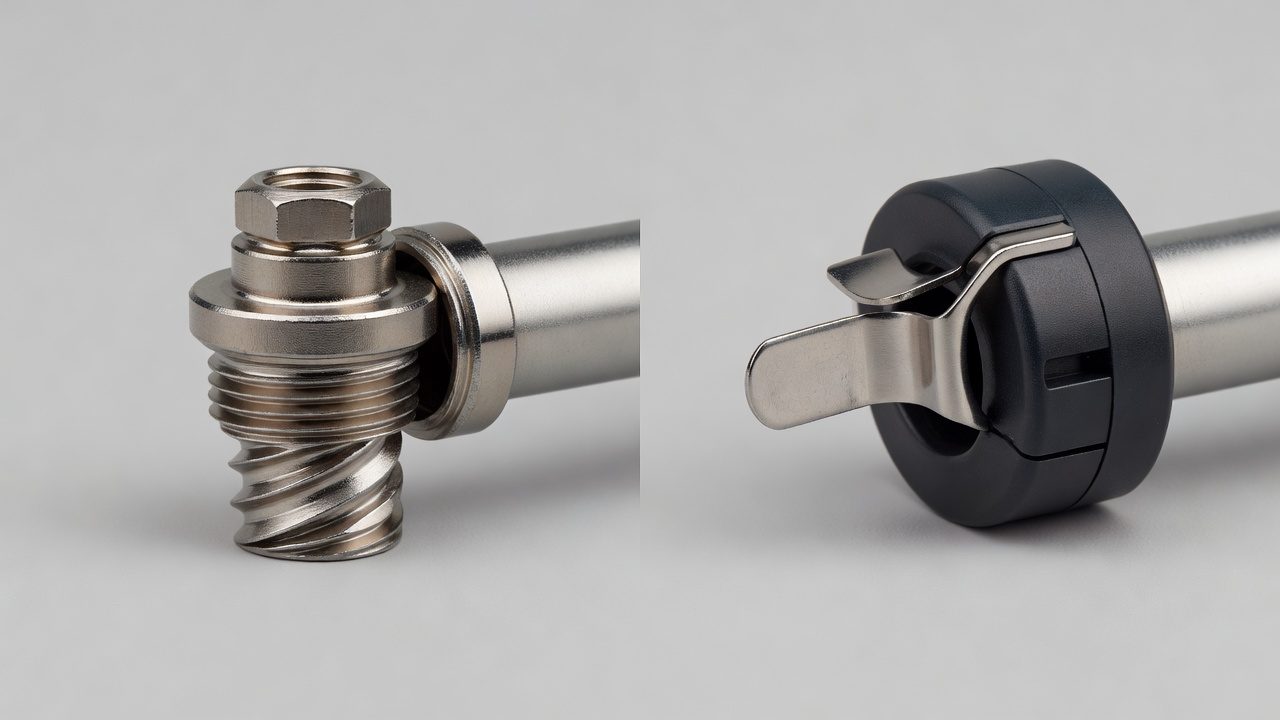
Before you begin, identify which type of head your trimmer uses. Most modern weed eaters fall into two categories: threaded heads and push-on heads.
Threaded heads screw onto the drive shaft and are secured with a retaining bolt. These are common on gas and many electric trimmers. They require a wrench or socket to remove and are generally more durable for heavy-duty use.
Push-on heads (also called snap-fit or clip heads) simply press onto the shaft and are held in place by a clip or friction fit. These are typical on cordless and lightweight electric trimmers and are quickest to change.
Check your trimmer’s manual or look at the base of the current head. If you see a visible bolt, it’s threaded. If the head appears to slide on without visible hardware, it’s push-on.
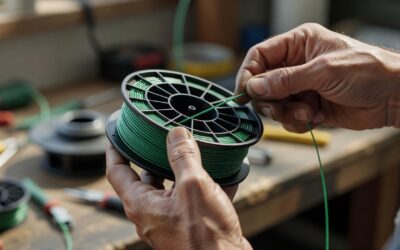
String reload vs. head replacement: Don’t confuse changing the head with reloading string. Most trimmer heads have a spool inside that holds the cutting line. If your head is functioning but you’ve run out of string, you only need to reload the spool—not replace the entire head. Replace the head itself only if it’s cracked, damaged, or the spool mechanism is broken.
Tools and Materials You’ll Need
Gathering the right supplies ensures a smooth replacement:
- Replacement trimmer head (compatible with your specific model)
- Wrench or hex key (size depends on your trimmer’s retaining bolt—typically 8mm to 13mm)
- Socket set or adjustable wrench (alternative to hex key)
- Work gloves (optional but recommended for safety)
- Flat work surface (workbench or table to lay out parts)
Check your trimmer’s manual to confirm the correct wrench size. Using the wrong size risks stripping the bolt. If you don’t have the manual, most manufacturers list this information online or on their website.
Safety Preparation Before Removing the Head
Never work on a powered tool while it’s running or charged:
- For gas trimmers: Turn off the engine, let it cool for 5–10 minutes, and disconnect the spark plug wire from the spark plug
- For electric trimmers: Unplug the cord from the outlet
- For cordless trimmers: Remove the battery completely
Place the trimmer on a stable, flat surface. If possible, secure it in a vice or ask someone to hold it steady. This prevents the shaft from spinning while you loosen the bolt.
Removing the Old Weed Eater Head
For Threaded Heads
Threaded heads turn counterclockwise to loosen (opposite of normal bolt tightening). Here’s the process:
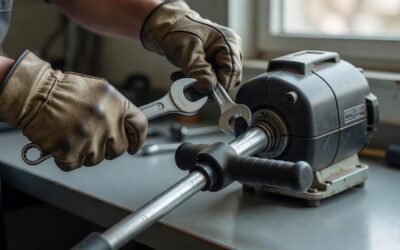
- Position the wrench or hex key on the retaining bolt at the base of the head
- Turn counterclockwise firmly but gradually—don’t force it, as the bolt may be tight from years of use
- If the bolt won’t budge, apply a penetrating lubricant (like WD-40) and wait 10–15 minutes before trying again
- Once loose, unscrew by hand until the head detaches from the shaft
- Remove any rubber washers or gaskets and set them aside—you’ll reinstall these with the new head
Tip: Some trimmers have a shaft-lock button that prevents the shaft from rotating. Press this while turning the wrench to make loosening easier.
For Push-On Heads
Push-on heads are simpler to remove:
- Locate the retaining clip or clip ring at the base of the head where it meets the shaft
- Gently pull the head straight off the shaft. It should come free with moderate hand pressure
- If it’s stuck, wiggle it gently side-to-side while pulling
- Some models have a small retaining ring that must be removed first—check your manual if the head won’t budge
Installing the New Head
Installing a Threaded Head
- Inspect the shaft threads for debris or damage. Clean if necessary with a dry cloth
- Slide any rubber washers or gaskets onto the shaft first (use the ones from the old head or new ones if included)
- Align the new head with the shaft threads and begin threading by hand to avoid cross-threading
- Once hand-tight, use the wrench or hex key to turn clockwise until snug. Don’t over-tighten—you want it secure but not stripped
- A properly installed head should have minimal wobble and sit flush against the shaft collar
Installing a Push-On Head
- Align the new head’s center hole with the shaft
- Push firmly onto the shaft until it seats completely. You should feel or hear a click as it locks into place
- If there’s a retaining ring or clip, install it according to your manual’s instructions
- Gently tug the head to confirm it’s secure and won’t slide off under operation
Testing the Installation
Before using your trimmer, verify the head is installed correctly:
- Spin the head by hand—it should rotate smoothly without wobbling
- The head should not move side-to-side on the shaft
- If using a gas or electric trimmer, hold it upright and run it briefly at low speed to confirm the head stays secure
Gas vs. Electric vs. Cordless: Key Differences
The basic head-replacement process is the same across trimmer types, but a few details vary:
| Trimmer Type | Head Type | Key Considerations |
|---|---|---|
| Gas | Usually threaded | Let engine cool completely. Bolt may be tighter due to vibration during use. Use a hex key or socket wrench for leverage. |
| Electric (corded) | Threaded or push-on | Always unplug before starting. Lighter design means bolt is often less tight than gas models. Quick changeover. |
| Cordless (battery) | Mostly push-on | Remove battery first. Fastest to change. Verify battery compatibility with new head if upgrading models. |
Check your manual or the trimmer’s shaft for markings indicating whether it’s a standard or reverse-threaded head. Most use standard threading (counterclockwise to loosen), but some older or specialty models may differ.
Troubleshooting Common Head Replacement Issues
The Head Won’t Unscrew
Cause: Bolt is stuck from corrosion or tight fit.
Solution: Apply penetrating lubricant (WD-40, PB Blaster, or similar) to the bolt base. Let it soak for 15–30 minutes. Try again with steady, firm pressure. If still stuck, tap the wrench handle gently with a rubber mallet to help break corrosion.
The New Head Doesn’t Fit
Cause: Wrong head model for your trimmer shaft diameter or threading type.
Solution: Verify the replacement head’s compatibility with your exact trimmer model. Check the manual or contact the manufacturer. Threading and shaft diameter must match precisely.
The Head Wobbles After Installation
Cause: Bolt isn’t tight enough, or head isn’t fully seated.
Solution: Remove the head and try again. Ensure the head is pushed all the way onto the shaft before tightening the bolt. For push-on heads, verify the retaining clip is fully engaged.
String Is Flying Off During Use
Cause: Head isn’t secure, or the cutting line wasn’t loaded correctly.
Solution: Stop immediately and check the head’s security. Verify the bolt is tight and the head hasn’t shifted. If using a new head, confirm the string spool is wound correctly and the line exits the proper hole.
When to Replace the Head vs. Reload String
Understanding when to replace saves time and money:
Reload the string spool if:
- You’ve run out of cutting line but the head itself is undamaged
- The spool mechanism turns freely and isn’t stripped
- The head has no visible cracks or breaks
- You simply want to continue using the same head with fresh line
Replace the entire head if:
- The plastic head is cracked, broken, or melted
- The spool won’t turn or catches when trying to advance the string
- The gears inside the head are stripped or damaged
- The head is old and no longer holds line tension effectively
- You’re upgrading to a different head type or brand for better performance
Most heads last 2–3 years with regular use before replacement becomes necessary. If you reload the string 2–3 times per season, you’re likely maintaining the head correctly.
Frequently Asked Questions
Can I use any trimmer head on my weed eater?
No. Trimmer heads must match your trimmer’s shaft diameter and threading type (standard or reverse). Using an incompatible head can damage the shaft or fail during use. Always confirm compatibility with your manual or the manufacturer before purchasing a replacement.
How tight should I make the retaining bolt?
Snug is the goal—tight enough that the head won’t move, but not so tight that you strip the threads or bolt. If you can turn it by hand after initial installation, it’s loose. If you need to force the wrench hard, it may be over-tightened. Most homeowners find a firm two-handed turn sufficient.
What should I do if I lose the washer or gasket?
If the washer or gasket doesn’t come with your new head, purchase a replacement from the trimmer’s manufacturer or a hardware store. These small parts prevent the head from sitting directly on the shaft and help create a secure seal. Operating without one can lead to wobbling or premature wear.
Do I need to clean the shaft before installing a new head?
Yes. Use a dry cloth to wipe debris, rust, or old lubricant from the shaft. A clean surface ensures proper threading or seating and helps the new head attach securely. If corrosion is present, gently clean with fine steel wool or a wire brush.
Final Tips for Success
Keep your trimmer in top condition by checking the head’s security monthly during mowing season. A loose head can become a safety hazard and cause poor cutting performance. If you’re uncomfortable working with tools, many lawn equipment shops offer head replacement as a service for a small fee—typically $15–$30. This is faster than learning the process yourself and guarantees a professional installation.