Direct Answer: What Charges a Lawn Mower Battery?
A lawn mower battery is charged by an alternator (on riding mowers) or a dedicated battery charger (for push mowers or when the battery is removed). In riding mowers, the engine turns the alternator or stator to produce electricity that replenishes the battery while you mow. In push mowers or when a riding mower battery is completely drained, an external battery charger plugged into a wall outlet must be used instead.
Understanding How Lawn Mower Batteries Are Charged
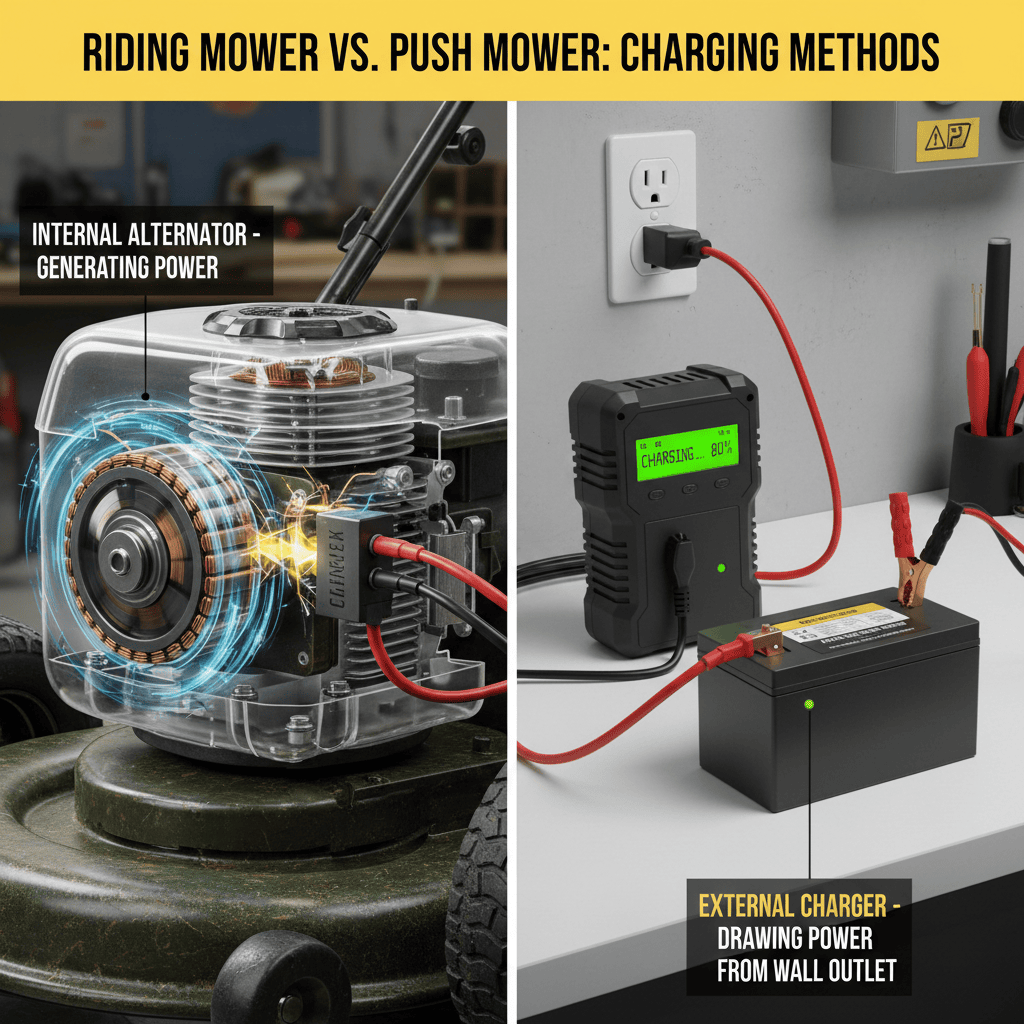
The charging system in a lawn mower converts energy into electrical current that restores the battery’s chemical energy. The method depends on whether your mower has a built-in charging system or relies entirely on external charging.
The Alternator: How Riding Mowers Charge Themselves
Most riding lawn mowers include an alternator or stator (also called a charging coil) that generates electricity as the engine runs. Here’s how the process works:
- Mechanical energy conversion: As the engine cranks, it rotates the alternator’s rotor. This spinning motion creates a changing magnetic field around copper coils.
- Electrical generation: The magnetic field induces an electrical current in the coils, producing alternating current (AC).
- Rectification: A rectifier (diode pack) converts the AC into direct current (DC), which the battery can accept and store.
- Voltage regulation: A voltage regulator ensures the charging voltage stays within safe limits (typically 13.5–14.5 volts for a 12-volt battery) to prevent overcharging.
This continuous charging cycle means that as long as your riding mower’s engine runs, the battery recharges itself during normal operation.
External Battery Chargers: For Push Mowers and Drained Batteries
Push mowers and cordless electric mowers do not have built-in charging systems. Instead, they rely on external battery chargers connected to a standard household outlet (120V AC in North America). The charger converts AC wall power into DC current at the correct voltage and amperage for the battery type.
Even riding mowers occasionally need external chargers if the battery becomes too depleted to start the engine, breaking the alternator’s charging cycle.
Riding Mowers vs. Push Mowers: Which Charging System Applies?
Riding Mowers: Built-In Charging System
Riding mowers have an engine-driven alternator that automatically charges the battery whenever the engine runs. This self-charging system means you typically do not need an external charger during the mowing season—just keep the engine running to replenish the battery.
When external charging is needed:
- The battery has been completely drained and the mower will not start.
- The mower has sat unused for an extended period (off-season storage).
- The alternator or voltage regulator is faulty and the battery is not charging while the engine runs.
Push Mowers: No Built-In Charging System
Push mowers are manually operated and do not have an engine to drive an alternator. Therefore, they have no built-in charging capability. Push mower batteries (whether 12V or smaller) must be charged using an external charger whenever they become depleted.
Similarly, cordless electric push mowers with lithium-ion or lead-acid batteries require dedicated external chargers provided by the manufacturer.
How to Know Which System Your Mower Has
- Riding mower: Check your owner’s manual for references to an alternator, stator, or charging system. Look under the engine hood for a cylindrical component connected to the engine.
- Push mower: If the mower does not have an engine (cordless electric) or the battery cannot be charged while the engine runs, you will need an external charger.
Key Factors to Consider When Charging a Lawn Mower Battery
Battery Voltage and Type
Most lawn mowers use 12-volt lead-acid batteries, similar to car batteries but typically smaller (ranging from 14 to 24 amp-hours). Some commercial mowers or specialized equipment may use 24V or 36V systems. Always verify your mower’s voltage before purchasing a charger to ensure compatibility.
| Battery Type | Typical Voltage | Charging Method | Common in |
|---|---|---|---|
| Lead-acid | 12V or 24V | Alternator (riding) or external charger | Riding and push mowers |
| Lithium-ion | 18V, 20V, 36V (varies by brand) | Dedicated manufacturer charger only | Cordless electric mowers |
| AGM (Absorbent Glass Mat) | 12V | Alternator or smart charger | Premium riding mowers |
Charger Types and Their Differences
Not all battery chargers are the same. Using the wrong charger type can damage your battery or fail to charge it properly.
- Trickle charger: Supplies a very low, constant current (0.5–2 amps). Ideal for maintaining a battery during storage but takes 24–48 hours or longer for a full charge. Safe for extended unattended charging.
- Float charger: Charges at a moderate rate and automatically switches to a maintenance mode once the battery is full. Good for general-purpose charging without risk of overcharge.
- Smart charger (microprocessor-controlled): Automatically adjusts voltage and current based on the battery’s condition. Can detect sulfation and bad cells. Fastest and safest option for lead-acid and AGM batteries.
- Fast charger: Delivers high amperage for quick charging but should only be used occasionally, as repeated fast charging reduces battery lifespan.
Charger Compatibility
Do not use a car battery charger on a lawn mower battery without checking compatibility. Car chargers often deliver too much current for smaller mower batteries, potentially causing damage. Always use a charger rated for your battery’s amp-hour capacity and voltage.
Step-by-Step: How to Charge a Lawn Mower Battery Safely
Before You Charge
- Read your mower’s owner’s manual for specific charging instructions.
- Verify the battery voltage and amp-hour rating.
- Inspect the battery for cracks, leaks, or corrosion.
- Ensure the charger is rated for your battery’s specifications.
Charging Process
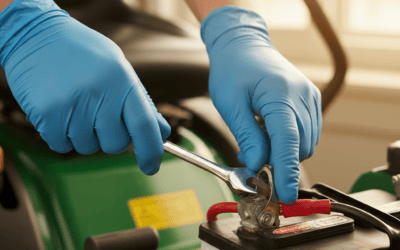
- Disconnect the battery (if removable): Remove the battery from the mower and place it on a clean, flat surface away from flammable materials.
- Connect the charger safely: Attach the red (positive) clamp first to the positive (+) terminal, then the black (negative) clamp to the negative (−) terminal. Connecting in this order prevents sparks.
- Set the charger: Select the appropriate voltage (12V or 24V) and amperage. Start with a lower amperage setting (2–5 amps) for standard charging.
- Monitor the charge: Most smart chargers display charge progress. A full charge typically takes 4–8 hours at standard amperage.
- Disconnect in reverse order: Once fully charged, disconnect the black (negative) clamp first, then the red (positive) clamp.
- Reinstall the battery: Place the battery back in the mower and secure it properly.
What If Your Riding Mower Won’t Charge with the Alternator?
If your riding mower’s battery is not charging while the engine runs, the alternator or voltage regulator may be faulty. Test this by measuring voltage at the battery terminals with the engine running: a healthy charging system should show 13.5–14.5 volts. If voltage is lower or the same as the resting battery voltage, have the charging system inspected by a technician.
Maintenance Tips for a Healthy Lawn Mower Battery
Extend Battery Life During the Season
- Run the mower regularly: Regular engine operation keeps the alternator charging the battery and prevents deep discharge.
- Inspect terminals monthly: Clean corrosion (white or blue-green buildup) from battery terminals using a wire brush and baking soda solution.
- Check water level (lead-acid only): Non-sealed lead-acid batteries may need distilled water added if water has evaporated. Never overfill.
- Avoid overcharging: Use a smart charger or float charger to prevent overcharging, which shortens battery life and can cause damage.
Off-Season Storage
- Charge fully before storage: Store the battery at 100% charge to prevent sulfation (a chemical reaction that reduces capacity).
- Use a trickle or float charger: Connect a charger with a maintenance mode to keep the battery fully charged throughout the off-season without overcharging.
- Store in a cool, dry place: Extreme temperatures accelerate battery degradation. Aim for 50–70°F if possible.
- Disconnect the negative terminal: Disconnecting the battery from the mower during storage prevents parasitic drain (slow discharge caused by the mower’s electrical system).
When to Replace Instead of Recharge
A lawn mower battery typically lasts 3–5 years. Replace the battery if:
- It will not hold a charge even after a full charge cycle.
- It fails to start the engine when fully charged.
- The battery is visibly damaged, swollen, or leaking.
- It has been deeply discharged multiple times (sulfation damage may be irreversible).
Frequently Asked Questions
How long does it take to charge a lawn mower battery?
Charging time depends on the charger type and battery capacity. A trickle charger (0.5–2 amps) may take 24–48 hours for a full charge. A standard charger (5–10 amps) typically requires 4–8 hours. A smart charger with high amperage can fully charge a battery in 2–4 hours. Always follow your charger manufacturer’s recommendations.
Can I use a car battery charger on a lawn mower battery?
Not always. Car chargers are often designed for larger batteries and higher amperage output, which can damage a smaller lawn mower battery. Use only a charger rated for your battery’s voltage and amp-hour capacity. If you must use a car charger, set it to the lowest amperage setting (typically 2 amps or less) and monitor the charge closely.
Why is my riding mower battery not charging even though the engine runs?
The alternator or voltage regulator may be faulty, or the battery terminals may be corroded. Test the system by measuring voltage at the battery with the engine running—it should read 13.5–14.5 volts. If it reads lower or the same as the resting voltage, have the charging system inspected. Clean corroded terminals with a wire brush and verify all connections are tight.
What is the difference between a smart charger and a regular battery charger?
A smart charger uses a microprocessor to monitor the battery’s condition and automatically adjust voltage and amperage during charging. It prevents overcharging, detects bad cells, and switches to maintenance mode when fully charged. A regular charger typically delivers a fixed current throughout the charge cycle and requires manual monitoring to prevent overcharge. Smart chargers are safer and better for battery longevity but usually cost more.