Direct Answer: How to Put String on a Trimmer
To put string on a trimmer, first identify your trimmer type and locate the spool head (usually by twisting counterclockwise or unclipping a release button). Remove any old string, then wind new trimmer line onto the spool in the direction indicated by arrows molded into the spool. Ensure the line seats properly in the guide grooves, thread the end through the exit hole, and reassemble the head by twisting or snapping it back in place. The exact process varies depending on whether your trimmer has a fixed spool or automatic feed system.
Understanding Your Trimmer Type
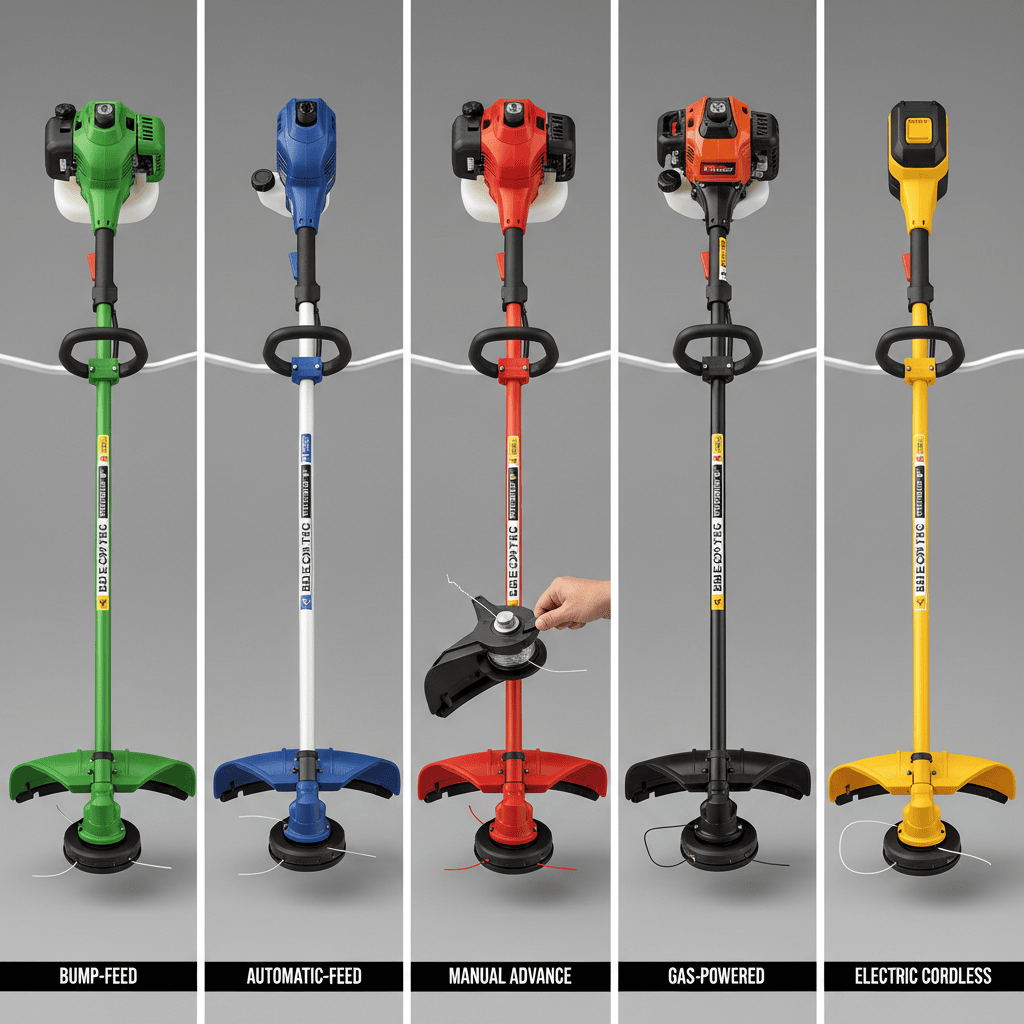
Before attempting string installation, you need to identify your specific trimmer model and type. String trimmers come in several variants, each with slightly different installation procedures.
Main Types of String Trimmers
- Bump-Feed Trimmers: Require manual feeding by bumping the head against the ground to advance the line
- Automatic-Feed Trimmers: Automatically advance trimmer line as it wears, eliminating manual feeding
- Manual-Advance Trimmers: Require you to manually pull out more line using a trigger or button
- Gas-Powered Trimmers: Heavy-duty models often with fixed spools and larger-diameter line
- Electric/Cordless Trimmers: Lighter-duty consumer models with various feed systems
Your trimmer’s type determines how you access the spool head and the winding method. Check your product manual or the manufacturer’s website to confirm your model’s category.
Identifying Your Trimmer Model and Manufacturer
Locate the model number on your trimmer, typically found on a sticker near the motor or handle. Write this down, then visit the manufacturer’s website or search for your model online. The manual usually contains installation instructions specific to your trimmer. Common manufacturers include Ryobi, DeWalt, Echo, Stihl, and Black+Decker, each with slightly different spool designs.
Tools and Materials You’ll Need
Essential Tools
- Replacement trimmer line (correct gauge for your model)
- Screwdriver (Phillips or flat-head, depending on your trimmer)
- Needle-nose pliers (optional, for difficult spool removal)
- Work gloves (to protect hands from sharp edges)
- Workspace with good lighting
Choosing the Right String
Trimmer line diameter is critical and varies by model. Common sizes are .065 inches, .080 inches, and .095 inches. Using incorrect diameter string can cause feeding issues and premature wear. Check your trimmer’s manual or the spool head itself, which often displays the compatible line size. Most manufacturers recommend using their branded replacement string for optimal performance, though third-party alternatives typically work if they match the specified diameter and material composition.
String material varies—most consumer trimmers use nylon monofilament, which is durable and affordable. Premium options include twisted or serrated edges for thicker vegetation, but these are heavier and drain batteries faster on cordless models.
Step-by-Step String Installation Process
Step 1: Prepare Your Trimmer
Disconnect the battery or ensure the trimmer is completely off and cool before handling. Lay the trimmer on a flat work surface with the head facing up. This prevents accidental starts and gives you stable access to the spool head.
Step 2: Access the Spool Head
Most trimmer heads detach by twisting counterclockwise—check for arrows indicating the direction. Some models have a release button on the side; press and twist simultaneously. Hold the head steady with one hand while turning. If resistance occurs, do not force it; check your manual for the correct release method. Once released, the spool head should separate from the motor shaft.
Step 3: Remove Old String
With the head separated, use your hands or pliers to pull out remaining old string. Some spools have multiple chambers—inspect the entire spool surface to ensure all old line is removed. Leftover fragments can interfere with new string feeding. If the spool is damaged or cracked, replace it with a manufacturer-approved alternative.
Step 4: Wind New String Onto the Spool
Look for directional arrows molded into the spool indicating the correct winding direction (clockwise or counterclockwise varies by model). Cut approximately 15-30 feet of new trimmer line, depending on spool capacity. Begin winding at the center post or starting point on the spool, pulling the line tight as you wrap to ensure even tension. Wind the line in neat, overlapping passes without crossing. Fill the spool until the line reaches the edge grooves marked on the spool rim.
Step 5: Seat the String in Guide Grooves
Once the spool is wound, locate the guide grooves at the rim of the spool head. These grooves direct the string during operation. Press the end of the trimmer line into the guide groove, ensuring it seats completely. Some heads require you to thread the line through an exit hole in the spool housing—follow the groove path to the exit point and push the line through. Leave approximately 4-6 inches of line extending from the exit hole.
Step 6: Reassemble the Trimmer Head
Align the spool head with the motor shaft and twist clockwise until it seats firmly (opposite the removal direction). You should hear a click or feel resistance when the head locks in place. Gently tug the string ends to confirm they feed freely without resistance. If the head does not seat securely, remove it and recheck the spool winding—improper winding often causes reassembly issues.
Step 7: Prime the Trimmer (Automatic-Feed Models Only)
Automatic-feed trimmers may require priming after string installation. Check your manual for the specific priming procedure, which often involves gently bumping the head against the ground while the trimmer is running to trigger automatic line advance.
Common Mistakes and Troubleshooting
String Won’t Feed or Rotate
Cause: String is wound in the wrong direction or not seated in guide grooves.
Solution: Remove the head and rewind the string following the directional arrows precisely. Ensure the line is pressed fully into guide grooves with no twists or bunching.
String Tangles or Breaks Frequently
Cause: Incorrect diameter string, improper winding tension, or damaged spool.
Solution: Verify the line diameter matches your manual specifications. Wind new string at consistent tension without leaving gaps between passes. Inspect the spool for cracks or rough edges that might snag the line.
String Won’t Stay in Guide Grooves
Cause: Grooves are damaged or filled with debris.
Solution: Clean grooves with a damp cloth and allow them to dry. If grooves are damaged, the spool head may need replacement. Some models have removable spool inserts that can be individually replaced.
Head Won’t Reassemble or Feels Loose
Cause: Spool wound too full or string is bunched on one side.
Solution: Unwind slightly until the head reassembles smoothly and rotates freely without wobbling. Rewind remaining string evenly across the spool.
When to Replace Your Trimmer String
Signs You Need New String
- String is noticeably shorter after each use (normal wear)
- String frays, shreds, or breaks during operation
- Trimming performance decreases despite correct winding
- String has become hard, brittle, or discolored from sun exposure
- The spool is empty or nearly empty
Replacement Frequency
Replacement frequency depends on usage. Homeowners trimming small lawns occasionally may need new string 1-2 times per season. Heavy users or those with dense vegetation may require installation monthly or more frequently. Inspect your string weekly during regular use to catch wear early.
Extending String Life
Store your trimmer indoors in a cool, dry place to prevent UV damage and brittleness. Avoid trimming hard objects like rocks, metal, or concrete, which significantly shorten string life. Use bump-feed models conservatively—excessive bumping accelerates wear. Keep the spool head clean and free of grass debris that can cause binding.
Model-Specific Variations
Automatic vs. Manual Feed Systems
Automatic-Feed Trimmers: These use a spring-loaded mechanism that advances string automatically as it wears. Installation is similar to manual systems, but the string must be wound precisely to avoid jams. After installation, test that the automatic advance engages smoothly by gently bumping the head against soft ground with the trimmer running at low speed.
Manual-Feed Trimmers: These require you to manually pull out more line using a trigger or button. Installation is straightforward—wind the string and leave sufficient slack for multiple manual pulls before needing replacement.
Gas-Powered vs. Electric Trimmers
Gas-powered trimmers typically use larger-diameter string and heavier-duty spools. The installation process is identical, but gas models often feature fixed spools rather than removable heads. Consult your manual for the specific access method. Electric and cordless models usually have removable heads, making string replacement faster and easier.
Single-Line vs. Dual-Line Configurations
Most consumer models use dual-line spools with two separate strings exiting the head. Dual-line systems require winding two strands onto separate chambers. Single-line spools are less common but feature a single continuous loop. Your manual will specify your trimmer’s configuration.
Frequently Asked Questions
What happens if I wind the string in the wrong direction?
The string will not feed properly during operation. When the spool rotates, incorrectly wound string may bunch up, tangle, or fail to advance. Always follow the directional arrows on your spool precisely. If feeding fails after installation, the first step is to remove the head and rewind the string in the correct direction.
Can I use thicker string to make my trimmer more durable?
No. Using string thicker than your trimmer’s specifications can damage the motor, cause excessive vibration, and reduce battery life on cordless models. Thicker string is heavier and puts more load on the drive system than it is designed to handle. Always match the diameter specified in your manual.
How much string should I load onto the spool?
Fill the spool until the string reaches the outer edge grooves, but do not overfill. Overfilled spools may not reassemble properly or can cause the string to tangle. Most spools hold 15-30 feet depending on diameter and model. Your manual usually specifies recommended loading length.
Why does my string keep breaking after I install it?
Breaking typically indicates incorrect diameter string, a damaged spool with rough edges, or winding tension issues. Verify you are using the correct gauge specified in your manual. Inspect the spool and grooves for cracks, burrs, or debris. If the spool is damaged, replacement is often more cost-effective than repeated string installations.
Conclusion
Installing or replacing trimmer string is a straightforward maintenance task that extends your trimmer’s lifespan and maintains cutting performance. Success requires identifying your specific trimmer model, using the correct string diameter, following directional winding arrows precisely, and ensuring proper seating in guide grooves. Most installations take 5-10 minutes once you understand your trimmer’s specific design. Consult your manufacturer’s manual when in doubt—each brand and model may have unique requirements that affect the process. With proper technique and regular maintenance, you can confidently handle string replacement and avoid common installation mistakes.