Direct Answer
To spool a weed wacker, remove the spool head by twisting or unclipping it counterclockwise. Remove old line remnants, measure and cut new trimmer line to your manufacturer’s recommended length (typically 20–30 feet depending on spool size). Wind the new line tightly and evenly onto the spool in the direction indicated by arrows on the spool, leaving 6–8 inches free. Thread the free ends into the guide slots, reattach the spool head to the trimmer, and pull the lines to extend them through the cutting head.
Understanding Your Weed Wacker Spool System
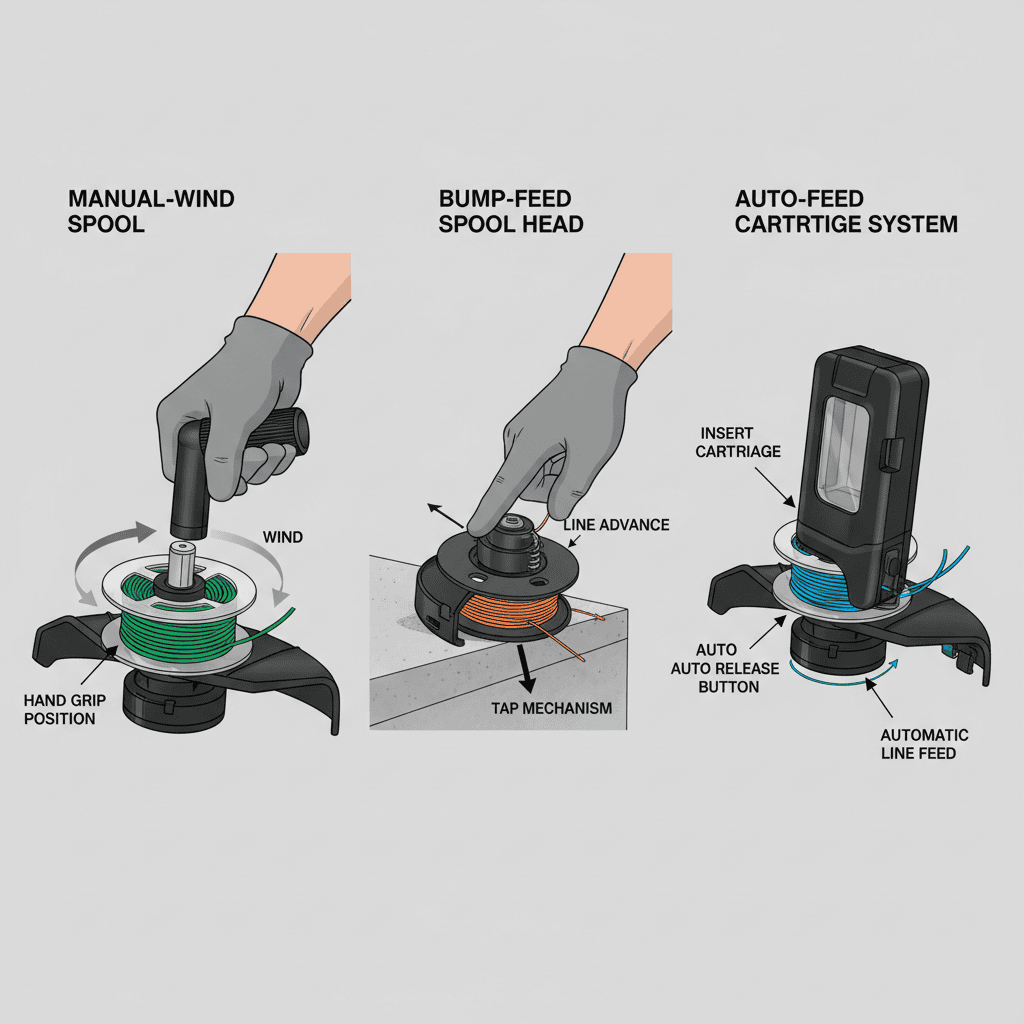
Before you begin spooling your weed wacker, it’s important to identify which type of spool mechanism your trimmer uses. Not all weed wackers are designed the same way, and the spooling process varies depending on your device’s mechanism. Three main types exist: manual-wind spools, bump-feed systems, and auto-feed spools.
Manual-wind spools require you to manually wind trimmer line by hand onto the spool mechanism. Bump-feed spools automatically extend line when you tap the spool head against the ground, requiring less manual intervention. Auto-feed spools continuously advance line as the trimmer head spins, requiring minimal user adjustment.
Check your trimmer’s user manual or examine the spool head itself—you’ll typically find directional arrows printed on the spool indicating the correct winding direction. These arrows are critical to proper spooling and should be your first reference point.
What You’ll Need Before Spooling
Gather the following items before attempting to respool your weed wacker:
- Trimmer line in the correct gauge for your model (common sizes are 0.065 inch and 0.080 inch diameter)
- Replacement spool (if your trimmer uses cartridge-based spools) or access to your existing spool head
- Scissors or line cutter to trim new line to proper length
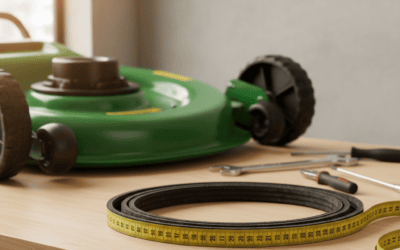
- Measuring tape to calculate line length
- Your trimmer’s manual for manufacturer-specific measurements and procedures
The most critical preparation step is determining the correct trimmer line gauge and length for your specific model. Consult your user manual—using the wrong gauge line can cause jamming, poor cutting, or damage to the trimmer head. Typical trimmer line lengths range from 20–30 feet depending on spool size, but this varies significantly by manufacturer and model.
How to Remove the Old Spool Head
Safely removing the spool head is the first hands-on step in the spooling process.
- Disconnect the trimmer from any power source (unplug electric models or remove the battery from cordless models) to prevent accidental activation.
- Locate the spool head at the bottom of the trimmer shaft. Look for a central bolt or locking mechanism.
- Twist counterclockwise (most models use this standard direction) to loosen and remove the spool head. Some models feature a push-button or clip release instead—check your manual if twisting doesn’t work.
- Remove old line remnants by hand or with tweezers. Clean out any debris or tangled line pieces inside the spool chamber. This prevents new line from catching on old fragments.
- Inspect the spool for cracks or damage. If the spool is damaged, replacement cartridge spools are available for most trimmer models.
Step-by-Step: Winding Line Onto the Spool
Proper winding technique is essential to prevent jamming, line breakage, and feeding problems. Follow these steps carefully.
Measuring and Cutting Your Trimmer Line
Start by calculating the correct line length for your spool:
- Consult your trimmer manual for the recommended line length (typically 20–30 feet for standard residential models).
- Some spools have measurement guides molded into them—use these as reference marks.
- Cut your trimmer line to length using scissors or a line cutter. Make a clean, straight cut to ensure smooth feeding into the spool.
Identifying Wind Direction
Examine your spool head closely—you’ll find arrows printed or embossed on the spool indicating the correct winding direction. This is non-negotiable:
- Most manual-wind spools wind in one direction only (typically counterclockwise when viewed from above).
- Winding in the wrong direction will cause the line to unwind during use or fail to feed properly.
- If you cannot locate directional arrows on your spool, consult your trimmer’s manual before proceeding.
The Winding Process
- Insert the line end into the anchor slot or notch on the spool (most spools feature a small slot designed for this purpose).
- Hold the line under slight tension between your fingers to maintain control while winding. The line should be taut but not so tight that you strain your hand.
- Wind the line evenly around the spool in the direction indicated by the arrows. Keep the line flat and parallel—avoid crossing lines or creating gaps, as this causes tangling and jamming.
- Work systematically from one side of the spool to the other, creating neat rows of line. If your spool has left and right chambers, wind each side separately.
- Leave 6–8 inches of free line unbound at the end. This length allows the line to extend properly through the cutting head when you pull it taut during final assembly.
- Maintain consistent tension throughout the winding process. Line wound too loosely will slip and not feed; line wound too tightly can jam or break during operation.
Preventing Common Winding Problems
Avoid these mistakes while winding:
- Crossing lines: Keep each wrap parallel to the previous one. Crossed or overlapped line will tangle.
- Uneven tension: Maintain steady hand pressure. Loose sections cause feeding failures; overly tight sections cause breakage.
- Overfilling: Don’t pack more line onto the spool than it’s designed to hold. Overfilled spools cause jamming and prevent the head from closing properly.
- Winding in wrong direction: Always check your arrows before starting. Reverse-wound line will not feed correctly.
Loading Line Into Guide Slots and Reattaching
The final steps complete the spooling process and prepare your trimmer for use.
Threading the Line Into Guide Slots
- Identify the guide slots on your spool head—these are small notches or grooves where the line exits the spool chamber.
- Pull each free line end taut (this is why you left 6–8 inches free).
- Thread each end into its corresponding guide slot. Most spools have two slots for dual-line operation, but some single-line models have just one.
- Make sure the line sits fully in the slot—it should not be twisted or kinked.
- Trim excess line sticking out beyond the cutting head to your trimmer’s specified length (usually around the edge of the trimmer head guard).
Reattaching the Spool Head
- Align the spool head with the threaded hole at the bottom of your trimmer shaft.
- Twist clockwise (opposite the removal direction) to screw the spool head back into place. Tighten firmly but do not over-tighten, as this can strip the threads.
- Ensure the head is seated flush against the trimmer body. Any gap indicates improper installation.
- Reconnect power to your trimmer (plug in or reinsert the battery).
Testing Proper Line Extension
Before using your trimmer on grass, test that the line extends and retracts properly:
- For manual-wind spools, pull each line end—the line should extend smoothly through the cutting head.
- For bump-feed models, hold the trimmer at waist height and gently tap the spool head against the ground once. A small amount of line should advance.
- For auto-feed models, activate the trimmer briefly at low speed to verify continuous line advancement.
- If line doesn’t feed, doesn’t feed smoothly, or jams, stop immediately and recheck your winding direction and tension.
Common Spooling Mistakes to Avoid
Understanding what goes wrong helps you prevent problems before they start.
Line Jamming During Use
Cause: Crossed lines, uneven tension, or overfilled spool.
Prevention: Wind lines parallel and flat. Maintain consistent tension. Don’t exceed the spool’s rated line capacity.
Line Doesn’t Feed at All
Cause: Line wound in wrong direction, too-tight tension, or incorrect gauge line.
Prevention: Always verify directional arrows before winding. Keep tension moderate. Use the exact gauge your manual specifies.
Line Breaks Frequently During Operation
Cause: Wrong line gauge, damage to line during winding, or excessive tension.
Prevention: Use the correct gauge for your model. Inspect line for nicks or cuts before spooling. Wind with consistent, moderate tension.
Spool Head Won’t Close Properly
Cause: Overfilled spool or line caught in the closure mechanism.
Prevention: Don’t exceed the line capacity indicated on your spool. Clear any line fragments before closing the head.
Tips for Different Spool Types
Manual-Wind Spools
Manual-wind spools require you to complete all winding by hand. These are typically found on lower-cost residential models. Key points:
- Spend extra time ensuring even, parallel winding—this type is most prone to jamming if poorly wound.
- Test line extension before using the trimmer on grass.
- These spools are typically the most affordable to replace when damaged.
Bump-Feed Spools
Bump-feed spools automatically advance line when you tap the spool head against the ground. These are common on mid-range residential trimmers.
- After winding and installing, test by making one light tap against the ground at low trimmer speed.
- If no line advances, check that your lines are properly threaded into guide slots.
- Some bump-feed models have a centering piece inside the spool—do not disturb or remove this during spooling.
Auto-Feed Spools and Cartridge Systems
Auto-feed spools advance line continuously during operation. Cartridge-based systems use replaceable cartridge spools rather than manual winding.
- For cartridge systems, you may simply purchase and snap in a replacement cartridge rather than hand-winding line.
- Check whether your model supports replaceable cartridges—if so, this eliminates spooling work entirely.
- Auto-feed spools require less line tension than manual-wind spools since the mechanism handles advancement automatically.
Frequently Asked Questions
How Much Trimmer Line Do I Need?
The length depends on your spool size and trimmer model. Consult your manual for the exact recommendation, which typically ranges from 20–30 feet for standard residential models. If your manual isn’t available, check the spool itself—many spools have measurement markings molded into the plastic. When in doubt, err on the shorter side; you can always wind a second length if the first runs out.
What If My Trimmer Line Keeps Breaking?
Line breakage usually results from three causes: using the wrong gauge (too thin for your trimmer), winding the line too tightly, or damaging the line during winding. Verify that you’re using the correct gauge for your model, maintain moderate and consistent tension while winding, and inspect the line for nicks or cuts before installation. Additionally, avoid hitting hard surfaces like rocks or concrete, as this is often the root cause of breakage during trimmer use rather than a spooling issue.
Why Isn’t My Trimmer Line Feeding?
If line won’t feed from your spool, the most common cause is winding in the wrong direction. Double-check the directional arrows on your spool before blaming other factors. Other causes include line wound too tightly (reducing feed), line threaded incorrectly into guide slots, or debris blocking the spool chamber. Remove the spool head and inspect for debris, re-thread the line into guide slots, and retest. If these steps don’t resolve the issue, consult your trimmer manual for model-specific troubleshooting.
Can I Use Any Trimmer Line on My Weed Wacker?
No—always use the specific line gauge (diameter) your trimmer manual recommends. Common gauges are 0.065 inch and 0.080 inch, but your model may specify a different size. Using the wrong gauge can cause jamming, poor cutting, overheating of the trimmer head, or damage to the motor. The correct gauge is printed in your manual and often stamped on the spool itself. When in doubt, contact the manufacturer before purchasing replacement line.