Direct Answer: To measure a lawn mower belt, first check for a printed part number on the belt itself. If that’s unavailable, measure the belt’s outer circumference with a flexible tape measure or string, then measure its width and thickness. For a broken or missing belt, trace the full pulley path with string to determine the required length.
Understanding Lawn Mower Belt Sizes Before You Measure
Before diving into measurement techniques, it’s important to understand the basics of lawn mower belt sizing. Most lawn mower belts are V-belts, designed with a trapezoidal cross-section that fits into grooved pulleys. The belt’s size is determined by two primary dimensions: its length (typically the outer circumference) and its cross-sectional width and thickness.
There are two main types of belts on a lawn mower: the deck belt and the drive belt. The deck belt connects the engine’s power take-off (PTO) to the mower deck’s spindle pulleys, which spin the blades. The drive belt transfers power from the engine to the transmission, enabling the mower’s wheels to move. These belts route through different pulley systems, so their measurement reference points can vary.
The most reliable way to identify a replacement belt is by its part number. Most original equipment manufacturer (OEM) belts have the replacement part number printed directly on the belt’s outer surface. This number corresponds to a specific size in the manufacturer’s catalog, eliminating guesswork. If this number is legible, it’s the fastest path to finding an exact replacement.
How to Measure an Intact Lawn Mower Belt: Step-by-Step
If your belt is still in one piece and can be removed from the mower, you can measure it directly. This method provides the most accurate length measurement.
Step 1: Remove the Belt (If Possible)
Consult your mower’s owner’s manual for instructions on safely removing the belt. This often involves releasing the tensioner pulley and slipping the belt off. If the belt is stuck or you’re unsure, it may be safer to measure it while it’s still on the mower, though this can be less precise.
Step 2: Measure the Outer Circumference
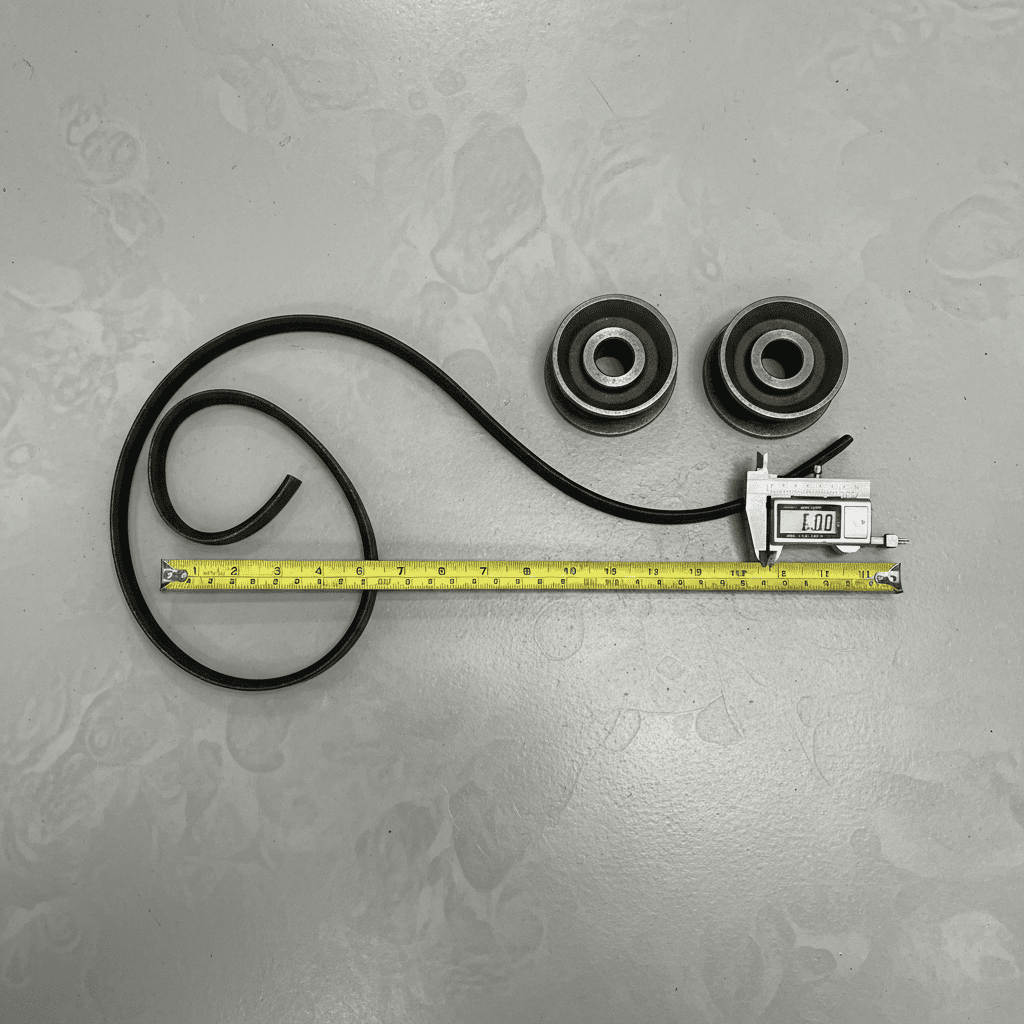
Lay the belt flat on a clean surface. Use a flexible tailor’s tape measure to measure around the outer edge of the belt from one point back to the same point. This gives you the outer circumference length.
Alternative Method (String and Ruler): If you don’t have a flexible tape, wrap a piece of non-stretch string tightly around the belt’s outer edge. Mark where the string overlaps, then lay the string flat and measure the distance between the marks with a rigid ruler. This method is highly accurate.
Step 3: Measure Width and Thickness
Using a ruler or caliper, measure the belt’s width across the top of the V (the widest part). Then measure the belt’s thickness from the top of the V to the bottom point. These measurements are crucial for matching the correct cross-section, as belts with the same length can have different widths.
How to Measure a Broken or Missing Belt: Tracing the Pulley Path
When a belt is broken, stretched beyond recognition, or completely missing, you must reconstruct its path to determine the correct length. This method measures the effective length the belt must travel.
Step 1: Identify All Pulleys
Locate every pulley the belt is supposed to wrap around. This includes the main drive pulley on the engine shaft, all spindle pulleys on the deck (for a deck belt), and the idler and tensioner pulleys. The tensioner pulley is spring-loaded and applies pressure to keep the belt tight.
Step 2: Trace the Path with String
Take a length of non-stretch string or cord. Starting at one pulley, wrap the string around each pulley in the exact path the belt would follow. Pay close attention to whether the belt wraps around the inside or outside of each pulley. Ensure the string follows the correct groove on multi-groove pulleys.
Step 3: Account for the Tensioner
When you reach the tensioner pulley, pull the spring-loaded tensioner to its normal operating position (as if the belt were installed) and wrap the string around it. This ensures you account for the belt’s path under proper tension.
Step 4: Measure the String
Once the string has traced the complete path and returned to the starting point, mark where the ends meet. Remove the string, lay it flat, and measure the total length with a tape measure. This measurement represents the required belt length.
Measuring Belt Width, Thickness, and V-Shape
For V-belts, the cross-sectional dimensions are just as important as length. A belt that’s too wide won’t seat properly in the pulley groove, while one that’s too narrow will slip.
Width: Measure the width across the top of the V (the widest part of the belt). This is the dimension that corresponds to standard belt size charts.
Thickness: Measure from the top of the V to the bottom point. This dimension ensures the belt sits at the correct depth in the pulley groove.
V-Shape: The angle of the V’s sides is standardized for most lawn mower applications, but if you’re matching a specialty belt, this angle can be measured with a protractor.
Outside Length vs. Effective Length: Avoiding Sizing Confusion
A common source of error when ordering replacement belts is confusion between outside length and effective length.
- Outside Length (Circumference): This is the measurement you get when you wrap a tape around the outer edge of the belt. It’s the most common measurement used in retail stores and online listings.
- Effective Length (Inside Length): This is the length measured along the neutral axis of the belt—the theoretical line that doesn’t stretch or compress. It’s often slightly shorter than the outside length.
Most lawn mower belt size charts and replacement listings use the outside length. However, some technical specifications may reference the effective length. Always check which convention the seller uses. If you measured the belt path with string, you’ve obtained a measurement close to the effective length, so you may need to add a small amount (typically 1-2%) to match an outside length listing.
What to Do With Your Measurements: Choosing the Right Replacement
Once you have your measurements—length, width, and thickness—you can confidently select a replacement.
Using a Belt Size Chart
Many manufacturers and retailers provide belt size charts. Look for a chart that lists belts by their outside length and cross-section width. Match your length measurement to the closest standard size, then verify the width matches.
When Measurements Fall Between Sizes
If your measurement falls between two standard sizes, it’s generally better to choose the next size up and rely on the tensioner to take up any slight slack. A belt that’s too short will be over-stressed and may fail prematurely.
When to Replace Instead of Reuse
Even if a belt appears intact, replace it if you notice any of the following: cracks, fraying, glazing (a shiny, hardened surface), or significant stretching. A worn belt is a common cause of poor mower performance and can lead to more expensive damage if it snaps.
Frequently Asked Questions
Can I use a belt with a slightly different length than my original?
It’s not recommended. Even a small difference in length can affect belt tension and tracking. A belt that’s too short will be over-stressed, while one that’s too long may slip or come off the pulleys. Always aim for an exact match in length and cross-section.
What if I can’t find the part number on my old belt?
If the part number is illegible, use the measurement methods described above. Measure the length, width, and thickness, then consult a belt size chart or provide these specifications to a parts dealer. Having the mower’s make, model, and year will also help them identify the correct belt.
Is the measurement for a deck belt different from a drive belt?
The measurement technique is the same, but the pulley paths are different. A deck belt typically wraps around multiple spindle pulleys on the mower deck, while a drive belt routes from the engine to the transmission. Always trace the specific path for the belt you’re replacing.
How tight should the new belt be after installation?
The belt should be taut but not overly tight. The tensioner pulley is designed to apply the correct amount of pressure. After installation, check that the belt is seated properly in all pulley grooves and that the tensioner is functioning. Refer to your owner’s manual for any specific tension specifications.