Direct Answer: How to Load a Weed Eater
To load a weed eater, access the trimmer head by removing the spool cover or cap, clear any old trimmer line from the spool, measure and cut new line to the appropriate length (typically 15–17 feet), wind the line tightly and evenly around the spool in the direction indicated by arrows on the spool, and then reinstall the cover. Test the bump feed or manual advance mechanism to confirm the line feeds correctly. The exact procedure varies by weed eater model and spool design, so consult your manual for your specific trimmer type.
Understanding Your Weed Eater’s Spool System
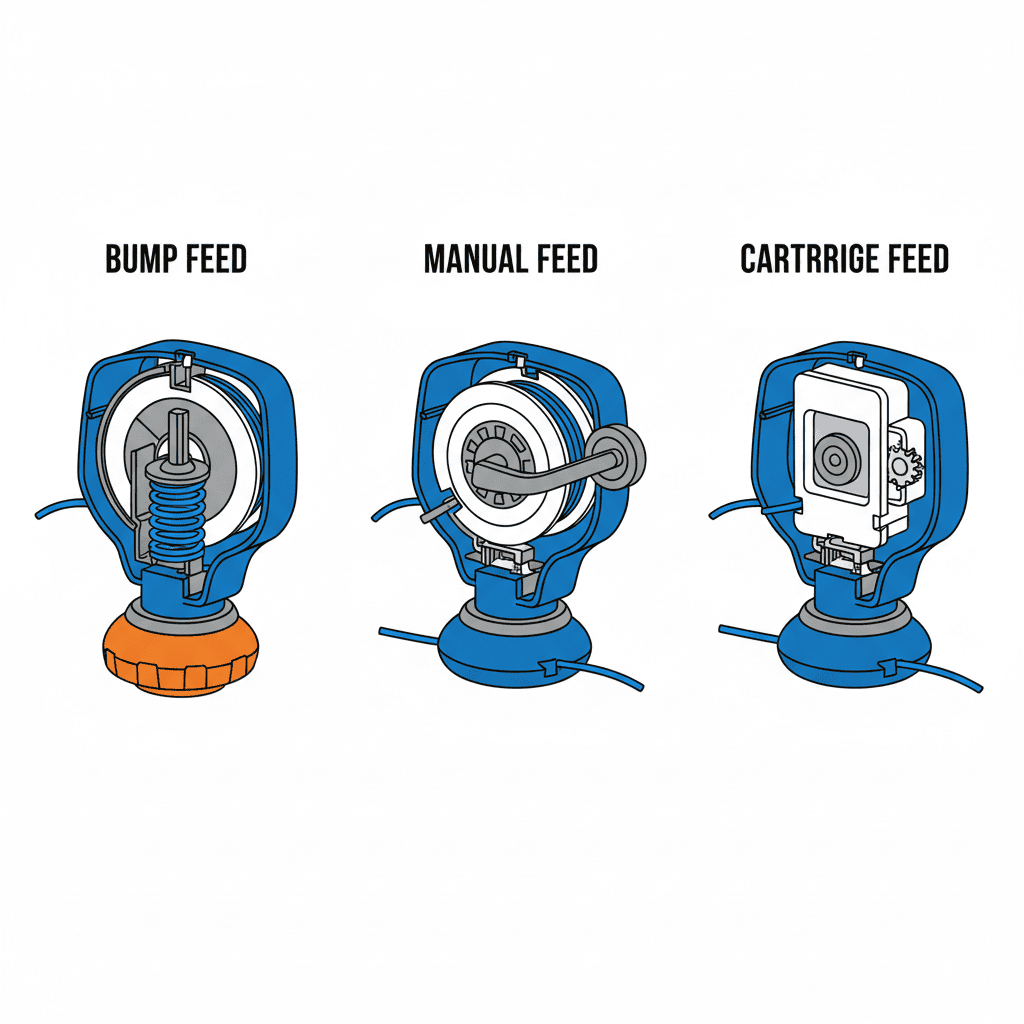
Before loading trimmer line, identify which spool system your weed eater uses. Most weed eaters fall into one of three categories: bump feed heads, manual feed trimmers, or fixed-spool systems. Bump feed heads advance the line automatically when you tap the spool head against the ground during operation. Manual feed trimmers require you to press a button or lever to extend fresh line. Fixed-spool systems have the line permanently attached and do not require loading.
Bump feed heads are the most common design on consumer-grade weed eaters. They feature a rotating spool inside a housing with a small bump knob at the base. When you lightly tap this knob on the ground during trimming, a spring-loaded mechanism advances a new section of line from the spool.
Manual feed trimmers have a spool that you load with line, and a button on top of the trimmer head that you press to manually advance the line as it wears. These are often found on commercial-grade or older weed eaters.
Replaceable-spool designs allow you to remove the entire spool as a cartridge and replace it with a pre-wound spool, eliminating the need to wind line yourself. However, most homeowners still need to know how to wind a spool for cost savings and convenience.
Tools and Materials You’ll Need
Gather these items before you start loading your weed eater:
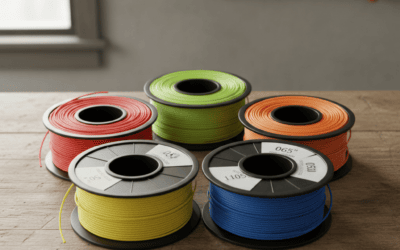
- Replacement trimmer line – Confirm the gauge (thickness) required for your model, typically .065, .080, or .095 inches. Check your owner’s manual or the spool itself for the correct gauge.
- Tape measure or ruler – To measure and cut the line to the correct length.
- Scissors or line cutter – A sharp pair of scissors or a dedicated trimmer line cutter works best.
- Your weed eater’s manual – Refer to this for model-specific directional arrows and line length requirements.
- Safety glasses – Wear these when handling the trimmer head.
The length of trimmer line you need typically ranges from 15 to 17 feet for standard residential spools, though larger commercial spools may require up to 30 feet. Your manual will specify the exact length for your model.
Step-by-Step: How to Access the Spool
Step 1: Unplug or disengage the power source. If your weed eater is gas-powered, ensure the engine is off and cool. For electric or cordless models, disconnect the power cord or remove the battery to prevent accidental activation.
Step 2: Locate the spool cover. The spool is housed inside the trimmer head at the bottom of the shaft. Look for a cover plate or cap with a center knob or bolt.
Step 3: Remove the spool cover. Most covers are held in place by a single center bolt or screw that you can turn counterclockwise by hand or with a wrench. Some models feature a push-button release on the side of the head. Refer to your manual if the cover does not come off easily. Store the cover and any springs or washers in a safe place—these are small and easily lost.
Step 4: Inspect the spool and housing. Check for debris, dried grass, or old line fragments inside. Clean these out gently with a dry cloth or soft brush. Do not use water inside the trimmer head, as this can damage internal components.
Removing Old Trimmer Line
Carefully unwind any remaining old trimmer line from the spool. If the line is tangled or broken into short pieces, use tweezers or a small hook to pull the fragments out. Dispose of the old line in the trash. Do not attempt to reuse old line, as it may be weakened or damaged.
If the spool itself appears cracked, warped, or damaged, consider replacing it rather than reloading it. A damaged spool can cause line to feed improperly and may be difficult to wind evenly.
Once you have removed all old line, the spool should be clean and ready for new line. If any adhesive residue remains, gently wipe it away with a slightly damp cloth and allow the spool to dry completely before proceeding.
Loading New Trimmer Line: The Winding Process
Step 1: Cut the trimmer line to length. Using your manual or the spool packaging, cut a length of new trimmer line. A common length is 17 feet for standard bump feed spools, but this varies. Measure twice to avoid cutting too short or too long.
Step 2: Locate the line slot and directional arrow. Most spools have a small notch or slot near the outer edge where you insert one end of the trimmer line to secure it during winding. Look for a printed or embossed arrow on the spool that indicates the correct winding direction—this is critical.
Step 3: Insert the line into the slot. Place approximately 2 to 3 inches of one end of the trimmer line into the line slot and hold it in place with your thumb and forefinger. This anchors the line so it does not unwind as you rotate the spool.
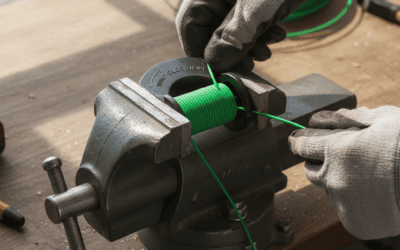
Step 4: Wind the line tightly and evenly. Rotate the spool in the direction indicated by the arrow on the spool. Apply steady tension on the line as you wind to keep it tight and prevent loose loops. Wind the line in neat, parallel passes across the spool width, avoiding overlaps or tangles. The line should form uniform, tightly wound layers. Continue winding until you reach approximately 2 inches from the outer edge of the spool, leaving room for the line to feed without binding.
Step 5: Secure the remaining line. Once you have wound most of the line, there should be another small slot or notch at the opposite end of the spool to anchor the remaining end of the line. Insert the free end into this slot to prevent the wound line from unwinding.
Important note: Winding the line in the wrong direction is a common mistake. If you wind against the arrows on the spool, the line will not advance correctly when you use the trimmer. Double-check the direction before you begin winding.
Reinstalling the Spool and Testing
Step 1: Reposition the spool in the trimmer head. Carefully place the loaded spool back into the housing, aligning any guide pins or tabs. The spool should sit flat and centered.
Step 2: Reinstall the cover and bolt. Replace the spool cover and hand-tighten the center bolt or screw. Do not over-tighten, as this can crack the cover or strip the threads. Tighten only until snug.
Step 3: Pull out the trimmer line. Feed approximately 4 to 6 inches of line out through the eyelets or slots on the cover on both sides of the trimmer head. These should be the two lines visible when you look at the front of the trimmer.
Step 4: Test the bump feed or manual advance. Reconnect the power (battery, fuel, or electrical cord) and test the trimmer on low speed in a safe, grassy area. Tap the spool head gently on the ground (if it is a bump feed model) to verify that new line advances. For manual feed models, press the advance button to feed fresh line. Listen for any unusual grinding or rattling sounds, which indicate an assembly problem.
Step 5: Trim a small test area. Verify that the line cuts cleanly and evenly. If the trimmer vibrates excessively or the line does not cut, turn off the trimmer and re-examine your loading.
Common Mistakes to Avoid
Winding the line in the wrong direction: This is the most frequent error. The line will not advance smoothly, and you may hear grinding sounds. Always confirm the winding direction matches the arrows on the spool before you begin.
Winding too loosely: Loose winding causes the line to slip and not feed evenly. Wind with steady, moderate tension to keep the line compact and secure.
Overfilling the spool: Winding too much line onto the spool causes it to jam or bind inside the head. Leave 1.5 to 2 inches of clearance at the outer edge of the spool.
Using the wrong gauge or type of line: Using line that is too thin or thick for your weed eater can cause feeding problems or damage the spool. Always match the gauge specified in your manual.
Not anchoring the line ends: If the line ends are not properly secured in the slots during winding, the entire load can unwind inside the trimmer head, creating a tangled mess.
Forgetting to pull out the line after installation: After reinstalling the cover, you must pull out enough line (typically 4–6 inches on each side) through the eyelets. Without this step, the trimmer will not cut, and the line will not feed properly.
Ignoring debris or damage: Loading new line onto a spool that is cracked, bent, or filled with debris results in poor feeding and frequent line breakage. Always clean and inspect the spool before loading.
Model-Specific Considerations
Gas-powered weed eaters: Gas trimmers often use heavier-gauge line (.080 to .095 inches) to withstand the higher cutting speed and torque. The spool access and loading process is identical to electric models, but ensure the engine is completely cold before handling the trimmer head. Always refer to the gas trimmer’s manual, as some commercial models use different spool designs.
Electric and cordless weed eaters: These typically use lighter-gauge line (.065 to .080 inches) since they operate at lower speeds. The loading process is the same. For cordless models, always remove the battery before accessing the spool to prevent accidental activation.
Bump feed versus manual advance: Bump feed spools require the line to be wound and pulled out so the edges are equal length. Manual advance spools must be wound tightly but do not require pulling out line, as the button mechanism controls line extension.
Finding your specific model’s instructions: If your owner’s manual is lost, visit the manufacturer’s website (such as Dewalt, Ryobi, Craftsman, or Stihl) and search for your model number. Most manufacturers provide PDF manuals and loading videos online. YouTube also hosts many tutorial videos for specific weed eater models and brands.
Frequently Asked Questions
Q: How often should I replace or reload the trimmer line?
A: The trimmer line wears during use and will become shorter and thinner over time. You will typically reload the spool every 4 to 8 weeks of regular use, depending on how often you trim and the density of your yard. When the line becomes too short to extend through the eyelets, reload the spool with fresh line.
Q: Can I use any type of trimmer line?
A: No. You must use the gauge and type of line specified for your weed eater model. Common gauges are .065, .080, and .095 inches. Using the wrong gauge can cause feeding problems, breakage, or damage to the spool mechanism. Check your manual or the spool itself for the correct specification.
Q: Why does my trimmer line keep breaking?
A: Line breakage can result from several causes: winding the line too loosely, using line that is too thin for your trimmer, hitting hard objects like rocks or concrete, over-tightening the spool cover, or winding the line in the wrong direction. Ensure the line is wound tightly and evenly, use the correct gauge for your model, and avoid trimming near hard surfaces.
Q: What if the spool cover is stuck or difficult to remove?
A: Apply penetrating oil (such as WD-40) around the bolt and let it soak for 15 minutes. Then use a wrench with a firm grip and gentle, steady pressure—do not force it, as you may strip the threads or crack the cover. If the bolt remains stuck after soaking, consult your manual or contact the manufacturer for guidance. Do not use excessive force.
Summary
Loading a weed eater is a straightforward task once you understand your specific trimmer’s spool design and follow the correct winding direction. Always consult your owner’s manual for model-specific instructions, measure and cut the line to the correct length, wind it tightly and evenly in the direction indicated by the spool arrows, and test the feed mechanism before resuming regular trimming. By avoiding common mistakes such as winding in the wrong direction, overfilling the spool, or using the wrong line gauge, you can ensure smooth line feeding and reliable trimmer performance for years to come.