Quick Answer: How to Start Your Lawn Mower After Winter
To start a lawn mower after winter, drain or replace old fuel with fresh gasoline (or add fuel stabilizer to existing fuel), check and top off engine oil, inspect the spark plug for fouling, clean or replace the air filter, and attempt starting with the choke fully engaged. If the engine doesn’t turn over after 5-6 pulls, check fuel flow to the carburetor, verify spark at the plug terminal, and ensure any battery is charged. Most winter start failures result from degraded fuel, fouled spark plugs, or carburetor varnish buildup—issues easily prevented through proper winterization.
Why Winter Storage Causes Lawn Mower Starting Problems
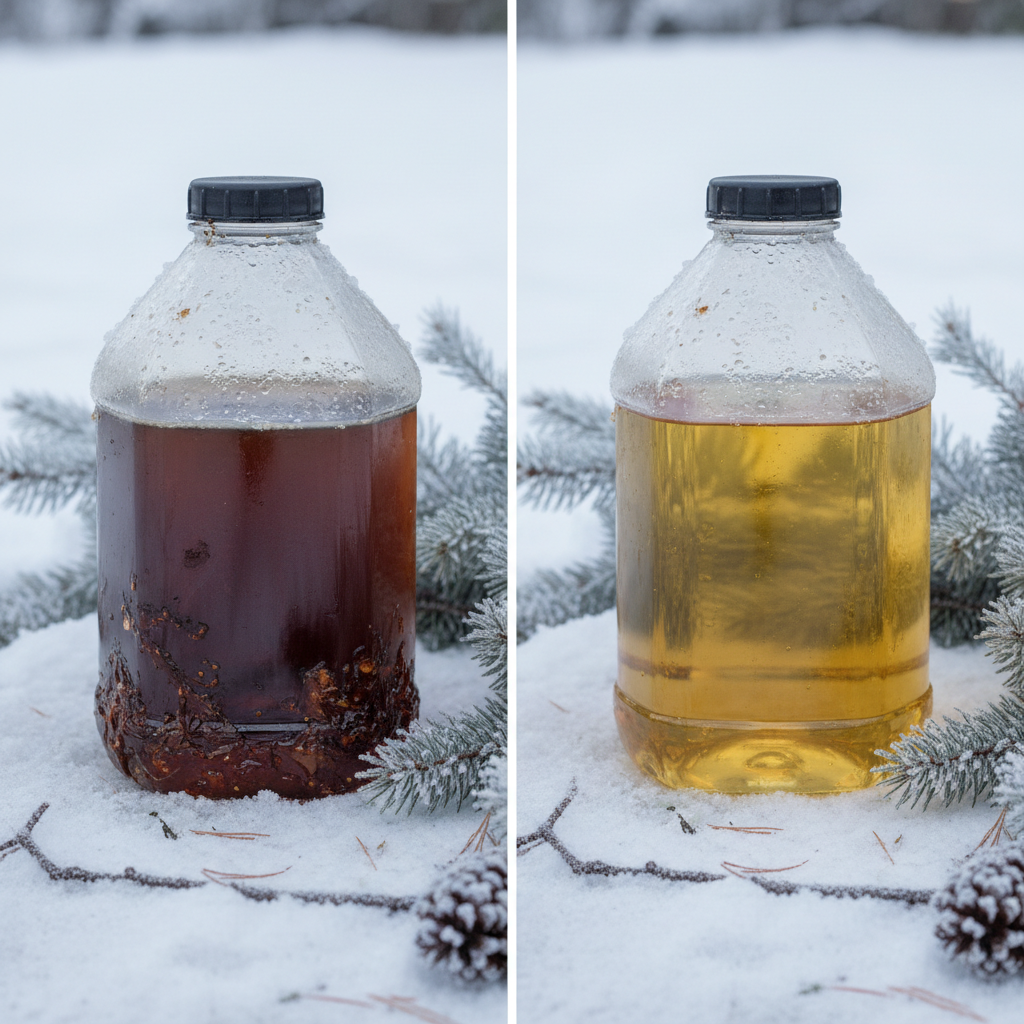
Winter dormancy creates a perfect storm for lawn mower failures. When gasoline sits unused for 30 days or longer without a stabilizer, its volatile compounds evaporate and heavier residues oxidize, leaving behind varnish and gum that clogs the fuel system and carburetor. This stale fuel cannot ignite reliably, especially in cold conditions where the engine already struggles to generate sufficient heat for combustion.
Cold temperatures thicken engine oil, reducing its ability to lubricate moving parts and increasing starter motor strain. Spark plugs sitting idle often accumulate moisture and carbon deposits, weakening the spark needed for ignition. The air filter collects dust and debris during storage, restricting airflow and creating a too-rich fuel mixture. Even properly winterized mowers can develop issues if storage conditions were damp or temperature swings were extreme.
Pre-Starting Inspection: Fuel, Oil, and Filters
Before attempting to start your mower, complete these essential checks:
Fuel System Assessment
Open the fuel cap and look inside. If fuel has been sitting all winter without stabilizer, it will appear darker or have a rancid smell. For push and small riding mowers: drain the old fuel completely using the fuel valve (if equipped) or by siphoning into a proper gasoline container. Refill the tank with fresh, quality gasoline—premium grade is unnecessary, but Top Tier fuel (from major brands like Shell, Chevron, Mobil) contains better detergents. Never use fuel older than two years, and never use fuel treated with methanol or ethanol blends higher than E10 unless your manual specifies compatibility.
If you’re uncertain whether the fuel was stabilized before storage, assume it wasn’t and drain it anyway. The cost of fresh fuel ($10–15) is far less than carburetor cleaning ($75–150).
Oil Level and Viscosity
Locate the oil dipstick (usually on the side of the engine) and check the level. Oil should reach the full mark when the mower is on level ground. If low, add the oil grade specified in your owner’s manual—typically SAE 30 for warm climates or 10W-30 for variable temperatures. Never overfill; excess oil can foul the spark plug and damage the engine.
If your mower has been stored in a climate with freezing temperatures, consider switching to a lighter winter-grade oil (10W-30 instead of straight 30W) to improve cold-start performance. Some users change oil seasonally, but this is optional unless your manual recommends it.
Air Filter Inspection
Remove the air filter cover (usually held by a single bolt or clip) and inspect the foam or paper element. If it’s visibly dirty, covered in dust, or compressed, replace it or clean it according to the filter type:
- Foam filters: Wash gently with warm soapy water, rinse thoroughly, dry completely, then re-oil lightly with foam filter oil if the manual specifies it.
- Paper filters: Tap gently on a hard surface to dislodge loose dust, but do not wash or oil—replace if heavily soiled.
A clean air filter improves fuel efficiency and starting reliability. Replacement filters cost $5–15 and take two minutes to install.
Step-by-Step Starting Procedure for Gas-Powered Mowers
Preparation
Place the mower on level, open ground away from obstacles. Ensure the blade brake or blade control lever is in the disengaged position (blades off). If your mower has a fuel valve, turn it to the ON position.
Engaging the Choke
The choke restricts airflow to enrich the fuel mixture for cold starting. Set the choke lever to the FULL or START position (consult your manual for the exact notation). On many mowers, this is a lever on the side of the carb; on others, it’s a cable or button. This step is critical—skipping it is the single most common reason engines won’t fire.
Engine Priming (If Equipped)
Some mowers have a primer button or bulb near the carburetor. Press it 3–5 times to push fresh fuel into the carburetor bowl. If your mower lacks a primer, skip this step.
Initial Pull Attempts
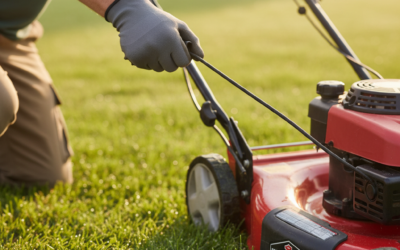
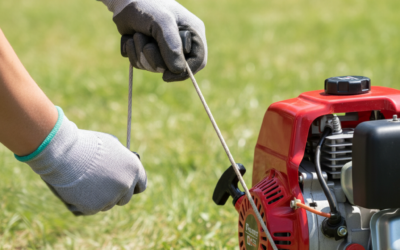
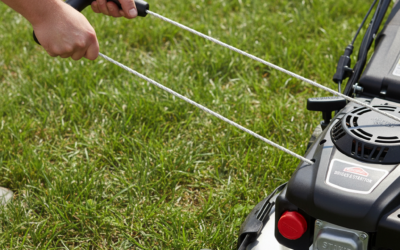
Grip the starter handle firmly and pull the cord with a smooth, deliberate motion—don’t jerk or yank. You should feel resistance as you pull. Release the handle and allow the cord to rewind automatically. Repeat 3–4 times. Listen for the engine to turn over; you may hear a few pops or sputters as fuel ignites.
Gradual Choke Adjustment
After the first few pulls, if you hear the engine trying to start but not fully catching, gradually move the choke lever toward the RUN position (open). Pull the cord 2–3 more times. The engine should fire and begin running. Once running smoothly, move the choke fully to RUN.
Warm-Up
Let the engine idle for 30 seconds to 1 minute. The engine may surge or stutter initially—this is normal. Once it settles into a steady idle, the mower is ready to use.
If the engine doesn’t start after 6–8 deliberate pulls, stop and move to troubleshooting rather than continuing to pull, which will only flood the carburetor with fuel.
Spark Plug Inspection and Replacement
A fouled spark plug is one of the top causes of winter no-start conditions. To inspect:
Safe Removal
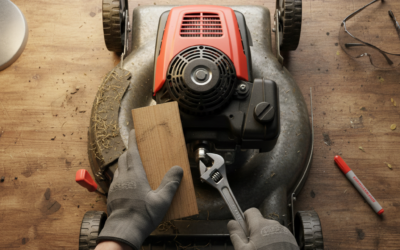
Locate the spark plug wire (a rubber boot on top of the plug). Twist it gently side-to-side while pulling straight up to disconnect it. Use a spark plug socket (usually 13/16-inch or 14mm) attached to a ratchet to unscrew the plug from the cylinder head. Set the used plug aside.
Diagnosis
Examine the plug’s center electrode (the thin rod in the middle):
- Wet and black: Fouled by excess fuel or oil; the plug needs replacement or thorough cleaning.
- Dry and white: Normal appearance; likely not the cause of starting failure.
- Heavily eroded or damaged: The plug is worn out and must be replaced.
- Gap too wide or inconsistent: The plug is defective and should be replaced.
Cleaning vs. Replacement
Lightly fouled plugs (wet with fuel but not heavily carbon-coated) can be cleaned with a wire brush or soft cloth to remove loose debris, then reinstalled. However, replacement is recommended for plugs that have been idle all winter, as they are inexpensive ($3–8) and a new plug guarantees a strong spark. Most lawn mower engines run a single plug; replacing it takes 3–5 minutes.
Installation of a New Plug
Thread the new plug by hand into the cylinder head to avoid cross-threading, then tighten firmly with the socket—not so tight that you strip the threads, but snug enough that it won’t come loose. Reconnect the spark plug wire by pushing it onto the terminal until you hear a click.
Carburetor and Fuel System Troubleshooting
If the engine still won’t start after spark plug inspection, the carburetor likely has varnish buildup from old fuel.
Checking Fuel Flow
Remove the fuel line from the carburetor inlet (have a small container ready to catch fuel). Open the fuel valve and observe if fuel flows freely. If fuel dribbles slowly or not at all, the fuel line or filter may be clogged. Inspect the fuel filter (if equipped) for debris, and replace if necessary. If fuel flows, the issue is inside the carburetor.
Carburetor Cleaning for DIY Users
For light varnish deposits, try this non-invasive approach: Locate the carburetor bowl at the base of the carburetor body. It may have a drain plug or bolt. Gently open it to allow old fuel and deposits to drip out into a container. Close the plug, refill the fuel tank with fresh fuel plus a fuel system cleaner (such as Techron or Gumout), and attempt starting again. The fresh fuel and cleaner agent will help dissolve light varnish as the engine runs.
For heavy varnish buildup visible on the carburetor exterior or in the bowl, professional carburetor cleaning or replacement is more effective than DIY efforts. A repair shop can disassemble, soak, and ultrasonically clean internal passages that remove deposits reliably. Cost typically ranges from $75–150 for cleaning or $150–300 for a new carburetor if internal damage is present.
When to Seek Professional Service
If the fuel flows, spark plug is new and dry, and the air filter is clean but the engine still won’t start after 8–10 pulls with proper choke technique, internal engine issues or advanced carburetor problems are likely. Professional diagnosis ensures correct repair and prevents further damage.
Starting Tips for Electric-Start and Riding Mowers
Battery-Powered Push Mowers
Electric-start push mowers rely on a rechargeable lithium-ion or lead-acid battery. Before your first start of the season, charge the battery fully (typically 4–8 hours). If the mower has been stored in a cold garage, move it to a warm location for 1–2 hours before charging; cold temperatures reduce battery charging efficiency. Once charged, the starting procedure mirrors gas mowers with manual pulls—engage the choke, press the electric start button, and allow the engine to warm up.
Riding Mower Engines
Riding mowers often have larger engines (single or twin-cylinder) and may feature electric start exclusively. Before attempting to start:
- Check the battery: Riding mower batteries should hold 12 volts (for standard models). If you have a multimeter, verify voltage. Dead or weak batteries are common after winter. Charge or replace as needed.
- Inspect the fuel system: Same steps as push mowers—drain old fuel, check filters, and inspect fuel lines for cracks or blockages.
- Change the oil: Riding mower engines are larger and benefit from a full oil change as part of spring maintenance. Refer to your manual for capacity and grade.
- Disengage the blade: Ensure the blade engage/disengage lever is in the OFF position before starting.
Turn the key to the START position and hold until the engine fires (typically 1–3 seconds). Release the key; the engine should continue running. If it doesn’t start within 5 seconds, release the key, wait 30 seconds, and try again to avoid starter motor strain.
Frequently Asked Questions
Q: How long can lawn mower fuel sit before it goes bad?
A: Untreated gasoline degrades within 30 days of storage. After 30 days, it begins to oxidize and separate, leaving varnish and gum that clogs carburetors and fuel injectors. With a fuel stabilizer added at the time of storage, fuel can remain usable for 1–2 years. To prevent issues, always add stabilizer before storing your mower for the season, or drain the fuel tank completely.
Q: What should I do if my mower starts but immediately dies?
A: An engine that fires but won’t stay running typically indicates a lean fuel mixture (too much air, not enough fuel). This often happens as the choke is being adjusted from START to RUN. Move the choke lever slowly back toward START and let the engine run at a richer setting for 1–2 minutes. Once stable, gradually adjust the choke to RUN. If the engine continues to stall, the carburetor may need professional cleaning to ensure proper fuel delivery.
Q: Can I use last year’s gasoline in my lawn mower?
A: No, not reliably. Gasoline stored in an open or poorly sealed container will degrade significantly over a year. Even in a sealed tank with stabilizer, fuel quality declines. Always start the season with fresh fuel from a reputable station. The cost of fresh fuel ($10–15) is negligible compared to the risk of carburetor damage and repair costs.
Q: Do I need to winterize my mower before storage to avoid these problems?
A: Yes. Proper winterization involves draining the fuel tank or filling it completely with stabilizer-treated fuel (to minimize air and moisture), changing the oil, and storing the mower in a dry location. Taking these steps in the fall eliminates most spring starting issues. If you didn’t winterize last fall, the steps in this guide will help recover your mower for the season.
When to Call a Professional or Use Professional Service
DIY troubleshooting works well for common issues like stale fuel, fouled spark plugs, and light carburetor varnish. However, seek professional service if:
- The engine turns over but produces no spark when a new spark plug is installed.
- Fuel flows to the carburetor, but the engine won’t fire after 10+ pull attempts with correct choke use.
- The mower has sat unused for more than 2 years, or you’re unsure of its storage history.
- You see rust inside the fuel tank or hear grinding sounds from the engine.
- The carburetor has visible cracks or fuel leaks from the bowl.
A professional tune-up at a mower repair shop typically costs $75–150 and includes fuel system cleaning, spark plug replacement, air filter service, and oil change—a worthwhile investment for mowers that won’t start despite your efforts. Many shops offer seasonal spring maintenance packages at a discounted rate.
Key Takeaways
Starting a lawn mower after winter is straightforward if you follow these priorities: replace old fuel with fresh gasoline, check the oil level, inspect and replace the spark plug, clean the air filter, and use proper choke technique during starting attempts. Most no-start issues stem from preventable problems—stale fuel and fouled spark plugs—that take minutes to address. If your mower still won’t start after these steps, professional carburetor cleaning or engine service is a reliable next step. For future seasons, winterize your mower in the fall by adding fuel stabilizer and storing it in a dry location; this investment of 10 minutes in the fall saves hours of troubleshooting in the spring.