Direct Answer: How to Remove a Mower Blade
To safely remove a mower blade, first disconnect the spark plug wire to prevent accidental engine starting. Tip the mower on its side with the air filter facing up to prevent oil leakage. Mark the blade’s top side with paint or tape for correct reinstallation, then use a wrench to hold the blade steady while loosening the center bolt (typically turning counterclockwise). Remove the bolt, washer, and blade. The exact process varies slightly depending on whether you have a push mower, riding mower, or a model with quick-release pins.
Safety Precautions Before Starting
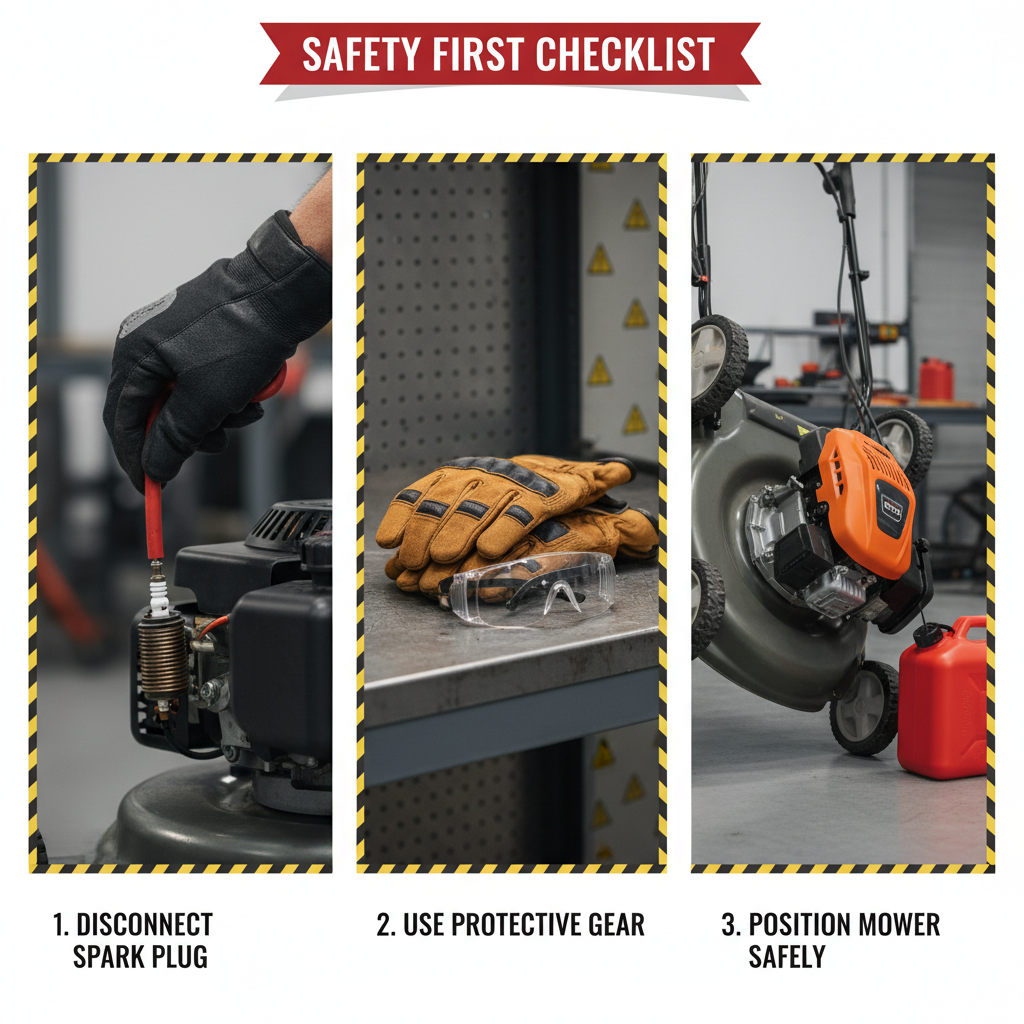
Removing a mower blade involves sharp edges and potential for serious injury, so safety must come first. Follow these critical steps before attempting any blade removal:
- Disconnect the spark plug wire: This is the single most important safety step. Even with the engine off, the blade could turn if accidentally bumped, or the engine could accidentally start. Always pull the spark plug wire completely off the spark plug to prevent any possibility of accidental ignition.
- Wear protective equipment: Use heavy-duty work gloves to protect your hands from the sharp blade edges. Safety glasses protect your eyes from debris or small parts that might fly loose during removal.
- Position the mower correctly: For push mowers, tip the unit on its side with the air filter facing upward. This prevents oil and fuel from draining into the air filter, which can damage the engine. Never tip it with the carburetor side down.
- Allow the engine to cool: If the mower has been running recently, wait at least 10-15 minutes for the engine and blade to cool. Hot metal can cause burns.
- Work on a flat surface: Place the mower on a level work surface to prevent it from rolling or shifting unexpectedly while you’re working on it.
Tools and Materials You’ll Need
Gathering the right tools before you start prevents delays and frustration. Here’s what to have ready:
| Tool/Material | Purpose | Notes |
|---|---|---|
| Socket wrench or adjustable wrench | Loosen the center bolt holding the blade | Most common sizes are 3/8″, 1/2″, or 9/16″. Check your mower’s manual for the exact size. |
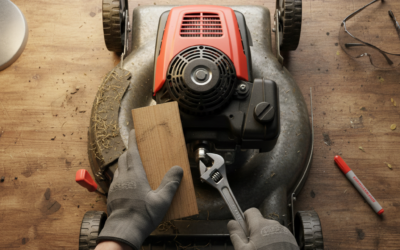
| Block of wood or blade holder | Hold the blade steady while loosening the bolt | Prevents the blade from spinning and protects your hands from the sharp edges. |
| Paint marker or tape | Mark the blade’s top side | Ensures correct blade orientation during reinstallation. Critical for proper mower performance. |
| Blade balancer (optional) | Check blade balance after cleaning or sharpening | An unbalanced blade causes vibration and engine strain. Available at hardware stores for $10-20. |
| Socket set or wrench set | Accommodate various bolt sizes | Ensures you have the right fit without stripping bolts. |
How to Remove a Blade from a Push Mower
Push mowers are the most common type, and their blade removal process is straightforward once you understand the steps.
Step 1: Prepare the Mower
- Disconnect the spark plug wire and set it aside where it won’t accidentally reconnect.
- Tip the mower on its side, ensuring the air filter side faces upward. Most push mower air filters are on the side near the fuel tank.
- If you’re unsure which way is up, consult your owner’s manual or look for the air filter location on your specific model.
Step 2: Mark the Blade
- Using a paint marker or tape, clearly mark the top side of the blade. The blade must be reinstalled in the same orientation, as blades are typically sharpened on one side only.
- Mark it with an arrow or large “TOP” label so there’s no confusion during reassembly.
Step 3: Secure and Loosen the Blade
- Place a wooden block against the blade to prevent it from spinning.
- Using the appropriately sized wrench, apply steady pressure to loosen the center bolt. The bolt typically turns counterclockwise to loosen, though some models may differ—check your manual if unsure.
- Once loose enough to turn by hand, remove the bolt completely along with any washers underneath it.
Step 4: Remove the Blade
- Carefully lift the blade away from the mower deck. Be mindful of the sharp edges.
- Place it on a clean, flat surface, keeping the marked side visible so you remember the correct orientation.
How to Remove Blades from a Riding Mower
Riding mowers typically have multiple blades mounted under the cutting deck. The removal process is similar to push mowers but requires additional steps for deck access.
Before You Begin
- Disconnect the spark plug wires—riding mowers usually have multiple plugs, so disconnect all of them.
- Lower the mower deck completely or, if your model allows, raise it to maximum height for better access. Check your manual for the recommended deck position for blade service.
- Some riding mowers require removing the deck or accessing blades from underneath. Consult your manual for your specific model’s procedure.
Removal Process
- Mark each blade’s top side and note its position (front left, front right, rear, etc.) if you have multiple blades.
- Use the same block-and-wrench technique as with push mowers to loosen each blade’s center bolt.
- Remove one blade at a time to avoid confusion about blade positions and orientations.
- Keep bolts and washers organized—consider using labeled containers for each blade’s hardware.
Removing Quick-Release Blades
Some modern mowers, particularly commercial-grade models and certain premium residential mowers, use quick-release pin systems instead of bolts.
- Locate the release pins: These are typically spring-loaded pins on either side of the blade assembly.
- Press or pull the pins: Depending on the design, push the pins inward or pull them outward to disengage the blade.
- Slide the blade out: Once the pins are disengaged, the blade should slide out easily from its mounting bracket.
- Keep track of hardware: Quick-release systems have fewer parts than bolt systems, making reassembly simpler—but mark blade orientation just the same.
If your mower uses quick-release pins and you’re unfamiliar with the mechanism, refer to your owner’s manual or contact the manufacturer for guidance before attempting removal.
What to Check While the Blade Is Off
With the blade removed, this is an ideal time to inspect and maintain it properly.
Inspect for Damage
- Look for cracks or splits: Cracked blades must be replaced immediately, as they can fail suddenly during operation.
- Check for bends: A bent blade is dangerous and should not be straightened. Replace it instead.
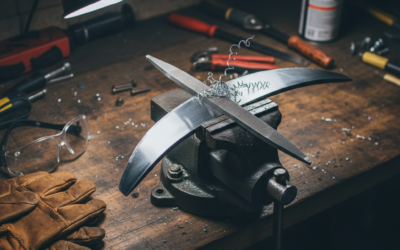
- Examine the cutting edge: If the blade is dull, you can sharpen it. If it’s severely worn, chipped, or has lost significant material, replacement is safer.
- Measure blade thickness: Most mower blades should maintain a minimum thickness. If worn down significantly from sharpening, replacement is needed.
Clean the Blade
- Remove dried grass, mud, and buildup using a stiff brush or scraper.
- Wipe the blade clean with a cloth.
- A clean blade is easier to inspect and measure accurately.
Check Blade Balance
- An unbalanced blade is one of the leading causes of mower vibration and premature engine wear.
- Place the blade on a blade balancer tool (or hang it on a nail through its center hole) to check balance.
- If one side dips lower than the other, the blade is unbalanced.
- You can carefully remove a small amount of material from the heavier side using a file or grinder, but professional sharpening services often balance blades as part of their service.
Decide: Sharpen or Replace?
- Sharpen if: The blade is intact, has no visible damage, and just needs a sharp edge restored.
- Replace if: The blade is bent, cracked, severely worn, or has lost more than 1/4 inch of material to wear or previous sharpenings.
How to Reinstall the Blade Safely
Proper reinstallation is just as important as removal. An incorrectly installed blade can cause poor cutting performance, vibration, and safety hazards.
Before Reinstalling
- Verify the blade is balanced and free of damage.
- Ensure your blade is clean and dry.
- Check that the mounting bolt, washers, and hardware are clean and undamaged. Replace any worn or stripped bolts.
Reinstallation Steps
- Orient the blade correctly: Look for your mark indicating the top side. The blade must be installed in the same orientation as it was removed. Reversed blades cut poorly and can cause vibration.
- Insert the blade: Slide the blade onto the center bolt or mounting shaft.
- Add the washer and bolt: Place the washer on the bolt, then thread the bolt by hand to avoid cross-threading.
- Tighten securely: Use your wrench to tighten the bolt. If your mower manual specifies a torque value (measured in foot-pounds), use a torque wrench to achieve the correct tightness. If no specification is given, tighten until snug—not so tight that you strip the bolt, but tight enough that the blade won’t slip.
- Reconnect the spark plug wire: Firmly push the spark plug wire back onto the spark plug until you hear or feel it click into place.
Test Before Full Use
- Start the mower and let it run at idle for 30 seconds to check for unusual vibration or sounds.
- If the mower vibrates excessively, stop it immediately, disconnect the spark plug wire, and recheck blade installation and balance.
- Assuming no issues, you’re ready to resume normal mowing.
Common Mistakes to Avoid
- Forgetting to mark blade orientation: Reinstalling a blade upside down causes poor cutting and vibration.
- Not disconnecting the spark plug: This is the leading cause of accidental blade injuries. Always disconnect it.
- Tipping the mower with the air filter facing down: This allows oil to drain into the air filter, damaging the engine.
- Over-tightening the bolt: This can strip the bolt hole or bend the blade. Tighten until snug, not with maximum force.
- Installing an unbalanced blade: This causes vibration and accelerates engine wear.
- Ignoring visible damage: Cracks and bends will worsen and can cause blade failure during operation.
Frequently Asked Questions
Q: How often should I remove and inspect my mower blade?
A: Inspect your blade at the beginning of each mowing season and after every 20-30 hours of mowing, or sooner if you notice increased vibration or poor cutting performance. For heavy use (weekly mowing throughout the season), monthly inspections are reasonable. Most homeowners find that blade sharpening once per season is sufficient, though heavy-use mowers may need sharpening every 2-3 weeks.
Q: Can I sharpen my blade myself, or should I take it to a professional?
A: You can sharpen a blade yourself using a metal file or angle grinder if you have experience with these tools. However, professional blade sharpening services ($10-25 per blade) ensure the blade is sharpened correctly and balanced precisely. An improperly sharpened or unbalanced blade causes vibration and poor cutting. If you’re unsure, professional sharpening is the safer choice.
Q: Which way does the bolt turn—clockwise or counterclockwise?
A: Most mower blade bolts loosen by turning counterclockwise. However, some models use reverse-threaded bolts that loosen by turning clockwise. Check your mower’s manual for your specific model. When in doubt, try gently—forcing a bolt in the wrong direction can damage the threads.
Q: What should I do if I can’t loosen the blade bolt?
A: If the bolt is stuck, try applying penetrating oil (like WD-40) and let it sit for 15-20 minutes before trying again. Use a properly sized wrench or socket to avoid stripping the bolt head. If still stuck, carefully apply heat with a heat gun for a few minutes to expand the metal and break corrosion. Never use excessive force, as you risk breaking the bolt or rounding the hole.
When to Call a Professional
While blade removal is a straightforward DIY task for most mower owners, consider professional help if:
- You cannot access the blade due to deck design or obstruction.
- The bolt is severely stripped or cannot be loosened.
- You’re unsure about your specific mower model’s procedure.
- The blade shows signs of internal damage (cracking near the center hole) that suggests a structural problem.
- Multiple bolts are seized or corroded.
A professional small engine technician can handle these situations safely and ensure your mower is back in working order quickly.