Quick Answer: How to Test a Lawn Mower Solenoid
Bridge the two large terminals on the solenoid with an insulated jumper wire while the ignition is off — if the starter motor cranks, the solenoid is faulty. Confirm with a multimeter: a healthy solenoid coil reads 0.4–4 ohms across the small terminals, and a voltage-drop test across the large terminals during cranking should show less than 0.5 V. A solenoid that fails any one of these three tests needs replacement, not repair.
What Is a Lawn Mower Solenoid and What Does It Do?
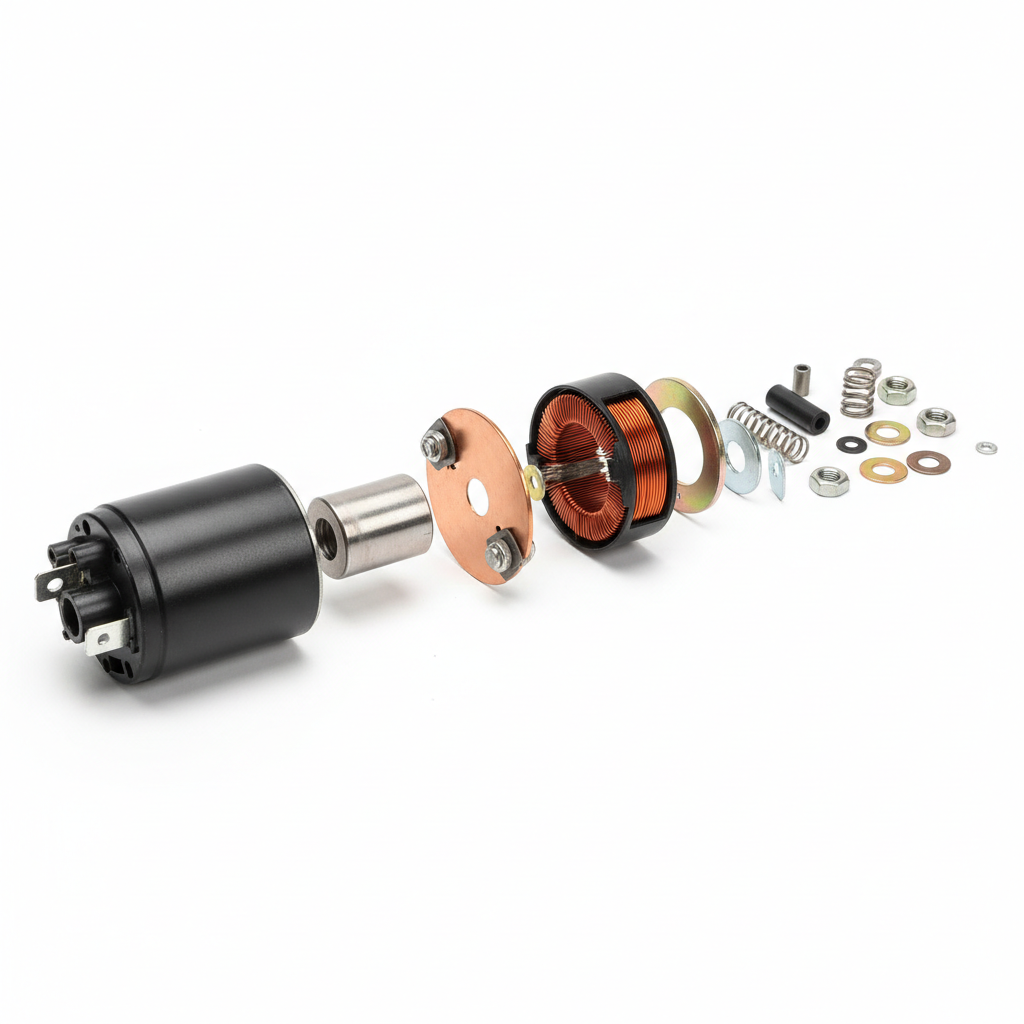
The starter solenoid is an electromagnetic switch mounted between the battery and the starter motor. When the ignition key turns to the start position, low-amperage current from the ignition circuit energizes the solenoid coil, which closes an internal set of contacts and sends high-amperage current directly to the starter motor. Without a functioning solenoid, that high-current path never completes and the engine never cranks.
This article covers the starter solenoid exclusively. Two other solenoid types exist on some mowers and are not the same component:
- Fuel solenoid (anti-afterfire solenoid): Sits on the carburetor and cuts fuel when the ignition is switched off. Symptoms of failure are engine runs rough or dies — not a no-crank condition.
- PTO solenoid: Engages the blade clutch on riding mowers. Failure causes the blades to stop engaging, not a starting problem.
Riding mowers are the dominant use case — the solenoid is typically bolted to the firewall, frame rail near the battery, or starter motor bracket. Push mowers with electric start and zero-turn mowers use the same electrical principle but differ in solenoid location and access; those variants are addressed in their own section below.
Symptoms That Suggest a Bad Solenoid (Before You Test)
Run through this checklist before testing. If one or more symptoms match and the battery is confirmed fully charged, a solenoid test is the correct next step.
- Single loud click when the key turns: The coil is energizing but the internal contacts are not closing properly.
- Rapid clicking (chatter): The solenoid contacts are closing and opening repeatedly because voltage drops the moment current is drawn — often a weak battery, but a high-resistance solenoid can cause the same pattern.
- No sound at all, no crank: The solenoid coil is open, or no voltage is reaching the solenoid (check ignition switch and safety interlock switches first).
- Solenoid body hot to the touch after a start attempt: Excessive coil resistance or internal short is dissipating current as heat.
- Starter motor does not engage despite a fully charged battery: Classic sign of a failed solenoid contact set.
Overlapping symptoms to rule out first: A dead or heavily sulfated battery produces identical click symptoms. Charge or load-test the battery before condemning the solenoid. A seized starter motor will also prevent cranking even when the solenoid is functioning correctly.
Safety Precautions and Tools Needed Before Testing
Follow these steps every time, in order:
- Park on a flat, hard surface and set the parking brake.
- Chock the rear wheels.
- Disconnect the spark plug wire(s) to eliminate any ignition risk during bypass testing.
- Wear insulated gloves when handling battery terminals or jumper wires near live circuits.
- Keep the fuel cap tight and avoid open flames near the fuel tank.
Tool paths:
| Test | Tool Required | Multimeter Setting |
|---|---|---|
| Bypass test | Insulated jumper wire (10–12 AWG) | None |
| Resistance / continuity test | Digital multimeter | Ohms (Ω) |
| Voltage-drop test | Digital multimeter | DC Volts (V DC) |
Test 1: The Jumper Wire Bypass Test (No Multimeter Required)
This is the fastest test and gives an immediate pass/fail result. Perform it first.
Steps
- Locate the solenoid. On most riding mowers it sits near the battery, on the firewall, or bolted to the starter motor bracket. It will have two large (thick-gauge) terminals and two small terminals.
- Turn the ignition OFF and remove the key. The spark plug wire should already be disconnected per the safety steps above.
- Identify the two large terminals. These carry main battery and starter current — they are the terminals the heavy red cable from the battery and the heavy cable to the starter motor connect to.
- Bridge the two large terminals with the insulated jumper wire. Touch one end to each large terminal simultaneously. Do not contact the small terminals or the solenoid body.
- Observe the starter motor.
Pass/Fail Criteria — Bypass Test
| Result | What It Means | Next Action |
|---|---|---|
| Starter motor cranks immediately | FAIL — solenoid is bad. Current flows freely when bypassed but the solenoid’s internal contacts are not closing on their own. | Replace the solenoid. |
| No crank, no click | PASS — solenoid contacts are not the problem. Fault likely in starter motor, wiring, or the battery itself. | Test the starter motor and battery next. |
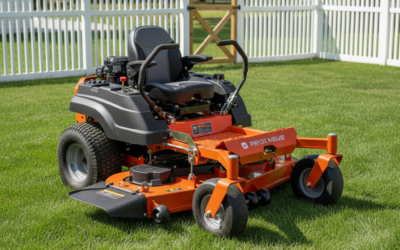
Zero-turn mower note: The solenoid is typically mounted behind or beneath the seat panel. Remove the seat or access panel before attempting this test. The terminal layout and test procedure are identical.
Test 2: Multimeter Resistance (Continuity) Test
This test checks the health of the solenoid’s internal electromagnetic coil. It does not test the main contacts, so always use it alongside Test 1 or Test 3 for a complete diagnosis.
Steps
- Disconnect the solenoid from the mower. Remove both large-terminal cables and the two small-terminal wires. Label them before removal.
- Set the multimeter to ohms (Ω).
- Touch the multimeter probes to the two small terminals (coil/trigger terminals) — not the large terminals.
- Read the resistance.
Pass/Fail Criteria — Resistance Test
| Reading | Interpretation | Action |
|---|---|---|
| 0.4 – 4 ohms | PASS — coil is healthy. | Proceed to Test 3 to check contacts. |
| OL / ∞ (open loop) | FAIL — coil is open-circuited. No current will flow; solenoid cannot energize. | Replace solenoid. |
| 0 ohms or near 0 | FAIL — coil is shorted. Will draw excessive current and overheat. | Replace solenoid. |
Why this test is insufficient on its own: A coil can measure within spec while the internal contact surfaces are pitted, corroded, or welded shut. Those contact failures are what the voltage-drop test catches.
Test 3: Voltage-Drop Test (Most Accurate In-Circuit Test)
The voltage-drop test is the method used by professional technicians because it replicates real operating conditions with full load current flowing. It catches contact resistance that the ohms test cannot detect.
Steps
- Reconnect the solenoid to the mower (all terminals back in place). Reconnect the spark plug wire for this test since the engine must attempt to crank.
- Set the multimeter to DC Volts (V DC).
- Connect the red probe to the large battery-side terminal of the solenoid and the black probe to the large starter-side terminal.
- Have a helper turn the ignition key to the START position while you read the meter. Hold for no more than 5 seconds per attempt to protect the starter motor.
- Read the voltage drop.
Pass/Fail Criteria — Voltage-Drop Test
| Voltage Drop Reading | Interpretation | Action |
|---|---|---|
| Less than 0.5 V | PASS — solenoid contacts are good. Minimal resistance across the main current path. | Look elsewhere for the fault (starter motor, wiring, battery). |
| 0.5 V or more | FAIL — excessive contact resistance. The solenoid is robbing voltage that the starter motor needs. | Replace solenoid. |
Why voltage drop beats a simple continuity check: Contact resistance only becomes measurable under load. A solenoid contact set with light pitting may read nearly 0 ohms on a bench test but drop a full volt under the 50–200 A draw of a starter motor, leaving the starter starved of power.
How to Test a Solenoid on a Push Mower or Zero-Turn Mower
Push Mower with Electric Start
Push mowers equipped with electric start use a smaller solenoid — sometimes integrated inline on the wiring harness rather than bracket-mounted. The bypass and multimeter tests apply identically; the only difference is access:
- Trace the positive battery cable from the battery toward the starter motor — the solenoid will be in-line along that cable run.
- On some models the solenoid is a sealed cylinder with no exposed terminals; in that case, a voltage-drop test in-circuit is the only practical method without cutting the harness.
- Coil resistance specifications (0.4–4 ohms) and voltage-drop thresholds (under 0.5 V) remain the same.
Zero-Turn Mower
- The solenoid is typically located under or behind the seat, mounted on the frame near the battery compartment. Remove the seat or access panel to reach it.
- Some zero-turn models use a relay instead of a traditional cylindrical solenoid — identifiable by its rectangular plug-in body and four or five blade terminals rather than two large bolt terminals. A relay is tested by swapping it with an identical relay of known good condition, or by applying 12 V directly to the coil pins and listening for a click.
- Terminal layout on a zero-turn solenoid is the same as a riding mower; all three tests apply without modification.
Replace or Repair? Decision Tree After Testing
Starter solenoids are sealed, non-serviceable components — internal contacts and coil windings cannot be accessed or adjusted in the field. Replacement is always the correct action when a solenoid fails any test. Attempting to clean or shim internal contacts risks worse electrical failures and voids any parts warranty.
Solenoid Replacement Cost
Replacement solenoids for riding mowers cost $10–$30 at hardware stores, tractor supply retailers, and online. OEM parts from the mower manufacturer cost slightly more but guarantee fitment.
How to Match a Replacement Solenoid
- Terminal count: Match the number of large terminals (usually 2) and small terminals (usually 2; some have 3 if a ground terminal is present).
- Voltage rating: Virtually all residential mower solenoids are 12 V; confirm on the old solenoid’s label.
- Mounting pattern: Match the bracket holes or strap configuration to the original mount point.
- Cross-reference by mower model number rather than by solenoid appearance alone — use the mower’s deck or frame plate model number when ordering.
What If Replacing the Solenoid Doesn’t Fix the Problem?
If a new solenoid produces the same symptom, the fault is upstream or downstream of the solenoid:
- Ignition switch: No voltage reaching the small solenoid terminals when the key turns = failed ignition switch. Test with a multimeter on DC volts across the small terminals during a start attempt — should read battery voltage (12–12.6 V).
- Safety interlock switches: Riding mowers have seat, blade-engagement, and brake/clutch interlock switches that cut power to the solenoid circuit when open. A failed or misaligned interlock is a common misdiagnosis as a solenoid fault. Bypass each interlock switch in sequence (consult the mower’s wiring diagram) to isolate the offending switch.
- Wiring harness: Corroded connectors or broken wires between the battery, ignition switch, and solenoid cause the same no-crank symptoms. Inspect and probe each connector in the start circuit.
- Starter motor: If the solenoid passes all tests and a new solenoid makes no difference, bench-test the starter motor directly by applying 12 V to its terminal — if it doesn’t spin freely, the starter motor is seized or failed.
Frequently Asked Questions
What does a bad solenoid sound like on a lawn mower?
A bad solenoid typically produces one of two sounds: a single loud click each time the key is turned (contacts failing to close), or a rapid chattering or clicking (contacts bouncing open and shut under load). No sound at all — combined with a fully charged battery — points to an open coil or no voltage reaching the solenoid from the ignition circuit.
Can I permanently bypass the solenoid to keep mowing?
Bridging the solenoid terminals permanently is not safe and not recommended. The solenoid serves as a high-amperage protection switch — removing it means the full starter circuit is live whenever battery voltage is present, creating a fire and shock hazard. Replacement solenoids cost $10–$30 and take under 30 minutes to swap; bypass is not a viable long-term solution.
How many ohms should a lawn mower starter solenoid read?
A healthy solenoid coil reads 0.4–4 ohms across the two small (trigger) terminals. A reading of OL (open loop) means the coil is broken internally. A reading near 0 ohms means the coil is shorted. Either failure requires solenoid replacement.
How do I know if it’s the solenoid or the ignition switch that’s bad?
Set a multimeter to DC volts and probe the two small terminals on the solenoid while a helper turns the key to START. If you read battery voltage (12–12.6 V) at those terminals and the solenoid still does not click, the solenoid is bad. If you read 0 V or very low voltage, the ignition switch or a safety interlock switch upstream is preventing voltage from reaching the solenoid.