Quick Answer: Connect a 12V battery charger set to 2–10 amps to the battery terminals—red clamp to the positive (+) terminal first, black clamp to the negative (−) terminal second. Charge for 4–8 hours in a well-ventilated area with the mower off. Disconnect in reverse order: black clamp first, red clamp second. Never charge a cracked, swollen, or leaking battery.
What Kind of Battery Does a Riding Lawn Mower Use?
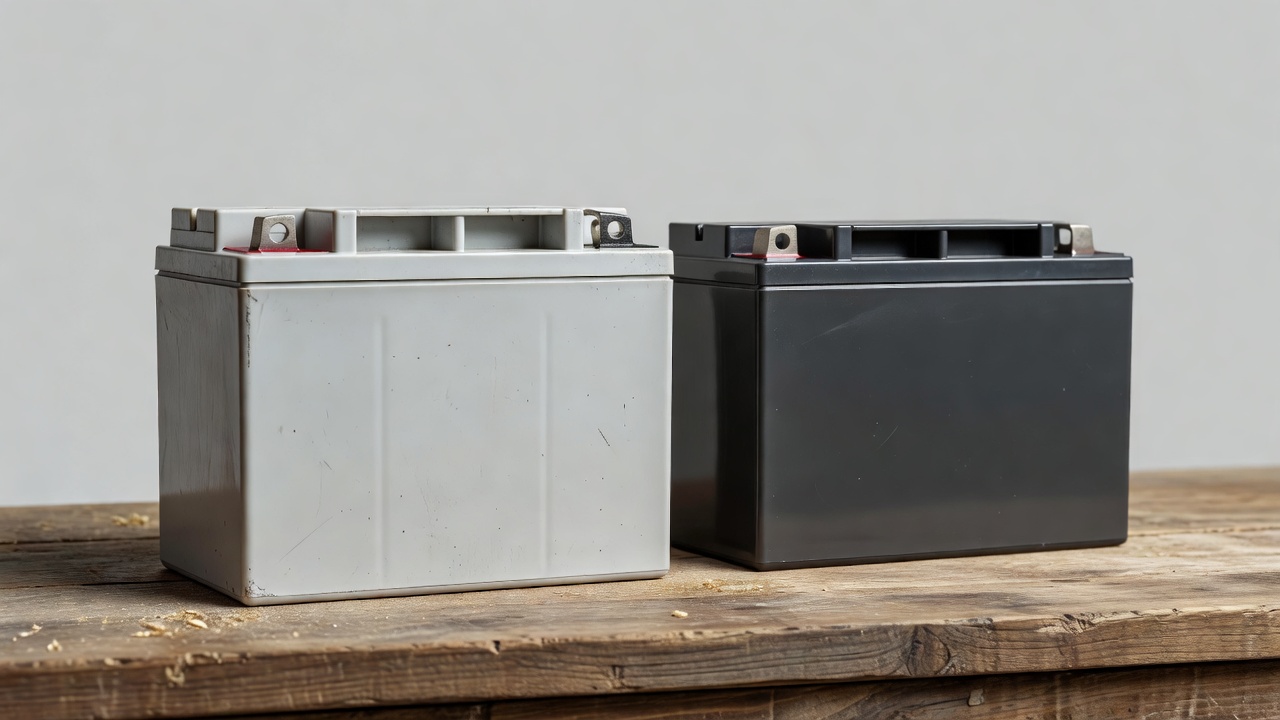
The vast majority of riding lawn mowers use a 12V lead-acid battery—the same basic chemistry as a car battery, only smaller. Most are group U1 batteries rated between 150–300 cold cranking amps (CCA). Briggs & Stratton and John Deere both specify 12V lead-acid as standard across their riding mower lines. Some newer battery-powered or hybrid mower platforms use lithium-ion packs, which require a dedicated lithium charger—using a lead-acid charger on a lithium pack can damage cells or create a fire hazard.
How to identify your battery type:
- Check the label on the battery case—it will state the voltage (12V) and chemistry (lead-acid, AGM, or lithium-ion).
- Consult your mower’s owner manual under the “Battery” or “Electrical” section.
- AGM (Absorbent Glass Mat) lead-acid batteries are sealed and maintenance-free but still charge the same way as flooded lead-acid at standard voltages.
All instructions below apply to 12V lead-acid and AGM batteries—the dominant type. If your mower uses a lithium pack, follow the charger instructions supplied by the mower manufacturer.
What You Need Before You Start
Gather everything before touching the battery to avoid interruptions mid-process.
- Battery charger — a smart/automatic charger or trickle charger rated for 12V lead-acid batteries. A 2-amp trickle charger is safest for overnight charging; a 10-amp setting speeds up the process but generates more heat.
- Multimeter or voltmeter — to test battery voltage before and after charging.
- Safety glasses and gloves — lead-acid batteries contain sulfuric acid and emit hydrogen gas during charging.
- Baking soda solution (1 tablespoon baking soda + 1 cup water) and an old toothbrush — to clean corroded terminals before connecting clamps.
- Wrench or socket set — to disconnect battery cables if removing the battery from the mower.
- Clean rags — for drying terminals after cleaning.
Trickle Charger vs. Smart Charger: Which Should You Use?
| Charger Type | Best For | Risk |
|---|---|---|
| Trickle charger (manual) | Slow, steady overnight charge (2 amp) | Can overcharge if left unattended too long |
| Smart / automatic charger | Set-and-forget; switches to float mode when full | Minimal—best choice for most users |
| Battery maintainer / tender | Off-season storage; keeps battery at full charge indefinitely | Not designed for deeply discharged batteries |
A smart charger is the recommended option—it monitors voltage and automatically drops to a safe float/maintenance mode once the battery reaches full charge, eliminating overcharge risk.
How to Locate and Access the Battery on a Riding Mower
Battery location varies by brand and model. The two most common positions:
- Under the seat — Lift or slide the seat forward. The battery sits in a plastic tray secured by a hold-down bracket. Common on Husqvarna, Cub Cadet, and many Murray models.
- Under the hood / front panel — Lift the hood like a car. The battery is mounted near the engine. Common on John Deere and Craftsman tractors.
Do you need to remove the battery to charge it? No—you can charge the battery in place on the mower as long as you have clear access to both terminals. Removing it first does give you a safer, more controlled workspace and is recommended for beginners or if the battery shows heavy corrosion.
To disconnect the battery (if removing it):
- Turn the ignition key to OFF and remove it.
- Disconnect the negative (black) cable first—this prevents accidental short circuits.
- Disconnect the positive (red) cable second.
- Remove the hold-down bracket and lift the battery straight out.
If terminals show white or bluish-green crust (corrosion), apply the baking soda solution, scrub with the toothbrush, rinse with water, and dry completely before charging.
How to Check Battery Voltage Before Charging
Testing voltage first tells you whether the battery is chargeable or already failed. Set your multimeter to DC voltage (20V range), touch the red probe to the positive terminal and the black probe to the negative terminal.
| Voltage Reading | Battery State | Action |
|---|---|---|
| 12.6V or higher | Fully charged | Battery is fine; diagnose elsewhere |
| 12.0V–12.5V | Partially discharged | Charge normally; should recover well |
| 11.8V–11.9V | Low / deeply discharged | Charge on 2-amp setting; monitor closely |
| Below 11.8V | Likely sulfated or dead cell | Attempt charge; replace if voltage won’t rise |
A battery reading below 11.8V under load (while trying to start the mower) is typically considered unrecoverable and should be replaced rather than repeatedly charged. After a full charge cycle, re-test: a healthy battery should return to 12.6V or above at rest.
How to Charge a Riding Lawn Mower Battery: Step-by-Step
Follow this sequence exactly. Skipping steps—especially clamp order—risks sparks, short circuits, or battery damage.
- Move the mower to a ventilated area. Work outdoors or in an open garage. Lead-acid batteries emit hydrogen gas during charging, which is flammable and can accumulate in enclosed spaces. Keep all open flames, cigarettes, and sparking tools away.
- Turn the mower off and remove the ignition key. Never charge with the engine running.
- Put on safety glasses and gloves.
- Inspect the battery. Do not charge a battery with a cracked case, swollen sides, or visible electrolyte leakage. Dispose of it at a battery recycling facility.
- Clean corroded terminals if needed (baking soda solution, scrub, rinse, dry) before connecting clamps.
- Set the charger to the correct amp setting before connecting clamps.
- 2 amps — slow, safe overnight charge (recommended for most users); takes 8–12 hours for a deeply discharged battery.
- 10 amps — faster charge; takes 1–2 hours for a partially discharged battery but generates more heat. Do not leave unattended on a manual charger at this setting.
- If your charger has a 12V / lawn & garden mode, select it.
- Connect the red (positive) clamp to the positive (+) terminal first. The positive terminal is usually marked with a + symbol and may have a red cover.
- Connect the black (negative) clamp to the negative (−) terminal second.
- Plug in the charger and turn it on. On a smart charger, the indicator light will confirm it has detected the battery. On a manual charger, the ammeter needle will deflect.
- Allow the battery to charge for 4–8 hours on a 10-amp setting, or overnight (8–12 hours) on a 2-amp setting. A smart charger will stop automatically when full.
- When charging is complete, unplug the charger from the wall first.
- Disconnect the black (negative) clamp first, then the red (positive) clamp second. This reverse-order disconnect minimizes spark risk.
- Re-test voltage with the multimeter. A fully charged 12V lead-acid battery should read approximately 12.6V at rest (after 30 minutes off the charger).
- Reinstall the battery if removed: positive cable first, then negative cable. Reinstall the hold-down bracket.
Clamp Connection Order — Quick Reference
| Step | Action | Why |
|---|---|---|
| Connect 1st | Red clamp → Positive (+) terminal | Establishes circuit safely |
| Connect 2nd | Black clamp → Negative (−) terminal | Completes circuit; any spark occurs away from battery gas |
| Disconnect 1st | Black clamp from Negative (−) terminal | Breaks circuit first; prevents short if red clamp touches chassis |
| Disconnect 2nd | Red clamp from Positive (+) terminal | Safe removal of live clamp after circuit is already open |
Charging Safety Precautions You Must Follow
- Ventilate the area. According to battery manufacturer safety data, lead-acid batteries produce hydrogen and oxygen gas during charging. Hydrogen is explosive at concentrations above 4% in air—charge outdoors or with the garage door fully open.
- No open flames or sparks. This includes cigarettes, power tools, and arc welders anywhere near the charging battery.
- Wear PPE. Safety glasses protect against sulfuric acid spray if a terminal arcs; gloves protect skin.
- Never charge a damaged battery. A cracked, bulging, or leaking battery can rupture or explode under charging pressure. Dispose of it immediately.
- Do not charge a frozen battery. A deeply discharged lead-acid battery can freeze in cold weather. Allow it to reach room temperature before charging.
- Connecting clamps in the wrong order risks a spark near the battery, which can ignite hydrogen gas. Always red first on, black first off.
- Do not charge indoors in an unventilated room, basement, or sealed garage without active airflow.
How to Jump-Start a Riding Lawn Mower Battery
Jump-starting gets the engine running immediately when the battery is too low to crank—it is a short-term fix, not a substitute for a full charge. Run the mower for at least 20–30 minutes after jump-starting to allow the alternator to partially recharge the battery, then follow up with a full charger cycle.
Jump-Starting with a Car Battery
- Park the car close enough for jumper cables to reach but do not let the vehicles touch.
- Turn the car engine OFF before connecting cables.
- Connect red clamp to mower positive (+) terminal.
- Connect red clamp to car positive (+) terminal.
- Connect black clamp to car negative (−) terminal.
- Connect black clamp to an unpainted metal surface on the mower frame (not the mower battery negative terminal)—this reduces spark risk near the battery.
- Start the car and let it idle for 2–3 minutes.
- Attempt to start the mower. If it starts, let it run for 20–30 minutes.
- Disconnect cables in strict reverse order: mower frame, car negative, car positive, mower positive.
Important: Do not run the car engine at high RPM while jump-starting the mower—the mower’s electrical system operates at lower current demands than a car, and a high-output alternator can damage mower electronics.
Jump-Starting with a Portable Jump Starter
A portable jump pack is the safest and most convenient option—no second vehicle required. Ensure the jump starter is rated for 12V lead-acid batteries.
- Confirm the jump starter is charged.
- Connect red clamp to mower positive (+), black clamp to mower negative (−) or unpainted frame ground.
- Turn the jump starter on, then attempt to start the mower.
- Disconnect clamps in reverse order after the mower starts.
Jump-starting does not fully recharge the battery. After the mower runs, connect a proper charger and complete a full 4–8 hour charge cycle.
When to Replace Instead of Recharge Your Riding Mower Battery
Repeated charging cannot fix a battery with dead cells. Replace the battery if any of these signs are present:
- Voltage won’t rise above 12.0V after a full charge cycle — indicates one or more dead cells inside the battery.
- Voltage drops below 11.8V under load (cranking the engine) — the battery cannot deliver sufficient current even when charged.
- Battery is 3–5 years old. Most riding mower batteries have a service life of 3–5 years under normal use, per battery manufacturer specifications. Age alone is reason to test with a dedicated battery load tester.
- Case is swollen, cracked, or leaking. Physical damage is not repairable—dispose of the battery at a recycling center immediately.
- Battery self-discharges rapidly — fully charged today, dead in two days without use, indicates internal leakage or sulfation beyond recovery.
Choosing a Replacement Battery
Match the replacement battery by:
- Group size — most riding mowers use U1 (check your owner manual).
- CCA rating — match or exceed the original specification. Higher CCA improves cold-weather starting.
- Terminal position — U1L (positive terminal left) vs. U1R (positive terminal right). Getting this wrong means cables won’t reach.
Frequently Asked Questions
How long does it take to charge a riding lawn mower battery?
At a 2-amp trickle setting, a fully discharged 12V riding mower battery takes 8–12 hours to reach full charge. At a 10-amp setting, a partially discharged battery charges in 1–2 hours. Always re-test with a multimeter after charging—a healthy fully charged battery reads 12.6V or higher at rest.
Can I charge the mower battery without removing it?
Yes. Charging in place is fine as long as both terminals are accessible and the ignition is off. Connect and disconnect clamps in the correct order (red first on, black first off). If terminals are heavily corroded or access is tight, removing the battery first gives a safer work environment.
What happens if I connect the charger clamps in the wrong order?
Connecting the negative clamp first (with the charger live) can cause a spark near the battery, which risks igniting hydrogen gas emitted by the battery. Always connect red (positive) first, then black (negative). Reverse this exact sequence when disconnecting.
Why does my riding mower battery keep dying after charging?
A battery that won’t hold a charge after a full cycle typically has a dead cell (internal failure), is sulfated from long-term discharge, or is 3–5 years old and past its service life. Perform a load test at an auto parts store—many offer this free. If voltage collapses under load, replace the battery. Also check that the mower’s charging system (alternator/stator) is functioning, as a faulty charging system drains the battery during storage.