

Direct Answer: To clean the carb on a Honda lawn mower, shut the fuel valve and disconnect the spark plug wire, remove the air filter housing and carburetor, disassemble the bowl, float, and jets, spray all passages with carburetor cleaner, clear jets with compressed air, then reassemble and reinstall in reverse order. The full process takes 45–90 minutes and resolves the majority of hard-start, rough-idle, and stalling problems caused by varnish and gum deposits from stale or ethanol-blended fuel.

Pros
- Large-size design named in product title
- Sharpening and balancing functions listed
- Listed as a new upgraded version

Pros
- Adjustable 15-to-45-degree range in title
- Sharpening and balancing functions listed

Pros
- Sharpener and balancer functions in title
- 15-to-45-degree adjustable setting listed
- Built for lawn mower blade maintenance
Pros
- Includes replacement gaskets and a 98079-55846 spark plug
- Matches Honda HRR216 and HRS216 lawn mower models
- Designed around the 16100-Z8B-901 carburetor specification
Cons
- Restricted to select Honda GCV160 mower applications
- Installation requires basic mechanical tools and skills
Signs Your Honda Lawn Mower Carburetor Needs Cleaning
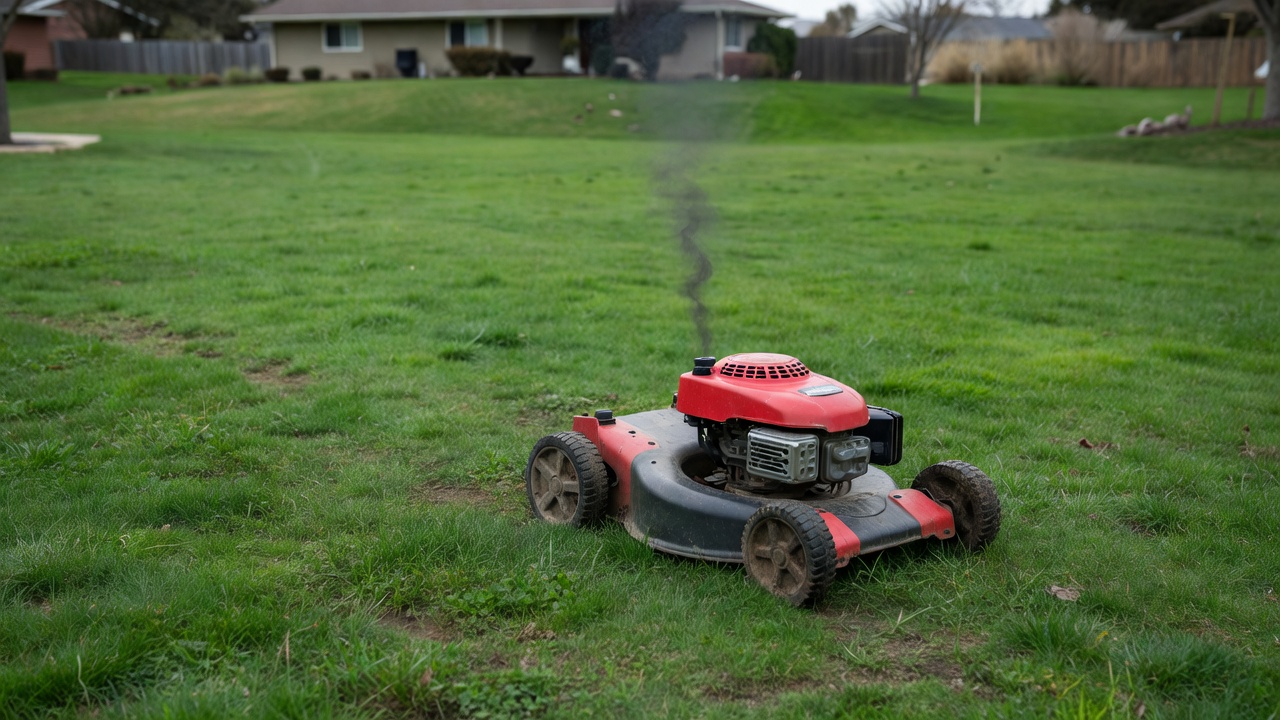
Before disassembling anything, confirm that a dirty carburetor is actually the problem. The following symptoms, especially after winter storage or extended non-use, point directly to carburetor contamination rather than a failed ignition system or low compression.
- Engine won’t start after sitting: Stale fuel leaves behind varnish and gum deposits that clog the main jet and pilot jet, blocking fuel flow entirely.
- Engine starts then dies: The mower fires on the choke because the enriched mixture forces fuel past partial blockages, but stalls at normal idle when fuel delivery drops.
- Rough or hunting idle: A partially clogged pilot jet (also called the slow jet) disrupts the air-fuel ratio at low RPM, causing surging or uneven idling.
- Black smoke from exhaust: A stuck float or blocked air passage floods the engine with excess fuel, producing rich black smoke.
- Fuel leaking from the bowl: A deteriorated bowl gasket or o-ring, often caused by ethanol fuel swelling rubber components, allows fuel to seep out around the carburetor bowl.
Clean vs. replace: If the carburetor body is cracked, the throttle shaft is worn with visible play, or cleaning produces no improvement after two attempts, replacement is the correct call. For most seasonal varnish cases, cleaning restores full function.
Tools and Materials You Need Before You Start
Gather every item before starting. Stopping mid-disassembly to find a tool risks losing small parts like the float needle or bowl o-ring. When planning workspace deployment, consider the engineering criteria outlined in our jbl partybox club 120 vs sony srs xv500 guide. For complementary hardware performance, examine our breakdown on riding lawn mower specifications.
| Item | Notes |
|---|---|
| Carburetor cleaner spray | Aerosol with a thin straw nozzle (e.g., Berryman B-12, Gumout Carb & Choke Cleaner). Choose a formula safe for rubber and plastic if the carb is cleaned assembled; use a stronger solvent-based cleaner for metal-only soaking. |
| Compressed air | Can of compressed air or an air compressor with a blow gun. Safe working pressure for carburetor passages is 30–50 PSI; higher pressure risks distorting brass jets. |
| Flathead and Phillips screwdrivers | Bowl screw on Honda GCV160 and GCV190 is typically a flathead or Phillips #2. |
| 10 mm wrench or socket | For the carburetor mounting bolts on most Honda GCV-series engines. |
| Needle-nose pliers | For throttle linkage springs and the float pin. |
| Small wire or carb jet cleaning tool | A single strand from a wire brush or a purpose-made jet cleaning wire. Never drill out jets—it alters the fuel metering orifice permanently. |
| Clean shop rags or paper towels | Absorbent surface to lay out small parts without losing them. |
| Small container or parts tray | Keeps bowl screws, float pins, and jets organized. |
| Carburetor rebuild kit (optional but recommended) | Includes a replacement bowl gasket, o-ring, and float needle for the specific model. Costs $5–$15 and eliminates reassembly leaks. |
| Safety glasses and nitrile gloves | Carburetor cleaner is aggressive—protect eyes and skin. |
Safety Steps Before Touching the Carburetor
These steps are non-negotiable. Skipping them risks fire, accidental engine start, or fuel spills. When planning workspace deployment, consider the engineering criteria outlined in our jbl partybox club 120 vs sony srs xv500 guide.
- Let the engine cool completely. A hot engine near fuel and carburetor cleaner vapors is a fire hazard. Wait at least 30 minutes after last use.
- Work in a well-ventilated area. Carburetor cleaner fumes are flammable and toxic. Work outdoors or in an open garage with no ignition sources nearby.
- Close the fuel shutoff valve. On Honda GCV160 and GCV190 mowers, the fuel shutoff valve is located on the bottom of the fuel tank where the fuel line connects. Turn it to the OFF (closed) position to prevent fuel from draining when the fuel line is disconnected.
- Disconnect the spark plug wire. Pull the rubber boot off the spark plug tip and move it away from the plug. This prevents accidental engine start if the flywheel rotates during work—a critical safety step on any small engine service job.
- Drain residual fuel from the bowl. Place a rag or small container beneath the carburetor before loosening the bowl screw to catch any remaining fuel.
How to Remove the Carburetor from a Honda Lawn Mower
The following steps apply directly to Honda GCV160 and GCV190 engines, which power the majority of Honda walk-behind mowers. The layout is nearly identical across both engine families. For additional operational safety benchmarks, see our published testing notes on z890 vs x870e motherboard. For complementary hardware performance, examine our breakdown on weed eater specifications.
Step 1: Remove the Air Filter Housing
- Locate the air filter cover on the side of the engine opposite the muffler.
- Unscrew the single wing nut or Phillips screw securing the cover and set it aside.
- Slide out the foam or paper air filter element. Inspect it—replace if heavily soiled, as a clogged filter causes the same symptoms as a dirty carburetor.
- Remove the air filter housing/backplate. It is secured by two or three Phillips screws directly to the carburetor inlet. Remove these screws and pull the housing straight off. The gasket between the housing and carburetor may stick—peel it off carefully and note its orientation.
Step 2: Disconnect the Throttle and Choke Linkages
- Study the throttle linkage and choke linkage connections before disconnecting them. Take a photo with your phone—this is the single most effective way to avoid reassembly confusion.
- The throttle linkage on GCV160/GCV190 consists of a bent wire rod that hooks into a slot on the carburetor throttle lever. Use needle-nose pliers to unhook it by sliding the rod sideways out of the slot.
- The choke linkage is a similar bent rod connecting the choke plate lever to the operator control handle cable. Unhook it the same way.
- The governor spring connects the governor arm to the throttle lever. Hook your finger under it and stretch it off its post—do not cut or discard it.
Step 3: Remove the Fuel Line
- Have a rag ready to catch drips even with the fuel valve closed—residual fuel will be present in the line.
- Use needle-nose pliers to slide the wire clamp back along the fuel line, away from the carburetor inlet fitting.
- Twist and pull the fuel line off the carburetor inlet fitting. If it’s stuck from age, twist firmly—do not yank straight, as this can crack the carburetor inlet.
Step 4: Unbolt the Carburetor
- The carburetor mounts to the engine intake with two 10 mm bolts (GCV160) or two longer studs with nuts (GCV190). Remove them and retain the hardware.
- Pull the carburetor straight off the intake studs. An intake gasket will be behind it—remove it carefully and replace it if it shows any cracking or compression damage.
How to Disassemble and Clean the Carburetor
Work over a clean rag or tray. The carburetor contains several small parts—the float needle in particular is easy to lose.
Step 1: Remove the Carburetor Bowl
- Hold the carburetor with the bowl facing down. The bowl screw is a single large-headed screw at the bottom center of the bowl.
- Place a rag beneath and unscrew the bowl screw counterclockwise. Fuel and sediment will drip out—this is normal.
- Pull the bowl straight down off the carburetor body. The bowl o-ring or gasket sits in a groove around the bowl rim—remove it and set it aside. If it’s cracked, flattened, or swollen (a common result of ethanol fuel damage), replace it from your rebuild kit.
Step 2: Remove the Float and Float Needle
- The float is a hollow plastic or brass pontoon hinged to a pin across the carburetor body. Use a small flathead screwdriver or a pin punch to push the float hinge pin out sideways.
- Lower the float and you will see the float needle—a small tapered pin with a rubber tip—hanging from a clip on the float or resting in the needle seat. Remove it carefully and inspect the rubber tip. A grooved or flat-spotted tip causes flooding and should be replaced.
- Inspect the float itself: shake it near your ear. Any sloshing sound indicates a crack and fuel inside the float, which causes the engine to run rich. Replace a damaged float.
Step 3: Remove and Clean the Main Jet
- The main jet is a brass fitting screwed into the center of the carburetor body, visible inside the bowl cavity. It has a flathead slot.
- Use a correctly sized flathead screwdriver (the slot must fit snugly—a loose blade strips the soft brass). Unscrew the main jet counterclockwise.
- Hold the jet up to light. The center hole should be a perfect, clean circle. A clogged main jet will show partial or total blockage—often a tan or brown varnish film.
- Spray carburetor cleaner through the jet in both directions. Follow with compressed air at 30–50 PSI. If blockage persists, pass a single strand of fine wire through the hole once, then repeat the spray and air sequence. Never enlarge the orifice.
Step 4: Clean the Pilot Jet (Slow Jet)
- On GCV160 and GCV190 carburetors, the pilot jet (also called the slow jet) is a smaller brass fitting located adjacent to the main jet or recessed in the side of the carburetor body. Not all versions have a removable pilot jet—some have a fixed drilled passage. Check whether yours has a slotted head.
- If removable, unscrew and clean it using the same spray-and-air method as the main jet.
- If fixed, spray carburetor cleaner directly into the pilot passage opening and follow with compressed air. Repeat 2–3 times.
Step 5: Clean All Passages in the Carburetor Body
- Spray carburetor cleaner into every visible port, passage, and orifice in the carburetor body. Watch for cleaner to emerge from corresponding passages—this confirms the passage is open.
- Pay specific attention to the idle circuit passages (small holes near the throttle plate) and the emulsion tube ports (small holes drilled around the main nozzle).
- Blow compressed air through every passage after spraying. Hold the carburetor up to light to verify openings are clear.
- Soaking option: For heavy varnish deposits, submerge only the metal carburetor body (no rubber parts, no plastic floats) in a container of carburetor dip or aerosol cleaner for 30 minutes to overnight. Rinse with clean cleaner and blow dry with compressed air afterward.
Step 6: Clean the Bowl
- Wipe out any sediment or varnish from inside the bowl with a rag dampened with carburetor cleaner.
- Inspect the bowl screw’s center hole—it doubles as a fuel passage on some Honda carburetors. Clear it with cleaner and air if blocked.
How to Reassemble and Reinstall the Carburetor
Reassemble in the reverse order of disassembly. Take your time at each step—most post-cleaning failures trace back to a misaligned float, a cross-threaded bowl screw, or a reversed linkage. To compare alternative configurations, check our hands-on review of marshall stanmore iii vs harman kardon onyx studio 8.
- Install the main jet and pilot jet. Thread them in by hand first, then snug firmly with a screwdriver. Do not overtighten—brass jets in an aluminum body strip easily.
- Install the float needle. Clip it back onto the float or set it into the needle seat, depending on the design.
- Reinstall the float and hinge pin. The float should swing freely on the pin without binding. With the carburetor inverted, the float should sit roughly parallel to the carburetor body face—this is the basic float height check. Consult your model’s service manual if adjustment is needed.
- Install the bowl gasket or o-ring. Seat it evenly in the groove. Use a new one from the rebuild kit if the original showed any damage.
- Reinstall the bowl. Thread the bowl screw in by hand, then tighten to snug plus a quarter-turn. Honda specifies approximately 7–10 Nm (60–90 in-lb) for the bowl screw—firm but not forceful.
- Reinstall the carburetor onto the engine. Use a new intake gasket if the original was damaged. Thread the mounting bolts in evenly and torque to snug.
- Reconnect the fuel line and slide the clamp back over the fitting.
- Reconnect the throttle and choke linkages using your reference photo. Verify that moving the operator handle causes the throttle plate to open and close smoothly and the choke plate operates correctly.
- Reinstall the air filter housing with its gasket, followed by the air filter element and cover.
How to Test the Mower After Cleaning the Carburetor
- Open the fuel shutoff valve to the ON position.
- Reconnect the spark plug wire.
- Set the choke to CLOSED (full choke) for a cold start, as you would normally.
- Start the engine. A freshly cleaned carburetor typically starts within 2–3 pulls. If it doesn’t start after 5–6 pulls, check for fuel at the bowl (loosen the bowl screw slightly to confirm fuel is reaching the carb) and confirm the spark plug fires.
- Once running, open the choke gradually as the engine warms, typically over 60–90 seconds.
- Let it run for 5–10 minutes at a steady idle and under blade load to confirm stable operation. A smooth, even idle without surging or stalling confirms successful cleaning.
- Adjust the idle screw if needed. The idle adjustment screw (also called the throttle stop screw) is a small flathead screw on the side of the carburetor body that controls the throttle plate position at idle. Turn it clockwise to raise idle speed, counterclockwise to lower it. Target a smooth idle without stalling—Honda GCV engines typically idle at approximately 1,500 RPM at no load.
Still won’t run after cleaning? Check these in order: (1) spark plug condition—replace if fouled or more than two seasons old; (2) intake gasket seal—a vacuum leak causes the same symptoms as a clogged carburetor; (3) float height—an incorrect float level floods or starves the engine; (4) carburetor replacement—if the throttle shaft is worn, cleaning won’t restore performance. For additional operational safety benchmarks, see our published testing notes on z890 vs x870e motherboard.
How Often Should You Clean a Honda Lawn Mower Carburetor?
Cleaning frequency depends primarily on fuel quality and storage practices rather than hours of use.
- Annual cleaning at minimum: At the start of each mowing season, inspect the carburetor and clean it if the mower was stored with untreated fuel. This interval covers the majority of residential Honda mower owners.
- Ethanol-blended fuel (E10 and above): Ethanol-blended fuel degrades and phase-separates in as little as 30 days, depositing varnish and gum throughout the fuel system and carburetor passages. Owners using E10 fuel who store without a stabilizer will likely need carburetor cleaning every season.
- Use fuel stabilizer for storage: Add a quality fuel stabilizer (such as Sta-Bil 360 or Sea Foam) to the fuel tank before any storage period exceeding 30 days. Most manufacturer formulations claim to keep fuel stable for up to 24 months in sealed containers; in an installed fuel system, 12 months is the practical upper limit. Run the engine for 2–3 minutes after adding stabilizer to ensure treated fuel reaches the carburetor.
- Use ethanol-free fuel when possible: Ethanol-free gasoline (available at many marinas and some fuel stations as recreational fuel) significantly reduces varnish buildup and eliminates the rubber swelling caused by ethanol. Honda small engine documentation recommends gasoline with no more than 10% ethanol (E10) and explicitly advises against E15 or higher blends.
- Drain the carburetor for long storage: After adding stabilizer and running the engine, shut the fuel valve and run the engine until it stalls from fuel starvation. This empties the carburetor bowl of fuel, eliminating the source of varnish deposits during storage.
Everything You Need to Know: Clean Carb On Honda Lawn Mower FAQ
Can I clean the Honda lawn mower carburetor without removing it?
Partially. With the air filter removed, spraying carburetor cleaner into the throat while the engine runs can dissolve light deposits in the throttle body and venturi. However, this method cannot reach the main jet, pilot jet, or bowl passages. For any meaningful blockage causing hard-start or stalling symptoms, full removal and disassembly is required. To compare alternative configurations, check our hands-on review of marshall stanmore iii vs harman kardon onyx studio 8.
What is the bowl screw torque on a Honda GCV160 or GCV190 carburetor?
Honda service documentation specifies the carburetor bowl screw at approximately 7–10 Nm (60–90 in-lb). Tighten to snug resistance plus a quarter-turn by feel if a torque wrench is not available. Overtightening cracks the bowl or strips the screw head; undertightening causes fuel leaks past the bowl o-ring.
Why does my Honda mower run rich (black smoke) after cleaning the carburetor?
Black smoke after reassembly typically indicates a stuck or misaligned float that holds the needle valve open, allowing excess fuel into the bowl. Remove the bowl and confirm the float swings freely on its hinge pin and the needle tip seats properly in the needle valve seat when the float rises. A damaged float (fuel inside the float body) causes the same symptom—shake it to check. Users looking for related component recommendations can explore our dyson v8 cyclone vs bissell featherweight stick breakdown.
Do I need a carburetor rebuild kit every time I clean the carb?
Not every time, but it is the recommended practice whenever the carburetor is fully disassembled. A rebuild kit for Honda GCV160 and GCV190 costs $5–$15 and includes the bowl o-ring, bowl gasket, and float needle—the three components most likely to fail and cause fuel leaks or poor fuel metering. Replacing them proactively during cleaning avoids a repeat disassembly job within the same season.
For more hands-on benchmarks and buying recommendations, consult our guides on heavy-duty chainsaw buyer guide, as well as high-CFM commercial leaf blower guide.
Mechanical safety standards, operational tolerances, and protective gear guidelines align with benchmark specifications established by the American National Standards Institute (ANSI).









