Loading a weed eater means replacing the trimmer line wound on the spool inside the cutting head. The basic sequence is: turn the trimmer off and disconnect power (remove the battery or disconnect the spark plug), open the cutting head to access the spool, remove any old or tangled line, feed a fresh length of line through the hole in the spool, wind it in the direction shown by the arrow on the spool or head, leave a short tail sticking out of the eyelet, reassemble the head, and test that the line feeds properly. Because spool designs differ by brand and model, always follow the arrow direction and any label printed on your specific trimmer head.
The Fast Answer: How to Load a Weed Eater
The word “loading” can mean two things: winding new trimmer line onto the spool, or installing a loaded spool into the cutting head. This guide covers both steps. Here is the high-level sequence:
- Shut off the trimmer and disconnect power (unplug, remove battery, or pull the spark-plug wire).
- Open the cutting head to reach the spool (press-and-turn, side tabs, or locking cap—method varies by model).
- Remove the old spool or any remaining line; clean debris from the head.
- Cut the correct diameter line to a length that will fill the spool without overfilling.
- Anchor one end of the line in the spool’s starter hole, then wind firmly in the direction of the arrow on the spool or cap.
- Leave a short tail protruding through each eyelet; many spools mark the intended tail length.
- Seat the spool back into the head, thread tails through the eyelets, and lock the cap or spool in place.
- Reconnect power and test: for bump-feed heads, tap the head on the ground while running to confirm line advances.
Exact opening, winding, and locking methods vary by manufacturer, so always follow the arrows and labels on your own trimmer head.
What You Need Before You Start
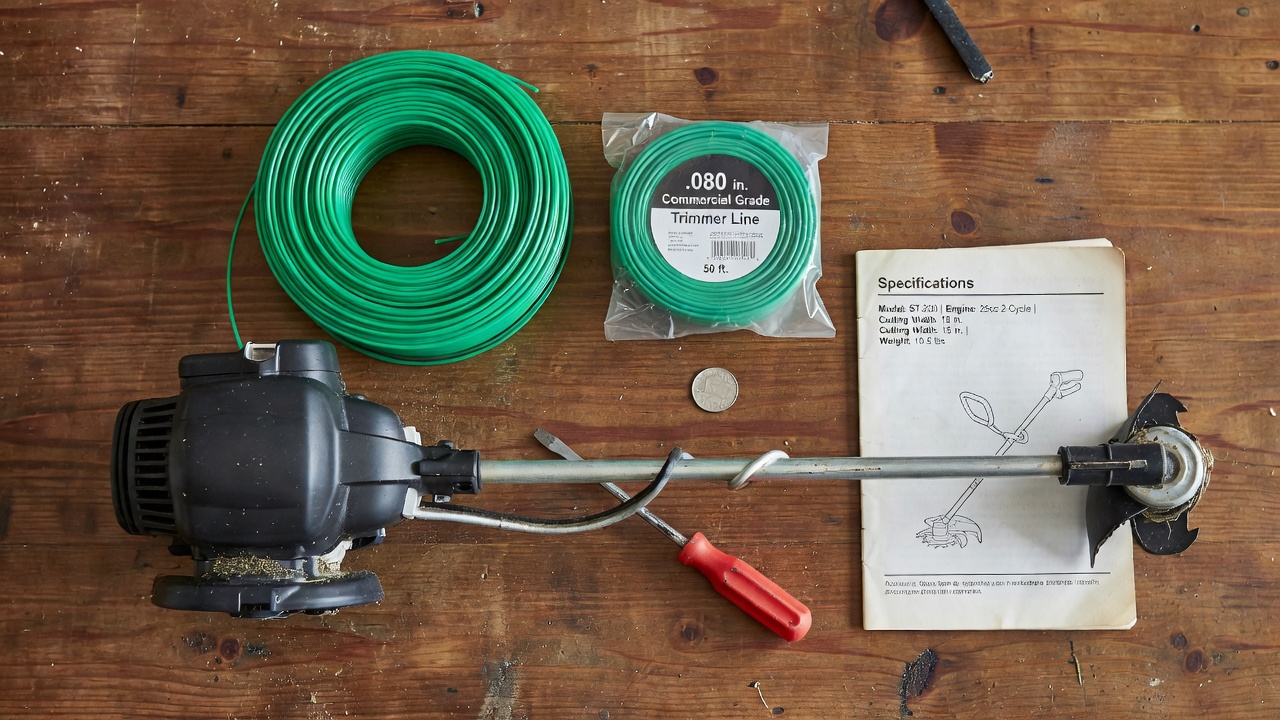
Correct Line Diameter
Check the spool, the cutting head, or the owner’s manual for the recommended line diameter. Common sizes range from about 0.065 inch for light-duty electric trimmers to 0.095 inch or larger for heavy-duty gas models. Using the wrong diameter can cause feeding problems, excessive line breakage, or damage to the head.
Tools (If Any)
Many modern heads open by hand using press-and-turn or side-release tabs. Some older or commercial heads require a coin, flat-blade screwdriver, or a specific wrench to release a locking cap. Look at your head before you begin; if a tool is needed, have it ready.
Pre-Wound Spools vs. Bulk Line
Pre-wound replacement spools are available for many popular models and eliminate the winding step. They cost more per foot of line but save time. Bulk line on a spool or donut is less expensive and lets you cut exactly the length you need. Either approach works; choose based on convenience and budget.
How to Access the Spool and Remove Old Line
Safety First: Disconnect Power
- Gas trimmers: Turn the engine off, let it cool, then disconnect the spark-plug wire and secure it away from the plug.
- Corded electric trimmers: Unplug the power cord from the outlet.
- Battery trimmers: Remove the battery pack completely.
Never work on the cutting head while the trimmer can start accidentally.
Opening the Head
Most heads use one of these general release methods:
- Press-and-turn: Push down on the cap or spool and rotate in the direction shown by an unlock arrow.
- Side tabs: Squeeze two opposing tabs or levers while pulling the cap off.
- Locking cap: Unscrew a threaded cap, sometimes requiring a coin or screwdriver slot.
Arrows or icons molded into the head usually indicate the release direction. If the head resists, do not force it; consult the manual for your model.
Clearing Old Line
Once the head is open, lift out the spool. Pull off any remaining line, including fragments stuck in the eyelets or wrapped around the spindle. Use a small brush or compressed air to remove grass clippings, dirt, and dust from the head cavity and the spool itself. A clean head feeds line more reliably.
How to Cut, Feed, and Wind the New Line
Cutting the Line
There is no universal length because spool capacities differ. A practical approach: pull a length of line that will fill the spool’s winding chamber nearly to the outer flange, leaving a small gap so the line does not bind. For a typical residential spool, this is often in the range of 10 to 25 feet, but always let the spool’s physical capacity be your guide rather than a fixed number.
Finding the Winding Direction
Look for an arrow molded into the spool, the cap, or the head body. Wind the line in the direction the arrow points. This is normally the same direction the head rotates during operation. Winding backward will prevent the bump-feed mechanism from releasing line.
Anchoring and Winding
- Insert one end of the line into the small anchor hole or slot in the spool’s core. Some spools have two holes for dual-line winding; if so, anchor each line in its own hole.
- Hold the anchor end with your thumb and wind the line onto the spool with firm, even tension. The line should lie flat, side by side, without crossing over itself.
- Avoid stretching the line as you wind; stretched line can shrink later and create slack that leads to tangles.
- Stop winding when the line reaches the outer flange or the fill line marked on the spool. Do not overfill.
- Leave a tail of line protruding from the anchor area. Many spools have a notch or slot to hold this tail temporarily; if yours does, snap the tail into it.
Dual-Line Spools
If your spool has two separate winding chambers (common on bump-feed heads), repeat the process for the second line. Keep the two lines separated; crossing them will cause jams.
How to Reassemble the Head and Install the Loaded Spool
Threading the Eyelets
Align the spool so each line tail lines up with an eyelet (the guide holes) on the head body. Push each tail through its eyelet from the inside out. Pull gently until the tail extends a short distance beyond the eyelet—many caps or spools mark the intended tail length with a line or arrow. If no mark is visible, a tail of roughly 3 to 6 inches is typical, but follow any marking on your specific head.
Seating and Locking
- Place the spool into the head cavity, making sure it sits flat on the spindle or drive hub.
- Replace the cap. On press-and-turn heads, push down and rotate in the lock direction (often opposite the winding arrow) until you feel or hear a click.
- On side-tab heads, press the cap on until both tabs snap audibly.
- On threaded caps, screw the cap down until snug; do not overtighten.
Some bump-feed heads require you to rotate the spool slightly against spring tension before the cap locks. Again, follow the arrows on your head.
Testing the Feed
Reconnect power (battery, plug, or spark-plug wire). Start the trimmer in a clear, safe area. For bump-feed heads, gently tap the head on the ground while the trimmer is running at operating speed. Line should advance a short distance each tap. For fixed-line heads, pull the lines by hand to confirm they release smoothly. If the line does not feed, stop and recheck winding direction and tail length.
Bump-Feed, Fixed-Line, and Auto-Feed Heads: Know Your System
Bump-Feed (Tap-and-Go)
The most common residential system. A spring-loaded spool releases a measured length of line when the head is tapped on the ground while the motor is running. Centrifugal force and the impact overcome the spring tension, letting line pay out. The user controls how much line is out by how often they tap.
Fixed-Line (Manual Feed)
The spool holds a single, pre-cut length of line (or several individual pieces). When the line wears down, the user stops the trimmer, opens the head, and manually pulls or threads a fresh section through the eyelets. Some fixed-line heads have a built-in cutter on the guard that trims the line to length when the head is bumped or a lever is actuated. These heads are simple and rarely jam, but require more frequent user intervention.
Auto-Feed (Self-Feed)
The head advances line automatically based on centrifugal force, line tension, or a sensor that detects line length. The user does not tap the head. These systems are convenient but can be more sensitive to line diameter and quality; using the exact specified line is especially important.
Troubleshooting: Line That Jams, Breaks, or Won’t Feed
| Symptom | Common Causes | General Fixes |
|---|---|---|
| Line won’t advance when bumped | Wound in wrong direction; tail too short to catch; spool overfilled; dirt or grass packed in head | Rewind following the arrow; ensure tails extend past eyelets; do not overfill; clean head cavity |
| Line breaks immediately | Wrong diameter (too thin for the head); old, brittle line; hitting hard objects (fences, curbs) | Use specified diameter; replace old line; avoid contact with hard surfaces |
| Line jams inside head | Crossed lines on dual spool; line wound too loosely; debris in eyelets | Rewind with even tension, keeping lines separated; clean eyelets |
| Line feeds too much / runs out fast | Spring weak or missing; cap not locked fully; line diameter too small | Check spring and cap engagement; verify correct line size |
| Auto-feed head won’t advance | Wrong line diameter; worn feed mechanism; line welded to itself from heat | Use exact specified line; inspect mechanism for wear; avoid prolonged high-RPM contact with dense growth |
If a problem persists after checking these points, consult the service manual for your specific model or contact a qualified repair technician.
Safety and Maintenance Notes</h2
Protective Gear
- Safety glasses or a face shield—line can snap and fly at high speed.
- Long pants and close-fitting clothing.
- Sturdy, closed-toe boots with good traction.
- Hearing protection for gas trimmers.
- Gloves when handling sharp or frayed line.
Power Disconnection
Always disconnect the energy source before opening the cutting head. A trimmer that starts unexpectedly while your fingers are near the spool can cause serious injury.
Storing Spare Line
Keep bulk line in a cool, dry place away from direct sunlight and heat sources. Ultraviolet light and heat make nylon line brittle over time, leading to premature breakage. Some users store line in a sealed container with a damp sponge to maintain flexibility, but avoid soaking the line.
Routine Head Maintenance
- Periodically remove the spool and clean grass buildup from the head cavity, eyelets, and spring (if present).
- Inspect the eyelets for sharp edges or wear that can cut the line.
- Check the bump knob or cap for cracks; a damaged cap can fly off at speed.
- Lubricate the spindle or drive hub lightly with a silicone-based lubricant if the manual recommends it.
Frequently Asked Questions
Can I use any brand of trimmer line?
Yes, as long as the diameter matches your trimmer’s specification. Line shape (round, square, star, twisted) affects cutting performance and noise, but diameter is the critical fit factor.
Why does my line keep welding together on the spool?
Extended high-speed contact with dense vegetation generates heat that can fuse nylon line. Let the trimmer cool periodically during heavy use, and consider a line shape designed to dissipate heat better.
How often should I replace the spool itself?
Replace the spool if the anchor holes are cracked, the flanges are warped, the spring (on bump-feed models) is weak or broken, or the eyelets are worn sharp. A damaged spool causes feeding problems no matter how carefully you wind the line.
Is it better to wind line tightly or loosely?
Wind firmly enough that the line does not slip or form loose loops, but not so tight that the line stretches or the spool distorts. Even, snug winding gives the most reliable feed.
Can I convert a bump-feed head to fixed-line or vice versa?
Some aftermarket heads fit multiple brands and offer different feed styles. Verify compatibility with your trimmer’s shaft size and thread pattern before purchasing. Installation typically requires removing the original head assembly.
Loading a weed eater is a straightforward task once you understand your specific head’s release method, winding direction, and line diameter. Follow the arrows on your equipment, keep the head clean, and use the correct line size. With a little practice, you can reload in just a few minutes and get back to trimming.