To change a lawn mower belt, first confirm whether you are replacing the drive belt (transmission) or the deck/blade belt, and whether you have a riding or push mower. Disconnect the spark plug wire for safety, then gather basic tools (wrench, socket set, screwdriver). Remove the blade or belt cover, release belt tension (via an idler pulley or by removing the blade), and note or photograph the old belt’s routing before removing it. Install the new belt following the same routing diagram, re-tension it, and reassemble all parts before reconnecting the spark plug.
Identify Your Mower and Belt Type First
Before you begin, it is essential to determine exactly which belt you are replacing. Most lawn mowers have at least two belts: a drive belt that transfers power from the engine to the transmission or wheels, and a deck belt (also called a blade belt) that spins the cutting blades. These two belts serve very different purposes and are replaced in different ways.
Your mower type also matters. A riding mower typically requires you to remove the mower deck or at least lower it to access the belts, while a push or walk-behind mower usually has a simpler belt system that is easier to reach. The process for each is significantly different, so knowing what you have will save you time and frustration.
To find the correct belt part number for your specific model, check the owner’s manual, look for a sticker or decal on the mower deck or frame, or search online using your mower’s make and model number. Using the wrong belt can cause poor performance, premature wear, or even damage to your mower.
Safety First: Disconnect the Spark Plug
Before doing any work on your lawn mower, the most important safety step is to disconnect the spark plug wire. This prevents the engine from accidentally starting while your hands are near the blade or belt, which could cause serious injury. Never skip this step, even if you are certain the mower is off.
To disconnect the spark plug, locate the spark plug wire (usually a thick black or colored wire attached to the top of the engine). Firmly grasp the rubber boot at the end of the wire and pull it straight off the spark plug. Do not pull on the wire itself, as this can damage it. For extra safety, you can remove the spark plug entirely with a spark plug socket, though this is not strictly necessary for most belt replacements.
Once the wire is disconnected, move it away from the spark plug so it cannot accidentally make contact. This simple step eliminates the risk of the engine firing while you work, making the entire job much safer.
Gather the Tools You Need
Having the right tools on hand before you start will make the job go much more smoothly. For most lawn mower belt replacements, you will need a basic set of hand tools. A socket set with both standard and metric sizes is usually sufficient, along with a ratchet and extension bar. A combination wrench set is also helpful for reaching bolts in tight spaces.
A flathead and Phillips screwdriver are useful for removing belt covers, which are often held in place with screws. Depending on your mower, you may also need a pry bar or a specialized belt tension tool to release tension on the idler pulley. Some mowers have a spring-loaded idler pulley that can be released with a simple wrench or socket.
If you are working on a riding mower, you may need a jack or a set of sturdy blocks to safely lift the mower and access the underside. Always use proper jack stands or blocks rated for the weight of your mower, and never rely on a jack alone to support the machine while you work underneath it.
Remove the Blade or Belt Cover
With the spark plug disconnected and your tools ready, the next step is to access the belt. On a push mower, this usually means removing the belt cover, which is a plastic or metal guard that protects the belt and pulleys. The cover is typically held in place with a few screws or clips and can be lifted off once removed.
On a riding mower, the process is more involved. You will likely need to remove the mower deck to access the belts. This involves lowering the deck to its lowest position, disconnecting the drive belt from the engine pulley, and removing the pins or bolts that secure the deck to the mower frame. Some decks also have a PTO (power take-off) shaft that must be disconnected.
If you need to remove the blade to access the belt, it is crucial to do so safely. The blade bolt is typically very tight, so use a breaker bar or a socket wrench with a cheater pipe for leverage. To keep the blade from spinning while you loosen the bolt, wedge a block of wood between the blade and the mower deck. Always wear heavy gloves when handling the blade, as it can be sharp.
Release Belt Tension and Remove the Old Belt
Once you can see the belt, you will need to release the tension before you can remove it. Most mowers use a spring-loaded idler pulley to keep the belt tight. To release the tension, use a wrench or socket to rotate the idler pulley arm, which will slacken the belt enough to slip it off the pulleys.
If your mower does not have an idler pulley, the tension may be released by removing the blade or by loosening the bolts that hold the engine or transmission in place. On some models, simply pushing the belt off the largest pulley first will give you enough slack to work it off the rest.
Once the tension is released, carefully slide the old belt off the pulleys one at a time. Take note of how the belt is routed as you remove it, as this will be your guide for installing the new one. If the belt is worn, cracked, or frayed, this is a clear sign that it needed to be replaced.
Note the Belt Routing Before Removal
One of the most common mistakes when changing a lawn mower belt is installing the new belt incorrectly. To avoid this, it is highly recommended to photograph or sketch the belt routing before you remove the old belt. A smartphone camera is perfect for this, and you can refer to the photo throughout the installation process.
If you forget to take a photo, look for a belt routing diagram. Many mowers have a diagram printed on the underside of the deck or on a sticker near the belt. If you cannot find one, consult your owner’s manual or search online for a diagram specific to your mower model. The routing is critical because a belt that is routed incorrectly will not function properly and may come off the pulleys or cause damage.
Pay close attention to how the belt wraps around each pulley, including which side of each pulley the belt rides on and whether it twists between pulleys. Some belts have a specific direction of travel, indicated by arrows on the belt itself. Matching the old routing exactly is the safest way to ensure a correct installation.
Install the New Belt Following the Routing
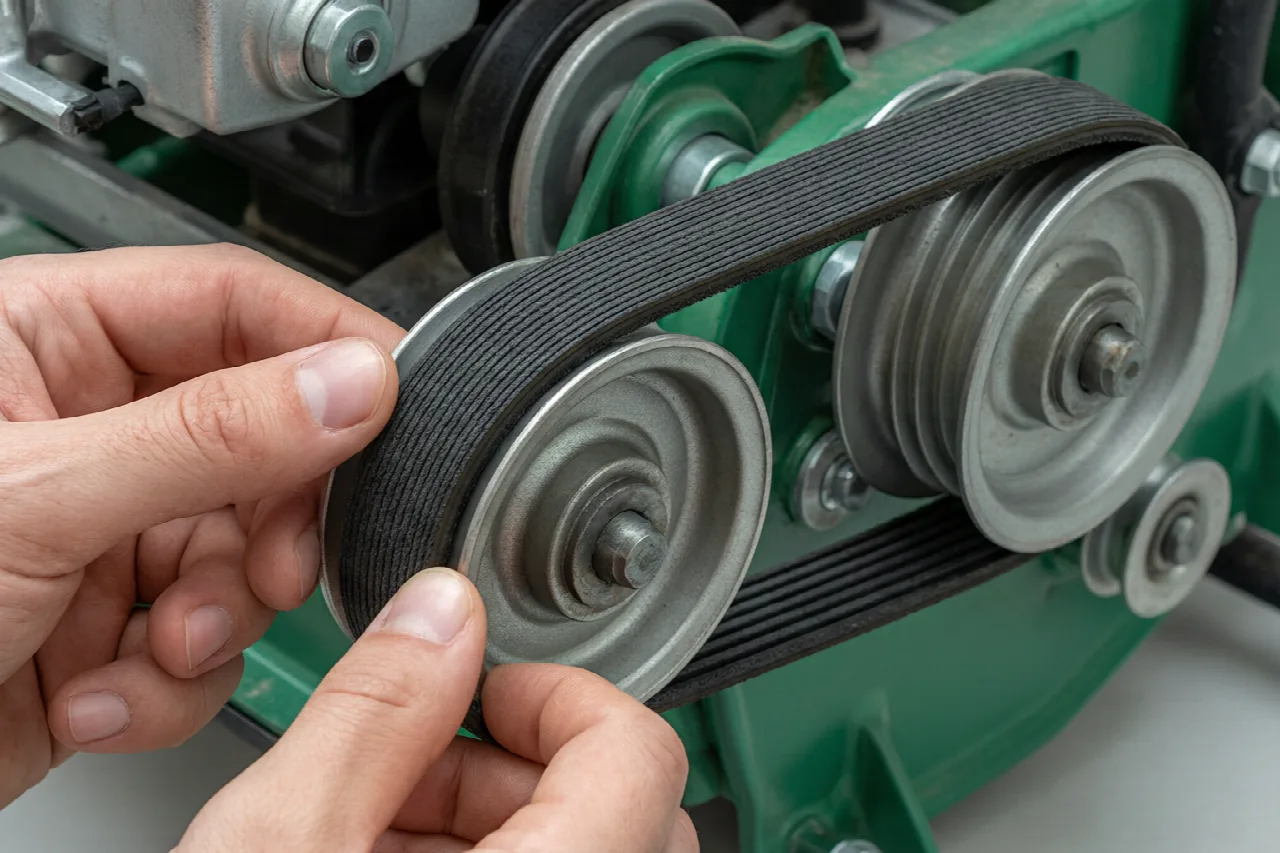
With the old belt removed and the routing noted, you are ready to install the new belt. Begin by placing the new belt on the largest pulley first, as this gives you the most slack to work with. Then, route the belt around the remaining pulleys in the order shown in your photo or diagram, working from one side to the other.
If your mower has an idler pulley, you will need to release its tension again to slip the belt over the last pulley. Once the belt is on all the pulleys, slowly release the idler pulley so it applies tension to the belt. Make sure the belt is seated properly in the grooves of each pulley and that it is not twisted or pinched anywhere.
Regarding tension, the belt should be snug but not overly tight. A good rule of thumb is that you should be able to twist the belt slightly at its longest span, but it should not have significant slack. If the belt is too loose, it will slip and squeal; if it is too tight, it can put excessive strain on the bearings and cause premature wear. Refer to your owner’s manual for specific tension settings if available.
Reassemble and Test
After the new belt is installed and tensioned, it is time to reassemble everything you removed. Reinstall the blade (if you removed it), making sure to tighten the blade bolt to the correct torque specification. If you do not know the exact torque, tighten it firmly with a wrench, but be careful not to overtighten.
Reattach the belt cover or reinstall the mower deck, following the reverse of the removal process. Make sure all pins, bolts, and clips are securely fastened. Before reconnecting the spark plug, give the belt a final visual inspection to confirm it is routed correctly and seated on all pulleys.
Once everything is reassembled, reconnect the spark plug wire and start the mower. Let it run for a few seconds, then engage the blades (if applicable) and listen for any unusual noises. If the belt squeals or slips, it may be routed incorrectly or not tensioned properly. Turn the mower off, disconnect the spark plug again, and double-check your work before testing again.
Troubleshooting Common Belt Problems
Even with careful installation, you may encounter issues with your new belt. A squealing or slipping belt is often caused by insufficient tension or incorrect routing. Check that the belt is properly seated on all pulleys and that the idler pulley is applying adequate tension. If the problem persists, the belt may be the wrong size or type for your mower.
If the belt keeps coming off the pulleys, the most likely cause is incorrect routing. Refer to your routing diagram and verify that the belt follows the exact path of the original. Worn or misaligned pulleys can also cause this issue, so inspect the pulleys for damage or excessive wear while you have the belt off.
Regarding how often a lawn mower belt should be replaced, there is no universal interval, as it depends on usage and conditions. Many manufacturers recommend inspecting the belt each season and replacing it if you notice cracks, fraying, or glazing. For heavy use, a belt may need replacement more frequently. Always use a belt that matches your mower’s specifications for the best performance and longevity.
If you encounter persistent problems after troubleshooting, consult your owner’s manual or a qualified small-engine mechanic. They can help you diagnose issues that may not be obvious, such as a bent pulley or a worn tensioner spring. With proper installation and routine maintenance, a new belt should provide reliable service for many seasons to come.
For more hands-on benchmarks and buying recommendations, consult our guides on heavy-duty chainsaw buyer guide, as well as high-CFM commercial leaf blower guide.