Quick Answer: How to Change Oil on a Craftsman Lawn Mower
To change oil on a Craftsman lawn mower, first identify your mower type and engine size, then gather supplies including new oil, a drain pan, and a wrench. Warm the engine briefly, turn it off, locate and remove the drain plug, allow oil to drain completely into the pan, replace the drain plug, refill with the manufacturer-recommended oil type and capacity (typically SAE 30 or 10W-30, ranging from 15 to 48 ounces depending on engine size), check the oil level with the dipstick, and dispose of old oil at a recycling center or auto parts store. Most Craftsman mowers require oil changes every 50 to 100 hours of operation or at the start of each mowing season.
Before You Start: Safety Precautions and What You’ll Need
Before beginning an oil change, prioritize safety and gather the right tools. Working on a warm engine can cause burns, so allow the mower to cool for at least 5 to 10 minutes after running—warm enough that the oil flows easily, but not so hot that it’s dangerous to touch.
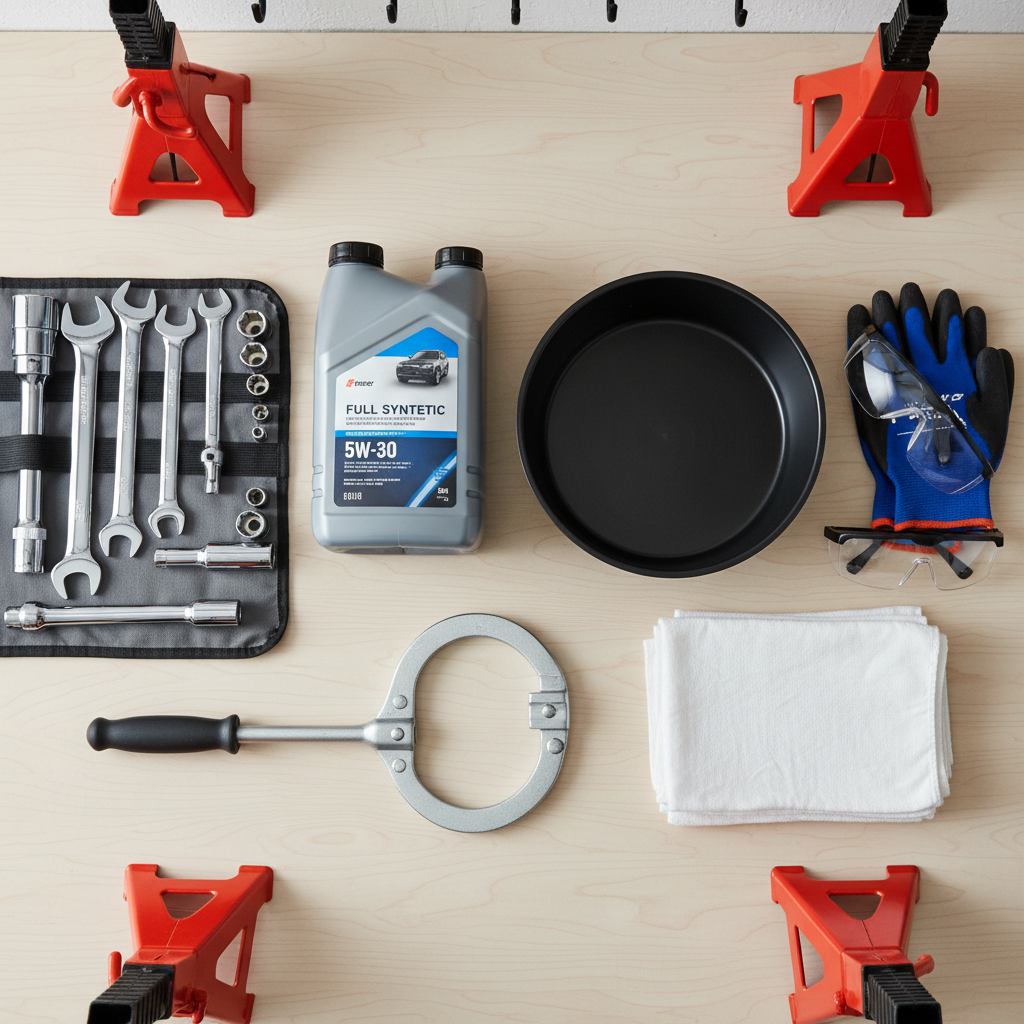
Essential tools and materials:
- New engine oil (correct type and capacity for your model)
- Drain pan (at least 2-quart capacity)
- Wrench or socket set (size depends on drain plug)
- Oil filter wrench (if your model has a replaceable filter)
- New oil filter (if applicable)
- Rags or paper towels for cleanup
- Safety glasses and work gloves
- Jack and jack stands (for riding mowers only)
Work on a flat, level surface away from children and pets. Ensure the mower is turned off and the engine has cooled slightly before draining oil. If working on a riding mower, engage the parking brake and consider using a block under the wheels for added safety.
Identifying Your Craftsman Mower and Oil Requirements
Craftsman manufactures several mower types—walk-behind push mowers, self-propelled mowers, and riding mowers—each with different engine sizes and oil capacities. Finding your model number is the first critical step.
Locating your model number:
- Check the rear or side of the mower deck
- Look on the engine housing or shroud
- Review the original purchase documentation or warranty card
- Visit the Craftsman website and search by model number for specifications
Once you have the model number, consult your owner’s manual or the Craftsman website to determine:
- Oil type: Most Craftsman lawn mowers use SAE 30 or 10W-30 multi-viscosity oil. Cold-climate models may require 5W-30.
- Oil capacity: Push mower engines typically hold 15 to 20 ounces; larger single-cylinder engines hold 32 to 48 ounces; twin-cylinder riding mower engines may require up to 48 ounces or more.
- Oil filter: Not all Craftsman mowers have replaceable oil filters. Some models use cartridge-style filters; others rely on spin-on filters. Check your manual to confirm whether your model requires filter replacement.
Using the wrong oil type or overfilling can damage the engine, reduce performance, and void your warranty. Always cross-reference your model number with official Craftsman documentation.
Step-by-Step Oil Drain Process
Step 1: Warm the Engine (Optional but Recommended)
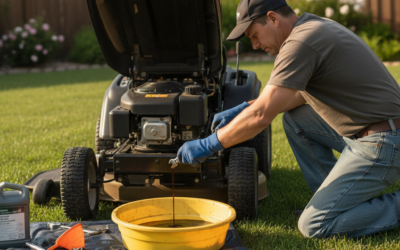
Run the mower for 2 to 3 minutes at low speed to warm the oil. Warm oil flows faster and drains more completely, ensuring you remove more contaminants. Turn off the engine and allow it to cool for 5 to 10 minutes. The engine should be warm to the touch but not hot enough to cause burns.
Step 2: Locate the Oil Drain Plug
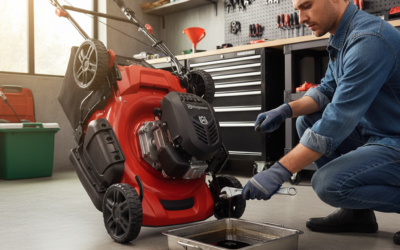
The drain plug is typically located on the underside of the engine crankcase. On push mowers, you may need to tip the mower on its side (check your manual for the correct side to avoid flooding the carburetor). On riding mowers, you can often access it without tipping. Look for a bolt with a hex head or a plastic plug—it’s usually the lowest point on the engine.
Step 3: Position the Drain Pan
Place a drain pan directly under the drain plug. Used oil can stain driveways and harm the environment, so contain it completely. If working on a tipped push mower, position the pan to catch all drainage.
Step 4: Remove the Drain Plug
Using the appropriate wrench or socket, loosen the drain plug by turning it counterclockwise. Once hand-tight, carefully remove it completely. The oil may still be warm, so proceed slowly to avoid splashing. If the plug has a crush washer or rubber seal, set it aside for replacement or cleaning.
Step 5: Allow Complete Drainage
Let the oil drain for at least 5 to 10 minutes, or until the flow slows to a drip. Patience here ensures maximum old oil removal, which improves new oil performance and engine longevity.
Step 6: Clean and Replace the Drain Plug
Wipe the drain plug clean with a rag and inspect it for damage or wear. If it has a crush washer, replace it with a new one to ensure a proper seal. If the plug itself is cracked or stripped, replace it with an OEM Craftsman part. Reinstall the drain plug and tighten it firmly—typically 15 to 25 foot-pounds of torque for most mowers—but do not over-torque, which can strip the threads.
Replacing the Oil Filter (If Applicable)
Not all Craftsman mowers have replaceable oil filters. Check your owner’s manual to determine if yours does.
For spin-on filters: Using an oil filter wrench, rotate the filter counterclockwise to remove it. Drain any remaining oil into your pan. Apply a thin coat of new oil to the rubber gasket on the new filter, then hand-tighten it until the gasket contacts the engine—then rotate an additional three-quarter turn. Do not use a wrench to tighten; hand-tightening is sufficient and prevents over-compression.
For cartridge-style filters: Remove the filter cover or housing by unbolting it. Lift out the old filter element and inspect the seals. Clean the housing and install the new filter element, ensuring it seats properly. Reassemble the housing and tighten bolts to manufacturer specifications.
Refilling and Checking Oil Level
Step 1: Locate the Oil Filler Cap
The oil filler cap is typically located on top of the engine crankcase. It may be labeled with an oil can symbol. Some caps are combined with the dipstick; others are separate.
Step 2: Add New Oil
Remove the filler cap and, using a funnel, slowly pour the recommended oil type and quantity into the engine. For most Craftsman push mowers, this is 15 to 20 ounces; for larger or twin-cylinder engines, follow your manual’s specifications. Pour slowly to avoid splashing and overfilling.
Step 3: Check the Oil Level
Wait a minute for the oil to settle, then remove the dipstick (or check the sight glass if your mower has one). Wipe it clean with a rag, reinsert it fully, and remove it again. The oil should reach the “full” mark on the stick. If the level is low, add oil in small increments—typically a few ounces at a time—and recheck until it reaches the full mark.
Do not overfill. Excess oil can cause smoking, fouling spark plugs, and damaging the engine. If you overfill, remove the excess by loosening the drain plug and allowing a small amount to drain, or use a siphon to extract oil carefully.
Step 4: Reinstall Components and Test
Replace the dipstick and oil filler cap securely. If you removed a push mower’s spark plug wire earlier, reconnect it now. Start the engine and let it idle for 1 to 2 minutes, checking for oil leaks around the drain plug and filter. If leaks appear, turn off the engine, allow it to cool, and tighten the drain plug or filter slightly. Otherwise, your oil change is complete.
Maintenance Schedule: When to Change Oil
Regular oil changes keep your Craftsman mower running smoothly and extend engine life. Most manufacturers recommend:
- First oil change: After 5 hours of operation for new mowers
- Routine changes: Every 50 to 100 hours of operation, or once per season for homeowners who mow 1 to 2 times per week
- Severe use conditions: If you mow in dusty, dirty, or high-heat environments, change oil every 25 to 50 hours
- Seasonal maintenance: At the start of each mowing season (spring) and before long-term storage (fall), perform an oil change
Keep a maintenance log noting the date and hours of each oil change. This habit helps you stay on schedule and provides documentation if you ever sell the mower or file a warranty claim.
Proper Disposal of Used Oil
Never pour used oil down the drain, into the ground, or in the trash. Used oil is a hazardous material that contaminates water supplies and harms wildlife. Instead:
- Take it to a local auto parts store (most accept free drop-off)
- Visit a municipal hazardous waste collection event
- Contact your city or county recycling program for guidance
- Check Earth911.com or your state’s environmental agency for nearby recycling centers
Many retailers that sell new oil also accept used oil for free recycling, making disposal convenient alongside your next purchase.
Common Oil Change Mistakes to Avoid
- Using the wrong oil type: Always verify oil weight (SAE 30, 10W-30, etc.) in your owner’s manual. Using lighter or heavier oil reduces engine efficiency and can cause damage.
- Overfilling the crankcase: Excess oil causes smoking, carbon buildup, and poor engine performance. Fill only to the “full” mark on the dipstick.
- Not draining completely: Rushing the drain process leaves old oil, sludge, and contaminants in the engine. Allow full drainage time.
- Over-tightening the drain plug: This strips threads and can cause leaks. Tighten firmly but not excessively—typically 15 to 25 foot-pounds.
- Forgetting to replace the drain plug washer: A worn or missing washer causes leaks. Replace it with each oil change.
- Skipping the filter replacement: If your mower has a replaceable filter, change it every other oil change at minimum. A clogged filter restricts oil flow and reduces engine protection.
- Running the engine on an empty crankcase: Always verify oil level before starting the mower. Running dry, even briefly, causes bearing wear and permanent damage.
Frequently Asked Questions
How long does it take to change oil on a Craftsman lawn mower?
For most homeowners, an oil change takes 15 to 30 minutes. This includes draining old oil, replacing the drain plug (and filter if applicable), refilling with new oil, and checking the level. If you’re unfamiliar with your mower, allow extra time to locate components and consult your manual. On riding mowers, the process may take slightly longer due to the need for positioning jacks and accessing the drain plug from underneath.
Can I use synthetic oil in my Craftsman lawn mower?
Many newer Craftsman mowers accept synthetic or synthetic-blend oils, which offer better protection at high temperatures and extend drain intervals. However, always verify in your owner’s manual before switching. Some older models or those with older engines are not rated for synthetic oil. If synthetic is approved, use the same viscosity grade (SAE 30, 10W-30) as you would with conventional oil—the viscosity matters more than the oil type for engine compatibility.
What happens if I don’t change the oil in my lawn mower?
Skipping oil changes allows oil to break down, accumulate sludge and contaminants, and lose its lubricating ability. This causes increased friction, higher operating temperatures, accelerated wear on pistons and bearings, and eventually engine seizure. Over time, the engine will lose power, consume more fuel, produce more smoke, and may fail completely. Regular oil changes are one of the cheapest and most effective ways to prevent costly engine repairs or replacement.
Is it normal for my mower to smoke after an oil change?
Light smoking immediately after an oil change is usually normal—residual oil on the engine burns off. However, if smoking is heavy or continues after the engine warms up, you likely overfilled the crankcase. Turn off the engine, allow it to cool, and check the oil level. Remove excess oil if necessary. Continued smoking after correction may indicate a more serious issue, such as a damaged piston ring or valve seal, and warrants professional inspection.