Changing the oil in your lawn mower is one of the most important maintenance tasks you can perform to extend your engine’s life and maintain peak performance. Whether you have a push mower or a riding mower, the basic process involves letting the engine cool, locating the drain plug, removing old oil into a collection pan, and refilling with the correct oil type and viscosity specified in your manual. This guide walks you through each step safely and effectively.
Identify Your Engine Type
Before you begin, you need to determine whether your lawn mower has a 4-stroke or 2-stroke engine, as the oil maintenance procedures are fundamentally different. Most modern residential lawn mowers use 4-stroke engines, where oil circulates through the crankcase and is changed separately. In contrast, 2-stroke engines require oil to be mixed directly with fuel, and they do not have a traditional oil crankcase to drain.
You can identify your engine type by consulting your owner’s manual, which is the most reliable source. The manual typically states the engine type prominently and includes maintenance schedules specific to your model. Alternatively, look at the fuel cap and fuel line area. If you see a separate oil fill cap or dipstick (usually with a yellow or orange handle), you likely have a 4-stroke engine. If your manual specifies a fuel-to-oil mixing ratio or indicates that you add oil directly to the fuel tank, you have a 2-stroke engine.
The engine type label may also be printed directly on the engine housing. Check near the spark plug, on the side of the engine block, or under the air filter cover. If you cannot locate this information, contact the mower manufacturer with your model number, which is typically found on a plate attached to the mower frame or under the seat.
Safety Preparation
Before performing any maintenance on your lawn mower, establish a safe working environment and follow essential safety protocols. These steps protect you from burns, injuries, and accidental engine startup.
First, allow the engine to cool completely after use. Running or recently stopped engines reach high temperatures that can cause severe burns. Let the mower sit for at least 10 to 15 minutes after the last use, or longer if it ran for an extended period. You can test the engine by carefully touching the metal housing near (but not on) the engine block—it should be cool enough to touch without discomfort.
Next, disconnect the spark plug wire to prevent accidental engine ignition while you work. Locate the spark plug, which is typically a ceramic component with a wire attached to its top. Gently twist or pull the wire boot (the rubber connector) away from the spark plug. Do not pull on the wire itself, as this can damage the connection. Set the wire aside where it cannot accidentally touch the spark plug terminal.
If your mower has a fuel shutoff valve, close it to prevent fuel spillage during the process. Ensure the mower is on a level, stable surface and that you have adequate lighting to see the drain plug and oil level indicator. Gather all necessary materials—an oil collection pan, wrenches or sockets matching your drain plug size, fresh oil, and paper towels or rags—before you begin.
Draining Old Oil (4-Stroke Engines)
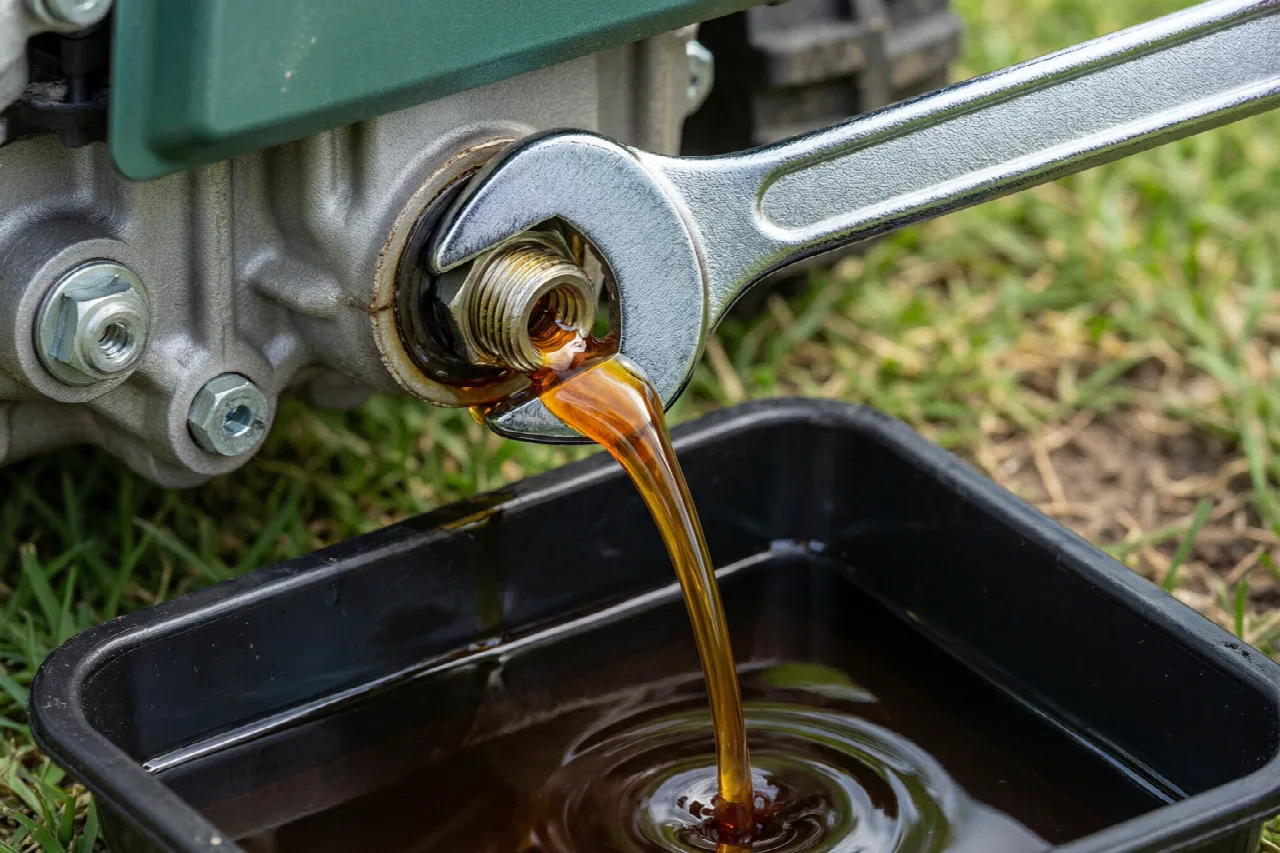
Locate the oil drain plug on your engine. On most push mowers, this is a bolt on the underside or side of the engine block, typically near the bottom. On riding mowers, the drain plug may be accessed from underneath the deck or from the side. Consult your manual or look for a bolt or plug that appears distinctly separate from other fasteners. Some mowers have the drain plug accessible without removing components, while others may require you to tilt or remove the fuel tank first.
Position your oil collection pan directly under the drain plug. Use a pan large enough to hold your mower’s oil capacity—typically 0.5 to 2 quarts for push mowers and up to 4 to 6 quarts for riding mowers. Check your manual for the exact capacity of your model.
Using the appropriate wrench or socket, loosen the drain plug by turning it counterclockwise. Once it is hand-tight but not fully removed, carefully unscrew it the rest of the way with your fingers, allowing oil to begin draining into the pan. Once the plug is free, set it aside on a clean surface so you can find it easily when you are ready to reinstall it.
Allow the old oil to drain completely into the pan. This may take several minutes. Once the flow stops, you can gently wipe the drain plug with a rag and inspect it for debris or damage. If the plug has a rubber washer or O-ring, check that it is intact. Some drain plugs have crush washers that should be replaced during each oil change; your manual will indicate if yours does.
Before reinstalling the drain plug, wipe the drain hole area with a rag to remove any remaining oil or debris. Screw the drain plug back in by hand first to avoid cross-threading, then tighten it with your wrench. Do not over-tighten, as this can strip the threads in the engine block. Tighten firmly, then stop—a quarter-turn additional pressure is sufficient.
Selecting and Adding New Oil
The correct oil type and viscosity for your lawn mower engine are specified in your owner’s manual. The manual will recommend an SAE grade such as SAE 30, 10W-30, 5W-30, or another specification. SAE 30 is a straight-weight oil suitable for use in warm to hot climates and is commonly recommended for lawn mowers. 10W-30 or 5W-30 are multi-grade oils that perform well across a wider temperature range, with better cold-start performance in cooler climates.
The “W” in multi-grade designations stands for winter, and the number before it indicates the oil’s flow at low temperatures. Multi-grade oils are generally preferred for climates with variable temperatures. If your manual lists multiple acceptable grades, choose based on your local climate. For example, if you live in a region with cool winters and warm summers, a 10W-30 oil may perform better than a straight SAE 30.
Purchase oil designed for small engines, which is formulated to handle the specific demands of lawn mower engines. Automotive oil intended for cars may not provide the same protection for small engine components. The label on your oil container will typically indicate that it is suitable for small engines or lawn mowers.
Locate the oil fill cap or dipstick, usually marked with a yellow or red handle. On most mowers, this is on the side of the engine block or near the top. Remove the cap by twisting it counterclockwise. If your mower has a dipstick cap, the dipstick is attached to the underside of the cap.
Slowly pour new oil into the fill opening. Begin with roughly 80 percent of the recommended capacity according to your manual, then check the oil level using the dipstick. Reinsert the dipstick fully into the fill tube, then remove it and look at the mark. The oil should reach the full mark on the dipstick. If it is below the full line, add oil in small increments and recheck. Overfilling can damage the engine, so stop once the level reaches the full mark.
Once the level is correct, reinstall the oil fill cap or dipstick cap by twisting it clockwise until it is snug. Do not over-tighten.
Oil Disposal
Used lawn mower oil should never be poured down a drain, onto soil, or into a storm sewer. Used oil is a hazardous waste that can contaminate groundwater and harm ecosystems. Responsible disposal protects your local environment.
Many communities offer free used oil recycling. Contact your local waste management authority, municipal hazardous waste facility, or public works department to learn where you can drop off used oil. Many auto parts retailers and quick-lube service centers also accept used oil from do-it-yourself maintenance, often free of charge or for a minimal fee.
Store used oil in a clean, sealed container until you are ready to dispose of it. Keep it in a cool location away from children and pets. Do not mix used oil with other fluids or chemicals, as this can complicate recycling or create disposal hazards.
2-Stroke Engine Oil Maintenance
If you have determined that your mower has a 2-stroke engine, the oil maintenance process is entirely different. 2-stroke engines do not have a separate crankcase for oil; instead, oil is mixed directly with gasoline in a specific ratio, typically ranging from 50:1 to 25:1 (gasoline to oil). This ratio must be followed precisely as specified in your manual.
To prepare fuel for a 2-stroke engine, measure the correct volume of oil according to the recommended ratio, then add it to a fuel container before adding gasoline. Mix thoroughly by stirring or swirling the container. Never add oil directly to the fuel tank without pre-mixing, as improper distribution can damage the engine.
Some modern 2-stroke mowers have automatic oil-mixing systems that inject oil into the fuel line at the correct ratio. If your mower has this feature, consult your manual for the specific oil type it requires and the procedure for filling the oil reservoir.
The oil you use in a 2-stroke engine must be formulated specifically for 2-stroke engines. Using automotive oil or incorrect oil types can cause engine damage or poor performance. Check your manual for the recommended oil type and ensure the product label indicates compatibility with 2-stroke small engines.
For more hands-on benchmarks and buying recommendations, consult our guides on heavy-duty chainsaw buyer guide, as well as high-CFM commercial leaf blower guide, as well as durable ride-on lawn tractor guide.