Quick Answer: How to Install Weed Wacker String
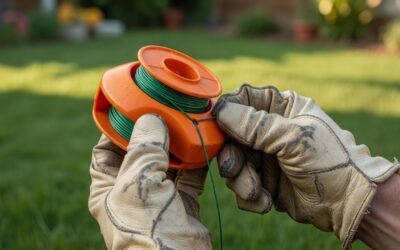
Power off your trimmer, unplug it or disconnect the spark plug wire, then press the spool head tabs to release and remove the spool. Cut the manufacturer-specified line to length (typically 20–25 ft per strand), thread it through the spool eyelets, wind firmly in the arrow-indicated direction, route the ends through the exit holes, and snap the spool back into the head. Tap the bump knob on hard ground to confirm the auto-feed advances the line.
Safety Checklist Before You Touch the Spool
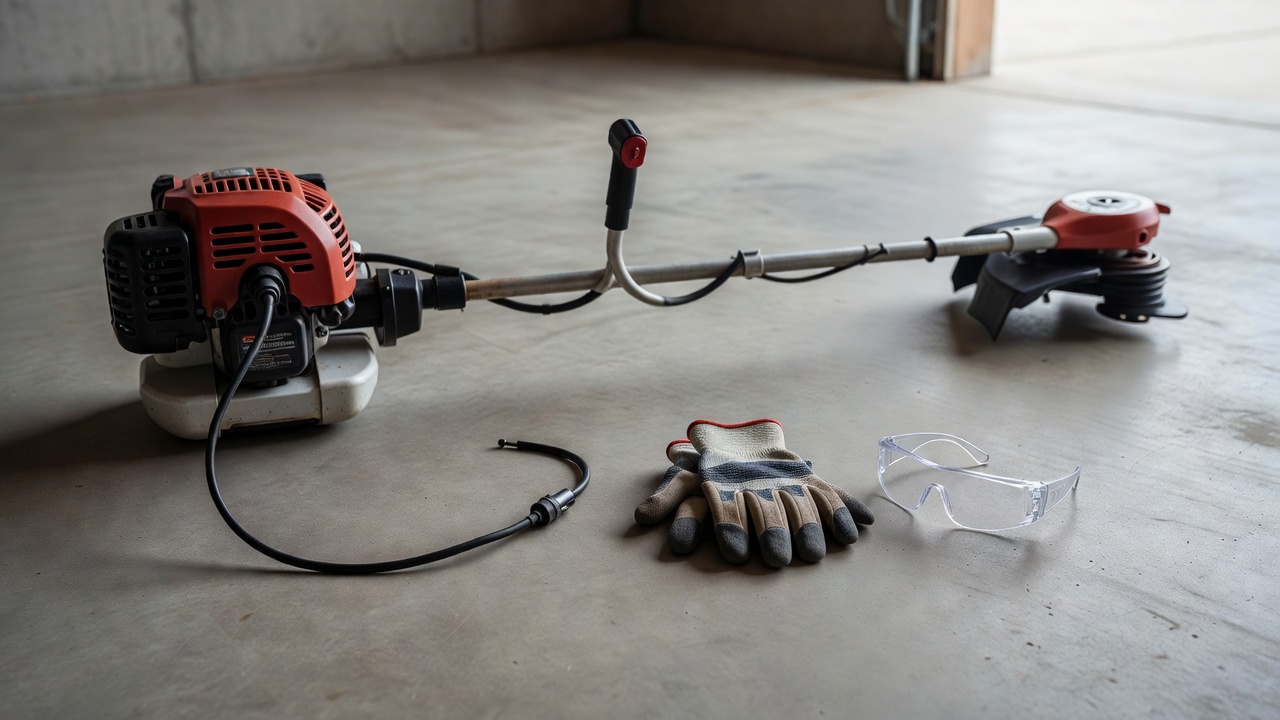
Trimmer blades and line move at thousands of RPM. Complete every item on this checklist before handling the spool head, regardless of head type.
- Gas trimmers: Turn the engine off, let it cool for at least two minutes, then disconnect the spark plug wire and tuck it away from the plug terminal. The ANSI B71.1 outdoor power equipment safety standard and every major manufacturer service manual — including STIHL and Husqvarna — require spark plug wire removal before any maintenance on gas-powered trimmers.
- Battery (cordless) trimmers: Power the unit off using the trigger lock or main switch, then remove the battery pack completely before touching the head.
- Corded electric trimmers: Power off and unplug the cord from the outlet. Switching off alone is insufficient — a power surge can restart the motor.
- Personal protective equipment: Wear cut-resistant gloves (trimmer line edge can slice skin when pulled under tension) and safety glasses in case the old line snaps back.
- Work surface: Set the trimmer on a stable flat surface or hold it securely between your knees with the head facing away from your body.
Choosing the Right Trimmer Line: Diameter, Length, and Shape
Using the wrong line diameter is the single most common reason a freshly strung trimmer feeds poorly or breaks immediately. Resolve this before cutting any line.
Line Diameter by Trimmer Class
| Trimmer Class | Typical Line Diameter | Best For |
|---|---|---|
| Light-duty (electric, cordless) | 0.065 in | Grass, thin weeds, edging |
| Medium-duty (mid-range gas or high-voltage battery) | 0.080 in | Thicker weeds, light brush |
| Heavy-duty (commercial gas) | 0.095 in – 0.105 in | Dense brush, woody stems |
These diameter ranges align with specifications published by major trimmer manufacturers including Ryobi, STIHL, and Husqvarna in their respective product documentation and owner’s manuals. The correct diameter for your specific model is printed on a label inside the spool head or listed in the owner’s manual under Recommended Accessories. Never use a heavier gauge than specified — oversized line overloads the motor, causes premature head wear, and voids many warranties.
Line Shape
- Round: Most common, quietest, works in all head types. Best for general grass trimming.
- Twisted or spiral: Reduced wind resistance, cuts cleaner through tall grass, slightly louder.
- Square, star, or multi-sided: More aggressive cutting edge, suited for thick weeds and brush. Wears faster on lighter-duty heads.
How Much Line to Cut
For bump-feed spools, most manufacturers recommend 20–25 ft per strand as the working spool capacity. Ryobi specifies up to 20 ft per side on its standard bump-head spools; Husqvarna lists 25 ft per side on comparable gas trimmer heads. Check your manual’s spool capacity note. Cutting more than capacity causes over-winding, which leads to jamming and line fusion inside the head.
How to Install Weed Wacker String on a Bump-Feed Head
Bump-feed (also called auto-feed) heads are the most common type. The spool sits inside a housing; tapping the bump knob on the ground releases a measured length of line through centrifugal force.
What You Need
- Replacement trimmer line (correct diameter)
- Scissors or line cutters
- Your trimmer owner’s manual (for spool arrow direction)
Step-by-Step: Single-Line Bump-Feed Spool
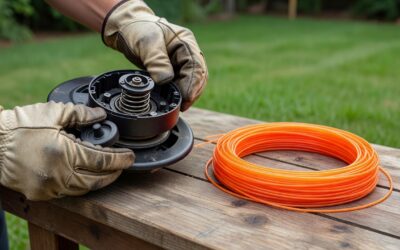
- Remove the spool head. Locate the two tabs on the sides of the bump head. Squeeze them simultaneously and pull the cover off. Lift the old spool out and discard old line.
- Inspect the spool housing. Clear any debris, dirt, or broken line fragments from the housing interior and the bump knob spring.
- Cut your line. Measure and cut a single strand to the length specified on the spool label (typically 20–25 ft).
- Anchor the line. Insert one end of the line into the small anchor hole or notch at the center of the spool. Pull it snug so it does not slip.
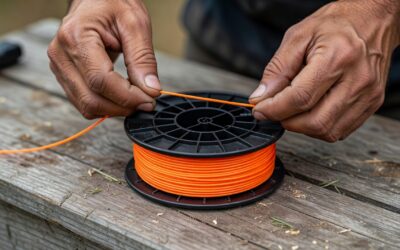
- Wind in the correct direction. Look for the arrow embossed on the side of the spool — this indicates the winding direction. Wind firmly and evenly in tight, parallel layers. Do not cross the line over itself.
- Leave a tail. Stop winding when approximately 6 inches of line remain. Hook this tail into the retaining notch on the spool rim to prevent unwinding during reassembly.
- Route through the exit hole. Thread the tail through the line exit hole on the spool housing.
- Reassemble. Drop the spool back into the housing, align the tabs, and press the cover until it clicks. Pull the line tail gently to release it from the retaining notch.
- Test. Hold the trimmer upright and tap the bump knob firmly on hard ground. The line should advance 1–1.5 inches per tap.
Step-by-Step: Dual-Line Bump-Feed Spool
- Complete steps 1–3 above, but cut two equal strands (each 20–25 ft).
- Locate the two anchor holes on the spool — one per strand, positioned on opposite sides of the spool center divider.
- Insert one end of each strand into its anchor hole.
- Wind both strands simultaneously in the arrow-indicated direction, keeping each strand on its own half of the spool (separated by the center divider). Maintain even tension on both strands as you wind.
- Leave a 6-inch tail on each strand, hook both into their respective retaining notches, then thread each tail through its corresponding exit hole.
- Reassemble and test as in steps 8–9 above.
Why winding direction matters: Winding opposite to the arrow causes the line to tighten and jam against the feed mechanism rather than releasing under centrifugal force. STIHL’s service documentation for bump-head trimmers explicitly identifies reverse winding as a leading cause of line feed failure.
How to Restring a Fixed-Line (Speed-Feed or Indexed) Trimmer Head
Fixed-line heads — marketed under names like Speed-Feed, Tap-N-Go, or indexed heads — eliminate traditional spool winding. Line threads directly through external eyelets on the head body. The head does not need to be removed from the trimmer shaft for restringing, which makes this the fastest method in the field.
How a Fixed-Line Head Differs from Bump-Feed
- No internal spool to wind — line feeds straight through the head body via opposing eyelets.
- Uses pre-cut segments rather than a continuous wound strand.
- No bump knob or spring mechanism.
Step-by-Step: Fixed-Line Head
- Complete the safety checklist at the top of this guide.
- Remove spent line. Pull the old line segments out through the eyelets. If they are fused, rotate the head by hand while pulling.
- Cut new line segments. Most fixed-line heads use two segments of 8–12 inches each (check your head’s label — Oregon, Husqvarna, and Echo publish this per-model). Use the same diameter as your original line.
- Thread the first segment. Push one end of a line segment into an eyelet on one side of the head and push it straight through until it exits the opposite eyelet. Center the segment so equal lengths extend from each side.
- Thread the second segment through the remaining pair of eyelets in the same manner, perpendicular to the first segment on heads with four eyelets, or parallel on two-eyelet designs.
- Verify seating. Pull each end outward firmly. Properly seated line will not pull back through — the center of each segment catches against the internal retaining ridge.
- No reassembly required. The head stays on the trimmer shaft throughout. Power on and test immediately.
Why line falls out of a fixed-line head immediately after installing: The segment was not pushed far enough through the eyelet to catch the internal retaining ridge, or the line diameter is too small for the eyelet channel and slides through without gripping.
How to Replace Trimmer Line with a Pre-Wound Drop-In Spool
A pre-wound (drop-in) replacement spool is a factory-wound spool sold as a sealed unit. You discard the old spool entirely and snap in the new one — no measuring, no winding. This method is ideal for beginners or anyone who wants the fastest possible line change.
Compatibility: Finding the Right Pre-Wound Spool
- Pre-wound spools are brand- and model-specific. A Ryobi spool does not fit a Black+Decker head, even if the line diameter matches.
- Find your trimmer’s model number on the label near the motor housing. Cross-reference it on the manufacturer’s website or at the point of purchase to confirm spool part number.
- Most manufacturers sell pre-wound spools in single packs and multi-packs. Third-party compatible spools exist but verify the part number match before purchase.
Step-by-Step: Drop-In Spool Replacement
- Complete the safety checklist at the top of this guide.
- Remove the bump head cover. Press the side tabs and pull the cover off as described in the bump-feed section above.
- Remove and discard the old spool. Lift it straight out of the housing. Check the spring beneath it — if the spring is deformed or missing, replace it before proceeding.
- Unwind the line tails on the new spool. The pre-wound spool ships with the line ends tucked into retaining notches. Free the tails from the notches.
- Drop the new spool in. Lower the spool into the housing, aligning the center arbor hole with the housing post.
- Thread the line tails through the exit holes. Push each tail through its corresponding exit hole in the housing wall.
- Snap the cover back on. Press until the tabs click. Pull each line end gently to confirm it is free and not pinched under the cover edge.
- Test. Tap the bump knob on hard ground to advance the line.
Pre-wound vs. self-wound: Pre-wound spools cost more per use but eliminate winding errors. Self-winding with bulk line on the same spool body is more economical for frequent users. Both methods produce the same cutting result when executed correctly.
Troubleshooting: Line Won’t Feed, Keeps Breaking, or Unravels
Line Breaks Immediately After Installing
- Cause: Line diameter too light for the trimmer’s power output, or line was wound with crossed-over layers creating a stress point.
- Fix: Step up one diameter size if within manufacturer tolerance, or rewind the spool in tight parallel layers without crossing.
Bump-Feed Line Won’t Auto-Feed
- Cause: Line was wound in the wrong direction (reverse of the arrow), the bump spring is missing or seated incorrectly, or the line tails were not released from the retaining notches.
- Fix: Remove the spool, confirm the wind direction arrow, and rewind. Check that the spring sits flat under the spool. Pull line tails free from notches before replacing the cover.
Line Unravels Inside the Spool Head
- Cause: Too much line was wound (over capacity), or the outer layers were wound loosely and shifted during operation.
- Fix: Rewind with no more line than the spool label specifies, maintaining firm, even tension on every layer.
Line Welds or Fuses Inside the Spool
- Cause: Friction heat from spinning fuses adjacent line layers together, most common with nylon line wound too tightly in hot conditions or left wound for extended periods between uses.
- Fix: Soak the spool in warm water for 30 minutes to soften the line, then manually separate the fused layers. Husqvarna’s operator FAQ and multiple manufacturer service bulletins identify over-tight winding and heat buildup as the primary causes of line fusion in nylon-core trimmer spools. Re-wind more loosely or store the trimmer in a cool location between uses.
Spool Spins But Line Does Not Advance
- Cause: The bump knob spring is broken or the arbor nut holding the head to the shaft is stripped, allowing the head to spin freely without engaging the feed mechanism.
- Fix: Replace the bump spring (sold separately at most hardware stores) or tighten / replace the arbor nut. Note that most trimmer arbor nuts use reverse (left-hand) thread — loosen by turning clockwise, tighten by turning counter-clockwise.
Frequently Asked Questions
How do I wind weed eater string without it coming loose?
Maintain constant outward tension on the line as you wind — pull the line taut against your thumb while rotating the spool. Wind in tight, parallel rows without crossing layers. When you finish, hook the tail into the retaining notch immediately to lock the wind before reassembling the head. Loose winding is the primary cause of line unraveling inside the housing during operation.
How much line should stick out of the trimmer head after installation?
4–6 inches per strand is the standard working length for most residential bump-feed and fixed-line heads. The trimmer’s cutting guard includes a blade that trims any excess to the correct length on the first power-on. If your trimmer has no guard blade, manually cut each strand to match the cutting swath diameter marked in your owner’s manual.
What happens if I wind the line in the wrong direction?
The line tightens against itself during operation instead of releasing outward, blocking the auto-feed mechanism. The trimmer runs but delivers no new line when you tap the bump knob, and any remaining exposed line breaks off without advancing. STIHL service documentation identifies reverse winding as one of the top causes of bump-head feed failure. The only fix is removing the spool and rewinding in the correct direction.
How often should I replace trimmer line?
Replace line when the exposed strands wear down to 2 inches or shorter, the line refuses to advance despite correct installation, or you notice the cutting swath narrowing noticeably during normal use. Heavy users trimming weekly may reload line every 1–2 sessions. Infrequent users may complete an entire season on one spool. Storing the trimmer with line already loaded is fine for short periods; for winter storage, many manufacturers recommend removing the spool and storing line in a sealed bag with a small amount of water to prevent brittleness.
Can I use any brand of trimmer line in my weed wacker?
Yes, provided the diameter matches the manufacturer’s specification exactly. Line brand is not locked to trimmer brand for the line material itself — only pre-wound replacement spools must match the trimmer’s specific spool part number. Generic bulk line in the correct diameter from Oregon, Arnold, or similar accessory brands performs comparably to OEM line in most residential applications.