

Quick Answer: How to Change a Trimmer Head
Turn off the trimmer and disconnect power (remove the battery or unplug the cord; kill the engine and let it cool for gas models). Press the shaft lock button to immobilize the arbor, then unscrew the retaining cap — counter-clockwise on most electric and cordless models, clockwise on most gas trimmers (reverse thread). Lift off the old head assembly, thread the new head onto the arbor bolt by hand in the opposite direction until snug, and test at low throttle before full use.

Pros
- Six-pack bundle listed in the product title
- Square profile line named in the product title
- Commercial 5 lb size listed for heavier use
Cons
- Trimmer compatibility is not verified in supplied data

Pros
- Six-pack bundle listed in the product title
- Star profile line named in the product title
- Commercial 5 lb size listed for heavier use
Cons
- Line length and trimmer fit are not stated in supplied data

Pros
- Title lists 1280 feet of line length
- Square profile named in the product title
- Lists a 5 lb line rating
- Title describes it as commercial-style line

Pros
- Title lists .095-inch square nylon line
- Lists 1280 feet of line length
- Manufacturer states fit with most string trimmers
- Lists a 5 lb line rating
Spool Replacement vs. Full Head Replacement: Which Do You Actually Need?
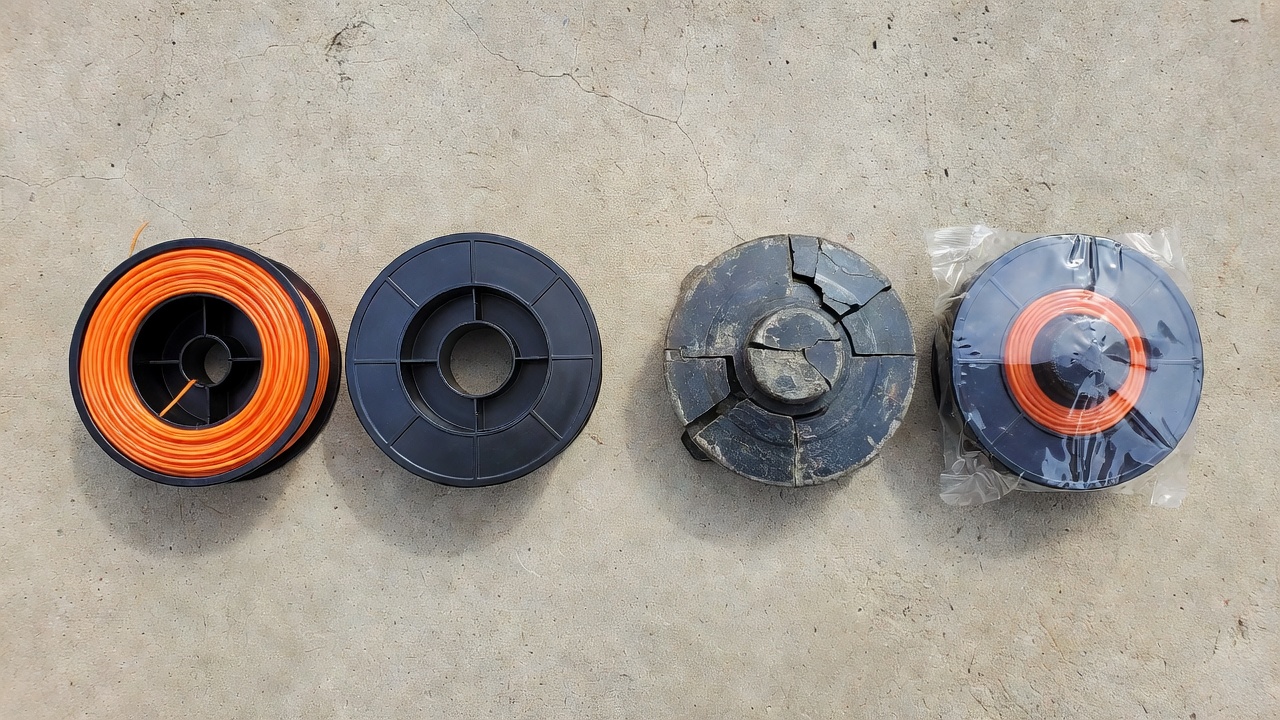
Before disassembling anything, confirm what you actually need to replace. These are two different jobs.
- Spool replacement (re-stringing): The head shell and its internal mechanism are intact. Only the trimmer line is worn, broken, or exhausted. You remove the retaining cap, pull out the spool, wind new line, and reassemble. This does not require removing the head from the shaft.
- Full head replacement: The entire head assembly — shell, internal mechanism, retaining cap — is cracked, stripped, worn beyond function, or you are upgrading to a different head type (e.g., switching from bump-feed to a fixed-line head). The head must be unthreaded from the arbor bolt and a new assembly installed.
Signs you need a full head replacement rather than a spool swap: the bump knob no longer feeds line even with a fresh spool loaded; the head housing is cracked or melted; the internal spring or eyelet is broken; or you are deliberately upgrading head type. If only the line is gone, stop here and re-string — this guide does not cover that process. When planning workspace deployment, consider the engineering criteria outlined in our jbl partybox club 120 vs sony srs xv500 guide.
Types of Trimmer Heads and How Each One Comes Off
The three main head types share the same arbor-bolt mounting system but differ internally and in how they are serviced. When planning workspace deployment, consider the engineering criteria outlined in our jbl partybox club 120 vs sony srs xv500 guide.
Bump-Feed Head
The most common residential head type. A spring-loaded spool inside the housing feeds new line each time the plastic bump knob is tapped against the ground. The entire assembly — knob, spool, housing, retaining cap — threads onto the arbor bolt as one unit. Removal: engage the shaft lock, unscrew the retaining cap (direction depends on thread type; see below), and the whole assembly lifts free. Internally the spring and spool are separate components, but for a full head swap you replace the whole unit. For additional operational safety benchmarks, see our published testing notes on z890 vs x870e motherboard.
Fixed-Line Head
Has no spool or bump mechanism. Pre-cut lengths of line are inserted directly into eyelets on the head and held by friction or a clamping groove. When the line wears, you pull it out and insert new segments. The head itself mounts identically to a bump-feed head — same arbor-bolt thread — so removal steps are the same. Fixed-line heads are popular on commercial trimmers and with users who prefer not to deal with spools.
Blade Head
Replaces line entirely with a rigid plastic or metal blade (or a multi-blade star). Used for heavy brush, thick weeds, and saplings that monofilament line cannot cut. Blade heads mount to the arbor bolt the same way, but they introduce additional safety requirements: the trimmer must have a blade-rated guard fitted before use, and the operator must wear appropriate personal protective equipment including face protection. Removal follows the same shaft-lock and retaining-cap process, but installation requires confirming the trimmer’s engine or motor is rated for blade use — not all residential trimmers are. For additional operational safety benchmarks, see our published testing notes on z890 vs x870e motherboard.
Does head type affect removal? The unthreading process from the shaft is identical across all three types. Internal disassembly differs, but for a full head swap you treat each type as a single unit coming off and going on.
Tools and Safety Precautions Before You Start
Tools Required
- Work gloves (cut-resistant preferred — old line edges are sharp)
- Safety glasses
- The replacement trimmer head (confirmed compatible with your model — see compatibility note in the installation section)
- Arbor wrench or the pair of flat wrenches supplied with the trimmer (some brands include these; check the tool bag)
- Needle-nose pliers (useful for extracting a stuck retaining cap)
- A flat, stable work surface
Safety Precautions by Trimmer Type
- Cordless battery trimmer: Remove the battery pack completely before touching the head. A partial press of the trigger with the battery seated can activate the motor.
- Corded electric trimmer: Unplug from the wall outlet. Do not rely on the power switch alone.
- Gas trimmer: Turn the engine off. Set the choke to the off or run position to prevent accidental starting. Allow the engine and the head area to cool for at least five minutes — the head housing near a gas engine can reach burn temperatures during operation. Disconnect the spark plug wire for an additional safety margin on any repair taking longer than a few minutes.
Understanding Reverse Thread — Critical Before You Apply Force
Most gas string trimmers use a reverse-thread (left-hand thread) arbor bolt. This means the retaining cap tightens counter-clockwise and loosens clockwise — the opposite of standard fasteners. The reverse thread exists so that the natural rotation of the cutting head during use tightens rather than loosens the cap. Applying force in the wrong direction can strip the arbor bolt or crack the head housing. To compare alternative configurations, check our hands-on review of marshall stanmore iii vs harman kardon onyx studio 8.
General convention (confirm in your manual before applying force):
- Gas trimmers: loosen the retaining cap by turning clockwise (reverse thread)
- Corded and cordless electric trimmers: loosen the retaining cap by turning counter-clockwise (standard thread)
This is a general rule, not universal. Always check your model’s owner’s manual or the directional arrow molded into the retaining cap before forcing it. Users looking for related component recommendations can explore our dyson v8 cyclone vs bissell featherweight stick breakdown.
How to Remove the Old Trimmer Head (Universal Step-by-Step)
- Power off and isolate. Remove the battery, unplug the cord, or shut off the gas engine and disconnect the spark plug wire. Confirm the head has stopped spinning completely.
- Position the trimmer safely. Lay the trimmer on a flat work surface with the head facing up and accessible. Do not hold the trimmer between your knees or against your body while applying rotational force to the head.
- Engage the shaft lock. Locate the lock button on the trimmer shaft — usually a small rubber or plastic button near the motor housing. Press and hold it. This locks the drive shaft so the head cannot rotate while you apply torque to the retaining cap. On models without a lock button (some older gas trimmers), insert a wooden dowel or flat-blade screwdriver through the venting slots in the head housing to block rotation — do not use metal tools directly against the spool eyelets.
- Identify thread direction. Check the retaining cap for a molded arrow or consult your manual. Confirm whether you need clockwise or counter-clockwise rotation to loosen.
- Unscrew the retaining cap. Grip the cap firmly and turn in the correct loosening direction. If hand pressure is insufficient, use the arbor wrench over the flat faces of the cap. Apply steady force — do not jerk. If the cap is heavily corroded or seized, a brief spray of penetrating lubricant (applied and allowed to soak for 10 minutes) can help. Never apply heat to the head assembly.
- Remove the retaining cap and internal components. Once the cap threads free, lift it off. On bump-feed heads, the spool and spring may fall loose — note the spring orientation before they drop so you can confirm the new head’s spring seats the same way. For a full head swap, set all old components aside.
- Slide off the head assembly. The head housing should now lift straight off the arbor bolt. If it is stuck, check that the retaining cap thread is fully disengaged — do not pry the housing off while any thread engagement remains, as this strips the arbor.
- Inspect the arbor bolt. Before fitting the new head, examine the arbor bolt threads for damage, corrosion, or debris. Clean with a wire brush if needed. A damaged arbor bolt requires shaft repair or professional service — installing a new head on a stripped arbor will not hold.
Gas vs. Electric/Cordless Removal Notes
- Gas trimmers are more likely to have reverse-thread caps, seized caps from heat cycling, and no shaft lock button (use the blocking method instead). The head may also have a washer between the housing and the shaft flange — keep it for reinstallation.
- Cordless and corded electric trimmers typically have a shaft lock button, standard thread caps, and lighter torque requirements. The process is generally faster and less likely to involve seized fasteners.
How to Install the New Trimmer Head
- Confirm compatibility before threading anything. Trimmer heads are not universally interchangeable. Arbor bolt thread sizes vary by manufacturer and model — common sizes include M10 × 1.25 LH (left-hand), M10 × 1.25 RH (right-hand), and 7/8 in.-9 UNC. Fitting a head with the wrong thread pitch will cross-thread and destroy the arbor. Check your trimmer’s model number against the replacement head’s fitment list, or bring both the old head and the trimmer model number when purchasing a replacement. Many aftermarket heads are sold as “universal fit” but require an included adapter — confirm the correct adapter is selected before installation.
- Position any required adapters or washers. If the new head includes thread adapters, select the correct one per the fitment chart and seat it on the arbor bolt first. Replace any washer removed during disassembly.
- Thread the new head onto the arbor bolt by hand. Turn in the tightening direction (opposite of the loosening direction used during removal). Start by hand to avoid cross-threading. The head should thread on smoothly with finger pressure for the first several turns. Resistance at the very start of threading (before any turns) indicates misalignment or wrong thread — stop immediately and recheck.
- Snug with the arbor wrench. Once hand-tight, engage the shaft lock and use the arbor wrench to snug the head — firm, not overtorqued. Trimmer heads are designed to self-tighten during use (via the reverse-thread principle), so excessive installation torque is unnecessary and can make future removal very difficult.
- Brand-specific installation notes:
- Husqvarna T25: The T25 bump-feed head uses a click-and-pull spool removal system for the inner spool, but the head assembly itself threads onto the arbor bolt in the standard way. A plastic retaining bolt threads clockwise to install on Husqvarna’s reverse-thread shaft.
- STIHL AutoCut (e.g., AutoCut 25-2, C 5-2): STIHL heads screw directly onto the gearbox shaft. The retaining nut on most STIHL gas trimmers has a left-hand thread — tighten counter-clockwise. Confirm in the STIHL model-specific manual, as thread direction has varied across generations.
- Ryobi Reel-Easy: The Reel-Easy head on many Ryobi cordless trimmers uses a clip-in spool system rather than a conventional bump knob, but the head still threads onto the arbor bolt. Ryobi corded and cordless models typically use standard right-hand thread — tighten clockwise.
- Installing a blade head: Confirm the trimmer is rated for blade use before proceeding. Fit the blade onto the arbor, add the blade retaining washer (concave side toward the blade), then thread and torque the retaining nut to the manufacturer’s specification. Install the blade-rated guard before any operation. Do not run a blade head without the correct guard — this is a serious laceration hazard.
- Pre-start check: Tug the head firmly by hand in both rotational directions and axially (away from the shaft). It must not wobble, shift, or show any thread movement. Verify the guard is properly fitted and all covers are closed before restoring power.
Testing the New Head and Troubleshooting Common Problems
Initial Test Procedure
- Move to an open outdoor area, away from people, vehicles, and hard surfaces.
- Restore power (reinsert battery, plug in, or reconnect spark plug wire and start engine).
- Run the trimmer at low throttle for 15–20 seconds while observing the head from a safe distance. Listen for abnormal vibration or rattling.
- Increase to full throttle briefly. Shut down and re-inspect the head seating before sustained use.
Troubleshooting
| Symptom | Likely Cause | Action |
|---|---|---|
| Head wobbles or vibrates excessively | Head not fully threaded; missing washer; incompatible arbor adapter | Remove head, inspect arbor and washer, rethread fully |
| Head spins loose during use | Threaded in wrong direction (loosening instead of tightening during rotation) | Remove, confirm thread direction convention for your model, reinstall in correct direction |
| New head won’t thread on | Wrong thread pitch or diameter; cross-threading attempt | Stop — do not force. Verify model compatibility and try the correct adapter |
| Head is on but line won’t feed (bump-feed) | Spool loaded incorrectly or line anchored wrong inside new head | Remove retaining cap, reload spool per new head’s instructions |
| Arbor bolt spins when trying to remove cap | Shaft lock not fully engaged; lock button worn | Re-engage lock button or use the blocking method; if lock mechanism is broken, service the shaft |
Compatibility: Universal vs. Brand-Specific
No trimmer head is truly universal despite that marketing term. Heads described as “universal fit” ship with multiple threaded adapters to cover common arbor sizes. The correct adapter must be selected — using the wrong one seats the head at the wrong depth and will cause it to work loose. When in doubt, purchase an OEM replacement head for your trimmer’s model number, or cross-reference the arbor bolt thread specification (found in the owner’s manual or on the manufacturer’s parts diagram) against the replacement head’s adapter list.
Everything You Need to Know: How To Change Trimmer Head FAQ
Which direction do I turn the retaining cap to remove a trimmer head?
On most gas trimmers: clockwise (reverse thread — left-hand thread loosens clockwise). On most corded and cordless electric trimmers: counter-clockwise (standard thread). The directional arrow molded into the retaining cap, or your owner’s manual, overrides any general rule. Confirm before applying force. Before finalizing equipment decisions, refer to our comprehensive bissell crosswave hydrosteam vs shark stainforce comparison.
Can I replace my trimmer head with a different type — for example, swap a bump-feed head for a blade head?
Mechanically, yes — all three head types use the same arbor-bolt mounting system. However, blade heads require that the trimmer’s engine or motor is rated for blade use, that a blade-compatible guard is installed, and that the operator uses full PPE including face protection. Not all residential trimmers meet these requirements. Check your trimmer’s manual before fitting a blade head.
What if my new trimmer head keeps coming loose during use?
The head was threaded on in the wrong direction — it is loosening with rotation rather than self-tightening. Remove it, identify the correct thread direction for your model, and reinstall in the tightening direction. Also confirm the correct arbor adapter is in use; a mismatched adapter can prevent full thread engagement and cause the head to back off under load.
Are trimmer heads from different brands interchangeable?
Only if the arbor bolt thread specification matches. Thread sizes are not standardized across the industry — common specs include M10 × 1.25 LH, M10 × 1.25 RH, and 7/8 in.-9 UNC, among others. Aftermarket “universal” heads ship with multiple adapters to cover several specs. Always verify compatibility against your trimmer’s model number or arbor thread specification before purchasing.
For more hands-on benchmarks and buying recommendations, consult our guides on residential zero-turn lawn mower guide, as well as heavy-duty chainsaw buyer guide, as well as durable ride-on lawn tractor guide.
Mechanical safety standards, operational tolerances, and protective gear guidelines align with benchmark specifications established by the American National Standards Institute (ANSI).









