Direct Answer: How Do You Start an Electric Lawn Mower?
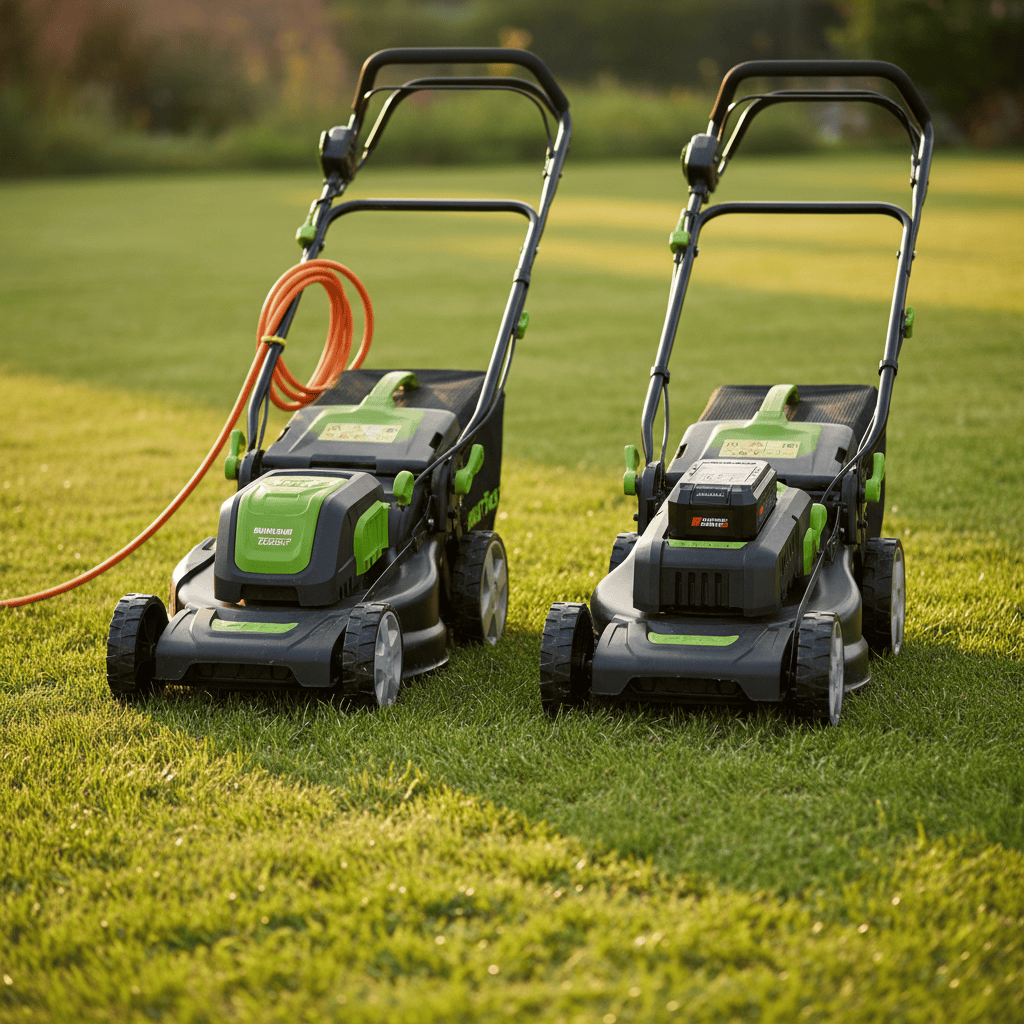
Starting an electric lawn mower depends on whether it is corded or battery-powered. For a corded model, connect the extension cord to the mower first, then to a GFCI-protected outlet, press and hold the safety start button, and pull the start bar or bail toward the handle. For a cordless model, insert a fully charged battery until it clicks, press the safety start button, and squeeze the bail or start lever. On both types, the motor runs only while the safety lever is held; release it and the mower stops. Always clear debris from the mowing area and confirm the blade is free of obstructions before starting.
Understanding Your Electric Mower Type
Before you can start your mower correctly, you need to know which type you own. Electric lawn mowers fall into two broad categories, and the starting procedure differs significantly between them.
How Can I Tell If My Mower Is Corded or Battery-Powered?
The most obvious clue is physical. A corded electric lawn mower has a power cord socket on the deck or handle, a cord retention hook or strap, and requires an extension cord connected to a wall outlet. A cordless or battery-powered mower has a battery compartment with a removable battery pack, a battery release or locking tab, and no power cord. Cordless models are often labeled with the battery voltage, such as 40V, 60V, or 80V, on the handle or battery housing.
If you are unsure, check the manufacturer’s label on the underside of the handle or near the motor. It will clearly state the input requirements, such as “120V AC” for a corded mower or list a battery model number for a cordless unit.
Main Differences in the Starting Mechanism
- Corded mowers: Typically use a two-step sequence — press a safety start button while pulling a bail bar or start lever toward the handle. The motor engages only when both actions are performed together.
- Cordless mowers: Often add a key, button, or switch that must be set before starting. Some require you to insert a safety key or press the start button while squeezing the handle lever.
- Push-button start models: Some newer cordless mowers feature a dedicated start button and an auto-stop when the handle is released.
Regardless of the type, every modern electric mower includes a safety control, sometimes called a dead-man switch or blade brake. This is the lever you must hold to keep the motor running. Releasing it stops the blade, usually within a few seconds. This is a required safety feature to reduce the risk of injury if you lose grip or need to stop quickly.
Pre-Start Safety Checklist
Perform these checks every time before starting your electric mower. They take less than a minute and prevent the most common starting problems and safety hazards.
- Clear the mowing area: Remove rocks, sticks, toys, hoses, and debris from the lawn. Objects can be thrown by the blade and cause serious injury.
- Inspect the blade deck: With the mower off and unplugged (or battery removed), check that nothing is wrapped around the blade and that the blade is not damaged. Never attempt to clear debris from under the mower deck while the motor is running or while the mower is connected to power.
- Check the extension cord (corded models): Uncoil the cord fully before use. A coiled cord heats up and can trip the breaker. Inspect the extension cord and the mower’s own cord for cuts, frayed insulation, or exposed wires. Use a cord rated for outdoor use, and note that a cord longer than 100 feet or with too light a gauge may cause a voltage drop that prevents the motor from starting.
- Verify the outlet (corded models): Use a GFCI-protected outlet to reduce the risk of electric shock. Many garages and outdoor receptacles are GFCI-protected; test the outlet with a “TEST” and “RESET” button before use. Never use an adapter to defeat a three-prong grounded plug.
- Confirm battery charge (cordless models): Check the battery indicator lights on the pack or mower. If the charge appears low, charge the battery fully before starting. A weak battery may not deliver enough power to spin the blade under load.
- Check the battery contacts: Make sure the battery contacts are clean and free of debris, and that the battery slides in fully and locks with an audible click.
- Wear appropriate gear: Use sturdy shoes, long pants, eye protection, and hearing protection. Never mow in bare feet or sandals.
Step-by-Step: Starting a Corded Electric Lawn Mower
Follow these steps in order for a corded electric lawn mower. The sequence matters because connecting power in the wrong order can create a shock hazard or leave the mower with a “dead” handle that will not start.
Step 1: Prepare the Extension Cord
Use a heavy-duty, outdoor-rated extension cord. As a guideline, select the correct gauge for the length: a 14-gauge cord is generally suitable for lengths up to 100 feet, while longer runs of up to 150 feet may require a 12-gauge cord. Uncoil the entire cord so it lies flat on the ground. Connect the female end of the extension cord to the mower’s power cord socket first, then route the cord through the cord retention hook or loop on the handle. This prevents the cord from being pulled loose or from falling into the blade path while you mow.
Step 2: Plug Into a GFCI-Protected Outlet
Plug the male end of the extension cord into the wall outlet after it is connected to the mower. This minimizes the chance of arcing at the mower connection. Confirm the outlet is GFCI-protected and that the cord is live by checking the outlet’s indicator light if present.
Step 3: Press the Safety Start Button
Locate the safety start button, usually mounted on the handle hub or on top of the upper handle. Press and hold it with one hand. The motor will not run if you press the button alone; it is an enabling switch designed to prevent accidental starts.
Step 4: Pull the Start Bar or Bail Toward the Handle
While still holding the safety button, squeeze the bail bar or start lever upward against the handle with your other hand. The motor should engage immediately. Continue holding the bail to keep the blade spinning.
Step 5: Release to Stop
The mower is designed to stop when you release the bail. In many models, the blade brake engages automatically within a few seconds of releasing the handle. This is normal and provides an important safety function if you need to step away or clear an obstruction.
When you finish mowing, stop the mower by releasing the bail, then unplug the extension cord from the wall outlet before disconnecting it from the mower. Store the cord loosely coiled, never tightly wrapped around the mower, to avoid damaging the insulation.
Why Does the Mower Stop When I Release the Lever?
This is the dead-man switch feature. It is a mandated safety mechanism that stops the blade rotation within a few seconds of releasing the handle. It prevents the mower from running unattended and greatly reduces the chance of injury if you trip, lose grip, or need to quickly stop the blade. You should never bypass or disable this mechanism.
Step-by-Step: Starting a Cordless (Battery) Lawn Mower
Cordless electric mowers remove the cord but add a battery procedure and often a key or switch. Follow these steps in order.
Step 1: Install or Insert the Charged Battery
Confirm the battery is fully charged, then slide it into the battery compartment on the mower deck or handle. Push firmly until the battery locks in place with an audible click. If your battery uses a separate locking tab or release button, verify that the tab snaps back into position. A loose battery is a common reason a cordless mower appears “dead” even with full charge.
Step 2: Check the Safety Key or Run Switch (If Equipped)
Some cordless mowers include a removable safety key, an On/Off switch, or a run position on the control panel. Insert the key or move the switch to the “On” position before attempting to start. Without the key, the motor circuit is open and the mower will not respond to the handle lever.
Step 3: Press the Safety Start Button
Press and hold the safety start button. On many cordless models, the button is located near the battery indicator or on the handle. You may see a green LED or hear a click confirming the system is armed.
Step 4: Squeeze the Bail or Start Lever
While holding the button, squeeze the bail bar and pull it toward the handle. The motor should spin the blade. Some models require you to hold both controls throughout the mowing session, while others allow you to release the button once the motor is running and continue holding only the lever. Check your owner’s manual, but the safest practice is to keep both hands on the controls as designed.
Step 5: Monitor the Battery Indicator
While mowing, keep an eye on the battery indicator. When the charge drops to the low range, finish your row and stop. Running the battery completely flat can reduce its lifespan. When the mower slows down or stops under load, it is time to recharge and swap in a spare battery if you have one.
What Should I Do If the Battery Indicator Shows Low Charge?
Stop mowing and remove the battery. Place it on the charger and recharge it fully. If you have a second battery, install it and resume mowing. If the fresh battery also fails to start the mower within a reasonable state of charge, check the battery contacts for dirt or corrosion and confirm the battery is an original or compatible replacement recommended by the manufacturer.
Troubleshooting: Why Won’t My Electric Mower Start?
If the mower makes no sound when you pull the lever, work through these checks in order. Most starting failures are simple and quick to fix.
Check the Safety Controls First
The most common cause is operator error. Make sure the safety start button is fully pressed, the bail or lever is squeezed completely to the handle, and, on cordless models, that the safety key or run switch is engaged. Some mowers require the button to be pressed and the lever pulled simultaneously; if the mower does not start, try pressing the button slightly before pulling the lever. Many newer models have a “cold start” or “prime” sequence described in the manual, so check that as well.
Check the Power Source
- Corded mower, no sound: Confirm the extension cord is plugged into the wall and the wall outlet is live. Test the outlet with another device or press the RESET button on the GFCI outlet. Loose or damaged cords are leading causes of failure, as is a cord that is too long or too thin, which causes a voltage drop. Try a shorter, heavier-gauge cord.
- Cordless mower, no sound: Verify the battery is seated and locked, check the charge indicator, and test the battery in another compatible tool if available. Dirty or corroded contacts can prevent power transfer; clean them with a dry cloth.
Reset the Thermal Overload or Circuit Breaker
Electric mowers have a thermal overload protector or a resettable circuit breaker. If the motor overheated, or if the mower is under heavy load, the breaker trips to protect the motor. Look for a reset button on the motor housing or deck. Wait a few minutes for the motor to cool, then press the reset button. If the breaker trips repeatedly, there may be an obstruction under the deck, the blade may be dull or bent, or the grass may be too tall and thick for a single pass.
Reposition the Extension Cord and Check the Switch Position
If the mower starts but runs briefly and dies, the extension cord may have been pulled partially out of the mower socket, or the cord may be pinched. Inspect the cord connection and the switch position. On some models, if the start lever is not fully engaged, the motor will surge or stop.
When to Get Professional Help
If the mower still will not start after these checks, inspect the blade for a solid obstruction, then consult the owner’s manual or contact the manufacturer’s support line. Do not disassemble the motor or attempt internal repairs while the mower is plugged in or the battery is installed. Faulty switches, worn brushes in the motor, or a damaged wiring harness require professional service.
Quick Start Checklist: Remembering the Steps
Use this concise checklist every time you mow. With practice, it becomes automatic in under ten seconds.
| Task | Corded Model | Cordless Model |
|---|---|---|
| Area check | Clear lawn of debris | Clear lawn of debris |
| Power prep | Uncoil cord; connect to mower, then to GFCI outlet | Insert fully charged battery until it clicks |
| Safety enable | Press and hold safety start button | Insert safety key (if equipped) and press start button |
| Start | Pull bail/start lever toward handle | Squeeze bail/start lever toward handle |
| Stop | Release lever; unplug from wall first when done | Release lever; remove battery when stored |
When Should You Release the Safety Lever or Stop the Mower?
Release the lever whenever you need to adjust the mower, pick up debris, empty the grass bag, cross a paved surface, or move away from the mower for any reason. The mower should be stopped before tilting it to inspect the underside. On corded models, always unplug before tilting or cleaning. On cordless models, remove the battery before tilting or performing maintenance.
Frequently Asked Questions
Can I use any extension cord with a corded electric mower?
No. Use only a heavy-duty, outdoor-rated extension cord. The cord must be rated for at least 14-gauge for runs up to roughly 100 feet, and 12-gauge for longer runs. Lighter indoor cords overheat, cause voltage drop, and can prevent the motor from starting. Plug the mower into a GFCI-protected outlet and never use damaged cords.
Do I have to hold the start button the whole time I mow?
It depends on the model. Many electric mowers require holding the safety start button only until the motor engages; after that, the bail keeps it running. Other models, especially some cordless designs, require holding both controls throughout mowing. Check your owner’s manual. In every case, you must hold the bail or start lever the entire time you are mowing.
Why does my electric mower stop as soon as I release the handle?
That is the dead-man switch, also called the blade brake control. It stops the blade within a few seconds of releasing the handle to prevent injury if you lose grip or need to stop quickly. This is a normal safety feature and should never be disabled or taped down.
My mower is plugged in and the battery is charged, but nothing happens when I pull the lever. What should I check?
First, confirm you are pressing the safety start button and pulling the lever simultaneously with the lever fully against the handle. Then check the power path: for corded models, verify the extension cord is live, properly seated in the mower socket, and not too long or thin; for cordless models, reseat the battery until it clicks, confirm the safety key is in place, and check the charge indicator. Finally, press the thermal overload reset button on the motor after letting it cool for a few minutes. If none of these work, consult the owner’s manual or contact the manufacturer for service.