

Quick Answer: How to Install Riding Mower Blades
Direct Answer: To install riding mower blades, first ensure safety by disconnecting the spark plug wire or battery. Secure the mower on a flat surface or safely lift it/deck using proper supports. Remove the old blade by blocking the spindle with a piece of wood and unbolting it (noting the bolt’s direction). Install the new blade with the cutting edge facing the direction of rotation (typically toward the discharge chute). Torque the spindle bolt to the manufacturer’s specification (usually 30-60 ft-lbs) and reconnect power before testing.
Before You Start: Essential Tools and Safety Prep

Before you begin any work under your riding mower, proper preparation is critical to prevent injury. Having the right tools and following safety protocols will make the job smoother and safer.
What tools do I need to change riding mower blades?
- Safety gear: Heavy-duty work gloves and safety glasses.
- Socket set or wrench: Typically a 15/16″ or 1″ socket, but check your manual for the exact spindle bolt size.
- Torque wrench: Essential for tightening the bolt to the manufacturer’s specification.
- Block of wood (2×4): To hold the spindle steady while loosening/tightening the bolt.
- Jack and jack stands or ramps: For safely lifting and supporting the mower.
- Pliers or a blade removal tool: Can help grip the blade or bolt if needed.
What are the most important safety precautions before working under a mower?
Always disconnect the power source. This means either removing the spark plug wire or disconnecting the battery cable on electric-start models. Never rely solely on the ignition key being off. Ensure the mower is on a flat, stable surface. If lifting the mower, use proper jack stands or approved supports, never work under a mower supported only by a jack.
Should I disconnect the battery or just the spark plug wire?
For gas-powered riding mowers, disconnecting the spark plug wire is the primary safety step to prevent accidental engine starts. If your mower has an electric PTO (Power Take-Off) blade engagement or electric start, it is best practice to also disconnect the negative battery terminal to eliminate all power sources.
Accessing the Blades: Lifting the Mower vs. Removing the Deck
The method you use to access the blades depends on your mower’s design and how much clearance you need. There are two primary approaches.

Pros
- 23.5HP Kawasaki FX730 V-Twin OHV engine
- 726cc displacement per listing
- 60-inch cutting width in the product name
Cons
- No features, description, or reviews to verify performance
- Listed weight of 930 pounds complicates transport

Pros
- Brushless motor system delivers gas-equivalent power without emissions or excessive noise
- High-capacity battery kit enables cutting coverage of up to 4.4 acres per charge set
- Durable 10-gauge steel deck and constant high blade tip speed handle dense grass effectively
- Premium seating and lighting features support comfortable extended operation
- 4-year warranty provides strong protection for the investment
Cons
- Runtime tops out around 4.4 acres depending on conditions, requiring recharges for bigger properties
- Electric design depends on charging infrastructure and battery management rather than simple refueling
- Height adjustment is noted only basically without extensive position details in available specs
The Greenworks 60V MaximusZ Zero Turn Riding Lawn Mower is a commercial-grade electric machine built for large lawns. Its primary construction centers on a heavy-duty 60-inch 10-gauge fabricated steel deck that prioritizes durability and airflow, paired with premium comfort elements including an adjustable suspension seat with lumbar support and foldable armrests for a solid first impression of quality and user focus.
Performance shines through an intelligent brushless motor system offering power equivalent to a 31HP gas engine with zero emissions. Three high-torque brushless hub motors sustain a constant 17,900 FPM blade speed, while SmartCut Technology auto-adapts to prevent bogging in thick or wet grass. The complete kit supplies (2) 20.0Ah suitcase batteries plus (4) 8.0Ah batteries and a 1.5kW fast charger for up to 4.4 acres of cutting. Additional capabilities include a 4-in-1 deck for mulching, bagging, rear and side discharge, 300 lb towing capacity with front/rear hitch, dual LED headlights, and an LCD display.
Drawbacks and considerations include the practical need to recharge the battery set after maximum runtime, which can interrupt work on properties exceeding 4.4 acres. Being fully electric means reliance on power sources for recharging instead of fuel, and height adjustment is referenced only in basic terms without more granular position data in the specifications.
In verdict, the Greenworks 60V MaximusZ delivers the most value to homeowners and professionals managing medium-to-large properties who want quiet, emission-free commercial power, versatile cutting options, and the security of a 4-year warranty in a comfortable zero-turn package.

Pros
- Commercial-grade electric performance with instant torque and no gas engine maintenance.
- Large included battery package and fast charger improve runtime and turnaround time.
- Heavy-duty 54-inch fabricated deck is built for durability and wider coverage per pass.
- Comfort-focused operator features are better than many basic riding mowers in this class.
- Backed by a 4-year limited warranty for added purchase confidence.
Cons
- At 848.78 pounds, it is very heavy and will be difficult to move manually or transport without proper equipment.
- The large footprint, with dimensions of 76.77 x 73.23 x 56.3 inches, requires substantial storage space.
- The premium feature set and battery system may be more than many small-yard owners need.
Overview & Design: The Greenworks 80V 54" MaximusZ Zero Turn Riding Lawn Mower is a commercial-style electric mower built for large residential properties. Its 54-inch 10-gauge fabricated steel deck, zero-turn layout, and premium operator seat give it a serious, heavy-duty feel right away.
Performance & Key Features: This model is positioned as a 41HP gas-equivalent machine with instant torque, a constant 17,900 FPM blade speed, and SmartCut technology that adapts to changing grass conditions. The included battery kit with (2) 16.0Ah and (4) 6.0Ah batteries is designed to support up to 4+ acres per charge, while the 1.5kW fast charger helps reduce downtime.
Drawbacks & Considerations: The mower is extremely heavy at 848.78 pounds, so it is not easy to move or store in tight spaces. It is also a major investment and may be excessive for smaller yards or users who do not need the runtime and power of a large battery-electric zero-turn.
Verdict: This is a strong fit for homeowners with large lawns who want powerful, low-maintenance mowing performance and premium comfort features. Buyers who need a wide cutting deck, long runtime, and electric operation will likely get the most value from it.
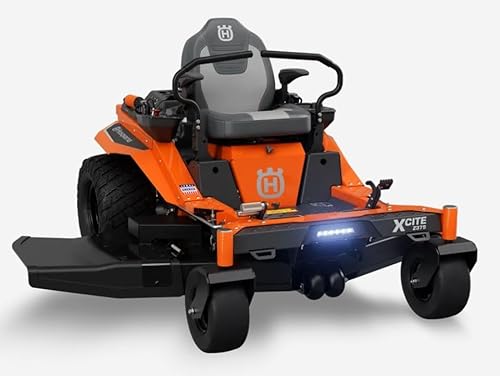
Pros
- Robust 26HP Kohler engine provides ample power for demanding mowing tasks and thick vegetation
- Large 60-inch fabricated steel deck enables faster coverage of extensive lawn areas
- Durable 3-blade fabricated construction enhances deck longevity and resistance to wear
- Zero-turn capability offers precise control and reduced mowing time in complex layouts
Cons
- Large 60-inch deck and overall zero-turn size demand significant storage space and may not suit smaller properties
- Base specifications lack details on accessories such as mulching kits or baggers, which may need separate purchase
- High-powered engine setup could increase fuel use during long sessions relative to lower-horsepower models
The Husqvarna Xcite Z375 is a zero-turn riding lawn mower engineered for large-scale residential and light commercial mowing. It combines a solid fabricated steel build with a capable Kohler power plant, creating an immediate impression of durability and purposeful design suited to expansive properties.
Performance centers on the 26HP 747cc Kohler V-Twin engine that supplies strong, consistent power for thick grass and varied terrain, paired with the 60-inch 3-blade fabricated steel deck. This setup delivers a wide, clean cut that covers ground efficiently and maintains quality across long sessions.
Considerations include the substantial footprint of the 60-inch deck and zero-turn frame, which requires ample storage and may feel oversized for compact yards. Available data also omits specifics on add-ons or comfort options, so buyers should confirm full feature sets independently.
The Husqvarna Xcite Z375 delivers the most value for owners of large lawns or light commercial operators who prioritize raw cutting power, deck durability, and zero-turn efficiency over compact size or extensive accessory packages.
How do I safely lift a riding mower to access the blades?
For mowers with a simple, non-removable deck, you may need to lift the entire front or rear of the unit. Use a hydraulic floor jack on a reinforced frame point (consult your owner’s manual) and immediately place sturdy jack stands under the frame. Never work on a mower supported only by a jack.
When should I remove the mower deck instead of lifting the entire unit?
Most modern riding mowers have a removable deck. This is often the safer and easier method, as it lowers the working height and gives you full access to all spindles. Deck removal is typically required for multi-blade (3+ blade) decks or when the deck is too low to the frame to safely slide underneath. The process involves disconnecting the drive belt, deck hangers, and any wiring for electric blades, then sliding the deck out from under the mower. For broader ecosystem context, read through our operational guide on z890 vs x870e motherboard.
What type of supports should I use to hold the mower up?
Always use jack stands rated for the weight of your mower. Place them on a solid, level surface like a concrete garage floor. Never use cinder blocks, wood blocks alone, or other unstable items as supports.
Removing the Old Blade: Step-by-Step Procedure
With the mower securely supported and the blades accessible, you can proceed with removal. For troubleshooting and reliability insights, consult our in-depth marshall stanmore iii vs harman kardon onyx studio 8 report.
How do I stop the spindle from turning while I loosen the bolt?
This is where the block of wood comes in. Wedge a sturdy piece of 2×4 lumber between the blade and the mower deck housing or frame. This will prevent the spindle from spinning when you apply torque to the bolt. Ensure the wood is positioned so it won’t slip.
Which direction do I turn the bolt to remove it (left-hand or right-hand thread)?
The vast majority of riding mower blade bolts have standard right-hand threads, meaning you turn them counter-clockwise (lefty-loosey) to remove. However, it is always best to verify this in your owner’s manual, as some older or specific models may use left-hand threads. Readers comparing setup options can review our technical analysis on dyson v8 cyclone vs bissell featherweight stick.
What should I do if the blade bolt is stuck or seized?
Apply a penetrating oil (like PB Blaster or Liquid Wrench) to the bolt threads and let it sit for 15-30 minutes. You can then try using a breaker bar for more leverage. If it remains stuck, carefully applying heat with a propane torch to the nut (not the bolt) can help break the corrosion bond. Use extreme caution with this method.
Installing the New Blade: Orientation and Torque
This is the most critical phase. Incorrect installation can lead to poor cutting, excessive vibration, or dangerous blade detachment. For complementary field maintenance guidelines, examine our breakdown of bissell crosswave hydrosteam vs shark stainforce.
How do I determine the correct orientation (cutting edge direction) for the new blade?
Look at the old blade or the new one. Blades have a “lift wing” or “air sail” on the back edge and a sharpened cutting edge on the front. The cutting edge must face the direction of rotation. On a standard side-discharge mower, this means the sharp edge should point toward the outside of the deck (the discharge chute). A common rule is that the “wings” or curved part of the blade should be pointing up toward the deck when installed. If you install it backward, the mower will not cut and will “beat” the grass.
What is the recommended torque specification for the blade spindle bolt?
Always refer to your owner’s manual for the exact torque specification. While a common range is 30-60 ft-lbs, this varies significantly by mower brand and model. Using a torque wrench to tighten the bolt to the specified value is non-negotiable for safety. Over-tightening can strip threads or crack the spindle, while under-tightening can allow the blade to come loose.
How can I tell if the blade is installed correctly before lowering the mower?
Visually inspect that the cutting edge is facing the correct direction. Ensure the blade is seated fully against the spindle boss. Give it a gentle tug to confirm it is secure. The blade should spin freely without wobbling.
Final Checks and Troubleshooting
Before you put the mower back into service, complete these final steps.
What final safety checks should I perform after installing the blades?
- Double-check that the spindle bolt is torqued to spec.
- Ensure no tools are left under the deck.
- Reconnect the spark plug wire and/or battery cable.
- Lower the mower safely from its supports.
- Before starting, visually inspect underneath (with the mower off) to confirm blade clearance and orientation.
What are signs that the blades are not installed correctly?
- Poor cut quality: The grass is torn, not cleanly cut.
- Excessive vibration: The mower shakes violently when blades are engaged.
- Unusual noise: Grinding or banging sounds.
- No grass discharge: Grass clumps under the deck instead of ejecting.
How often should riding mower blades be replaced or inspected?
Inspect blades for damage, dullness, or bending at the start of each mowing season and after hitting any solid objects. Most blades will need sharpening every 20-25 hours of use. Replace blades when they are bent, cracked, or when the metal has worn thin from repeated sharpening, which is typically after 100-200 hours of use or every 2-3 seasons for a homeowner.
Everything You Need to Know: How To Install Riding Mower Blades FAQ
Can I install blades from a different brand on my mower?
It is not recommended. Blades are designed for specific spindle bolt patterns, diameters, and deck sizes. Using the wrong blade can cause severe vibration, damage the spindle, and create a safety hazard. Always use the OEM (Original Equipment Manufacturer) part number or a verified equivalent from a reputable supplier.
What is the difference between a mulching blade and a standard blade?
A standard blade has a straight cutting edge and is designed for side-discharge. A mulching blade has additional curved fins or “wings” on the back that recirculate grass clippings under the deck, cutting them repeatedly into fine pieces that decompose quickly. You can install mulching blades if your deck is designed for it, but you may need to install a mulching plug to block the discharge chute.
My new blade doesn’t seem to fit. What could be wrong?
First, verify you have the correct part number for your mower’s make, model, and deck size. Second, check that the center hole (arbor) on the blade matches your spindle bolt pattern. Some spindles have a keyed or shaped boss (e.g., star-shaped) that requires a matching blade center. Forcing a mismatched blade is dangerous.
Do I need to balance the new blade before installing it?
New, high-quality blades are typically pre-balanced. However, if you are reinstalling a sharpened blade, you should check its balance using a blade balancer. An unbalanced blade causes vibration that can damage spindle bearings and the mower deck over time. If you sharpen blades yourself, always balance them.
Riding Mower Blade Safety Notes
Installing blades on a riding mower calls for supporting the deck securely and making sure the engine cannot start during the job. Helpful background on general equipment safety can be found at American National Standards Institute (ANSI).









