Quick Answer: How to Winterize and Store Lawn Mower Battery
Quick Answer: Store your 40V or 18V lawn mower battery at a 50% charge level (roughly 2 to 3 LED bars on most indicators) in a dry, climate-controlled space between 40°F and 80°F. Never store it fully charged or fully depleted. Disconnect the battery from the mower, remove it from the machine, and check the charge every 30 to 60 days, topping it back up to 50% if it drops below 30%. In spring, simply recharge to 100% and reinstall, no special “wake-up” procedure is needed for modern lithium-ion packs.
Why Winter Storage Kills Lawn Mower Batteries (And How to Prevent It)
Most homeowners don’t realize that the #1 killer of cordless lawn mower batteries isn’t cold weather itself, it’s the combination of cold temperatures and improper state of charge. When you park your mower in an unheated shed in November and forget about it until April, you’re subjecting a lithium-ion pack to conditions that accelerate internal degradation, trigger protective sleep modes, and in worst cases, permanently brick the battery.
Here’s the core problem: lithium-ion cells self-discharge at roughly 2, 3% per month. Over a 5-month winter, that’s a 10, 15% loss. If you stored the battery at 100% charge, it stays in a high-voltage stress state that degrades the cathode. If you stored it at 0%, the voltage can drop below the cell’s minimum cutoff, causing the battery management system (BMS) to enter a deep sleep mode that many chargers refuse to wake up. Standard operational and maintenance protocols can be consulted via ENERGY STAR official efficiency certification benchmarks.
Lithium-Ion Freezing Temperature Storage: The Real Danger Zone
Let’s address the most common misconception first: lithium-ion freezing temperature storage does not mean the electrolyte literally freezes solid. The electrolyte in modern lithium-ion cells has a freezing point well below 0°F (-18°C). However, the operational limits are much narrower.
- Charging below 32°F (0°C): Absolutely forbidden. Charging a cold lithium-ion cell causes lithium plating on the anode, which permanently reduces capacity and creates a fire risk. Most quality chargers have built-in temperature sensors that refuse to charge below freezing.
- Discharging below 14°F (-10°C): Severely reduces available capacity and increases internal resistance, which can trigger the BMS to shut down mid-operation.
- Storing below -4°F (-20°C): While not immediately destructive, prolonged exposure increases the risk of electrolyte degradation and can cause physical stress on the cell casing.
The safe storage window for lithium-ion is 32°F to 95°F (0°C to 35°C), with the ideal range being 40°F to 80°F. If your garage or shed regularly dips below freezing, the battery must come inside.
What Actually Happens to a Frozen Battery
When a lithium-ion battery is stored in sub-freezing conditions, the electrolyte becomes more viscous, increasing internal resistance. If the battery was stored at a low state of charge, the voltage can sag below the BMS’s minimum threshold (typically 2.5V per cell). The BMS then enters a protective sleep mode, effectively disconnecting the cells from the terminals. From the outside, the battery appears completely dead, no voltage at the terminals, no response to the charger.
Storage Charge Percentage: Why 50% Is the Magic Number
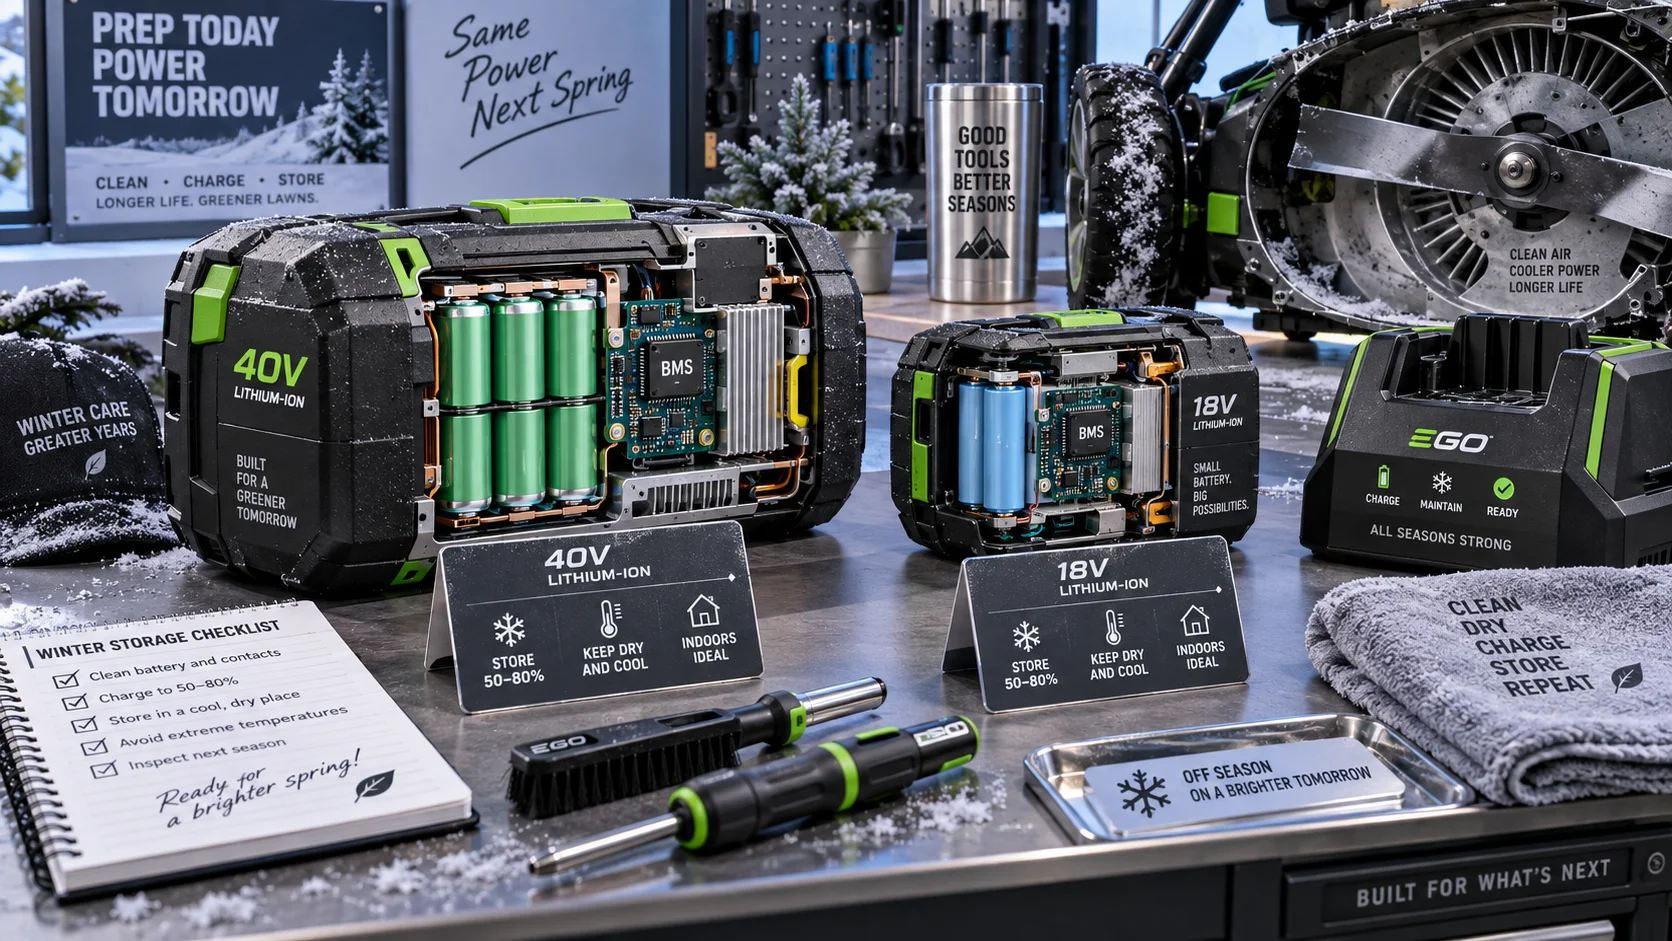
The storage charge percentage is the single most important variable in winter battery care. Lithium-ion cells experience the least internal stress at approximately 50% state of charge (SOC), which corresponds to roughly 3.8V per cell. Here’s why:
- At 100% SOC (4.2V/cell): The cathode material is under maximum electrochemical stress. Storing at full charge accelerates capacity fade by up to 20% per year, even in ideal temperatures.
- At 0% SOC (2.5V/cell): The cell risks dropping below the cutoff voltage during self-discharge, triggering deep sleep mode and potentially causing copper shunting that permanently shorts the cell.
- At 50% SOC (3.8V/cell): Minimal stress on both electrodes, maximum calendar life. This is the industry-standard storage recommendation for all lithium-ion chemistries.
How to Hit 50% on Your Mower’s Battery Indicator
Most 40V and 18V mower batteries use a 4-LED charge indicator. Here’s how to translate the LEDs to storage charge: Users looking for related component recommendations can explore our how to change lawn mower oil breakdown.
| LED Indicator | Approximate Charge | Storage Suitability |
|---|---|---|
| 4 LEDs (solid) | 100% | ❌ Too high, stress on cells |
| 3 LEDs | 75% | ⚠️ Acceptable but not ideal |
| 2 LEDs | 50% | ✅ Perfect storage charge |
| 1 LED (blinking) | 25% or below | ⚠️ Too low, risk of deep discharge |
| No LEDs | 0% / BMS sleep mode | ❌ Dangerous, may not recover |
If your battery shows 4 LEDs, mow a small patch of grass or run the mower for 5 to 10 minutes to draw it down to 2 LEDs. If it shows 1 LED or less, charge it for 15 to 20 minutes to bring it back up. The goal is a steady 2-LED reading before storage.
Step-by-Step: How to Store Lawn Mower Battery in Winter
Follow this exact sequence to maximize battery lifespan through the off-season. This applies to both 40V and 18V systems from brands like EGO, Ryobi, DeWalt, Greenworks, and Kobalt. Before finalizing equipment decisions, refer to our comprehensive self propelled vs push mowers comparison.
Step 1: Disconnecting Mower Battery, Always Remove It
Disconnecting mower battery from the machine is non-negotiable. Even when the mower is “off,” the battery management system and any standby electronics (like LED headlights or digital displays) draw a small parasitic load. Over months, this trickle drain can push the battery below its safe threshold. Additionally, leaving the battery in the mower exposes it to vibration, moisture, and temperature extremes that the mower’s chassis doesn’t insulate against.
Press the release latch, slide the battery out, and wipe the contacts with a dry cloth. Inspect the terminals for corrosion or debris, if you see white or green residue, clean it with a small brass brush or contact cleaner before storage. For broader ecosystem context, read through our operational guide on litheli vs worx compact mower.
Step 2: Clean the Battery Housing and Contacts
Grass clippings, dust, and moisture trapped in the battery compartment can cause corrosion and short circuits. Use a dry brush or compressed air to remove debris from the vent slots and terminal area. Never use water or liquid cleaners on the battery itself. If the contacts look dull, a pencil eraser works surprisingly well to polish them without damaging the plating.
Step 3: Set the Charge to 50%
As covered above, aim for 2 LEDs on the indicator. If you’re unsure of the exact percentage, a multimeter reading of 19.0V, 19.5V for an 18V battery or 40.0V, 41.0V for a 40V battery indicates the ideal storage range. (Note: 18V and 40V are nominal ratings; actual full charge is 20V and 42V respectively.) For troubleshooting and reliability insights, consult our in-depth ego vs greenworks battery mower showdown report.
Step 4: Choose the Right Storage Location
The storage environment matters as much as the charge level. Your battery needs:
- Temperature: 40°F-80°F (5°C-27°C). A heated basement, closet, or interior garage wall is ideal. Never leave it in an unheated shed or attached garage that drops below freezing.
- Humidity: Below 60% relative humidity. Moisture accelerates corrosion and can damage the BMS. Add a silica gel pack to the storage container if your basement is damp.
- Fire safety: Store on a non-flammable surface (concrete, metal shelf) away from combustible materials. While rare, lithium-ion batteries can fail catastrophically, and you want to minimize collateral damage.
- Physical protection: Keep the battery in its original plastic case or a padded container to prevent terminal shorting from metal objects (tools, keys, loose change).
Step 5: Monthly Maintenance Check (Preventing Deep Discharge Sleep Mode)
Even at 50% charge, lithium-ion cells self-discharge. Over 4 to 5 months, a battery can drop from 50% to 35 to 40%. While this isn’t dangerous, it’s a slippery slope, if you forget for 8 months, you risk hitting the BMS cutoff.
Preventing deep discharge sleep mode is simple: set a calendar reminder for the 15th of every month (or every 60 days at minimum) to check the battery. Press the indicator button. If it shows 1 LED, charge it back to 2 LEDs. This 5-minute monthly ritual is the single best insurance against a dead battery in spring.
Spring Battery Wakeup: How to Revive a Stored Battery
When the snow melts and you’re ready to mow, the spring battery wakeup process is straightforward, if you followed the storage steps above. Here’s the correct sequence:
- Inspect: Check the battery for physical damage, swelling, or corrosion. If the casing is warped or cracked, do not charge it, recycle it.
- Warm up: If the battery was stored in a cold space, let it acclimate to room temperature for 2 to 4 hours before charging. Charging a cold battery (below 40°F) can cause lithium plating.
- Charge fully: Insert the battery into the charger and let it complete a full charge cycle. This may take 60 to 120 minutes depending on the charger and battery capacity.
- Test: Install the battery in the mower and run it for 2 to 3 minutes. Verify the indicator shows full charge and the mower operates at full power.
What If the Battery Won’t Charge (Deep Sleep Recovery)
If your battery shows no LEDs and the charger refuses to start, the BMS has likely entered deep sleep mode. Here’s a safe recovery procedure:
- Leave the battery on the charger for 10 to 15 minutes. Some chargers have a “trickle wake” feature that slowly applies voltage to revive the BMS.
- If that fails, try a different charger of the same voltage and brand. Some chargers are more aggressive than others.
- If the battery has a manual reset button (some EGO and Ryobi models do), press and hold it for 5 seconds.
- As a last resort, use a multimeter to check terminal voltage. If it reads above 10V (for 18V) or 20V (for 40V), the cells may be recoverable. If it reads near 0V, the BMS has disconnected and the battery is likely beyond DIY recovery.
Warning: Never attempt to “jump start” a lithium-ion battery with a car charger or bench power supply. This is extremely dangerous and can cause a thermal runaway fire. If the battery won’t charge through normal means, recycle it and buy a replacement.
40V vs. 18V: Are There Different Rules?
The chemistry is identical, both use lithium-ion cells, so the storage rules are the same. The only practical differences are:
- Cell count: 18V batteries use 5 cells in series (5S); 40V batteries use 10 cells (10S). More cells mean more self-discharge surface area, so 40V batteries may drop slightly faster.
- Weight and size: 40V batteries are physically larger and heavier. They’re more prone to terminal damage if dropped, so handle them carefully during storage.
- Charger compatibility: Always use the brand-matched charger. Cross-brand charging can deliver incorrect voltage and damage the BMS.
Recommended Hardware & Essential Equipment
To execute the winterization process above correctly, you need three things: a reliable multimeter to verify storage voltage, a battery storage case to protect terminals and prevent shorting, and a contact cleaner to keep terminals corrosion-free. The units below are specifically selected because they cover the full voltage range (18V-40V), feature auto-ranging for safe measurement, and provide physical protection that prevents the exact failure modes described in this guide, accidental terminal shorting and moisture ingress.
Pros
- Precise EPOS positioning system ensures accurate navigation without boundary wires
- Handles slopes up to 45 percent and works rain or shine for year-round reliability
- Full app control for schedules, patterns, cutting height, and theft tracking
- Bundle includes ready-to-use cordless trimmer with dual-direction head and power boost
- Simple blade swaps and hose-down cleaning make ongoing upkeep quick and easy
Cons
- Maximum mowing capacity limited to 0.5 acres, unsuitable for larger properties
- Virtual mapping setup requires manually driving the mower to define boundaries, adding initial time investment
- Performance details such as exact battery runtime for the mower are not specified in available data
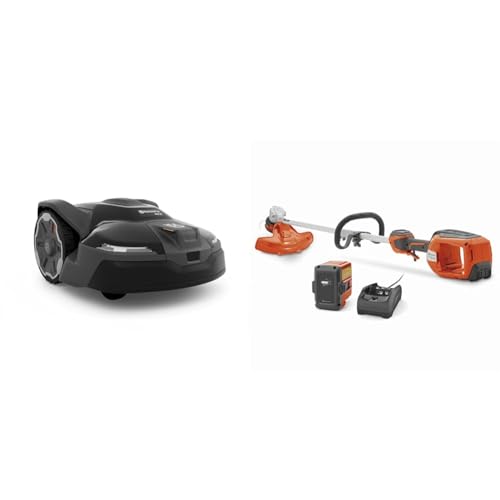
The Husqvarna 410iQ Automower Bundle combines the brand's robotic mower with the 320iL cordless string trimmer into a complete lawn care package. Built for American yards, the 410iQ features a rugged bumper, larger wheels, and solid construction that crosses paths and driveways smoothly while the included trimmer arrives with a 4 Ah battery and charger for immediate use. The overall design prioritizes wire-free convenience and ease of maintenance from the first unboxing.
In performance, the Exact Positioning Operating System uses satellite communication for centimeter-level accuracy, allowing the mower to handle slopes up to 45 percent and cut heights from 1 to 4 inches without tearing grass. App-guided virtual mapping replaces boundary wires, and the mower operates rain or shine with customizable schedules and patterns. The companion 320iL trimmer delivers a 16-inch cutting width, dual-direction head to keep clippings off beds, and a power boost mode offering 20 percent more power for heavy weeds, all while remaining 25 percent lighter with active cooling for consistent runtime.
Considerations include the 0.5-acre capacity limit, which may restrict use on bigger properties, and the initial virtual mapping process that requires driving the unit around the lawn. Available data also lacks specific battery life figures for the mower itself, so owners should plan for typical robotic charging cycles based on lawn conditions.
This bundle delivers excellent value for homeowners seeking automated mowing plus versatile cordless trimming on medium-sized properties. Those with complex landscaping who value app control, precision navigation, and a ready-to-go trimmer kit will benefit most from the Husqvarna 410iQ and 320iL combination.

Pros
- Two-year warranty, per listing
- Eight cutting heights from 0.75 to 4 inches
- Mulching plug and 2.1-bushel grass bag included
- Nationwide parts and service network, manufacturer-stated
Cons
- Runtime of up to 45 minutes per charge is manufacturer-stated
- Second 12Ah battery is sold separately

Pros
- 30-inch cutting width enables significantly faster mowing sessions compared to standard decks
- Dual blade mulching system produces fine clippings that nourish the lawn without bagging
- Push-button start and battery power provide consistent, low-maintenance operation
- Dual LED headlights and Quick Stow handle add practical convenience for day-to-night use and storage
- Compatible with multiple 60V Max battery sizes for customizable power and runtime
Cons
- Battery and charger are not included, requiring an additional purchase of compatible 60V Max batteries
- Actual runtime and total operating cost depend entirely on the chosen battery capacity and number of packs
- Larger 30-inch deck and frame may feel bulkier for users with very compact storage or tight yard access
The Toro 60V MAX 30 in. eTimeMaster Personal Pace Lawn Mower is a cordless walk-behind model built for efficient yard maintenance. Its durable steel deck and cast aluminum frame create a sturdy impression right out of the box, while the Quick Stow handle offers two storage positions for compact placement in limited spaces. Battery and charger are sold separately, allowing users to select from recommended 60V Max 4.0Ah through 7.5Ah packs based on their needs.
In performance, the 30-inch deck is designed to save up to 40 percent of mowing time by covering more ground per pass. Dual Force Dual Blade Technology shreds grass into fine mulch for a clean finish and improved lawn health. Push-button start ensures reliable ignition every time, dual LED headlights support early or late sessions, and the Personal Pace system adjusts propulsion to match walking speed for reduced effort across medium and large properties.
Key considerations include the absence of a battery and charger in the package, so buyers must factor in extra cost and plan for adequate runtime capacity. The wider deck, while efficient, may require more maneuvering room in tight areas compared with narrower mowers. No customer reviews are yet available to confirm long-term durability under varied conditions.
Overall, this Toro eTimeMaster model delivers strong value for homeowners seeking faster coverage, quality mulching, and low-maintenance battery operation on larger lawns. Those prepared to add compatible 60V Max batteries will appreciate the time savings and convenience features most.

Pros
- All-wheel drive delivers reliable performance on slopes up to 45 percent with controlled stability
- Completely wire-free with no need for RTK stations, antennas, or boundary wires for quick setup
- Built-in 4G connectivity included with the first year of service free for seamless operation
- Energy-efficient on-demand drive maximizes battery coverage up to 2690 sq ft per charge
- Supports multi-zone management for up to 20 areas with auto-resume and GPS security features
Cons
- Coverage limited to 0.25 acre may require multiple charges to complete larger medium-sized lawns
- Cutting height range restricted to 2-3.6 inches limiting options for very short grass preferences
- Optimal NRTK precision depends on consistent 4G signal availability in the mowing area
The NAVIMOW i210 AWD is a wire-free robotic lawn mower built for medium lawns covering up to 0.25 acre. It features a sturdy all-wheel drive system paired with a unique triple-wheel design that emphasizes grass protection and stability. The overall build focuses on simplicity with integrated connectivity so users can start mowing quickly without traditional setup hardware.
In performance the mower handles 45 percent slopes using automotive-grade stability control while on-demand drive optimizes the 5.1Ah battery for up to 2690 sq ft per charge. The 7.1-inch cutting deck with adjustable height from 2 to 3.6 inches produces an even finish. NRTK plus vision technology supports one-tap auto mapping and multi-zone control for up to 20 areas along with GPS alerts if the unit is lifted or leaves the designated space.
Key considerations include the 0.25 acre maximum coverage that works best for smaller to medium yards and may need recharges for fuller sessions. The cutting height does not drop below 2 inches and full navigation precision requires available 4G coverage in the area.
This model offers strong value for homeowners with sloped or uneven lawns who want automated mowing without wires or extra stations. Users prioritizing easy installation, slope capability, and multi-zone smart features will benefit most from the NAVIMOW i210 AWD for consistent low-effort lawn maintenance.
Frequently Asked Questions About How To Store Lawn Mower Battery In Winter
Can I leave my lawn mower battery outside in winter?
No. Outdoor storage exposes the battery to freezing temperatures, moisture, and temperature cycling that accelerate degradation. Even if the battery survives, the BMS may enter sleep mode, and the charger may refuse to wake it. Always store the battery indoors in a climate-controlled space between 40°F and 80°F.
Should I store my lawn mower battery fully charged or empty?
Neither. Store at approximately 50% charge (2 LEDs on most indicators). Full charge stresses the cathode and accelerates capacity loss; empty charge risks deep discharge and BMS sleep mode. The 50% sweet spot minimizes electrochemical stress while providing enough buffer for self-discharge over the winter months.
How cold is too cold for a lithium-ion lawn mower battery?
For storage, anything below 32°F (0°C) is too cold for extended periods. For charging, never charge below 32°F, this causes lithium plating that permanently damages the cells. For operation, avoid discharging below 14°F (-10°C). The ideal storage range is 40°F-80°F (5°C-27°C).
How do I wake up a lawn mower battery that won’t charge after winter?
First, leave it on the charger for 10 to 15 minutes, some chargers have a trickle-wake feature. If that fails, try a different charger of the same brand and voltage. Check for a manual reset button (common on EGO and Ryobi models) and press it for 5 seconds. If the battery still shows no response, measure terminal voltage with a multimeter. Below 10V (18V battery) or 20V (40V battery) indicates the BMS has disconnected, and the battery is likely not worth recovering. Never attempt to jump-start a lithium-ion battery with external power sources.
How often should I check my mower battery during winter storage?
Check the charge indicator every 30 to 60 days. Lithium-ion batteries self-discharge at 2 to 3% per month, so a 50% charge will drop to roughly 40 to 45% after two months. If the indicator shows 1 LED (25% or below), charge back to 2 LEDs. This monthly ritual prevents deep discharge and ensures the battery is ready for spring.
Next Step & Hardware Pairing: For recommended machine configurations and real-world durability tests, see our buyer guide on cordless battery lawn mowers.
Final Checklist: Winter Battery Storage in 60 Seconds
- Disconnect the battery from the mower and remove it.
- Clean the housing, vents, and terminals with a dry brush.
- Set the charge to 50% (2 LEDs, or 19 to 19.5V for 18V / 40 to 41V for 40V).
- Store indoors at 40°F-80°F, below 60% humidity, on a non-flammable surface.
- Protect terminals from shorting with the original case or a padded bag.
- Check the charge every 30 to 60 days; top up to 50% if it drops below 25%.
- In spring, warm the battery to room temperature, charge fully, and test before mowing.
Following this protocol will extend your battery’s usable life by 2 to 3 seasons compared to careless storage. A $150-$300 battery deserves 10 minutes of winter preparation, the alternative is a $150-$300 replacement in April.
Off Season Battery Storage Background
Storing a mower battery over winter calls for a cool, dry spot and the charge level the manufacturer recommends. General background on battery handling for outdoor tools is at American National Standards Institute (ANSI).