Quick Answer: How to Remove a Lawn Mower Battery
To remove a lawn mower battery safely: turn off the mower and let it cool for 5–10 minutes, disconnect the spark plug wire to prevent accidental starting, locate the battery (typically under the seat on riding mowers), disconnect the negative (black) terminal first, then the positive (red) terminal, remove the hold-down bracket, and lift the battery straight out. Always reverse this process when reinstalling—connect the positive terminal first, then the negative terminal.
Why Safe Battery Removal Matters
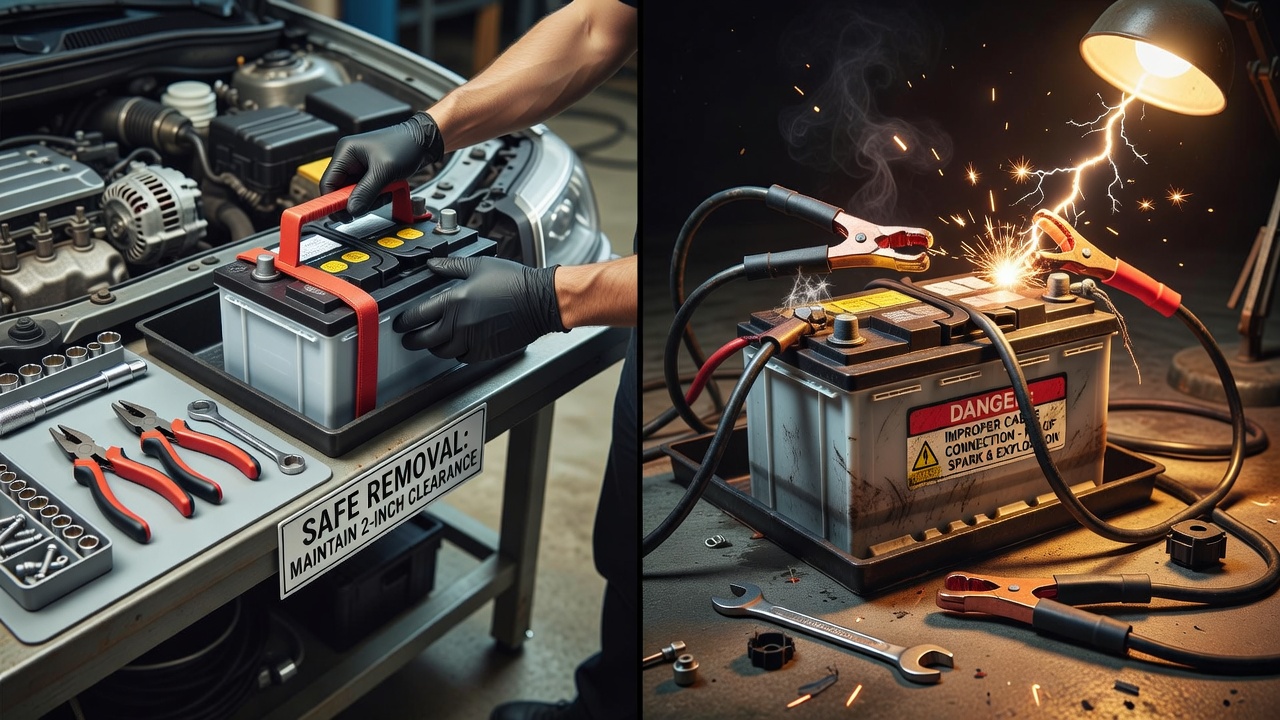
Lawn mower batteries store significant electrical energy and, in the case of lead-acid batteries, contain corrosive sulfuric acid. Improper removal can result in electrical shorts, acid spills, accidental engine starting, or personal injury. Following the correct sequence protects both you and your equipment. Even a brief moment of carelessness—like touching both terminals simultaneously or skipping the spark plug wire disconnection—can create hazardous conditions.
Safety Precautions Before Removing the Battery
Before you touch the battery, establish a safe working environment:
- Turn off the mower and remove the ignition key. This is your first line of defense against accidental starting.
- Allow the engine to cool for 5–10 minutes. A hot engine can ignite spilled battery acid or fuel vapors.
- Disconnect the spark plug wire. This wire runs from the ignition coil to the spark plug. Gently twist it free from the plug. This step prevents the engine from starting if the ignition is accidentally turned on during battery work.
- Work in a well-ventilated area. Lead-acid batteries can release hydrogen gas, especially if they’re old or damaged.
- Wear safety glasses and nitrile gloves. Battery acid can splash during disconnection, particularly if terminals are corroded. Gloves also protect against electrical contact.
- Have a spill kit nearby. Baking soda neutralizes spilled sulfuric acid from lead-acid batteries. Keep paper towels and a small container of baking soda within arm’s reach.
Locating Your Lawn Mower Battery
Battery location varies by mower type. Knowing where to look saves time and prevents unnecessary disassembly:
Riding Mowers: The battery is almost always mounted under the operator’s seat. Remove the seat by unbolting it (typically two bolts) or lifting the hinged seat forward. The battery sits in a plastic or metal tray, with terminals facing up or to the side.
Zero-Turn Mowers: Similar to riding mowers, the battery is usually under the seat but may also be mounted on the frame near the engine. Check your operator’s manual for the exact location.
Push Mowers (Gas-Powered): Most gas push mowers don’t have batteries—they use pull-cord ignition. However, some newer models with electric starters have small 12-volt batteries mounted near the engine, often in a plastic case on the frame.
Electric (Cordless) Push Mowers: These use rechargeable lithium-ion battery packs that slide into or clip onto the mower deck. Simply press the release button and slide the pack away. These batteries do not require terminal disconnection.
Step-by-Step Battery Disconnection Process
Once you’ve located the battery, follow this exact sequence to disconnect it safely:
Step 1: Inspect the Terminals
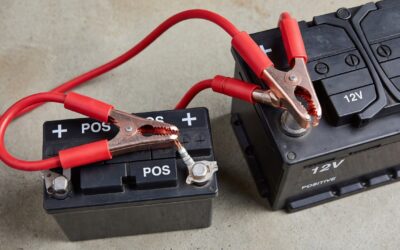
Look at both battery terminals. The negative terminal is marked with a minus sign (−) and is usually black; the positive terminal has a plus sign (+) and is usually red. If terminals are covered in white, blue, or green corrosion, you may need to clean them before disconnecting. A wire brush or old toothbrush works well for light corrosion. For heavy corrosion, apply a battery terminal cleaner or a mixture of baking soda and water.
Step 2: Disconnect the Negative Terminal First
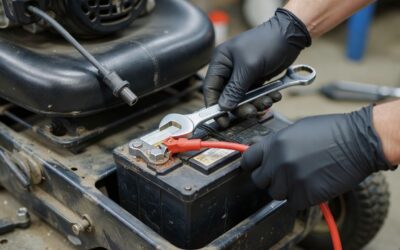
This step is critical. Using a wrench sized to fit the negative terminal bolt (typically 8mm or 10mm), loosen the nut holding the negative (black) cable to the terminal. Do not remove the nut completely—just loosen it enough to slide the cable off. Gently wiggle the cable and pull it away from the terminal. If it’s stuck, tap the wrench lightly with a hammer or use a terminal puller tool. Do not allow the cable to touch the positive terminal while it’s disconnected.
Why disconnect negative first? The negative terminal is your ground reference. Disconnecting it first prevents accidental short circuits. If you disconnect positive first and then touch the negative cable to metal frame while removing it, you create a direct short that can damage the battery, starter, and alternator.
Step 3: Disconnect the Positive Terminal
Using your wrench, loosen the nut on the positive (red) terminal bolt. Slide the cable off and set it aside, ensuring it doesn’t touch any metal part of the mower frame. The positive cable often has a plastic cover—don’t force it off; it will slide along the cable as you disconnect the terminal.
Step 4: Check for Any Additional Cables
Some batteries have a third cable: a ground strap running to the mower frame. If present, disconnect this as well by removing its bolt.
Removing the Battery Hold-Down Bracket
With cables disconnected, the battery is held in place by a bracket or strap. Locate the bolt(s) securing it—usually one to three bolts. Using an appropriately sized wrench or socket, remove these bolts completely. On some mowers, the bracket simply lifts away; on others, it may slide sideways. Set the bracket and bolts aside in a safe location.
Battery weight: Lead-acid riding mower batteries typically weigh 30–50 pounds. Lithium-ion batteries are much lighter, usually 5–15 pounds. Use your legs, not your back, when lifting. Keep the battery level—tilting it excessively can cause internal acid to slosh in lead-acid batteries.
Removing the Battery
With the bracket removed, lift the battery straight upward. If it’s stuck, check that all cables and bolts are truly disconnected. Gently rock it side to side while pulling up. Do not force it. Once free, place the battery on a level surface or directly into your vehicle for transport. If you’re storing it temporarily, keep it in a cool, dry location away from extreme temperatures (below 32°F or above 100°F can damage lead-acid batteries).
Reinstalling the Battery: Correct Terminal Order
When you’re ready to reinstall the battery (or install a new one), reverse the removal process—but reverse the terminal connection order too. This prevents short circuits during reinstallation:
- Place the battery back in its tray and secure it with the hold-down bracket and bolts. Tighten bolts firmly but do not over-torque them; 7–10 foot-pounds is typical.
- Connect the positive (red) terminal first. Slide the red cable onto the positive terminal post and tighten the nut with your wrench. The connection should be snug but not strained.
- Connect the negative (black) terminal second. Attach the black cable and tighten its nut.
- Reconnect any ground strap to the frame.
- Reattach the spark plug wire by gently pushing it onto the spark plug until it clicks or seats fully.
- Check all connections by gently tugging each cable. None should move.
- Close or reinstall the seat.
Start the mower to confirm the battery is properly installed. If the starter is sluggish or the battery doesn’t hold a charge, check terminal connections—loose terminals are a common cause of starting problems.
Battery Type Considerations: Lead-Acid vs Lithium-Ion
Lead-Acid Batteries are the traditional choice for riding and zero-turn mowers. They’re affordable and reliable but heavier. When removing or storing a lead-acid battery, avoid tilting it excessively and keep it in a temperature-controlled space. These batteries require periodic charging during off-season storage (every 30–60 days) to prevent sulfation.
Lithium-Ion Batteries are increasingly common on newer mowers, especially commercial models. They’re lighter, charge faster, and require no maintenance. Removal is simpler—usually just a button press or release lever. Lithium batteries handle temperature extremes better than lead-acid and don’t require trickle charging during storage. However, they’re more expensive to replace.
Battery Disposal and Recycling: Do not throw old mower batteries in the trash. Lead-acid batteries contain lead and sulfuric acid, both hazardous. Most regions legally require battery recycling. Check with your local recycling center, auto parts store (many accept batteries), or the battery manufacturer for drop-off locations. Lithium-ion batteries also should be recycled to recover valuable materials.
Troubleshooting Common Battery Removal Issues
Corroded Terminals
White or blue-green corrosion on terminals makes disconnection difficult. Apply battery terminal cleaner (available at auto parts stores) or mix baking soda with water into a paste. Let it sit for 5 minutes, then scrub with a wire brush. Rinse with clean water and dry thoroughly before disconnecting. Corrosion indicates your battery may be aging and a replacement could be in your near future.
Stuck or Seized Cables
If a cable won’t slide off the terminal post, do not force it. Apply a penetrating oil like WD-40 and wait 10 minutes for it to loosen the corrosion. Tap the wrench lightly with a hammer to help free it. A battery terminal puller tool (inexpensive at auto parts stores) can also help remove stuck cables safely.
Bracket Won’t Release
Ensure you’ve removed all bolts securing the bracket. Sometimes one bolt is hidden under a cable or wrapped in the battery tray. Trace the bracket completely to find any missed fasteners. If a bolt won’t budge, apply penetrating oil and wait before trying again.
Frequently Asked Questions
Can I disconnect both battery terminals at the same time?
No. Always disconnect the negative terminal first, then the positive. Disconnecting both simultaneously—or connecting them in the wrong order during reinstallation—risks electrical short circuits that can damage your mower’s charging system and starter motor. The negative-first rule protects equipment and prevents sparks.
How often should I remove and clean my mower battery?
For seasonal mowers, remove and store the battery during off-season months (winter, for most users). Inspect terminals for corrosion at the start of each season and clean them if needed. For year-round mowers, there’s no need to remove the battery regularly unless you’re troubleshooting an electrical issue or replacing it.
What should I do if I spill battery acid during removal?
Immediately neutralize the spill with baking soda. Sprinkle baking soda directly on the acid until fizzing stops (the acid and baking soda are neutralizing each other). Wipe up the residue with paper towels and dispose of them as hazardous waste. For large spills or if acid contacts skin, call emergency services or poison control (1-800-222-1222 in the US).
Why won’t my mower start after I reinstalled the battery?
Check that both terminal connections are tight—loose connections are the most common cause. Wiggle the cables; they shouldn’t move. Verify the spark plug wire is fully seated on the spark plug. If the battery is new, ensure it’s fully charged before starting. If the mower still won’t start and terminals are tight, the battery may be defective or your charging system may have an issue requiring professional diagnosis.