Quick Answer: How to Replace a Starter Cord
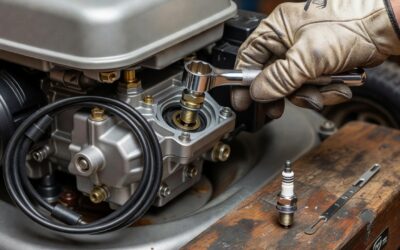
To replace a starter cord on most gas-powered lawn mowers, disconnect the spark plug wire for safety, remove the starter housing cover, unwind the old cord from the pulley, thread the new cord through the housing and around the pulley, tie it off securely with a proper knot, and reassemble the starter handle. The process typically takes 30-60 minutes for walk-behind mowers and requires only basic hand tools like screwdrivers, pliers, and a socket wrench. Always consult your mower’s manual for model-specific instructions, as procedures vary between manufacturers.
Safety Precautions Before You Start
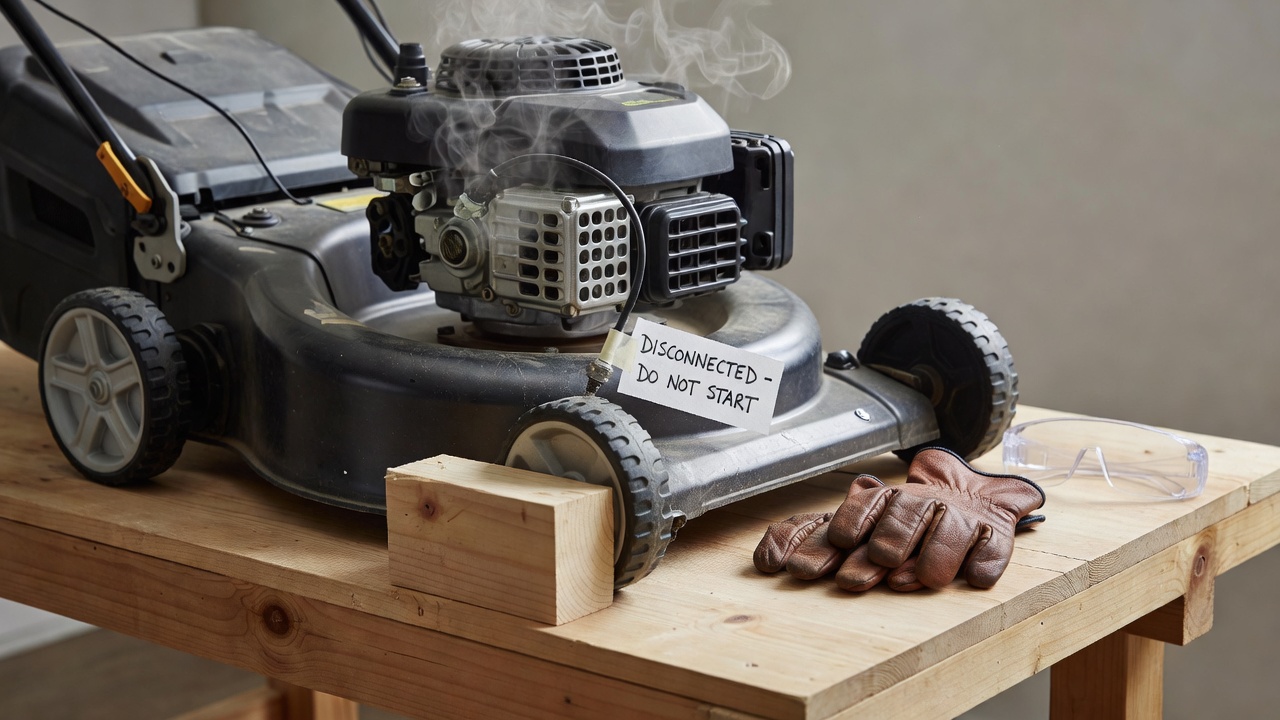
Before beginning any work on your lawn mower, take these essential safety steps to prevent injury or accidental engine startup:
- Disconnect the spark plug wire: Remove the wire from the spark plug to prevent the engine from accidentally starting while you’re working on the starter mechanism.
- Allow the engine to cool: Wait at least 30 minutes after running the mower to ensure the engine is completely cool before handling components.
- Wear appropriate protective gear: Use work gloves to protect your hands from sharp edges on the housing and sharp edges on the pulley. Safety glasses are recommended in case small springs or fasteners fly loose.
- Drain fuel if necessary: For extended work or if you’re uncomfortable with fuel present, drain the gas tank. This is especially important if you’re replacing the entire starter assembly and may need to tip the mower.
- Work on a level surface: Place the mower on flat, stable ground to prevent it from rolling or tipping during the repair.
- Secure the mower blade: Ensure the blade is not rotating and consider securing it with a block to prevent accidental contact.
Tools and Materials You’ll Need
Gather these items before starting the replacement to avoid interruptions:
- Replacement starter cord: Purchase cord rated for outdoor power equipment, typically 3-4mm in diameter and made from braided nylon. Most universal starter cord kits come in 50-150 foot lengths; you’ll use only 10-20 feet depending on your mower model.
- Screwdrivers: Both Phillips and flathead in various sizes to remove the starter housing cover and handle.
- Socket wrench and socket set: For removing bolts securing the starter assembly to the engine (typically 8mm, 10mm, or 12mm).
- Pliers or needle-nose pliers: Useful for manipulating the cord through tight spaces and bending the cord eye for securing.
- Wire cutters: To trim the new cord to the proper length and cut away excess material.
- Lighter or match: To carefully melt the cut end of the nylon rope slightly, preventing fraying (optional but recommended).
- Paper towels and degreaser: To clean the housing and pulley before reassembly.
- Instruction manual or online documentation: For your specific mower model and brand to reference model-specific steps.
Understanding Your Mower’s Recoil Starter System
Before replacing the cord, it helps to understand how the recoil starter works:
A typical recoil starter consists of a metal or plastic housing, a pulley with a grooved rim, a strong recoil spring (usually enclosed inside), and the cord itself. When you pull the cord handle, it unwinds the cord from the pulley, which rotates and engages teeth on the engine’s crankshaft (similar to how a car’s starter motor works). As you release the handle, the recoil spring automatically winds the cord back onto the pulley and returns the handle to its resting position.
Over time, starter cords wear out for several reasons:
- Regular friction from repeated pulling gradually frays and weakens the fibers.
- Exposure to UV light and outdoor elements degrades nylon.
- The cord can break suddenly from a sharp pull on an engine that won’t turn over (due to thick oil or carbon buildup).
- The handle attachment point can tear or degrade, making the cord unusable even if the cord itself is intact.
Cord-only replacement vs. full assembly replacement: If only the cord is broken or frayed but the handle, pulley, and housing are intact, you can replace just the cord. However, if the pulley is cracked, the recoil spring is broken (you’ll hear it rattling or won’t retract), or the housing is severely damaged, replace the entire starter assembly. A full assembly typically costs $30-80 depending on mower brand, while a cord-only replacement costs $5-15.
Step-by-Step Replacement Process
Step 1: Remove the Starter Housing Cover
Locate the starter housing, typically mounted on top of the engine with the handle facing outward. Most mowers use two to four screws or bolts to secure the cover. Remove these fasteners with the appropriate screwdriver or socket wrench, and carefully lift away the cover. Set fasteners aside in a small container so you don’t lose them. Clean any dirt or debris from inside the housing with a cloth.
Step 2: Relieve Tension on the Recoil Spring
The spring inside is under tension. To safely work on the pulley, you need to release this tension gradually. Pull the cord handle slowly and smoothly until the pulley has rotated as far as it will go (usually 3-5 rotations). Hold the pulley in this position using a wooden dowel, bolt, or screwdriver inserted through a hole in the pulley housing to prevent it from spinning back. Some mowers have a small notch or hole designed for this purpose.
Step 3: Untie and Remove the Old Cord
Locate where the cord is attached to the pulley. Most mowers use a knot (typically a figure-eight knot or overhand knot) or a small clip to secure the cord. If knotted, carefully untie the knot. If clipped, remove the clip. Gently unwind the old cord from the pulley groove, noting the direction and pattern (almost always wound clockwise when viewed from the outside). Once fully unwound, remove the cord completely from the handle.
Step 4: Prepare the New Cord
Measure and cut the new cord to the appropriate length. Most walk-behind mowers use 10-20 feet of cord. As a general guide, the cord should be long enough to make 3-5 complete wraps around the pulley plus an additional 6-8 inches for securing to the handle and pulley. Trim the new cord with wire cutters, then carefully melt the cut end with a lighter to prevent fraying and create a sealed edge. Allow the melted end to cool completely before handling.
Step 5: Thread and Wind the New Cord
Thread one end of the new cord through the handle (if not already pre-assembled) and secure it with a figure-eight knot or overhand knot, ensuring the knot is large enough that it won’t slip back through the handle opening. Start winding the cord onto the pulley groove, maintaining even tension and following the same clockwise direction as the original cord. Wind tightly and neatly, with each wrap sitting snugly against the previous one, making 3-5 complete rotations around the pulley.
Step 6: Secure the Cord to the Pulley
Once wound, tie the free end of the cord to the pulley using a secure knot. Most manufacturers recommend a figure-eight knot or a double overhand knot. The knot should be tight and positioned so it doesn’t interfere with the pulley’s rotation or the housing. Some pulley designs have a notch specifically for securing the cord end; use this if available.
Step 7: Test and Reassemble
Carefully remove the wooden dowel or bolt that’s holding the pulley in place, allowing the spring to slowly rewind the cord. The handle should smoothly return to its resting position with a gentle resistance. If the cord rewinds too quickly or unevenly, stop, remove the handle again, and adjust the winding. Once you’re satisfied, reassemble the starter housing cover, replacing all fasteners securely. Test the cord by pulling it several times before reconnecting the spark plug wire.
Model-Specific Variations to Consider
Walk-Behind Push Mowers
Most standard walk-behind gas mowers follow the process outlined above. Common brands like Briggs & Stratton, Honda, Craftsman, and Toro use similar recoil designs, though mounting locations and housing styles vary. Check your manual to identify the exact starter type and any special considerations.
Riding Mowers and Zero-Turn Mowers
Riding mowers often have larger, more complex starter systems. The recoil starter housing may be harder to access, sometimes requiring removal of the engine shroud or deck panels. The process is similar, but you may encounter additional fasteners and more complex assembly sequences. Consult your mower’s manual—the repair can take 1-2 hours for first-time users due to increased complexity.
Electric Mowers
Battery-powered and corded electric mowers do not have recoil starters or pull cords; they use push-button starts. This article does not apply to electric models. If your mower has an electric start but also a pull-cord backup, the cord replacement process is the same as gas mowers.
Manufacturer Differences
Briggs & Stratton: Uses straightforward recoil designs with cord typically wound clockwise. Starter housings are usually bolted to the top of the engine with easy access.
Honda: Often features more compact starter housings and heavier-duty springs. Follow the specific winding pattern shown in your manual, as some Honda models wind counterclockwise.
Toro: Starter cords on Toro mowers are often more accessible, located on the side of the engine. The process is generally the same, but handle designs may vary.
Troubleshooting Common Issues
Cord Won’t Stay Wound or Keeps Going Slack
This usually indicates the recoil spring is weak or broken. Verify the spring is properly seated inside the housing. If you hear rattling or the spring doesn’t retract the cord at all, the spring is damaged and the entire starter assembly should be replaced rather than just the cord. Attempting to add extra tension won’t solve a broken spring.
Cord Rewinds Too Quickly or Jerks
You may have wound the cord too tightly or with uneven tension. Unwind the cord and rewrap it more gently and evenly. Alternatively, the recoil spring may be too strong (less common). Slight jerking is normal; significant jerking indicates a winding problem.
Handle Is Difficult to Pull or Won’t Return
If the handle is stiff, you may have wound the cord too tightly around the pulley. Try loosening the winding by half a rotation. If the handle won’t return after pulling, the recoil spring is stuck or broken. A stuck spring can sometimes be freed by gently working the handle back and forth, but a broken spring requires full assembly replacement.
Starter Doesn’t Catch or Engine Won’t Turn
A new cord won’t fix an internal engine problem. If the engine won’t turn over with a new cord, the issue is likely poor compression, a stuck crankshaft, or old fuel. Try fresh fuel and ensure the ignition is switched on. If the problem persists, consult a professional repair service.
Cord Breaks Again Quickly After Replacement
If the new cord breaks within a few pulls, the pulley or housing may have sharp edges damaging the cord. Inspect the pulley groove for burrs or cracks and sand them smooth if present. Alternatively, the engine may be very hard to start (stuck rings or thick oil), causing excessive pulling force. Change the oil and filter, try fresh fuel, and pull more gently. If problems persist, replace the entire starter assembly.
When to Replace the Entire Starter Assembly
Cord-only replacement is a quick, affordable fix when the cord is the only damaged component. However, replace the entire recoil starter assembly if you notice:
- The pulley is cracked, warped, or has deep gouges in the rope groove.
- The recoil spring is visibly broken, makes rattling sounds, or won’t retract the cord.
- The starter housing is cracked or stripped (bolts won’t tighten securely).
- The handle is broken, cracked, or severely worn.
- You’ve replaced the cord three or more times in a single season (indicates underlying pulley or spring wear).
Full assembly replacement costs $30-80 depending on brand and mower type and takes 30-45 minutes for most models. Many home owners find this preferable to attempting complex internal repairs, especially if the mower is older and other components are showing wear.
Frequently Asked Questions
How long does a starter cord typically last?
Most lawn mower starter cords last 3-5 years with normal use (seasonal mowing). Cords exposed to UV light, extreme temperatures, or rough handling may degrade faster. A cord that breaks after only one season likely indicates a problem with the pulley or spring rather than cord defect.
Can I use any rope or paracord as a replacement?
No. You need rope specifically rated for outdoor power equipment, typically 3-4mm diameter braided nylon. Regular paracord, twine, or rope from a hardware store lacks the durability and abrasion resistance needed for the repeated friction and tension in a recoil starter. Inexpensive universal starter cord kits ($5-15) are reliable and designed for this exact purpose.
What should I do if I can’t get the recoil spring to stay wound?
If the cord won’t stay wound and keeps unraveling, the spring is likely broken or severely weakened. A functioning recoil spring should hold the wound cord under tension indefinitely. You cannot repair or strengthen a broken spring—replace the entire starter assembly. Attempting to work around it by over-tightening the cord only wears it out faster.
Is it safe to use my mower if the cord is frayed but not broken?
A mower with a frayed but functional cord is safe to use temporarily, though the cord may break with the next hard pull. Fraying indicates the cord is nearing the end of its life. Replace it soon—delaying risks being stranded with a non-starting mower at the most inconvenient time. Replacement is inexpensive and only takes an hour.