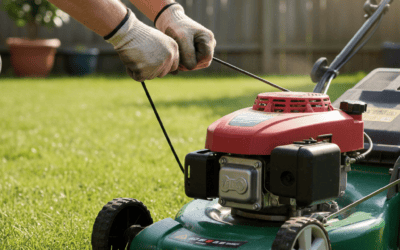
Quick Answer: How to Balance Lawn Mower Blades
To balance lawn mower blades, disconnect the spark plug wire, secure the mower, and remove the blade. Use a blade balancer or makeshift pivot point to identify which end is heavier. Carefully grind or file metal from the heavy side in small increments until both ends hang level. Reinstall the blade and test. For most rotary mowers, the process takes 15–30 minutes with basic tools. If blades are cracked, severely bent, or you lack confidence, replacement is the safer choice.
Why Balancing Lawn Mower Blades Matters

Unbalanced blades cause centrifugal forces that generate excessive vibration during operation. This vibration travels through the mower deck and engine, accelerating wear on bearings, belts, and the crankshaft. Beyond equipment damage, unbalanced blades produce a ragged, torn grass cut instead of a clean slice—stressed grass tips turn brown and invite disease and pest problems.
From a safety perspective, severe vibration can cause loss of operator control, especially on riding mowers traveling across uneven terrain. Excessive vibration also increases noise levels and operator fatigue. Regular blade balancing is one of the simplest maintenance tasks that prevents cascading damage and keeps your mower running smoothly.
Signs Your Lawn Mower Blades Are Unbalanced
Catch blade imbalance early by watching for these warning signs:
- Noticeable vibration: The mower deck or engine shakes noticeably during operation, especially at full throttle.
- Ragged or torn grass edges: Instead of a clean cut, grass tips appear shredded or ripped, often with brown discoloration within 24–48 hours.
- Uneven cutting height: The mower cuts grass at different lengths across the deck despite a consistent height setting.
- Increased noise: The blade produces a higher-pitched or rougher sound than normal.
- Unusual vibration in the steering or handles: On push mowers and self-propelled models, unbalanced blades transmit vibration through the frame.
- Visible blade damage: Dents, bent edges, or impact marks suggest the blade may be out of balance and potentially cracked.
Tools and Materials You’ll Need
Balancing blades requires minimal equipment. Most homeowners already own these tools:
| Tool | Purpose | Alternatives |
|---|---|---|
| Socket wrench or blade removal tool | Remove and reinstall the blade bolt safely | Adjustable wrench (less reliable) |
| Blade balancer | Accurately measure weight distribution | Screwdriver or nail through center hole, balanced on a vice or pivot point |
| Metal file or angle grinder | Remove metal from the heavy side | File (slower); sandpaper (impractical for steel blades) |
| Marker or tape | Mark the blade for reference and safety | Any visible marking method |
| Safety glasses and work gloves | Protect eyes and hands from metal shavings | None—non-negotiable for safety |
| Cloth or wire to lock the blade | Prevent accidental blade rotation during work | Rope or zip tie |
Optional but helpful: A torque wrench ensures the blade bolt is tightened to the correct specification (typically 35–90 ft-lbs, depending on mower model). Check your owner’s manual for the exact torque value.
Step-by-Step: How to Balance Rotary Mower Blades
Step 1: Prepare for Safety
Safety is non-negotiable. Start by:
- Disconnecting the spark plug wire to prevent accidental engine start.
- Allowing the engine to cool completely if recently used.
- Placing the mower on a flat, level surface or securing it in a vice.
- Putting on safety glasses and work gloves.
Step 2: Remove the Blade
Most rotary mower blades are bolted to the underside of the deck:
- Locate the blade bolt (usually a single large bolt in the center of the blade assembly).
- Use the correct socket wrench to loosen and remove the bolt. Some blades have a key or washer—keep these organized.
- Carefully lift the blade away from the deck. Mark the top side of the blade with tape or a marker so you reinstall it correctly; blades are directional and installing them backward will reduce cutting performance.
- Place the blade on a clean, flat work surface.
Step 3: Inspect the Blade
Before balancing, examine the blade for damage:
- Cracks or deep gouges: If present, the blade should be replaced, not balanced.
- Severe bending: Minor bends can sometimes be straightened, but large bends usually warrant replacement.
- Rust or corrosion: Light surface rust is normal and does not affect balance. Heavy rust reducing blade thickness should be cleaned but may indicate age-related replacement is approaching.
Step 4: Identify Which Side Is Heavier
Use one of these methods to find the heavy side:
Commercial blade balancer (most accurate): Insert the blade into the balancer’s cradle according to the manufacturer’s instructions. The heavier end will dip downward.
DIY pivot method (effective and free): Insert a nail or screwdriver through the center hole of the blade, then balance the nail on the edges of a vice or on two wooden blocks positioned under each end. The heavy side will dip down due to gravity. Rotate the blade 180 degrees and recheck to confirm which side consistently drops.
Mark the heavy side clearly with tape or a marker.
Step 5: Grind or File the Heavy Side
Remove metal from the heavy side in small increments:
- Using an angle grinder: Position the grinder against the blade edge (not the flat top surface) on the heavy side. Grind for 2–3 seconds, then recheck balance. Repeat in small increments. Grinding removes metal quickly, so work gradually.
- Using a metal file: File the heavy side edge with steady, controlled strokes. This method is slower but gives finer control, reducing the risk of removing too much metal.
- Where to grind: Focus on the trailing edge or top surface of the blade on the heavy side, never the cutting edge (the leading beveled edge). Removing metal from the cutting edge reduces its effectiveness.
Check balance frequently—after every 2–3 grinding passes with a grinder, or every 10–15 file strokes. Removing too much metal forces you to start over with a new blade.
Step 6: Verify Balance
Once you believe the blade is balanced, use your balancer or pivot method again:
- The blade should remain level or hang with minimal tilt when balanced on the pivot point.
- Rotate the blade 180 degrees and recheck from both sides to confirm balance from multiple angles.
- Ideally, the blade should hang perfectly level with no side heavier than the other.
If one side still dips after grinding, remove a bit more metal and retest. This iterative process typically takes 5–10 minutes once you’ve removed initial metal.
Step 7: Reinstall the Blade
Carefully reinstall the balanced blade:
- Align the blade’s center hole with the bolt hole on the mower deck.
- Insert the blade with the marked top side facing up (the direction it was originally installed).
- Reinstall the washer and bolt, tightening by hand first.
- Use your torque wrench to tighten to the correct specification (check your owner’s manual). If you don’t have a torque wrench, tighten until snug but not over-tight—typically firm enough that you cannot move the blade by hand.
- Reconnect the spark plug wire.
Step 8: Test the Mower
Start the mower in an open area and run it for 30–60 seconds at half throttle, then full throttle:
- Feel for vibration in the handle. The mower should run smoothly with minimal vibration.
- Listen to the blade sound—it should be a steady, even whirring without roughness or unusual noise.
- Make a test cut on a small area of grass. The cut should be clean and even across the deck width.
If vibration persists, turn off the mower, disconnect the spark plug wire, and recheck the blade balance. You may need to remove and grind a bit more.
Balancing Blades on Other Mower Types
Rotary vs. Reel Mowers
Reel mowers (cylinder mowers) use a rotating cylinder of blades that cut against a stationary blade. Reel blades require a different approach because they operate as a set and must cut in unison. Individual reel blade balancing is not typical for DIY maintenance; instead, reel mowers require cylinder sharpening or professional servicing if cutting performance degrades. If you own a reel mower and notice uneven cutting, contact a professional or check your owner’s manual.
Riding Mowers
Riding mowers often have two or three blades under a large deck. Balance each blade individually using the same rotary blade procedure. After balancing all blades, run the mower and feel for vibration in the seat and steering wheel. If vibration is still present after balancing individual blades, there may be other issues (worn bearings, damaged deck) requiring professional service.
Hover Mowers
Hover (air-cushion) mowers have a single rotary blade. Use the same balancing procedure as push rotary mowers. These mowers are particularly sensitive to blade imbalance because the blade is the primary source of lift and thrust, so balancing is especially important.
When to Balance vs. When to Replace Blades
Not every blade problem can be solved by balancing. Use this decision tree:
| Blade Condition | Action | Why |
|---|---|---|
| Unbalanced but no visible damage | Balance the blade | Balancing restores performance and extends blade life. |
| Minor dent or impact mark (less than 1/4 inch deep) | Balance after filing smooth | Light filing removes the dent, and the blade can then be balanced normally. |
| Visible crack or stress fracture | Replace the blade | Cracks propagate during operation and may cause blade failure, throwing debris. |
| Severe bend (more than 1/2 inch out of plane) | Replace the blade | Severely bent blades cannot cut properly and create excessive vibration even after straightening attempts. |
| Blade edge chipped or broken | Replace the blade | A compromised cutting edge cannot be restored and will always produce a ragged cut. |
| Blade rusted through or corroded (thin spots visible) | Replace the blade | Thinned steel loses structural integrity and may fail during use. |
| Blade bent beyond straightening and unbalance | Replace the blade | Combination damage suggests the blade has reached end of life. |
Cost consideration: A replacement blade typically costs $15–$50, depending on mower model. Balancing a blade takes 15–30 minutes and costs nothing if done yourself. If you have any doubt about blade integrity or your ability to balance safely, replacement is the better choice.
Professional Blade Balancing Services
Not everyone has the tools or confidence to balance blades at home. Professional options include:
- Local lawn mower repair shops: Most shops offer blade balancing for $15–$40 per blade. They have commercial blade balancers and can inspect for damage while balancing. Turnaround is usually 1–3 days.
- Big box retailers with mower service departments: Some national retailers (Home Depot, Lowe’s, Tractor Supply) offer blade balancing, though availability varies by location.
- Small engine repair specialists: Independent shops specializing in small engines often balance blades as part of seasonal tune-up packages.
When to choose professional service: If you lack a blade balancer, are uncomfortable working with metal-removing tools, or the blade is valuable (commercial-grade or specialty blade), professional balancing is worth the cost. For homeowners with basic tools and confidence, DIY balancing saves money and is straightforward.
Maintenance Tips to Prevent Imbalance
Keep blades balanced longer by following these practices:
- Inspect blades weekly during mowing season: Check for dents, bent edges, or grass buildup on the blade. Remove dried grass with a stiff brush (with the engine off and spark plug disconnected).
- Mow at the right height: Cutting too short or too close to the ground increases the risk of hitting rocks, sticks, and hard soil, which dents and bends blades.
- Clear the lawn before mowing: Remove sticks, rocks, and debris to prevent blade strikes.
- Sharpen blades seasonally: A dull blade is more prone to denting on impact. Sharp blades glide through obstacles better. Sharpen or balance blades at the start of spring and mid-summer if you mow heavily.
- Avoid abrasive surfaces: Do not mow gravel, packed dirt, or pavement. These surfaces dull and damage blades faster than grass.
- Check after impacts: If you hit something hard (a stump, rock, or curb), stop and inspect the blade immediately for damage or imbalance.
- Store properly in off-season: Clean and dry blades before storing. Moisture causes rust, which weakens steel and eventually causes blade failure.
Frequently Asked Questions
How often should I balance my lawn mower blades?
Balance blades at the start of each mowing season (spring) and mid-season (summer) if you mow frequently or heavily. If you hit something hard or notice vibration, balance immediately. For light residential use, seasonal balancing usually suffices. For commercial or frequent use, monthly balancing may be necessary.
Can I balance a blade without a blade balancer?
Yes. A nail or screwdriver balanced on the edges of a vice or two wooden blocks works well as a makeshift balancer. The key is a pivot point at the blade’s center hole that allows the blade to rotate freely. Gravity will pull the heavier side down, indicating which side to grind.
How much metal should I remove when balancing a blade?
Remove metal gradually in small increments. Start with 2–3 seconds of grinding or 10–15 file strokes, then recheck balance. Removing too much metal at once can overshoot balance and require starting over. Aim to remove only enough to equalize weight, typically 1/16 inch to 1/8 inch of material from the blade edge.
What if the blade is still unbalanced after I grind it?
Remove slightly more metal from the heavy side and recheck. Repeat this process in small increments until balance is achieved. If you’ve already removed a significant amount of metal (more than 1/4 inch) and balance is still not achieved, the blade may be damaged internally or warped, in which case replacement is safer than further grinding.
Is it safe to use an angle grinder on a lawn mower blade?
Yes, with precautions. Wear safety glasses and work gloves. Secure the blade firmly in a vice or hold it steadily. Use short, controlled grinding bursts (2–3 seconds) and grind on the edge or top surface, never the cutting edge. Let the grinder do the work—do not force it. If you’re uncomfortable using an angle grinder, a metal file is a safer alternative, though slower.
Can I straighten a bent blade instead of replacing it?
Minor bends (less than 1/4 inch) can sometimes be straightened carefully with a rubber mallet and a block of wood, then balanced. Severe bends (more than 1/2 inch out of plane) usually cannot be straightened enough for safe operation and should be replaced. If the blade is cracked in addition to bent, replace it immediately.