Direct Answer: How to Change a Belt on a Riding Lawn Mower
To change a belt on a riding lawn mower, first disconnect the spark plug (and battery if accessible) to prevent accidental starting. Then remove the mower deck, release the belt tension, remove the old belt, route the new belt according to the diagram in your owner’s manual, and reinstall the deck. Always consult your owner’s manual for model-specific routing, tensioning, and safety procedures, since belt paths and tensioners vary between brands and models.
Understanding the Belt Replacement Process
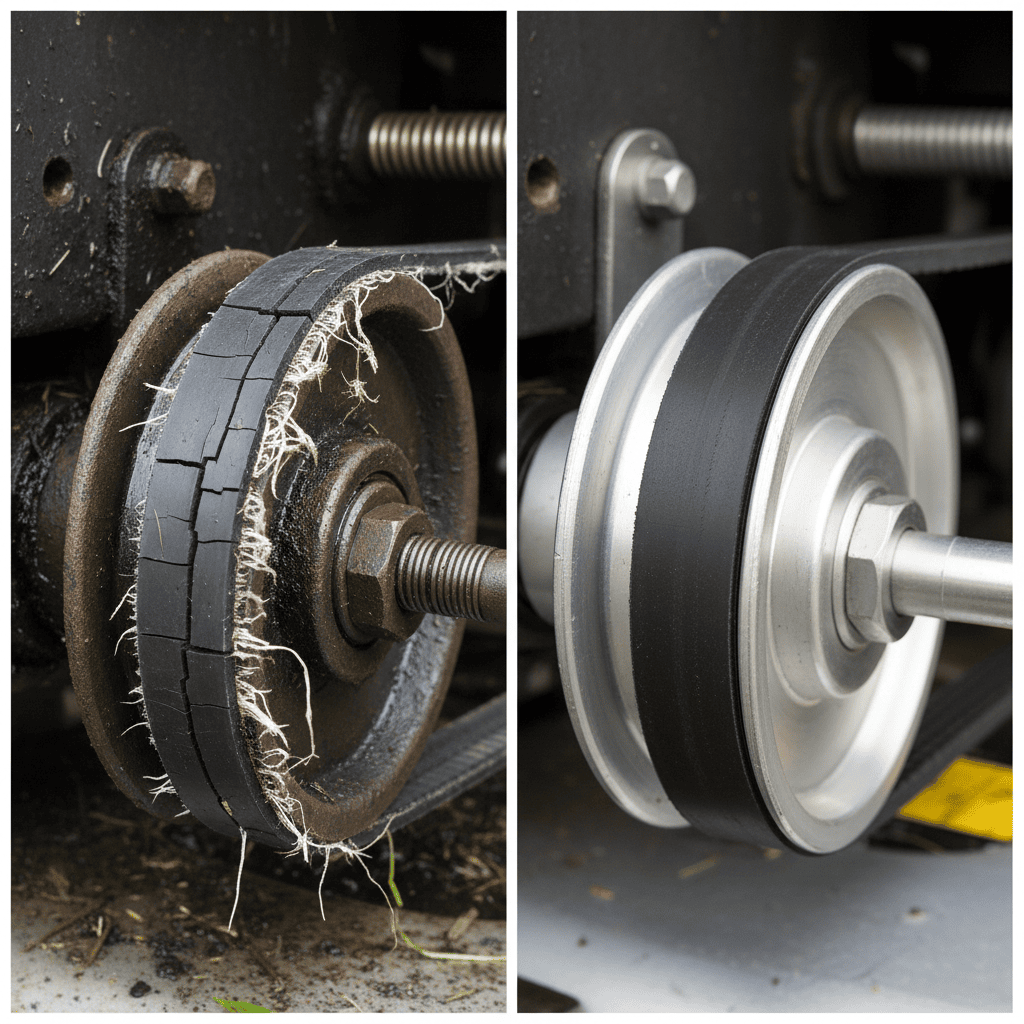
Riding lawn mower belts are essential components that transfer power from the engine to the blades and, in many models, to the drive wheels. Over time, these belts wear out due to friction, heat, and exposure to grass clippings and debris. When a belt fails, the mower may stop cutting properly, make squealing noises, or fail to move forward. Understanding why belts wear out and recognizing the signs of a failing belt can help you address the problem before it leads to more expensive repairs.
Why Do Riding Lawn Mower Belts Need to Be Replaced?
Belts are made of reinforced rubber that flexes thousands of times per minute while the engine is running. This constant flexing, combined with heat and friction, causes the belt material to stretch, crack, glaze, or fray. Common reasons belts fail include:
- Normal wear and tear: Belts naturally degrade over time and with heavy use.
- Misalignment: A pulley that is bent or out of alignment can cause uneven wear and premature failure.
- Debris buildup: Grass clippings, sticks, and stones can get caught between the belt and pulleys, accelerating wear.
- Improper tension: A belt that is too loose slips and generates heat, while a belt that is too tight strains the pulleys and bearings.
- Aging and dry rot: Over time, rubber can dry out and crack, especially if the mower is stored in direct sunlight or extreme temperatures.
What Are the Signs of a Worn or Broken Belt?
You may need to replace the belt if you notice any of the following symptoms:
- Squealing or screeching noises coming from the deck or engine area, especially when engaging the blades.
- Poor cutting performance, such as uneven grass, scalping, or blades that stop spinning under load.
- Visible damage like cracks, frayed edges, glazing (shiny, hardened surface), or missing chunks of rubber.
- A burning rubber smell while the mower is running.
- The mower won’t move or moves sluggishly, indicating a problem with the drive belt.
- Belt slippage, where the blades or wheels hesitate when engaging.
If you notice any of these signs, inspect the belt immediately. Replacing a worn belt promptly is far less expensive than repairing damaged pulleys, spindles, or bearings caused by a broken belt.
What Type of Belt Does My Riding Mower Use?
Most riding lawn mowers use one or two belts: a deck belt (also called a blade belt) that drives the mower blades, and a drive belt that transfers power to the wheels. Some models use a single belt for both functions, while others have separate belts. The exact type, length, and width of belt your mower needs depends on the make and model. Check your owner’s manual or look for the part number printed on the side of the old belt. When in doubt, contact your mower’s manufacturer or a local dealer with your model number to get the correct replacement part.
Tools and Safety Precautions
Before you begin, gather the right tools and take important safety precautions. Working under a mower deck involves sharp blades, heavy components, and the risk of accidental engine startup, so preparation is key.
What Tools Are Needed to Change a Riding Mower Belt?
The exact tools vary by model, but the following list covers what you will typically need:
| Tool | Purpose |
|---|---|
| Socket wrench and sockets | Removing bolts and nuts that secure the deck and tensioner |
| Wrenches (combination or ratcheting) | Loosening tensioner bolts and hardware |
| Screwdrivers (flathead and Phillips) | Removing covers, clips, or retaining pins |
| Pliers or needle-nose pliers | Removing cotter pins, springs, and small hardware |
| Belt routing diagram or owner’s manual | Ensuring correct belt installation |
| Work gloves | Protecting your hands from sharp metal and debris |
| Safety glasses | Protecting your eyes from dirt and debris |
| Floor jack or jack stands (optional) | Raising the mower for better access to the underside |
| Penetrating oil | Loosening rusted or stuck bolts |
| Replacement belt | The correct belt for your specific mower model |
What Are the Essential Safety Precautions to Take?
Safety should always come first when working on any power equipment. Follow these precautions before and during the belt replacement:
- Park on a flat, level surface and engage the parking brake.
- Turn the engine off and remove the ignition key.
- Disconnect the spark plug wire and secure it away from the spark plug to prevent accidental starting.
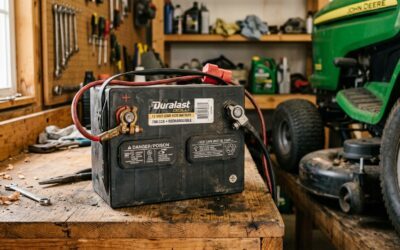
- Disconnect the battery if your mower has one, especially if you need to work near electrical components.
- Allow the engine and muffler to cool completely before touching anything near the engine.
- Block the mower securely with jack stands or wheel chocks if you raise it off the ground. Never rely on a jack alone.
- Wear gloves and safety glasses to protect against sharp blade edges, springs, and debris.
- Be careful with tension springs, which are under heavy pressure and can snap and cause injury.
How Do I Properly Disconnect the Spark Plug and Battery?
To disconnect the spark plug, locate the thick rubber boot attached to the top of the engine. Grip the boot firmly, twist it slightly, and pull it straight off the spark plug. Tuck the wire away from the plug so it cannot accidentally reconnect. If your mower has a battery, disconnect the negative (black) cable first, then the positive (red) cable. This prevents any electrical spark while you work. Reconnect the battery in reverse order: positive first, then negative.
Removing the Old Belt: A Step-by-Step Guide
Once your mower is safely prepared, you can begin removing the old belt. The process generally involves removing the mower deck, releasing the tension, and sliding the belt off the pulleys.
How Do I Remove the Mower Deck from the Riding Lawn Mower?
The method for removing the deck varies by model, but the general steps are:
- Lower the deck to its lowest position using the deck lift lever. This makes it easier to access the mounting hardware.
- Locate the deck mounting pins or brackets. Most decks are held in place by two or more pins, bolts, or clips, often near the front and rear of the deck.
- Remove the retaining hardware using a socket wrench or pliers. Keep the hardware organized so you can reinstall it later.
- Disconnect any linkages, such as the lift arm, engagement cable, or anti-scalp wheel brackets, as needed.
- Slide the deck out from under the mower. It is heavy, so support it as you pull it free, or use a floor jack if needed.
Consult your owner’s manual for the exact procedure for your model, as some decks have unique attachment systems.
How Do I Release the Tension on the Old Belt?
Most riding mowers use a spring-loaded idler pulley to keep tension on the belt. To release the tension:
- Locate the idler pulley and tension spring on the deck or under the mower.
- Use a wrench or socket on the idler pulley bolt to pivot the idler arm away from the belt, which relieves the tension.
- Hold the idler in the released position while you slip the belt off the pulleys. Some models have a locking pin or hole to hold the tensioner in place.
- Slowly release the tensioner once the belt is free, being careful of the spring’s force.
Never force the belt off the pulleys. If it is stuck, check that the tensioner is fully released and that no debris is caught around the pulleys.
How Do I Properly Remove the Old Belt from the Pulleys?
Once the tension is released, remove the belt by working it off each pulley one at a time. Start with the idler pulley, then move to the spindle pulleys and the engine pulley. Take note of the belt’s routing before you remove it, or refer to the belt routing diagram in your owner’s manual. It is often helpful to take a photo with your phone before removing the old belt so you have a visual reference for installation. After the belt is free, inspect the pulleys for wear, damage, or debris and clean them if necessary.
Installing the New Belt and Reassembly
Installing the new belt is essentially the reverse of removal, but it requires careful attention to routing and tension to ensure proper operation.
How Do I Find the Correct Belt Routing Diagram for My Mower?
The most reliable source for a belt routing diagram is your owner’s manual. Many mowers also have a diagram printed on a sticker under the seat, on the deck, or near the engine. If you no longer have the manual, you can often find a PDF version on the manufacturer’s website by searching your model number. The diagram shows exactly how the belt wraps around each pulley, which is critical for correct installation.
What Is the Proper Way to Route the New Belt Around the Pulleys?
Follow these general steps, but always defer to your model’s diagram:
- Compare the new belt to the old belt to confirm it is the correct size and type.
- Route the new belt around the pulleys according to the diagram, starting with the most fixed pulleys (such as the engine pulley or spindle pulleys) and leaving the idler pulley for last.
- Make sure the belt sits flat in each pulley groove and is not twisted or pinched.
- Release the tensioner so the idler pulley presses against the belt and applies the correct tension.
- Rotate the pulleys by hand to ensure the belt tracks properly and does not slip off.
If the belt has a directional arrow or a specific orientation, install it accordingly. Never use tools to pry the belt onto a pulley, as this can damage the belt or the pulley.
How Do I Reinstall the Mower Deck and Reconnect the Blades?
After the belt is routed correctly, reinstall the deck by reversing the removal steps:
- Slide the deck back under the mower, aligning it with the mounting brackets.
- Reconnect any linkages, including the lift arm, engagement cable, and anti-scalp wheels.
- Insert and tighten the mounting pins or bolts that secure the deck in place.
- Reconnect the belt to the engine pulley if it was disconnected during deck removal, following the routing diagram.
- Raise the deck to its normal cutting height using the lift lever.
- Reconnect the spark plug wire and battery.
Double-check that all hardware is tight and that the belt is properly seated on every pulley before starting the engine.
Post-Installation Check and Maintenance Tips
After the new belt is installed, take a few minutes to verify everything is working correctly and to set yourself up for a longer belt life.
How Do I Test the Mower After Installing the New Belt?
Before starting the engine, rotate the pulleys by hand to confirm the belt moves smoothly and stays on track. Then:
- Start the engine at a low idle and engage the blades briefly to confirm they spin properly.
- Listen for unusual noises such as squealing, which may indicate the belt is misrouted or too loose.
- Test the drive function by slowly moving forward and backward to ensure the drive belt is working.
- Visually inspect the belt with the engine off to confirm it has not slipped off any pulley.
If the mower vibrates excessively, cuts unevenly, or makes noise, shut it off and recheck the belt routing and tension.
How Can I Extend the Life of My New Mower Belt?
Regular maintenance can significantly extend the life of your new belt:
- Keep the underside of the deck clean by scraping off grass buildup after each use.
- Check belt tension periodically and adjust it if your mower has an adjustable tensioner.
- Inspect pulleys and spindles for wear, rust, or debris that could damage the belt.
- Store the mower in a dry, sheltered area to prevent dry rot from sun and moisture.
- Replace worn pulleys and bearings promptly, as they can cause premature belt failure.
- Follow the manufacturer’s recommended maintenance schedule for belt inspection and replacement.
When Should I Consult a Professional or My Owner’s Manual?
If you are unsure about the correct belt routing, if the belt keeps slipping off, or if you encounter rusted or damaged components, consult a professional. Likewise, always refer to your owner’s manual for model-specific instructions, torque specifications, and safety warnings. If the manual is missing, contact the manufacturer or an authorized dealer with your mower’s model number. Attempting to force a belt onto the wrong routing can damage the belt, pulleys, or deck, so it is better to ask for help than to risk a costly repair.
Frequently Asked Questions
How long does a riding lawn mower belt last?
Belt lifespan depends on usage, storage conditions, and maintenance. Belts that are inspected regularly, kept clean, and stored out of the sun tend to last longer than those exposed to harsh conditions. Rather than relying on a specific time frame, inspect your belt at the start of each mowing season and replace it when you notice cracking, fraying, glazing, or slipping.
Can I replace a riding mower belt without removing the deck?
On some models, it is possible to replace the belt without fully removing the deck by raising the mower and working underneath. However, removing the deck is usually easier and safer because it provides better access to the pulleys and tensioner. For most home mechanics, removing the deck is the recommended approach.
Why does my new belt keep coming off?
A new belt that keeps coming off is usually caused by incorrect routing, improper tension, or a worn pulley. Double-check the belt routing against the diagram in your owner’s manual, confirm the tensioner is functioning correctly, and inspect the pulleys for damage or misalignment. If the problem persists, consult a professional.
Do I need to replace both the deck belt and drive belt at the same time?
Not necessarily, but if one belt is worn, it is a good idea to inspect the other. If both belts show signs of aging or damage, replacing them together can save time and effort. Always use the correct replacement belt specified for your mower model.