How to Clean a Lawn Mower Carburetor: Quick Answer
To clean a lawn mower carburetor, first ensure the engine is cool and disconnect the spark plug wire for safety. Remove the air filter and its housing, then disconnect the fuel line and detach the carburetor from the engine. Drain old fuel, remove the float bowl, and spray the internal passages, jets, and needle valve with carburetor cleaner. Use a thin wire or compressed air to clear clogged jets and ports, avoiding damage to soft gaskets and diaphragms. Replace any worn gaskets, reassemble the carburetor, reconnect fuel and air lines, reattach the spark plug, and test-start the mower.
Why Does a Lawn Mower Carburetor Get Dirty and Need Cleaning?
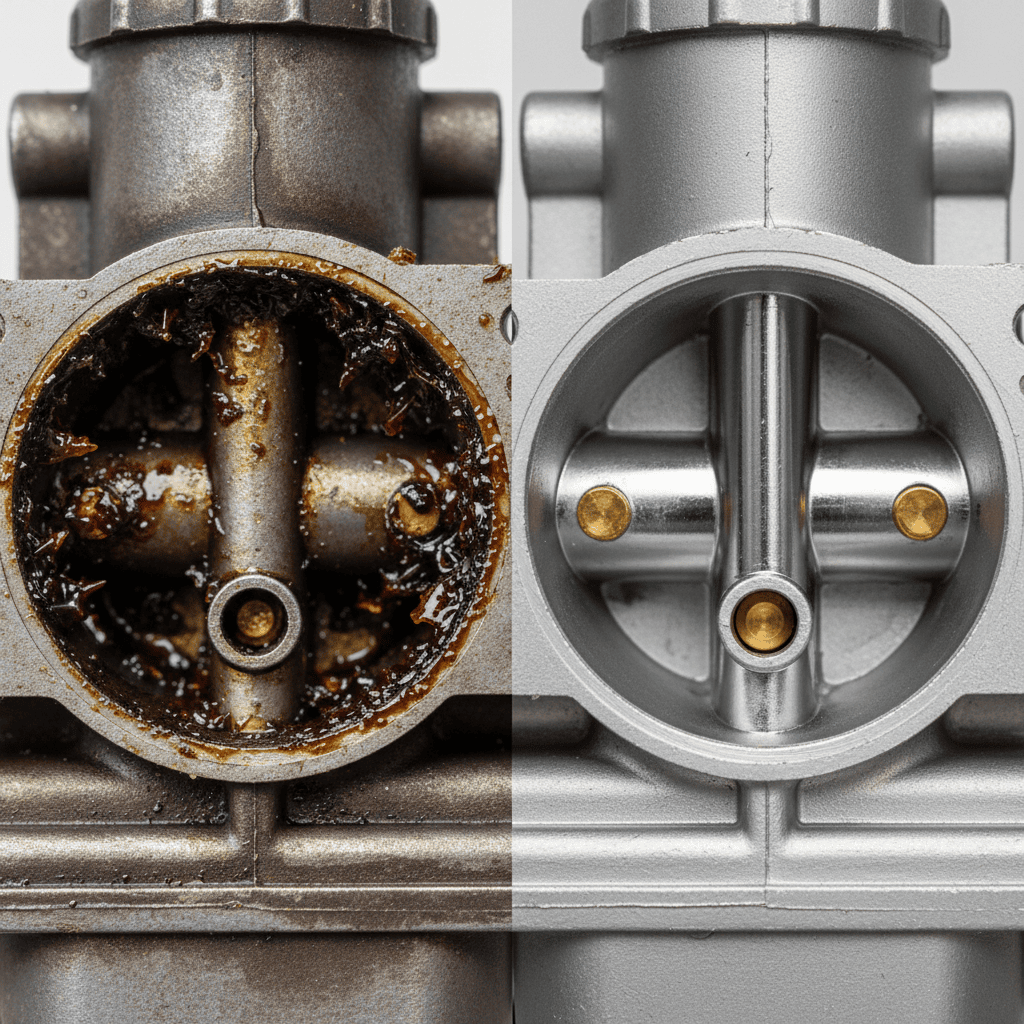
The carburetor is the heart of your lawn mower’s fuel system. Its job is to mix air and gasoline in the precise ratio needed for combustion. Over time, this critical component becomes clogged and dirty, leading to frustrating performance issues.
What Causes a Carburetor to Become Clogged?
- Stale Fuel: Gasoline left in the mower for more than 30 days begins to break down, forming a sticky varnish that coats internal passages.
- Ethanol Blends: Modern ethanol-blended fuels attract moisture and accelerate the formation of gum and deposits inside the carburetor.
- Dirt and Debris: Tiny particles can bypass the air filter and accumulate in the tiny jets and orifices.
- Old Gaskets: Deteriorating gaskets can allow dirt to enter and disrupt the fuel-air mixture.
Common Signs Your Carburetor Needs Cleaning
- The engine is hard to start or won’t start at all.
- The mower runs rough, sputters, or stalls shortly after starting.
- The engine idles poorly or surges up and down.
- There is a noticeable loss of power during mowing.
- You see black smoke from the exhaust, indicating a rich fuel mixture.
Tools and Materials You Need to Clean a Carburetor
Having the right tools and supplies on hand will make the job smoother and prevent damage to your carburetor. Here is a checklist of what you will need.
Essential Tools
- Screwdrivers: Both Phillips and flat-head sets.
- Wrenches or Socket Set: To remove mounting bolts and fuel line clamps.
- Needle-Nose Pliers: For handling small clips and linkages.
- Small Container: To catch draining fuel.
- Compressed Air Can or Air Compressor: For blowing out passages.
- Thin Wire or Carburetor Jet Cleaning Tool: To clear stubborn clogs.
Cleaning Supplies and Consumables
- Carburetor Cleaner Spray: A dedicated aerosol cleaner that dissolves varnish and gum.
- Replacement Gaskets: It is highly recommended to have a new gasket set or a complete carburetor rebuild kit on hand.
- Clean Rags or Paper Towels: For wiping parts.
- Safety Gear: Nitrile gloves and safety glasses.
Safety Preparation Before You Start
Working with fuel and engine components requires caution. Follow these safety steps to prevent injury or damage.
Critical Safety Steps
- Disconnect the Spark Plug Wire: This is the most important step. It prevents the engine from accidentally starting while you are working on it.
- Work in a Well-Ventilated Area: Perform this task outdoors or in a garage with the door open to avoid inhaling fumes.
- Ensure the Engine is Cool: A hot engine can cause burns and makes handling parts difficult.
- Keep Away from Open Flames: Gasoline and carburetor cleaner are highly flammable. Do not smoke or work near pilot lights or sparks.
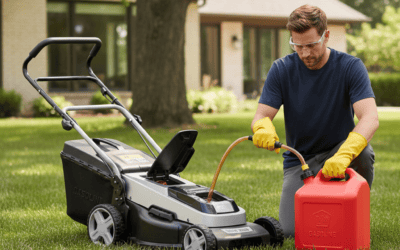
- Handle Fuel Carefully: Have a fire extinguisher rated for flammable liquids nearby. Drain fuel into an approved container.
Step-by-Step: Removing the Carburetor from the Mower
Accessing the carburetor varies slightly between mower models, but the general process is similar for most standard walk-behind mowers.
1. Access the Carburetor
Remove the air filter cover and the air filter itself. This will expose the air filter housing, which is typically held on by a few screws or bolts. Remove these fasteners and carefully lift the housing away to reveal the carburetor.
2. Disconnect Linkages and Fuel Line
Note the position of any throttle or choke linkages connected to the carburetor. You may need to take a photo for reference. Gently disconnect these metal rods or springs. Next, use pliers to slide the clamp off the fuel line and carefully pull the hose free. Be prepared for a small amount of fuel to spill.
3. Detach the Carburetor
Remove the two bolts that secure the carburetor to the engine block. Once unbolted, carefully pull the carburetor away. If it is stuck, do not pry forcefully; check for any remaining connections or gasket adhesion.
How to Clean the Carburetor Parts Thoroughly
With the carburetor removed, you can now perform a detailed cleaning. For a quick fix, you can spray cleaner into the assembled unit. For a thorough clean, disassembly is required.
Disassembly and Float Bowl Cleaning
Place the carburetor over a container. Remove the screw(s) holding the float bowl (the bottom cup) and carefully lower it. The old fuel will drain out. Inside, you will see the float and the needle valve. Remove the pin holding the float, then lift out the float and needle. Spray the inside of the float bowl and the main body with carburetor cleaner, focusing on the central tube and all visible holes.
Cleaning Jets and Passages
The tiny brass jets are the most common points of clogging. Use the straw attachment on your carburetor cleaner can to spray directly through each jet and passage. For stubborn blockages, gently insert a thin wire or a specialized jet cleaning tool. Caution: Do not use a drill bit or hard wire, as this can enlarge the orifice and ruin the carburetor. Compressed air can also be used to blow debris clear.
Inspecting the Needle, Seat, and Diaphragm
Check the rubber tip of the needle valve for wear or grooves. Inspect the seat (the small hole the needle plugs) for debris. If your carburetor has a rubber diaphragm (common on some models), inspect it for cracks, tears, or stiffness. A damaged diaphragm must be replaced.
Soaking and Ultrasonic Cleaning
For extremely gummed-up carburetors, you can soak disassembled metal parts (excluding rubber gaskets and diaphragms) in a carburetor cleaner solution for several hours. An ultrasonic cleaner uses sound waves to agitate the cleaning solution, providing an exceptionally deep clean that can restore even badly neglected carburetors.
Reassembly, Reinstallation, and Testing
Once all parts are clean and dry, reassembly is the reverse of disassembly. Pay close attention to gasket placement and ensure all linkages are reconnected correctly.
Reassembly Tips
- Install the new gasket between the carburetor and the engine block.
- Reattach the float, needle, and float bowl. Ensure the bowl screw is snug but not overtightened.
- Reconnect the fuel line and secure the clamp.
- Reattach the air filter housing and the air filter.
Final Steps and Testing
Reconnect the spark plug wire. If you drained the fuel tank, refill it with fresh gasoline. Consider adding a fuel stabilizer to prevent future gumming. Start the mower and let it run for a few minutes. Listen for smooth operation and check for fuel leaks around the carburetor.
When to Clean vs. Rebuild or Replace the Carburetor
Cleaning solves most carburetor problems, but sometimes more is needed.
Signs You Need a Rebuild Kit or Replacement
- Cracked or Warped Body: If the metal casting is damaged, cleaning won’t help.
- Worn Needle and Seat: If fuel leaks into the engine after cleaning, the needle valve is likely worn and needs replacement.
- Stripped Screw Threads: If you cannot reassemble the carburetor securely.
- Extensive Corrosion: Severe pitting inside the carburetor can prevent proper sealing and flow.
A complete rebuild kit, which includes all gaskets, needles, and sometimes new jets, is often a cost-effective solution. If the carburetor body is damaged, a full replacement is the only option.
Frequently Asked Questions
Can I clean a lawn mower carburetor without removing it?
Yes, for a quick clean, you can remove the air filter and spray carburetor cleaner directly into the air intake while the engine is running. This may clear minor deposits. However, for a thorough clean and to fix significant issues, removal and disassembly are necessary.
What type of carburetor cleaner should I use?
Use a dedicated aerosol carburetor and choke cleaner available at any auto parts store. Ensure it is labeled as safe for the materials in your carburetor, particularly for any rubber or plastic components. Avoid using brake cleaner, as it can be too harsh and damage gaskets.
How often should I clean my lawn mower carburetor?
There is no fixed schedule. Cleaning is needed when performance problems arise. To minimize the need, always use fresh fuel, add a stabilizer if the mower will sit for more than a month, and run the engine dry at the end of the mowing season.
Is it worth rebuilding or replacing a carburetor?
If cleaning does not resolve the issue, a rebuild kit is usually inexpensive and effective. Replacement carburetors are also relatively affordable for common mower models. If you are not comfortable with disassembly, a professional service is a reliable option.