Direct Answer: How Do You Draw a Lawn Mower?
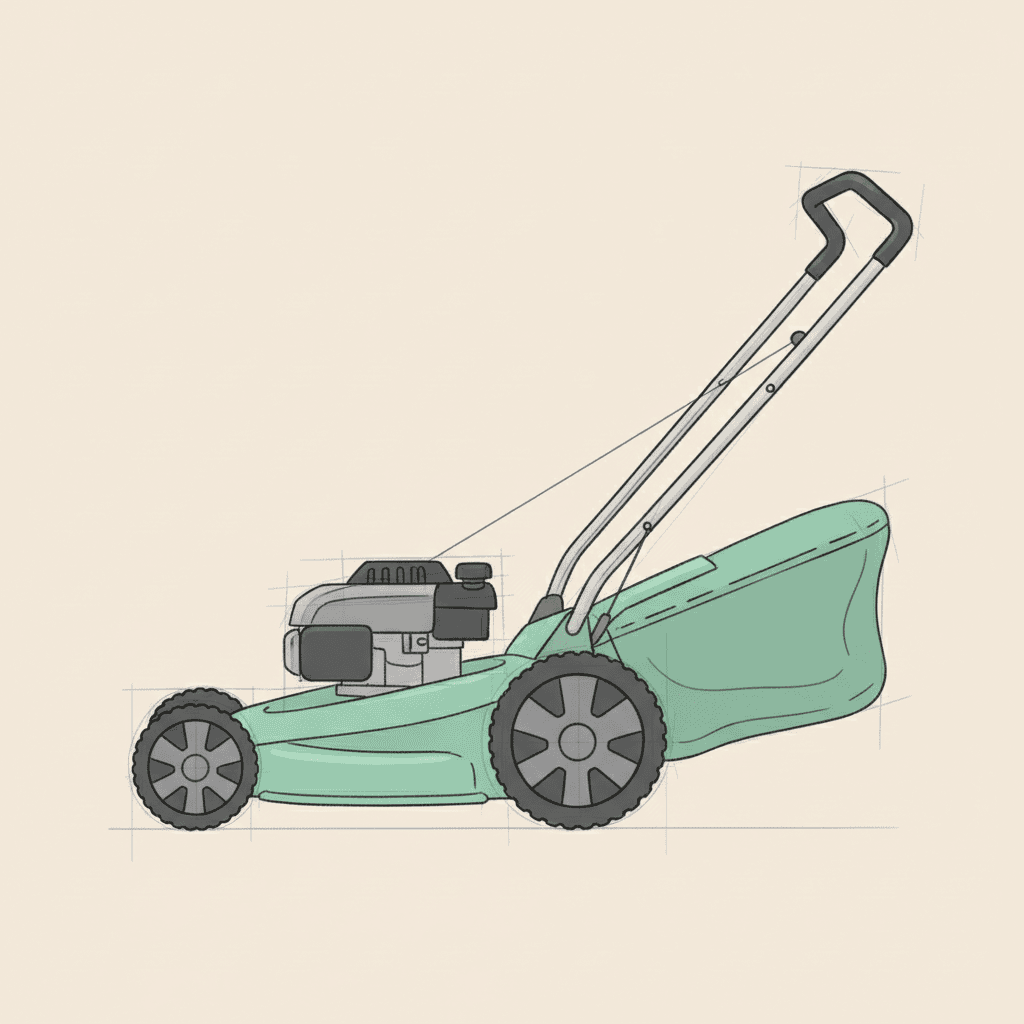
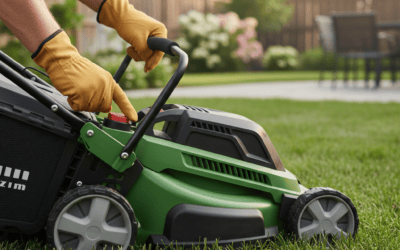
To draw a lawn mower, begin by sketching the main body as a rounded rectangle or low trapezoid at the center of your page. Add two large circles beneath it for the front and rear wheels, then draw a long handle extending upward and backward from the body. Lightly block in the engine block, grass catcher bag, and control levers using simple shapes, then refine the outlines, erase construction lines, and add shading and small details like vents, bolts, and a fuel cap to make it look realistic.
The key is to work from large, simple shapes to small, specific details. Most beginner drawings fail not because of poor detail work, but because the proportions of the wheels relative to the body are off, so establishing correct proportions early is the single most important step.
Understanding the Basic Shapes of a Lawn Mower
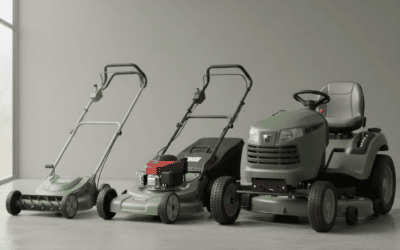
Every complex object can be reduced to a handful of simple geometric forms. A walk-behind lawn mower is made up of just four main shape families: rectangles or trapezoids for the body, circles for the wheels, a long thin rectangle for the handle, and assorted small blocks and cylinders for the engine components. Once you can visualize these shapes, the actual drawing becomes a matter of connecting and refining them.
Primary Geometric Shapes of the Mower Body
- Main deck: A wide, flat, rounded rectangle or shallow trapezoid that sits close to the ground. This is the largest shape and anchors the entire drawing.
- Engine block: A smaller rectangle or cylinder sitting on top of the deck, usually toward the rear.
- Grass catcher bag: A soft, rounded rectangle or pillow-like shape that hangs off the back or side of the deck.
- Wheels: Two or four circles (or ellipses) positioned underneath and slightly outside the deck. In side view, you typically see one front wheel and one rear wheel.
- Handle: A long, slightly angled rectangle or pair of parallel lines extending up and back, usually ending in a T-bar or curved grip.
- Control levers: Small rectangles or L-shapes near the top of the handle.
Proportions: How Wheels and Handle Relate to the Body
Getting proportions right is what separates a convincing drawing from a confusing one. As a general rule for a side-view walk-behind mower: the wheel diameter is roughly one-third to one-half of the deck’s height, and the deck is about twice as wide as it is tall. The handle is typically one-and-a-half to two times the length of the deck. The rear wheels are usually slightly larger than the front wheels on many real mowers, but you can simplify by making them equal for a cartoon or beginner version.
Place the wheels so that their centers line up just above the very bottom edge of the deck. If the wheels sit too low, the mower looks like it is sinking into the grass; if they sit too high, the mower looks like a hovercraft. The handle should attach to the rear of the deck at roughly a 40-to-50-degree angle from the horizontal, giving it a natural pushing stance.
Step-by-Step Drawing Process
Follow these steps in order. Use light pencil strokes for the first several stages so you can easily erase and adjust. Keep a kneaded eraser handy, and do not press hard until you are confident in the overall layout.
Step 1: Draw the Main Deck
Start by lightly sketching a horizontal rounded rectangle about midway down your page. This will be the mower deck. Make it wider than it is tall, roughly in a 2:1 ratio. Add a slight upward curve at the front of the deck so it resembles the underside of a real mower, which is shaped to lift grass as it passes. If you want a more realistic look, sketch the deck as a trapezoid that is narrower at the front and wider at the rear.
Step 2: Position the Wheels
Draw two light circles below the deck, one near the front and one near the rear. Use a compass or trace a coin if you want perfect circles, but freehand circles are fine too. Make the circles tangent to the bottom edge of the deck, meaning the top of each wheel just touches or slightly overlaps the deck line. Ensure both wheels sit on the same baseline so the mower looks like it rolls on flat ground. For a more realistic look, make the rear wheel slightly larger and the front wheel slightly smaller.
Step 3: Add the Handle
From the upper rear corner of the deck, draw two parallel, slightly angled lines extending upward and backward. The angle should be between 40 and 50 degrees from vertical, leaning back toward the person who would push it. Let the lines extend well above the mower body. At the top, connect them with a horizontal bar (like a T-shape) for the grip, or curve them into a bicycle-style handlebar. If your mower has a single central handle, draw one thicker line instead and add a grip at the end.
Step 4: Block in the Engine and Grass Catcher
On top of the deck, toward the rear, sketch a rounded rectangle or trapezoid for the engine cowling. Keep it smaller than the deck and centered or slightly off-center depending on your reference. Behind the mower, sketch a soft rounded rectangle for the grass catcher bag, sitting low so it hangs from the rear of the deck. At this stage, everything should still be blocky and simple, with no small details.
Step 5: Add Control Levers and Cables
Near the top of the handle, draw two small rectangular levers that curve inward toward the grip. These are the dead-man control levers that you squeeze to start and run the mower. Add a thin curving line from each lever down along the handle to the engine block; these represent the control cables. Keep the cables loose and gently curved, not stiff straight lines.
Step 6: Refine Outlines and Erase Construction Lines
Now go over your drawing with a firmer, cleaner line. Trace the final outlines of the deck, wheels, handle, engine, and bag, and erase all the light guide lines and overlapping circles. Add thickness to the wheels by drawing a hub cap circle in the center of each, and give the tires a slightly wider profile. Clean up any areas where the handle meets the deck so the connection looks solid.
Step 7: Add Details and Shading
Add small details like a fuel cap on the engine, air vents or slits on the engine cowling, a pull-cord handle, bolts at the wheel centers, and a grass discharge chute on the side of the deck. Then add light shading under the deck, under the engine, and on the side of the wheels opposite the light source. Shade the grass catcher bag with vertical hatch marks to suggest fabric texture. Finally, add a few short grass blades at the bottom of the wheels if you want to show the mower in action.
Adding Realistic Details and Refinements
A basic sketch becomes a convincing illustration when you add the right details. The goal is to strike a balance: enough detail to read as a lawn mower, but not so much that the drawing becomes cluttered or confusing.
Key Details That Make a Mower Look Realistic
- Vents and cooling slits: Small horizontal lines or grill-like openings on the engine cowling. These instantly communicate mechanical machinery.
- Fuel cap and fuel tank: A small circle or square cap on top of the engine, sometimes with a tiny hinge detail.
- Pull cord handle: A small loop or handle sticking out of the engine front; adds a lot of authenticity for a tiny amount of line work.
- Grass bag texture: A woven pattern of small diagonal lines, or a stitched seam line around the edge, makes the cloth bag read as fabric rather than plastic.
- Wheel details: Tread marks (short lines around the tire), hub caps, and axle bolts. Adding a small mud guard above each wheel is a nice optional touch.
- Discharge chute: A flat rectangular flap on the side of the deck that routes cut grass either into the bag or out onto the lawn.
- Decals and controls: A simple rectangular decal shape on the engine and small labels or printed lines on the control levers give the drawing product-level realism.
Using Shading and Line Weight for Depth
Shading is what turns a flat line drawing into a three-dimensional object. Identify a light source direction first, and keep it consistent across the whole drawing. If the light comes from the upper left, shade the right and lower edges of every component.
- Core shadow: The darkest area is usually directly under the deck and under the engine, where light cannot reach. Use dense hatching or a soft pencil there.
- Cast shadow: Add a soft shadow on the ground beneath the mower, slightly offset from the wheels in the direction opposite the light source. This anchors the machine to the ground.
- Line weight: Make the outermost contour lines thicker and the interior detail lines thinner. This is called line-weight variation and it dramatically improves readability.
- Cross-hatching: For curved surfaces like the engine cowling, use curved hatch lines that follow the shape’s contours rather than straight parallel lines.
- Highlights: Leave small areas of paper untouched where the light hits directly, such as the top of the engine and the upper rims of the wheels.
If you are working in color, the same principles apply. Use a darker tone of the base color for shadows and a lighter tint for highlights, and keep a consistent light direction.
Tips for Beginners and Common Mistakes to Avoid
Most drawing mistakes are fixable if you catch them early. Here are the most frequent problems beginner artists run into when drawing a lawn mower, along with simple corrections.
| Common Mistake | Why It Happens | How to Fix It |
|---|---|---|
| Wheels too small relative to the deck | Drawing the deck first and shrinking the wheels to fit | Sketch the wheels first, or measure the wheel diameter against the deck height using your pencil as a measuring tool |
| Wheels not touching the same ground line | Placing each wheel independently without a baseline | Draw a faint horizontal ground line first and anchor both wheels to it |
| Handle angle too steep or too flat | Guessing the angle instead of planning it | Mark a 40-50 degree angle guide line from the rear of the deck before drawing the handle |
| Engine drawn too large | Focusing on the engine as the main subject | Remember the engine is roughly one-third the height and one-half the length of the deck |
| Drawing details before the overall shape | Jumping straight to vents, levers, and cables | Force yourself to complete all large shapes first; add details only in the final stage |
| Symmetrical drawing when a side view needs asymmetry | Copying a front-view mental image | Decide on a viewpoint (side, front, or three-quarter) and stick to it throughout |
Should You Use a Reference Image?
Yes, especially if you are a beginner. A reference image removes the guesswork about proportions, part placement, and details. When choosing a reference, look for one shot in clear daylight that shows the whole mower in profile. Avoid heavily stylized or low-angle photos, and prefer real photographs over cartoon images until you understand the underlying structure. If you are drawing from memory as an exercise, still build the drawing from the same stage-by-stage process described above, and compare your result to a reference afterward to identify what you misremembered.
Simplify for Cartoon or Icon Styles
If your goal is a cartoon or icon rather than a realistic illustration, exaggerate the proportions intentionally. Make the wheels very large, reduce the deck to a simple rounded rectangle, and barely suggest the engine with a small bump on top. Cartoon mowers read best when the wheels are oversized and the handle is thin and simple. An icon version can drop the grass bag and cables entirely, keeping only deck, wheels, handle, and an engine block.
Practicing Different Views
Once you feel comfortable with the side view, try the three-quarter view, where you see both the side and slightly onto the top deck. Begin with an elongated rectangle for the deck, two pairs of ellipses for the wheels (the far-side wheels slightly higher and smaller), and the engine as a rounded rectangle on top. The front view is simpler but less interesting: a wide rectangle, two wheels visible at the bottom edges, and the handle lines angling back behind the body. Practicing all three views will rapidly improve your overall drawing skills.
Frequently Asked Questions
What is the easiest way to draw a lawn mower for a child or absolute beginner?
The easiest approach is the cartoon method: draw one large rounded rectangle for the body, two big circles for the wheels underneath, a straight line for the handle angling up and back, and a small rectangle on top for the engine. Add a smile-shaped line for the grass chute and a few short grass blades beneath the wheels. Skip the cables, vents, and shading entirely until the basic version looks right.
How do you draw a lawn mower from a front view?
Draw a wide horizontal rectangle for the front of the deck, then two circles near the left and right bottom corners for the wheels. Add a smaller rounded rectangle on top of the deck for the engine cowling, and a small circle for the pull-cord mechanism. The handle is drawn as two short lines disappearing behind the deck, angled slightly inward toward the center. Leave the grass bag out because it is not visible from the front.
What materials do I need to draw a lawn mower?
For a pencil sketch, you only need an HB or 2B pencil, a kneaded eraser, and plain drawing paper. A ruler or compass helps with straight handle lines and perfect wheels. For a finished illustration, add fine-tipped pens for inking, colored pencils or markers for color, and a blending tool or cotton swab for smooth shading. Cheap materials work fine; the technique matters far more than the brand.
How long does it take to learn to draw a realistic lawn mower?
With regular practice, most beginners produce a recognizable lawn mower within one or two 30-minute practice sessions if they follow a structured step-by-step process. Realistic results with proper shading and proportions typically take a few weeks of consistent practice. The fastest way to improve is to draw the same mower from the same reference image multiple times, comparing each attempt with the previous one.