How to Clean a Carburetor on a Toro Lawn Mower
To clean the carburetor on a Toro lawn mower, start by disconnecting the spark plug wire and turning off the fuel valve. Remove the air filter assembly and housing, then detach the carburetor from the engine, noting how the linkage, fuel lines, and gaskets are positioned. Drain any fuel from the float bowl, remove the float bowl and its gasket, and remove the main jet and pilot jet. Soak metal parts in a commercial carburetor cleaner for 15–30 minutes (do not soak rubber or plastic parts), then spray all passages and jets with carburetor cleaner and compressed air. Do not use wire or drill bits to clean jets, as this can enlarge them. Inspect gaskets and diaphragms for cracks and replace them if damaged. Reassemble in reverse order, torque the bowl screw to spec, reconnect the fuel line and linkage, and test the engine, adjusting the idle screw if needed.
Why the Carburetor Gets Clogged and When Cleaning Is Needed
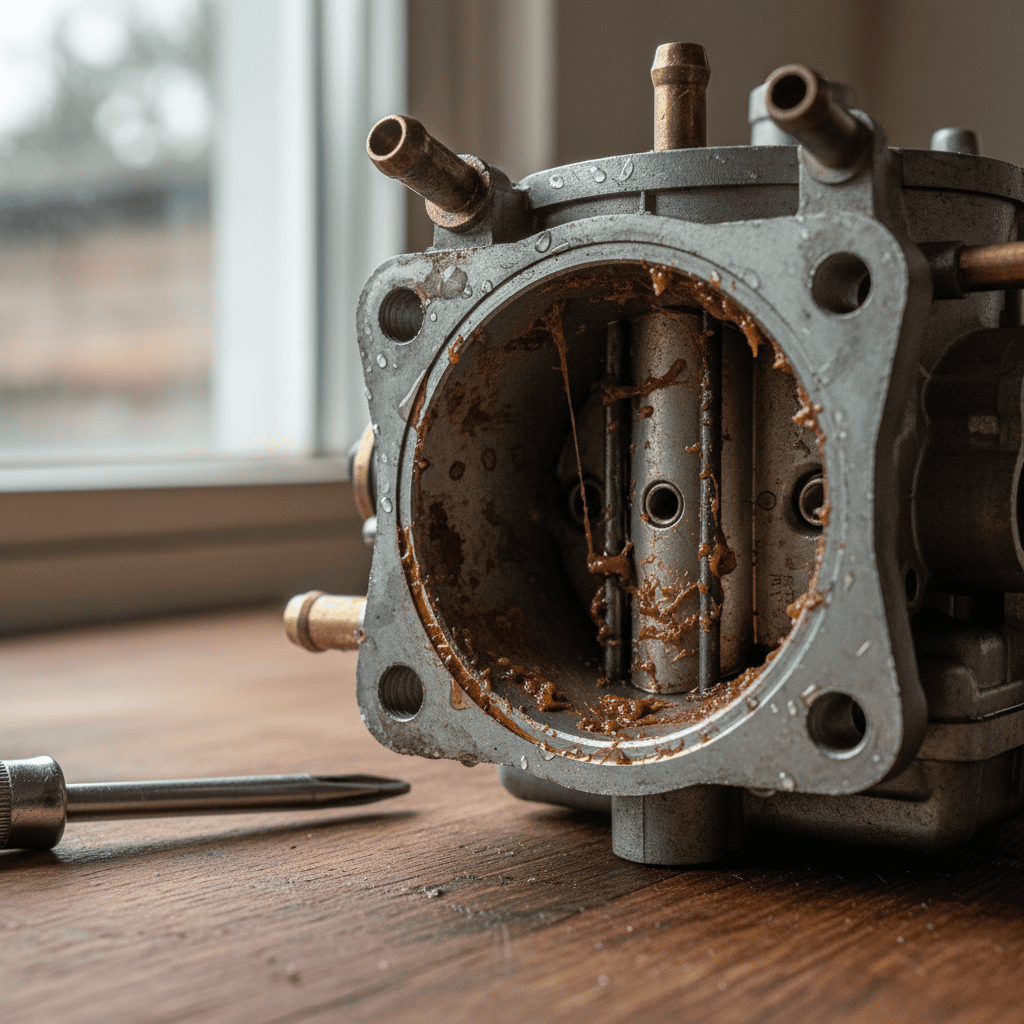
A dirty carburetor is the most common reason a Toro lawn mower runs poorly or won’t start. Understanding the symptoms and causes helps confirm that cleaning is the right solution.
Common Symptoms of a Clogged Carburetor
- Engine won’t start after sitting unused for several weeks or months.
- Engine starts but stalls within a few seconds or when you engage the blades.
- Rough idle or surging — the engine RPM fluctuates up and down.
- Engine runs only with the choke on, indicating a lean fuel mixture.
- Black smoke or fouled spark plug from a rich mixture due to a stuck float needle.
Why Carburetors Get Dirty
Modern gasoline, especially fuel containing ethanol, is the primary culprit. Ethanol-blended gasoline causes gum and varnish deposits and damages rubber and plastic carburetor components. When fuel sits in the carburetor for more than 30 days without a stabilizer, it begins to break down, leaving sticky residue that clogs the tiny jets and passages. Moisture absorbed from the air can also cause corrosion inside the float bowl.
Cleaning vs. Replacement
Cleaning is appropriate when the carburetor body and jets are intact but coated with deposits. However, if the carburetor is badly corroded, the float needle does not seat properly, or the plastic components are warped, replacement with an OEM or compatible carburetor is often simpler and more reliable.
Tools, Parts, and Safety Preparation
Before you begin, gather the necessary tools and replacement parts. Having everything on hand prevents interruptions and ensures a proper reassembly.
Tools You Will Need
- Socket set and wrenches (typically 10mm, 12mm, and 13mm for Toro models)
- Flathead and Phillips screwdrivers
- Needle-nose pliers
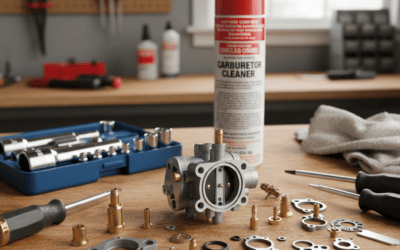
- Carburetor cleaner spray (aerosol can with a straw applicator)
- Commercial carburetor cleaning solution for soaking
- Compressed air canister or air compressor with a blow gun
- Drip pan or container to catch fuel
- Nitrile gloves and safety glasses
- Shop towels or rags
Replacement Parts to Have on Hand
- Carburetor gasket set (float bowl gasket, intake manifold gasket)
- Float needle and seat (if the old one shows wear)
- Fuel line (if cracked or hardened)
- Fuel filter (recommended to replace during carburetor service)
- Air filter (inspect and replace if dirty)
Safety Precautions
Working on a fuel system requires care. Follow these safety steps before disassembly:
- Disconnect the spark plug wire and secure it away from the plug to prevent accidental starting.
- Work in a well-ventilated area away from open flames, sparks, or heat sources.
- Turn off the fuel valve if your Toro model has one. If not, use a fuel line clamp to stop fuel flow.
- Allow the engine to cool before working on it. Do not warm up the engine specifically for carburetor cleaning.
- Dispose of old fuel properly at a recycling center — never pour it on the ground or into a drain.
Step-by-Step Carburetor Removal and Disassembly
The exact steps vary slightly by Toro model, but the general procedure applies to most walk-behind and push mowers with Briggs & Stratton, Honda, or Toro engines.
Step 1: Access the Carburetor
Remove the air filter cover and the air filter element. On most Toro mowers, the air filter housing is held on by one or two screws or clips. Remove the housing to expose the carburetor mounted behind it.
Step 2: Disconnect Fuel Line and Linkage
Use pliers to slide the fuel line clamp back and gently twist the fuel line off the carburetor inlet. Have a rag ready to catch residual fuel. Disconnect the throttle linkage and any governor springs by unhooking them from the carburetor lever. Take a photo of the linkage configuration before removal — this makes reassembly much easier.
Step 3: Remove the Carburetor
Remove the two mounting bolts that secure the carburetor to the intake manifold or engine block. Carefully pull the carburetor away, noting the position of any gaskets between the carburetor and the engine. Set the carburetor on a clean workbench.
Step 4: Disassemble the Carburetor
Place a drip pan under the carburetor. Remove the float bowl screw (usually a single bolt on the bottom of the bowl) and carefully lower the float bowl. Drain any remaining fuel. Remove the float by sliding out the hinge pin. The float needle will come with it — inspect the rubber tip for wear or grooves.
Identify the main jet and pilot jet. The main jet is typically located in the center post inside the carburetor body or in the float bowl. The pilot jet (also called the slow jet or idle jet) is a smaller jet accessible from the top of the carburetor or from a recessed port. Remove both jets carefully using the correct screwdriver — do not force them.
Cleaning Methods: Chemical Versus Mechanical
Proper cleaning removes deposits without damaging the precision-machined components. The key is to use chemical cleaning and air pressure, not mechanical abrasion.
Soaking Metal Parts
Soak metal parts in commercial carburetor cleaner for 15–30 minutes removes deposits effectively. Place the jets, float bowl, and any other metal components in a container with the cleaning solution. Do not soak rubber or plastic parts, including the float, gaskets, diaphragms, and the carburetor body if it contains plastic inserts.
Spraying Passages and Jets
After soaking, use aerosol carburetor cleaner with the straw applicator to spray through every passage and jet. You should see fluid flow freely through each opening. Follow up with compressed air to blow out loosened debris and dry the passages. Repeat until the passages are completely clear.
What Not to Do
Is it safe to use wire or a drill bit to clear a clogged jet? Absolutely not. Do not use wire or drill bits to clean jets because it enlarges them and changes the air-fuel mixture. Even a tiny increase in jet diameter causes a lean condition that can damage the engine. If a jet cannot be cleared with chemical cleaner and compressed air, replace it.
Cleaning Without Full Removal
Can I clean a Toro carburetor without removing it from the engine? In some cases, you can spray carburetor cleaner through the air intake while the engine is running (with the air filter removed), but this is only a temporary fix for mild deposits. A thorough cleaning requires full removal and disassembly.
Cleaning Plastic Carburetor Bodies
Some newer Toro models use carburetors with plastic bodies. How do I clean a plastic or composite carburetor body? Use only carburetor cleaner spray — do not soak plastic in strong chemical solutions or use compressed air at excessive pressure, which can crack the body. Inspect for cracks or warping, and replace the carburetor if damaged.
Reassembly, Adjustment, and Troubleshooting
Reassembly is the reverse of disassembly, but attention to detail ensures the carburetor functions correctly.
Reassembly Steps
- Install the pilot jet and main jet, tightening them snugly but not overtightening.
- Reinstall the float needle onto the float tab and position the float in the carburetor body. Insert the hinge pin.
- Place a new float bowl gasket and reinstall the float bowl. Torque the bowl screw to the manufacturer’s specification (typically 5–8 ft-lbs for most small engines).
- Position new gaskets on the intake manifold and mount the carburetor with the two bolts.
- Reconnect the throttle linkage and governor springs exactly as they were positioned.
- Reattach the fuel line and secure the clamp. Turn the fuel valve on (if applicable).
- Reinstall the air filter housing and a clean air filter.
- Reconnect the spark plug wire.
Priming and Testing
How do I prime and test the mower after cleaning the carburetor? If your Toro has a primer bulb, press it 3–5 times to draw fuel into the carburetor. If it uses a choke, set the choke to full and pull the starter rope. Once the engine fires, move the choke to half and then to the run position as the engine warms up.
Adjusting Idle and Air-Fuel Mixture
How do I adjust the idle and air-fuel mixture screws if the mower idles rough? Locate the idle mixture screw on the side of the carburetor. With the engine running at operating temperature, turn the screw slowly clockwise until the engine starts to stumble, then turn it counterclockwise until it stumbles again. Set it in the middle of these two points. Some Toro models have a fixed-idle design with no adjustable mixture screw — in that case, a rough idle after cleaning indicates a remaining clog or a vacuum leak.
Trouleshooting After Cleaning
Why does my Toro mower still not start after cleaning the carburetor? Common causes include:
- A clogged fuel filter or kinked fuel line restricting flow.
- A vacuum leak at the intake manifold gasket.
- A stuck float needle allowing too much fuel into the bowl (flooding).
- An incorrect idle screw setting.
- A fouled spark plug from the previous rich condition — replace the plug.
Frequently Asked Questions
How often should I clean the carburetor on my Toro lawn mower?
Cleaning is typically needed once a year or whenever you experience starting or running problems. Using fresh fuel with a stabilizer and running the mower dry before storage can extend the interval significantly.
Can I use household cleaners instead of carburetor cleaner?
No. Household cleaners are not formulated to dissolve gasoline varnish and gum. Use a commercial carburetor cleaner designed for small engines to avoid damaging components.
Is it worth cleaning a carburetor or should I just replace it?
If the carburetor is structurally sound and only has deposits, cleaning is cost-effective. If it is corroded, warped, or the jets are damaged, replacement is faster and more reliable. Replacement carburetors for Toro mowers typically cost between $15 and $40.
How do I prevent the carburetor from clogging in the future?
Add a fuel stabilizer to every tank of gas if you store fuel for more than 30 days. At the end of the mowing season, either run the mower completely dry or add stabilizer and run the engine for a few minutes to circulate treated fuel through the carburetor. Store the mower in a dry location.