Quick Answer: How to Install a Lawn Mower Battery
Disconnect the spark plug wire first to prevent accidental engine starts. Remove the old battery by disconnecting the negative (black) terminal first, then the positive. Install the new battery by connecting the positive (red) terminal first, then the negative, and secure it with the hold-down bracket before reconnecting the spark plug wire.
Understanding Lawn Mower Battery Types and Locations
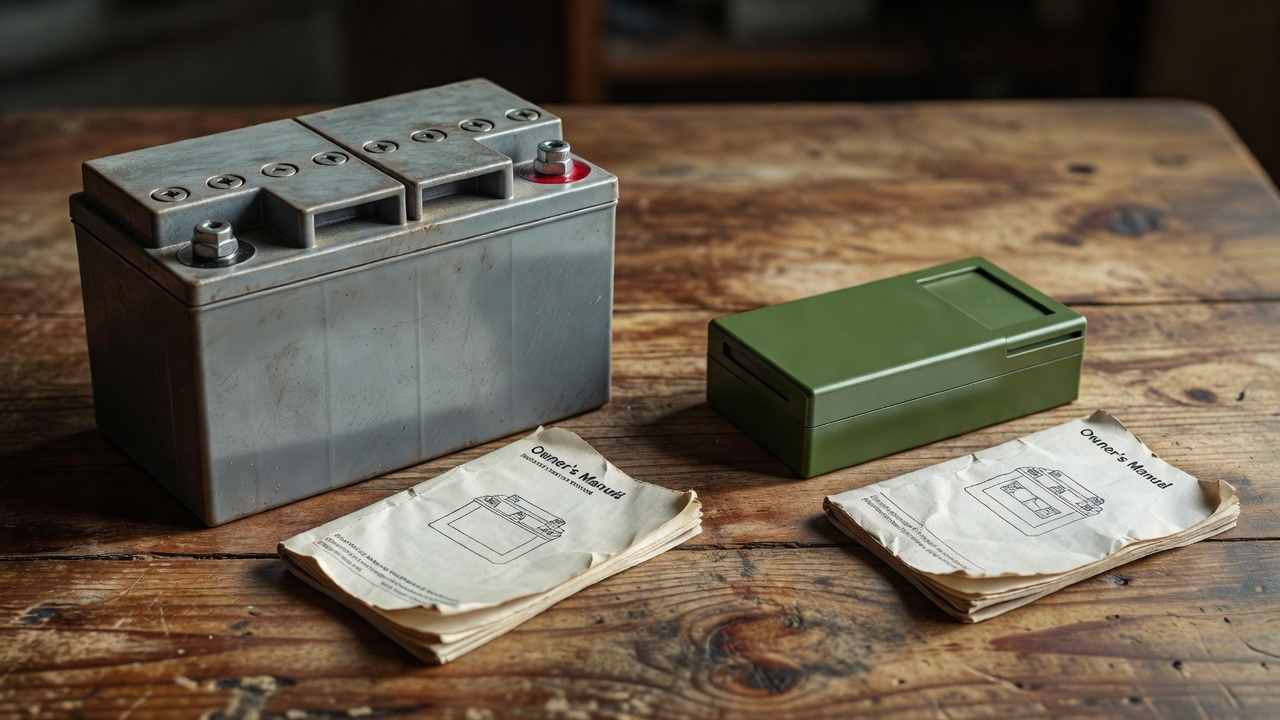
Before touching a terminal, identify what battery your mower uses and where it sits. Getting this wrong wastes time and risks buying the wrong replacement.
Where Is the Battery Located?
Battery placement varies significantly by mower type:
- Riding mowers: Most commonly under the seat or beneath a front hood panel. Some models position the battery on the side frame near the engine. Lift the seat or open the hood and look for a rectangular plastic case with two cable terminals.
- Walk-behind mowers with electric start: Battery is typically mounted on the engine deck, near the recoil starter handle, or enclosed in a side housing. These batteries are physically smaller than riding mower units.
- Zero-turn mowers: Usually located under the seat or behind an access panel at the rear of the machine.
Consult your owner’s manual or the manufacturer’s website if the battery location is not immediately visible. Never force open a panel — most battery compartments have a simple latch, strap, or two-bolt cover.
Lead-Acid vs. Lithium-Ion Mower Batteries
The two dominant battery chemistries require slightly different handling:
| Feature | Lead-Acid (SLA/AGM) | Lithium-Ion |
|---|---|---|
| Weight | Heavy (10–20 lbs typical) | Significantly lighter |
| Maintenance | Flooded types need distilled water; AGM is sealed | Maintenance-free |
| Installation method | Standard bolt-on terminals | May use proprietary connectors or slide-in packs |
| Common in | Most gas riding mowers | Battery-powered push and riding mowers |
| Corrosion risk | Higher — inspect terminals at every change | Lower |
Important: Lithium-ion packs on battery-powered mowers (e.g., EGO, Greenworks, Ryobi 40V/80V platforms) are designed as tool-free slide-in modules. The steps in this guide apply primarily to lead-acid and AGM batteries on gas-powered riding and walk-behind mowers with electric start. Lithium-ion pack swaps require only ejecting the old pack and clicking in the new one — no tools, no terminal order rules.
Essential Safety Precautions Before Installation
Skipping safety steps causes short circuits, acid burns, or an engine that cranks unexpectedly while your hands are inside the battery compartment. Follow every step below before picking up a wrench.
Why You Must Disconnect the Spark Plug Wire First
The spark plug wire is a physical interlock. Even with the ignition key off, residual charge in the ignition system or an accidental key bump can fire the starter motor. Pulling the spark plug boot off the plug tip eliminates that possibility entirely. On riding mowers with multiple cylinders, disconnect all plug wires. Tuck the boot(s) away from the plug so they cannot fall back into contact during the job.
Protective Gear
- Safety glasses or goggles: Lead-acid batteries contain sulfuric acid. A cracked case or a terminal spark can spray acid toward your face.
- Chemical-resistant gloves: Nitrile or rubber gloves rated for acid contact. Latex is not sufficient.
- Old clothing or an apron: Battery acid permanently damages fabric and can irritate skin on contact.
Additional Precautions
- Work in a well-ventilated area. Charging or discharging lead-acid batteries release hydrogen gas, which is flammable. No open flames or smoking near the battery.
- Keep a box of baking soda and water nearby to neutralize acid spills instantly.
- Place the mower on a flat, stable surface. Set the parking brake on riding mowers.
- Remove metal jewelry — rings and bracelets can bridge terminals and cause severe burns.
- Do not tip a flooded lead-acid battery sideways. Electrolyte will spill. Keep it upright at all times.
Step-by-Step Guide: Removing the Old Battery
Work methodically. Each step exists to prevent a specific failure mode.
Tools You Will Need
- Socket wrench or adjustable wrench (typically 8 mm, 10 mm, or 5/16″ for terminal bolts)
- Flathead screwdriver (for prying cable clamps if corroded)
- Wire brush or battery terminal cleaner tool
- Baking soda solution (1 tablespoon baking soda per cup of water) for corrosion cleanup
- Clean rags
Step 1 — Disconnect the Spark Plug Wire
Grip the rubber boot firmly and pull it straight off the spark plug tip. Do not yank by the wire itself. Set the boot aside so it cannot accidentally reattach. On V-twin engines, repeat for the second cylinder.
Step 2 — Access the Battery Compartment
Lift the mower seat, open the hood, or remove the access panel as applicable. Some riding mower seats unclip with a single latch. If the battery is covered by a plastic shroud with fasteners, use the appropriate socket to remove them and set the hardware somewhere it will not roll away.
Step 3 — Inspect Before Touching
Look for:
- Cracked or bulging battery case — if present, wear full eye protection and handle with extra care. A visibly damaged lead-acid battery should be removed slowly and taken to a recycling center immediately.
- Heavy white or blue-green corrosion on terminals — neutralize with baking soda solution before loosening bolts to prevent spreading corrosive residue.
- Frayed or damaged cable insulation — note for replacement before reinstalling new battery.
Step 4 — Disconnect the Negative Terminal First
Locate the negative terminal, marked with a minus sign (−) and typically fitted with a black cable. Loosen the terminal bolt or nut with your wrench and slide the cable clamp off the post. Move it away from the battery so it cannot accidentally contact either post during removal.
Why negative first? The mower’s metal frame is grounded to the negative terminal. If your wrench slips while removing the positive terminal, it will contact the frame and complete a circuit, causing a spark or short. Removing the negative side first breaks the ground reference, making that accidental contact harmless.
Step 5 — Disconnect the Positive Terminal
Loosen the positive terminal bolt, marked with a plus sign (+) and typically with a red cable. Slide the clamp off the post. Some manufacturers cover the positive terminal with a rubber boot for extra protection — pull this back before loosening.
Step 6 — Remove the Hold-Down Bracket
Most riding mowers secure the battery with a hold-down bracket — a metal bar, J-bolt, or strap that clamps across the top or base of the battery. Loosen the bracket bolts and set the hardware aside. Do not lose these fasteners; a missing hold-down bracket allows the battery to shift during mowing, which vibrates terminals loose and shortens battery life.
Step 7 — Lift Out the Old Battery
Grip the battery by its case — never by the terminals or cables. Lead-acid batteries are heavy (often 10–20 lbs). Lift straight up and out of the battery tray. Keep it upright at all times. Place it on a flat surface away from your work area.
Dispose of the old battery properly. Most auto parts stores, hardware retailers, and municipal recycling centers accept lead-acid batteries for free. Do not place them in household trash — it is illegal in most jurisdictions and environmentally harmful.
Step 8 — Clean the Battery Tray
Wipe out the battery tray with a damp rag. If corrosion deposits are present, apply baking soda solution, let it fizz for 60 seconds, then wipe clean. A corroded tray can accelerate terminal corrosion on the new battery. Allow the tray to dry before installing the replacement.
Step-by-Step Guide: Installing the New Battery
Installation is removal in reverse — with one critical difference in terminal connection order.
Step 1 — Verify the Replacement Battery
Before placing the new battery, confirm:
- Group size matches — the physical dimensions must fit the tray and allow the hold-down bracket to seat correctly.
- Voltage matches — most gas riding mowers use a 12-volt battery. Verify against your owner’s manual or the label on the old battery.
- Cold cranking amps (CCA) meet or exceed the original — CCA determines the battery’s ability to start the engine in cold conditions. Installing a lower-CCA unit may cause hard starts in cool weather.
- Terminal position matches — positive and negative posts must align with the cable routing in your mower. Some batteries offer dual terminal positions; configure accordingly.
Step 2 — Place the New Battery in the Tray
Lower the battery straight into the tray, keeping it upright. Confirm it sits flat and flush with no rocking. The terminal posts should face the correct direction so the cables reach without stretching or bending sharply.
Step 3 — Secure the Hold-Down Bracket
Reattach the hold-down bracket before connecting any terminals. A battery that shifts freely can arc terminals against the frame. Snug the bracket bolts firmly — the battery should not move when you push it sideways with moderate hand pressure. Do not overtighten to the point of cracking the battery case.
Step 4 — Connect the Positive Terminal First
Slide the positive (red) cable clamp onto the positive (+) post. Push it fully down onto the post and tighten the terminal bolt until the clamp is snug and does not rotate on the post. Give the cable a firm tug to confirm the connection holds.
Why positive first during installation? With the negative cable still disconnected, the circuit is open. You can tighten the positive terminal freely. If you connected negative first, the frame would be live and any tool contact with the positive terminal or the frame could spark.
Step 5 — Connect the Negative Terminal
Slide the negative (black) cable clamp onto the negative (−) post. Tighten the terminal bolt to the same snug specification. Both terminal connections should be tight enough that you cannot twist the clamp on the post by hand.
Step 6 — Apply Anti-Corrosion Protection (Recommended)
After both terminals are tight, apply a thin coat of battery terminal protector spray, petroleum jelly, or battery terminal grease to the exposed metal of both posts and clamps. This creates a moisture barrier that significantly slows corrosion buildup. This step is optional but extends the service life of both terminals and cables.
Step 7 — Reconnect the Spark Plug Wire
Push the spark plug boot firmly back onto the spark plug tip until you feel or hear it click into place. If you disconnected multiple plug wires, reconnect each to its corresponding plug — do not swap them.
Step 8 — Test the Installation
Close the hood or lower the seat. Turn the ignition key to the start position. The engine should crank promptly. If it cranks slowly or not at all:
- Check that both terminal connections are fully tight.
- Verify the battery was fully charged before installation — new batteries from the shelf are sometimes shipped partially discharged. Charge with a compatible battery charger before further troubleshooting.
- Inspect cables for damage that could cause high resistance.
Common Mistakes to Avoid
- Connecting positive terminal last during removal: Always negative off first, positive off second when removing. Positive on first, negative on second when installing. Remember: off negative first, on positive first.
- Skipping the hold-down bracket: Vibration from the mower engine and terrain will loosen terminal connections within a single season without it.
- Ignoring corrosion on the old cables: Installing a new battery on corroded cables transfers the problem. Clean cables with baking soda solution and a wire brush, or replace them.
- Installing the wrong group size: A battery that is too small rattles in the tray. One that is too large will not allow the bracket to secure properly or may contact the hood.
- Forgetting to reconnect the spark plug wire: The mower will not start, and the cause is easy to miss during troubleshooting.
Frequently Asked Questions
Which terminal do you disconnect first when removing a lawn mower battery?
Always disconnect the negative (black) terminal first. The mower frame is grounded to the negative terminal. Removing it first breaks the ground circuit, so if your wrench accidentally contacts the frame while working on the positive side, no short circuit occurs. Reverse the order for installation: positive terminal connects first.
Can you install a lawn mower battery with the engine running or the key in the ignition?
No. The key must be removed and the spark plug wire disconnected before any battery work begins. Working on a battery with the ignition on risks electrical shorts, blown fuses, and damage to the charging system. An accidental engine start while hands are in the battery compartment is a serious injury risk.
How do I know if my lawn mower battery is the problem, or if it is the alternator or starter?
A healthy battery that fails to hold a charge after multiple charges typically indicates a bad battery. If a fully charged, confirmed-good battery still fails to crank the engine, suspect the starter solenoid or starter motor. If the battery discharges rapidly after every use despite the engine running, the charging system (stator or alternator) likely is not recharging the battery. A multimeter voltage test across terminals — 12.6V or higher at rest indicates a good charge; below 12V indicates a discharged or failing battery — narrows down the fault.
How long does a lawn mower battery typically last?
Lead-acid and AGM mower batteries average 3 to 5 years with proper maintenance, including keeping the battery charged over winter storage, cleaning terminal corrosion annually, and not allowing deep discharge cycles. Storing the mower without a trickle charger through winter is the single most common cause of premature battery failure, as fully discharged lead-acid batteries sulfate internally and lose capacity permanently.