A lawn mower belt eventually wears out from friction, age, and weather exposure. Replacing it is a straightforward maintenance task that most owners can handle with basic tools and care. Whether you’re dealing with a drive belt that powers the wheels or a deck belt that engages the blades, the process follows a similar pattern: disconnect power, access the belt, remove the old one, route the new belt correctly, and verify tension. This guide covers both belt types and emphasizes why consulting your specific owner’s manual is essential—routing paths and hardware vary significantly between models.
Understanding Your Lawn Mower Belt: Drive Belt vs. Deck Belt
Lawn mowers typically use two distinct belt systems, each serving a different function. Knowing which one needs replacement helps you locate the right component and source the correct replacement.
Drive Belt: The drive belt transfers engine power to the wheels, enabling the mower to propel itself forward. On most walk-behind mowers, the drive belt runs from the engine’s crankshaft or pulley system down to the axle or wheel drive system. When this belt wears or breaks, the mower won’t move, though the blade may still spin if powered independently.
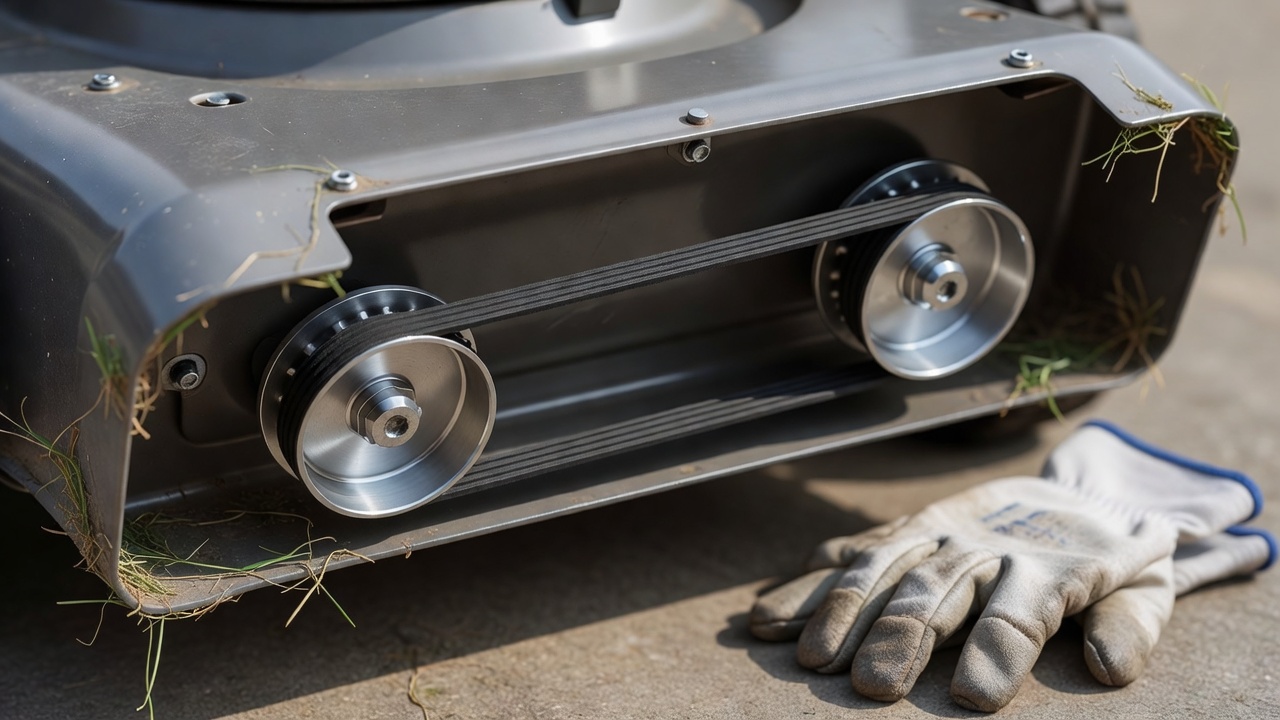
Deck Belt: The deck belt engages the cutting blade or blades. It runs from the engine pulley to one or more pulleys attached to the mower deck. When this belt fails, the blade won’t turn even though the engine runs and the mower may still move. Some zero-turn or riding mowers use multiple deck belts for multiple blade assemblies.
To identify which belt needs attention, start your mower and observe what happens. If it won’t move forward or backward despite engine power, the drive belt is likely the culprit. If the engine runs but the blade doesn’t engage, the deck belt requires replacement. Look for visible wear: fraying edges, cracking, glazing (a slick, shiny surface), or missing chunks are all signs of failure. A belt that appears intact but produces a squealing noise during operation is also nearing the end of its lifespan.
Essential Tools and Safety Precautions Before Starting
Proper preparation protects you from injury and helps the job proceed smoothly. Gather your tools and materials before beginning work.
Tools and Materials You’ll Need:
- Replacement belt (correct model and part number from your manual or mower identification)
- Socket wrench set or adjustable wrench (exact sizes vary by model)
- Screwdrivers (flathead and Phillips, as needed)
- Work gloves and safety glasses
- Clean cloth or rag
- Flashlight or work light for better visibility
- Belt routing diagram (usually inside the owner’s manual cover or on a label under the mower deck)
Critical Safety Steps:
Before touching any belt, disconnect the spark plug wire by twisting and pulling it off the spark plug. This prevents accidental engine ignition while you work. For added safety on riding mowers, also disconnect the battery negative cable. Allow the engine to cool completely if it has been running—metal pulleys and deck components can cause serious burns.
Work on a level surface with the mower on stable ground. If the mower must be tilted or lifted to access the belt, use jack stands or equivalent support—never work under an unsupported load. Keep hands, clothing, and hair clear of pulleys and any moving parts during reassembly and testing.
If you are uncomfortable working on power equipment, or if your mower shows signs of other damage, consider taking it to a qualified repair technician. Belt replacement alone is usually manageable, but complex issues are best left to professionals.
Step-by-Step Guide to Installing a New Belt
Step 1: Access the Belt Area
Consult your owner’s manual to determine how to safely access the belt on your specific model. On many walk-behind push mowers, you must remove a plastic shield or deck cover using a wrench or screwdriver. On riding mowers, you may need to remove a side panel or tilt the deck upward. Follow the manual’s instructions exactly, taking photos of the current setup if it helps you reassemble components later.
Clean away any grass, dirt, or debris from the belt area using a cloth. Cleanliness helps you see the belt routing clearly and prevents contamination of the new belt.
Step 2: Locate and Measure the Old Belt
Once the belt area is accessible, identify the old belt and trace its path through all pulleys. Take note of the belt width, length, and the number of grooves (if it is a ribbed belt). The owner’s manual typically includes a routing diagram showing how the belt should loop around each pulley. If you cannot find a routing diagram in your manual, check for a decal or sticker on the mower itself—many manufacturers attach this information directly to the equipment.
Measure or photograph the old belt from multiple angles. Write down or photograph the belt part number if visible. This information ensures you order the correct replacement.
Step 3: Remove the Old Belt
Release tension on the old belt by loosening the idler pulley. The idler pulley is typically spring-loaded and held in place by a bolt or screw. Locate this fastener—usually near the main pulley—and loosen it according to the manual’s instructions. As tension decreases, you can slip the old belt off the pulleys by hand. Once clear, remove it from the mower.
If the belt is stuck or frayed, work carefully to avoid tearing pieces that could remain lodged in the pulley system. A belt that crumbles during removal often signals rust or severe wear on the pulleys, which may need inspection or replacement.
Step 4: Inspect the Pulleys and Deck
Before installing the new belt, check all pulleys for damage. Spin each pulley by hand—it should rotate freely without wobbling or grinding noise. Look for rust, cracks, glazing, or uneven wear on the pulley surface. If a pulley is visibly damaged, corroded, or does not spin smoothly, it should be replaced to ensure the new belt wears evenly and lasts as long as intended.
Also inspect the deck or frame for bent metal or cracks that could pinch or misalign the new belt. Address any damage before proceeding.
Step 5: Route the New Belt
Position the new belt carefully according to the routing diagram in your owner’s manual. This is the most critical step: incorrect routing can cause the belt to slip, wear prematurely, or fail immediately. Some common routing patterns include looping around the engine pulley, through the idler pulley, and to a wheel-drive pulley or blade pulley. Others are more complex on larger or multi-blade systems.
Start at one end of the routing path and work methodically through each pulley, ensuring the belt sits fully in the groove of each pulley. The belt should lie flat and centered, not twisted or bunched. Use your hands to guide it into place, and verify the path matches the diagram at each step.
Step 6: Adjust Tension
Once the belt is routed correctly, tension is maintained by the idler pulley spring. Gradually tighten the idler pulley bolt while checking that the belt remains centered on each pulley. The belt should be snug enough that you cannot easily twist it more than about 90 degrees when pressing on its midpoint, but not so tight that it strains the pulleys or engine bearings.
Consult your manual for the specific tension specification if provided. Some manuals recommend a particular deflection range or torque value for the idler pulley bolt. If your manual does not specify, aim for moderate tension: the belt should not slip under load, but should not be so tight that you hear grinding or feel excessive resistance when rotating the pulleys by hand.
Step 7: Reassemble and Test
Reinstall any covers, shields, or panels you removed, securing all fasteners. Double-check that nothing is loose or misaligned. Reconnect the spark plug wire by pushing it firmly onto the spark plug until it clicks or seats fully. If you disconnected the battery, reconnect the negative cable now.
Before starting the engine, manually rotate the blade or wheels by hand (depending on which belt you replaced) to confirm the belt moves smoothly without binding or slipping. Start the engine and let it run at low speed for a few seconds, listening for unusual noises. Slowly engage the function the belt powers—move the drive lever forward, or engage the blade—and observe whether the belt turns smoothly without slipping or squealing.
If you hear squealing, the belt may need slightly more tension. If the belt slips visibly, tighten the idler pulley further. If the mower performs normally for 5–10 minutes of operation, you have successfully completed the belt replacement.
Model-Specific Tips and Final Checks
Why the Owner’s Manual Matters: Belt routing, tool requirements, and tension specifications vary widely between manufacturers and even between model years of the same brand. A drive belt on one mower may route entirely differently than on another. The owner’s manual contains diagrams, torque specifications, and model-specific warnings that generic instructions cannot replace. Before you begin, locate your manual—often available as a free download from the manufacturer’s website using your mower’s model and serial number.
Riding Mowers and Zero-Turn Mowers: These machines often have multiple belts and more complex routing. Some use serpentine belts that power several functions. Follow the routing diagram exactly, as mistakes can affect steering, transmission, or blade engagement. If your riding mower has a deck with multiple blade pulleys, ensure each belt is routed and tensioned correctly.
Seasonal Storage: If you have replaced the belt before storing the mower for winter, run it briefly to warm the engine and dry the new belt. Store the mower in a dry location to prevent rust on the new belt and pulleys.
Post-Installation Inspection: Check the belt again after 1–2 hours of use. New belts sometimes settle slightly, and tension may need minor adjustment. Listen for any change in noise or performance. If the mower suddenly loses drive or blade engagement after a successful installation, stop immediately, disconnect the spark plug, and inspect the belt for slippage or breakage.
When to Call a Professional: If the pulleys are damaged, rusted, or do not spin freely, professional replacement is wise—worn pulleys will damage a new belt quickly. Similarly, if you encounter unexpected obstacles during disassembly or cannot locate a routing diagram for your model, a qualified technician can handle the job safely and efficiently.
Quick Troubleshooting Reference
| Issue | Likely Cause | Solution |
|---|---|---|
| Belt squeals during operation | Insufficient tension | Tighten the idler pulley slightly and retest |
| Belt slips or mower loses drive/blade engagement | Incorrect tension or routing; worn pulleys | Verify routing against the diagram; increase tension; inspect pulleys |
| Belt wears quickly after replacement | Misaligned or damaged pulleys; excessive tension | Check pulley alignment and condition; reduce tension slightly |
| Mower won’t start or engine stalls after belt work | Spark plug wire not fully connected | Reconnect the spark plug wire firmly and retest |
Replacing a lawn mower belt is a practical maintenance task that extends your equipment’s life and saves money compared to professional repair. By following your manual, taking your time with routing, and verifying tension, you can install a new belt confidently. Always prioritize safety by disconnecting the spark plug before work and allowing the engine to cool. When in doubt, consult the manufacturer’s instructions or contact a qualified repair service.