

Quick Answer: How To Replace Dewalt Weed Eater String?
Disconnect the battery or unplug the trimmer first. Open the cutting head, remove leftover line, and load new line that matches the diameter and winding direction marked on your DeWalt head or spool. Route the ends through the eyelets, close the head fully, restore power only after the cover is locked, then bump or advance the line and confirm it…

Pros
- Six-pack bundle listed in the product title
- Square profile line named in the product title
- Commercial 5 lb size listed for heavier use
Cons
- Trimmer compatibility is not verified in manufacturer listing

Pros
- Six-pack bundle listed in the product title
- Star profile line named in the product title
- Commercial 5 lb size listed for heavier use
Cons
- Line length and trimmer fit are not stated in manufacturer listing

Pros
- Title lists 1280 feet of line length
- Square profile named in the product title
- Lists a 5 lb line rating
- Title describes it as commercial-style line

Pros
- Title lists .095-inch square nylon line
- Lists 1280 feet of line length
- Manufacturer states fit with most string trimmers
- Lists a 5 lb line rating
A DeWalt weed eater, like other string trimmers, cuts with nylon trimmer line that wears down, breaks, or fuses inside the head. Replacing that cutting line is ordinary maintenance, but the job only works when the head is powered down, the leftover string is cleared, and the new line is the size and winding style that particular head was built to use. The steps below cover the common process for consumer DeWalt trimmer heads. Confirm the details stamped on your head, spool, or product label before you cut or wind anything.
Make the trimmer safe to service
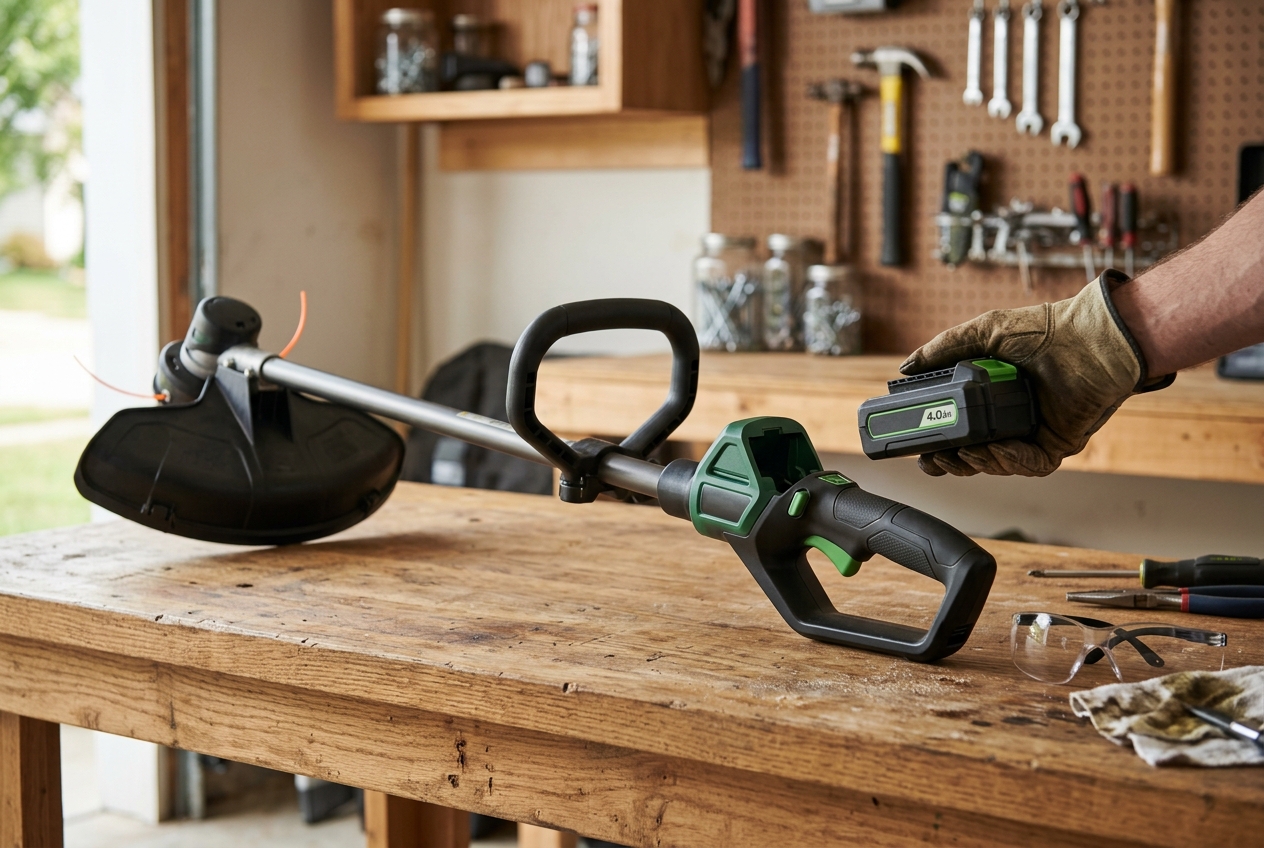
Do not open a cutting head while the tool can still start. On a cordless DeWalt trimmer, remove the battery pack completely and set it aside, not next to the handle where it can be clicked back in by accident. On a corded model, unplug the power cord from the outlet. Leaving a pack installed or a cord plugged in is the most common way people start a head while their hands are on the spool.
Wait until the trimmer head has stopped completely. The cutting line can keep spinning after the trigger is released, and a coasting head can still cut skin or fling debris. Set the tool on a stable, well-lit surface so the head cannot roll or drop while the cover is off. If the trimmer has a hanging hook or a flat rest, use it. Keep the cutting guard in place unless the manual for that model says the guard must come off to reach the head; most line changes do not require removing the guard.
Wear eye protection. A spring, cap, or short piece of old line can jump when the housing comes apart. Close-fitting gloves help when you pull fused nylon or wipe packed grass off sharp plastic edges, but they are ordinary shop practice, not a substitute for the tool manual. Do not invent a lockout sequence that is not on your machine. If your model has a lock-off or a battery-release that you do not recognize, stop and read the label on the tool before you force anything.
Confirm the head type and the line it needs
DeWalt string trimmers are not built around one universal head. Before you buy or cut line, look at the head on the tool rather than assuming a method from another brand or an older model. The markings on the housing, the inner spool, and the original product label are more reliable than a one-size-fits-all length or diameter.
Recognize the common head styles
Most consumer DeWalt weed eaters use one of these arrangements:
- A bump-feed head, which pays out line when you tap the bump knob on the ground while the head is spinning.
- An auto-feed head, which advances line without a bump, often a little at a time as the motor runs or as line wears.
- A dual-line head, which holds two cutting ends, usually wound on opposite halves of one spool.
- A drop-in or pre-wound replacement spool, which skips hand-winding if you buy a spool made for that head.
You can often tell the style from the outside. A springy center button that you tap on turf is a bump knob. A sealed cap with no knob, or a head that feeds after a brief run, is more likely auto-feed. Two line ends sticking out opposite each other usually mean a dual-line head. If the inner reel lifts out as one finished coil, you may be looking at a pre-wound design.
Match line diameter, not a guess
Line diameter is usually printed on the trimmer head, on the spool itself, or on the tool’s specification label. Use that marking. Line that is much thicker than the head is designed for can jam in the eyelets, overload the feed mechanism, or stress the plastic housing. Line that is much thinner can break early, slip on the spool, or feed poorly. Shape and material vary by aftermarket brand, but diameter and winding method matter more than marketing claims about how long a particular profile will last. For broader ecosystem context, read through our operational guide on marshall stanmore iii vs harman kardon onyx studio 8.
If you have bulk trimmer line, you will cut a length the head can actually hold and wind it yourself. If you bought a replacement spool sold for that DeWalt head, you can often drop it in after you clear the old line, as long as the spool matches the housing and the line still exits through the same eyelets. Do not mix a spool from a different head family just because it looks close. A slightly different hub, spring seat, or eyelet height can keep the cover from locking or keep the line from advancing.
Winding direction matters on a dual-line head because each half of the spool is meant to unwind toward its own eyelet. Arrows, molded text, or a winding diagram on the spool tell you which way to turn. Winding against those marks is a common reason new line will not feed even though the cover clicks shut. For troubleshooting and reliability insights, consult our in-depth dyson v8 cyclone vs bissell featherweight stick report.
Open the trimmer head
Clear grass, mud, and wrapped stems from the outside of the head first. Debris packed under the cap can hide the tabs or make a twist-off cover feel seized. A stiff brush or a wooden stick is enough for most of that cleaning. Avoid prying the housing with a screwdriver or knife. The covers are plastic, and a cracked tab usually means a new cap or a whole new head.
How the cover comes off depends on the head. Typical patterns include: Readers comparing setup options can review our technical analysis on bissell crosswave hydrosteam vs shark stainforce.
- Press-in tabs on opposite sides of the cap that release when you squeeze them and lift.
- A twist-off cover that unlocks after a short turn, then lifts straight off.
- A bump-knob assembly that comes away with the cap after you release latches or unscrew a retainer.
There is no single rotation direction that fits every DeWalt model. Look for arrows, unlock icons, or a raised lip that shows which way the cap is meant to move. If the cover will not budge, stop forcing it. Recheck that you have pressed every tab, that grass is not wedged in the joint, and that you are turning the part that is supposed to move. Soaking caked dirt with a little water and brushing again is safer than twisting until a latch snaps.
Before you lift anything out, note the stack. Many heads hold a spring under or inside the spool, sometimes with a washer or a small retainer. Photograph the order with your phone or lay the parts out in the same sequence they came off. A spring that flips over or a washer that stays in the grass will make the new line feel loose, rattle, or refuse to feed later. Keep the inner spool, spring, and cap together on a tray so nothing rolls away.
Remove leftover line and inspect the parts
Old cutting line should come out completely. Unwind what is still coiled, pull short stubs through the eyelets, and cut away any fused or melted ends that will not slide. Leftover, welded, or crossed line can lock a bump-feed or auto-feed system even after you add fresh string. Do not leave a few wraps “to save line.” Those wraps often sit in the wrong direction or occupy the space the new coil needs.
Inspect the parts while the head is empty:
- Spool: look for cracked flanges, a broken center hub, or slots that no longer hold the midpoint of the line.
- Spring: it should be present, unbent, and seated the way you found it. A missing or collapsed spring is a frequent cause of a bump head that will not pay out.
- Eyelets: the metal or hard-plastic holes in the housing should be round enough for line to slide. Deep grooves, sharp burrs, or missing inserts chew line and can snap it at the housing.
- Cap and bump knob: check for broken tabs, a cover that no longer sits flush, and a knob that is cracked or jammed with dirt.
- Arbor area: packed grass around the shaft or under the spool can keep the reel from turning freely after you reassemble the head.
There is no official wear number you can apply to every DeWalt head from general knowledge. Use a visual standard: if a part is cracked, the spring is gone, an eyelet is sharp enough to cut nylon, or the cover will not lock, replace that part with one specified for the tool. Do not wire a broken tab, glue a cracked housing, or enlarge an eyelet to accept thicker line. Those shortcuts can throw line or let the cover come off while the head is spinning.
If the housing itself is split, or the feed mechanism inside is broken rather than merely dirty, changing the string will not fix the tool. At that point you need a matching replacement head or dealer service, not a homemade repair.
Cut and load new trimmer line
This is the core of the job. The safe general method is: use the diameter printed on the head, spool, or manual; cut only as much line as that head is designed to hold; and follow the winding arrows. Do not use a single foot-length or millimeter size as if it fit every DeWalt weed eater. If the spool or housing shows a maximum fill line or a pair of length marks, stay inside those marks.
Loading bulk line on a dual-line spool
Many dual-line DeWalt heads use a spool with a divider and a slot or hole at the midpoint. A stable method for that layout is:
- Cut a single piece of the marked diameter, long enough for that spool but not so long that the coil stands above the flanges when wound.
- Fold the piece, or mark the midpoint, so the two halves are even.
- Seat the midpoint in the spool slot or hole so each half will occupy its own side of the divider.
- Wind each half tightly and evenly in the direction shown by the arrows. Keep the wraps flat. Do not let one side pile up while the other stays loose.
- Leave short free ends. Those ends must be long enough to reach through the eyelets and still be held in the spool’s parking notches, if the spool has them.
- Clip the free ends into any holding slots on the spool rim so the coil does not spring open while you carry it back to the housing.
Keep the two lines from crossing. Crossed wraps bind against each other and against the divider, which is a common reason a bump head feels dead after a reload. Wind under light, even tension. Slack coils shift when the head spins; overtight coils can be hard to start through the eyelets. If the spool has two different arrow sets, follow the set that matches a dual-line refill, not a single-line diagram from another product.
Single-line heads and other layouts
Some heads take one continuous coil instead of two halves. On those, you still start the end in the spool’s anchor hole or slot and wind in the marked direction, leaving one free end for the single eyelet. Do not assume every DeWalt weed eater is dual-line just because many are. If the housing has only one exit hole, load one line. Forcing a second line through a single-eyelet head will jam the cap.
Using a pre-wound replacement spool
A pre-wound DeWalt-compatible spool skips the hand-winding steps. Confirm the spool is the pattern for your head, not merely the same color or a similar diameter. Transfer the spring and any washer in the same order you removed them. Pull the factory ends out only far enough to reach the eyelets. If the replacement coil is overfilled, or the line is a different diameter than the housing stamp, the cover may sit high or the feed may stall. In that case, do not crush the cap shut. Return to the correct spool or rewind with the marked size.
Overfilling, reverse winding, and crossing the two lines are the usual causes of feed failure after a careful-looking reload. None of those problems is fixed by running the trimmer harder.
Reassemble the head and advance the line
Thread the free ends through the matching eyelets before the cover goes on. On a dual-line head, each end goes to the eyelet on its own side. If you close the cap first and then try to fish line through the holes, you will often pinch a wrap or leave one end trapped inside. Pull the ends just far enough that they cannot slip back when the spool drops into the housing. They should be roughly even.
Set the spool onto the arbor so it sits in the same orientation you noted earlier. The spring belongs where you found it, usually under the spool or captured in the bump-knob stack. Align any tabs, arrows, or slots on the cap with the housing. The cover should sit flush all the way around. A cap that stands proud on one side is not locked, even if one tab clicked. Twist or press only in the way that head is designed to close. If it will not seat, lift it off and check for a crossed wrap, a spring out of its pocket, or debris on the rim.
Keep the battery out or the cord unplugged until the head is fully closed and the guard is in place. After the cover is locked, restore power. How you get usable cutting length depends on the feed style:
- Bump-feed: with the head spinning and the tool held as you would for trimming, tap the bump knob on bare ground or a firm surface. The tap is a light, square contact, not a swing that slams the housing. Stop and inspect if nothing comes out after a few taps.
- Auto-feed: many of these heads pay out a short amount as the motor runs or as the remaining line shortens. You should not need to strike the head. If the system never advances, treat that as a loading or debris problem, not a reason to hit the housing.
There is no universal bump force or guaranteed feed length that applies to every DeWalt trimmer. What you want to see is two ends that are roughly even, long enough to cut, and still clear of the cutting guard. If a built-in cutoff blade on the guard is present, it will trim excess after the line is spinning. Do not stand in line with that blade or reach under the guard to pull more string while the tool is powered.
Checks to make before you start cutting
After the battery pack is back in or the cord is plugged in, recheck the obvious items before you walk into tall grass:
- The head cover is fully seated and does not wiggle like a loose lid.
- Both line ends, or the single end on a one-line head, are through the eyelets and not folded under the cap.
- The cutting guard is installed and undamaged.
- No tools, spare spools, or loose springs are still sitting on the work surface near your feet.
Do the first test in an open area, away from people, pets, windows, and loose gravel. Wear eye protection. Keep bystanders well outside the cutting path. A brief, controlled trigger pull is enough to see whether the line stays in the eyelets, whether the head sounds even, and whether a bump-feed or auto-feed system advances at all. You are checking assembly and feed, not trying to prove how thick a stalk the tool can cut.
Stop and open the head again if the cap loosens, the tool vibrates in a new and harsh way, a line end disappears back into the housing, or nothing advances after a normal bump or a short auto-feed run. Continuing to run a misassembled head can throw the cover or the remaining line. Do not promise yourself that the next pass in heavier weeds will “seat” a cover that already feels loose.
If the new line will not feed or keep breaking
Most post-reload problems come from the string and the plastic parts, not from a hidden electrical fault. Work through the usual causes before you assume the trimmer is worn out.
A bump head that refuses to pay out line often has reverse or crossed winding, an overfilled spool, leftover fused nylon, packed grass under the cap, a missing spring, or line that is the wrong diameter for the eyelets. Open the head and look for those items first. An auto-feed head can stall for the same mechanical reasons. Too much line hanging out can also keep a feed system from working as designed, because the remaining coil has little left to unwind or the extra length slaps the guard.
Line that snaps at the eyelet often means a grooved or sharp eyelet, a diameter that is too small for the work, or a wrap that is kinked where it exits the housing. Line that welds itself into a lump is usually heat from friction: the coil is rubbing because it was wound loosely, crossed, or forced into a head that is too full. Let the head cool, cut out the fused section, and rewind cleanly. Do not keep running a welded coil hoping it will break free.
A cover that pops off or a head that rattles after reassembly often means a tab is broken, the spring is not in its seat, the spool is on upside down, or debris is holding the cap off the housing. Power down and correct the stack. If the housing is cracked or a latch is gone, replace the affected part with one specified for that tool. Do not tape the cap or add hardware that was not part of the original head. Those changes can fail at speed.
Stop and replace the head, or have the tool checked by a qualified service provider, if the feed mechanism is broken, the housing is split, or the problem is not a loading issue you can see. Ordinary string replacement does not include modifying the head, drilling eyelets, or diagnosing motor and switch faults. For those jobs, the model manual and a matching replacement part are the next step, not a homemade fix.
Replacing DeWalt weed eater string is straightforward once the tool is disconnected, the old line is gone, and the new cutting line follows the diameter and winding marks on that specific trimmer head. Close the head fully, keep the guard on, and verify the feed in a clear area before you go back to cutting.
Technical Standards and Compliance
For more hands-on benchmarks and buying recommendations, consult our guides on robotic pool cleaner comparison guide, as well as deep carpet cleaning machine reviews, as well as automated robotic vacuum cleaning systems, as well as all-in-one vacuum steam mop combo guide.
For more detailed testing breakdowns and top recommendations, check our in-depth guide to cordless stick vacuum buyer guide.
Mechanical safety standards, operational tolerances, and protective gear guidelines align with benchmark specifications established by the American National Standards Institute (ANSI).









