

Quick Answer: How To Replace The String On A Weed Eater?
On most consumer weed eaters, you power the tool down, open the bump-feed head, remove the old line or spool, load matching trimmer line, wind it the way the spool arrows show, thread the ends through the eyelets, and refit the cap so a bump can feed fresh line. Designs vary—rewindable bump-feed, prewound spool, auto-feed, and fixed-line—so follow the marks…

Pros
- Six-pack bundle listed in the product title
- Square profile line named in the product title
- Commercial 5 lb size listed for heavier use
Cons
- Trimmer compatibility is not verified in supplied data

Pros
- Six-pack bundle listed in the product title
- Star profile line named in the product title
- Commercial 5 lb size listed for heavier use
Cons
- Line length and trimmer fit are not stated in supplied data

Pros
- Title lists 1280 feet of line length
- Square profile named in the product title
- Lists a 5 lb line rating
- Title describes it as commercial-style line

Pros
- Title lists .095-inch square nylon line
- Lists 1280 feet of line length
- Manufacturer states fit with most string trimmers
- Lists a 5 lb line rating
Safety before you open the head
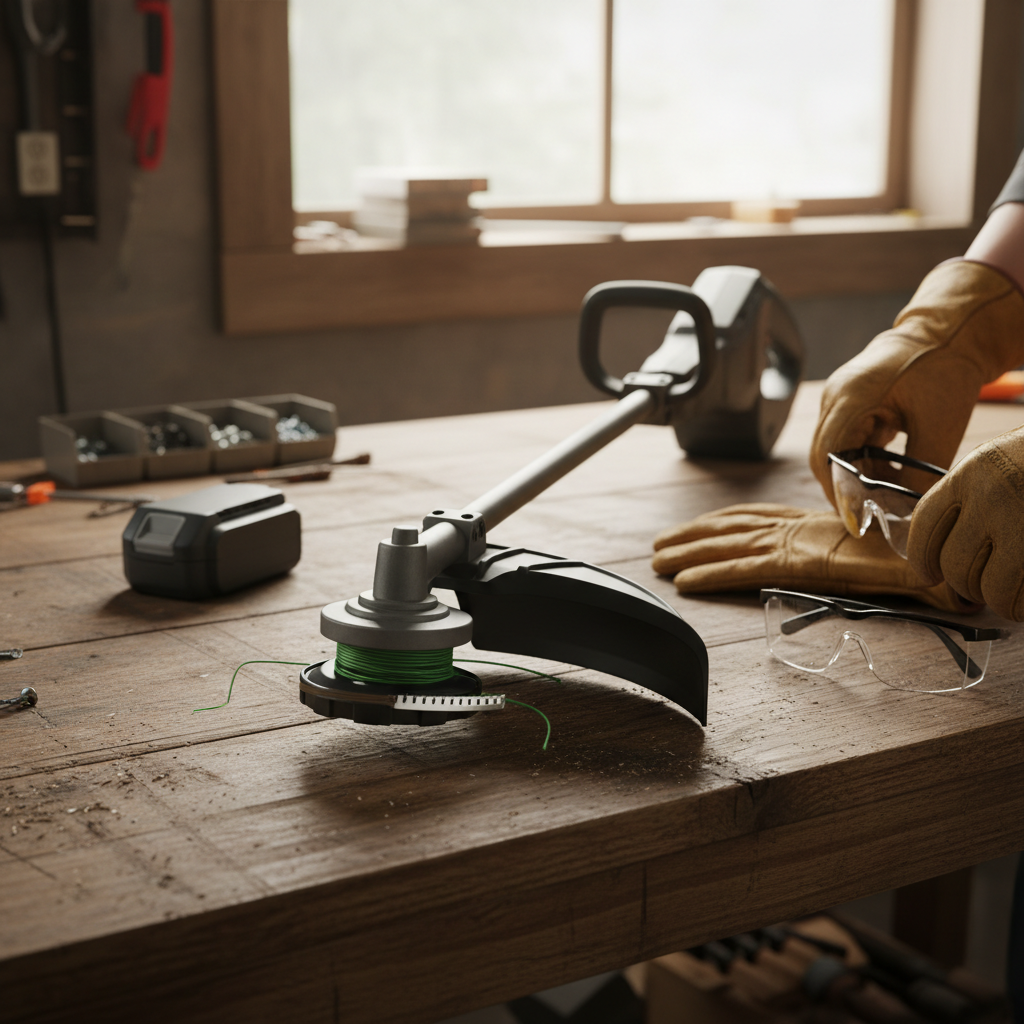
Treat the head as a spinning cutter until the tool cannot start. A weed eater that still has power can turn the spool while your fingers are in the eyelets or under the cap. Power-down is mandatory on every design, whether the tool is battery, corded, or gas.
Remove a removable battery pack and keep it away from the tool. Unplug a corded trimmer at the outlet, not only at an extension-cord joint you might kick back together. On a gas unit, move the switch or stop control to off. If you can pull the spark-plug boot off the plug without forcing brittle plastic or stretching a stuck wire, do that as well so a bump of the starter cannot fire the engine. Do not drain fuel, pry on a hot muffler, or treat battery contacts as something you need to clean in order to restring the head. Fuel, heat, and the pack are separate hazards; leave them alone unless the tool’s own manual tells you otherwise for storage or service.
The metal cutoff blade on the debris guard is sharp on purpose. It trims line to length when the head is spinning. Broken line stubs sticking out of the eyelets can also cut. Work slowly around both. Eye and face protection, plus gloves stout enough for plastic burrs and a steel edge, are strongly recommended for disassembly and for the first test after reassembly. That is practical protection, not a claim about a particular workplace rule.
Do not open the head to “test” anything while the tool can still run. Do not remove the guard to make the job easier. After the string is replaced, any check that the feed works should happen only with the tool fully back together and used the way its controls and guard were designed.
What weed-eater string is and when it needs replacing
A weed eater is a common name for a string trimmer: a handheld cutter that uses plastic trimmer line, not a lawn-mower blade. The line is stored in the trimmer head at the end of the shaft. On many consumer tools the line lives on a spool inside a bump-feed head. Tapping the bump knob or bump button on the ground pays out a little more line as the old ends wear away. Other heads use a drop-in prewound spool, an auto-feed mechanism, or short pre-cut pieces locked in slots. In every case the cutting “string” is consumable plastic line.
Replace the line when it is too short to reach the grass, snapped off at an eyelet, fused into a hard lump on the spool, tangled so it will not unwind, or no longer advancing when you bump or trigger the feed. Leftover stubs still count as a restring job on many bump-feed heads. Once the remaining line is shorter than the path from the spool through the eyelets, bumping will not recover a useful cutting length. You rewind the spool or install a fresh one.
New line will not fix a cracked housing, a missing or bent spring, a bump button that is jammed solid, or eyelets worn into sharp grooves. Those are head or spool problems. New line also will not fix an engine, motor, clutch, or switch that fails to spin the head. If the shaft turns and the head is intact, restringing is the right first step. If the head will not turn, or parts are broken, stop treating it as a string problem.
This guide is for plastic line in a typical consumer string-trimmer head. It is not a conversion to a metal blade attachment, and it is not a repair guide for the powerhead.
Identify the trimmer head before you buy or rewind line
The restring method follows the head, not the fuel or battery. Gas, corded, and battery trimmers can share the same families of heads. Guessing from the power source is how people force a rewind onto a cartridge that was never meant to be opened.
Look at the head before you cut new line:
- Rewindable bump-feed head. A spring-loaded bump knob sits in the center of the cap. The cap usually twists, unscrews, or releases from molded tabs. Inside you should find a spool, often with two line channels, an anchor hole or slot, and molded arrows that say which way to wind.
- Prewound-spool head. The outer shell looks similar, but the spool is meant to be swapped as a unit. The replacement already has line on it. You still align ends with the eyelets and keep the spring in order.
- Auto-feed head. Line advances without a bump, or the housing is more of a sealed cartridge. Some designs load a length of line through the housing and wind by turning a knob. If there is no obvious user spool, do not pry the case apart.
- Fixed-line head. Short pre-cut pieces lock into slots, clips, or holes around the rim. There is no rewind. Random scrap that does not lock is the wrong part.
Markings matter more than memory. Look for arrows, “wind this way” text, left and right channels, line-size stamps on the cap or spool, and alignment marks that show how the cap indexes onto the housing. Photograph the head from a couple of angles before you open it, and set parts down in the order they come off. A spring that looks unimportant is often the reason the bump feed works at all.
If you see no arrows, no channels, no obvious cap, and no slots for pre-cut line, do not invent a winding pattern. Use the tool or head manual, or buy a matching prewound spool or replacement head. Power source still does not tell you the method. The parts in your hand do.
Choose replacement line without guessing a size
Match the diameter the head is built for. Check leftover line first if a piece is still intact and clearly the original size. Then look for molded stamps on the spool, cap, or housing. If those are worn off, use the diameter listed in the tool or head manual, or a manufacturer-listed replacement spool for that head. Do not pick a size because it is popular on a store peg, and do not mix leftover scraps of different diameters on the same spool.
Line that is much too thick can jam in the eyelets, keep the cap from seating, or overload a small head so the spool binds. Line that is much too thin may slip in the channels, fail to lock in an anchor slot, or break as soon as it hits the work. Those are qualitative mismatches, not a reason to assume one universal diameter for every weed eater.
Round line is the usual default shape already on many consumer heads. Twisted or multi-sided line can feel more aggressive on stems and may wear plastic eyelets faster. That is a general tradeoff, not a promise that a shape will last longer or cut cleaner. If the head is unmarked, the safest buy is a small amount of the same type already on the tool, or a listed replacement spool, rather than a new shape and an unknown size at the same time.
Do not put metal cutting line, wire, or cable in a typical plastic consumer head. Metal does not belong in eyelets and bump parts designed for nylon-style trimmer line. It can damage the head and throw dangerous fragments. If you need a blade tool, that is a different attachment and a different manual, not a restring.
Open the head and remove the old line or spool
Work on a bench or clean patch of ground so a spring cannot vanish in grass. Hold the housing, not the cutoff blade. Look for molded release tabs, a quarter-turn pair of arrows, or threads that unscrew the cap. Press the tabs evenly or turn the cap the way the marks show. Do not chisel, twist with pliers until the plastic whites, or hammer the bump knob. Cracked housings are a replacement job, not a victory.
Typical parts, when they are present, come off in this kind of order:
- Cap or outer cover, sometimes with the bump knob captured in it.
- Spool, with or without leftover line.
- Spring under or around the spool.
- A washer, retainer, or inner plate on some designs.
Not every head has every part, and not every spool lifts straight off. If a piece does not move after the marked release, stop and check the other side of the housing for a second latch. Set parts in a row so the spring cannot be reversed later. Losing the spring, or putting the wide end the wrong way, is a common reason a freshly strung bump-feed head will not pay out line.
Pull fused or tangled line off the spool instead of carving the plastic. Clear broken stubs from the eyelets so new ends can pass through. If line is welded into a solid mass, discard that length; heat and friction have already ruined it as a feedable coil. Inspect while the head is open:
- Eyelets that are cracked or grooved sharp enough to shave the new line.
- A cracked or warped spool.
- A bump button that is bent, stuck, or missing its travel.
- A spring that is broken, rust-frozen, or gone.
Any of those is a reason to replace the spool or the whole head rather than rewind. Gentle, reversible disassembly is the whole method. There is no useful torque spec to invent here, and adhesive or a mallet is the wrong tool on consumer plastic.
Feed and wind line on a typical bump-feed spool
This sequence is for a rewindable bump-feed spool that already shows an anchor hole or slot, winding-direction arrows, and, on dual-line designs, separate channels. If those cues are missing, skip to a prewound spool or the head instructions. Do not copy a neighbor’s wind pattern onto an unmarked part.
Cut a workable length from the supply coil—enough to fill the spool in even layers without burying the rim or forcing the cap. There is no single length that fits every consumer spool. Overfilling binds the head so the bump feed cannot turn. Underfilling is only an inconvenience; you will rewind sooner. If the spool or manual shows a fill limit or a molded “max” rib, stay under it.
Dual-line spool
Most dual-line heads want one piece of line folded so each half lives in its own channel. Find the anchor hole or slot through the spool divider. Push the line through until the two sides are about equal. Seat the midpoint in the slot so it cannot slip when you start winding. Keep the left half in the left channel and the right half in the right channel. Crossed strands lock against each other and will not advance when you bump the head.
Wind both sides together, tightly and evenly, in the direction of the molded arrows. The arrows are not decoration. Winding against them is one of the most common reasons a bump-feed head refuses to feed: the line cinches tighter when the head spins instead of peeling off. Keep the coils flat, side by side, not heaped in the middle. Leave both ends long enough to reach through the housing eyelets with a little extra to hold. If the spool has parking notches on the rim, clip each end into its notch so the coil cannot spring loose while you carry the spool back to the housing.
Single-line spool
A single-line spool has one channel and one working end. Anchor the line in the hole or slot provided, wind with the arrows, and leave one end long enough for the single eyelet. The same rules apply: even layers, no overfill, no winding against the marks. If you only find one eyelet in the housing, you are not looking at a dual-line head, and you should not force a second strand through a path that is not there.
Do not wet the line, heat it, or use a solvent to “set” the coils. A clean, tight wind in the marked direction is the mechanical fix. A rewind also does not restore a worn cutter to like-new performance; it only puts fresh line where the old line used to be.
Reassemble the head and test the feed
Reassembly is the reverse of what you actually removed, not a universal stack from memory. If a spring came out, it goes back before or under the spool in the same orientation you found. If a washer or retainer was present, it returns to the same side of the spool.
Thread each line end through the matching eyelet in the housing before you fully seat the cap. On a dual-line head that means one end through each eyelet, not both through one hole. Many caps lock only when the spool is indexed to a mark or when the parked ends have been released from the rim notches and pulled into the eyelets. If the cap will not sit flush, stop. Pinching line under the cap or forcing tabs past a misaligned spool cracks parts and leaves the head able to open in use.
Pull a little line by hand once the cap is locked. Both ends, if there are two, should slide without the spool jumping out of place. Equalize the protruding ends so they are similar in length. With the tool still off, you can trim them to the guard’s cutoff blade so the first spin does not slap extra-long line against the shield. Some heads are meant to be shortened by that blade during a cautious first spin; either way, the guard stays on and the cap stays on.
Only then restore power the way that tool is supposed to start: battery in, cord plugged in, or a gas unit restarted with its own controls after the spark-plug boot is back on. This is not a starting tutorial. A brief check that the bump or auto mechanism pays out a little line is enough. Do not run the head at full speed indoors, do not remove the guard to watch the spool, and do not defeat the cutoff blade so you can keep extra-long line.
After that short run, switch the tool off again and look. The cap should still be fully seated. The two ends on a dual-line head should still be similar. There should be no grinding feel and no hot plastic smell that suggests the line is rubbing a misaligned cap or a jammed spool. If something is wrong, power down completely before you open the head again.
Prewound spools, auto-feed, and fixed-line heads
These are different families, not lesser versions of a bump-feed rewind. Using the rewind steps on them is how housings get broken.
Drop-in prewound spool
Open the head the same cautious way, keep the spring and any retainer in order, and drop in the new spool so its winding direction matches the way the old one sat. Ends still have to pass through the eyelets before the cap locks. A prewound spool that is inserted backward, or whose ends never reach the eyelets, will behave like a bad rewind even though you never touched a coil.
Auto-feed and through-the-housing loaders
Some heads never ask you to remove a traditional open spool. You feed a single length of line straight through the housing until it is centered, then rotate a knob or the head to wind the line inside. Only do that when the head itself shows that path and those arrows. Describe the pattern from the parts in front of you, not from a brand name. If the unit is a sealed cartridge with no user wind path, replace the cartridge or the head. Prying a sealed auto-feed case usually destroys the feed mechanism.
Fixed-line or slot-lock heads
These use equal pre-cut pieces locked in clips, holes, or slots around the rim. Cut or buy pieces that match the length and diameter the head is made for, push each piece in until it locks, and pull to confirm it cannot fly out. Rewind is not used because there is no storage spool. Unequal scraps, line that does not click into the lock, or metal substitutes are unsafe. If a slot is cracked and will not retain the piece, replace the head.
When an auto-feed mechanism is worn, a bump head is cracked, or eyelets are shredded, replacing the entire consumer head is often cleaner than fighting one more rewind. A new head still has to match the shaft and the tool’s mounting hardware. That match comes from the tool documentation or the marked replacement head, not from improvising fasteners.
If the line will not feed, stay seated, or keeps breaking
Most post-restring failures are mechanical and tied to how the line was loaded.
- Nothing pays out when you bump. Common causes are winding against the arrows, dual-line halves crossed in one channel, an overfilled spool that cannot turn, ends that never went through the eyelets, a cap that is not fully locked, or a spring left out or reversed.
- Line welds into a solid mass. Loose coils slap and heat-soften. Running with almost no line protruding can also let the remaining line cook against itself. The fix is to discard the fused length and rewind clean and tight, not to soak the spool in a chemical.
- One side vanishes on a dual-line head. That often means the two halves were unequal, one end slipped the anchor, or the strands crossed so only one channel could unwind. Open the head and reload both sides as a matched pair.
- Line keeps snapping at an eyelet. The eyelet may be grooved sharp, or the line may be too thin, old, and brittle. Wrong diameter and damaged eyelets are parts issues, not a lack of winding skill.
- The cap walks off or the head rattles. The cap is not indexed, a tab is broken, or line is pinched under the cover. Do not keep running it. Power down and reseat or replace the cap.
Repeated breaks in the middle of the cutting length can also mean you are hitting fences, masonry, or the guard blade more than grass. That is use, not a restring defect. What this article will not do is assign a lifespan, a melt temperature, or an engine diagnosis. If the bump button is jammed, the housing is cracked, or the spring is gone, buy a replacement head or spool. Homemade clips, extra screws, and wire ties on a spinning head are a bad trade.
When to stop and use the manual or replace parts
A general rewind is only for a head that opens as marked and shows a spool you can wind. Stop when any of this is true:
- The cap has no tabs, arrows, or threads you can work without breaking plastic.
- Parts that come off do not match a simple cap-spool-spring stack, and you cannot see how they return.
- The spool has no hole, slot, arrows, or channels.
- The housing, eyelet, bump button, or spring is damaged.
- The head is a sealed cartridge.
In those cases the tool or head manual overrides this guide. A listed prewound spool or a replacement consumer head is safer than improvising a wind on unmarked parts. Following the manufacturer’s instructions for your exact head also matters more than any general article when the latch style is unusual.
Do not force tabs past their travel. Do not mix leftover metal fasteners into a plastic head. Do not run the head with the cap off to “see if it feeds.” Do not substitute wire, cable, or metal cutting line. Do not bypass the guard or the cutoff blade. Those shortcuts turn a string change into a debris-and-fragment hazard.
A cracked housing, failed spring, or shredded eyelet is a parts problem. New trimmer line will not hold a broken head together. Replace the worn piece, or take the tool to a qualified repair shop if the shaft mounting, clutch, or powerhead is involved. Restringing is a small job when the head is intact and clearly marked. It is the wrong job when the head is the thing that failed.









