

Quick Answer: How to Change a Blade
Most blade replacements follow this sequence: power off and unplug the device, locate the blade release mechanism or fasteners (bolts, arbor nuts, or quick-release levers), remove the old blade while wearing gloves and eye protection, install the new blade with the correct orientation (check the directional arrow), and tighten all fasteners firmly. Always consult your specific tool’s manual, as procedures differ significantly between lawn mowers, reciprocating saws, box cutters, and other equipment.

Pros
- Large-size design named in product title
- Sharpening and balancing functions listed
- Listed as a new upgraded version

Pros
- Adjustable 15-to-45-degree range in title
- Sharpening and balancing functions listed
Pros
- Includes replacement gaskets and a 98079-55846 spark plug
- Matches Honda HRR216 and HRS216 lawn mower models
- Designed around the 16100-Z8B-901 carburetor specification
Cons
- Restricted to select Honda GCV160 mower applications
- Installation requires basic mechanical tools and skills
Identify Your Tool Type First
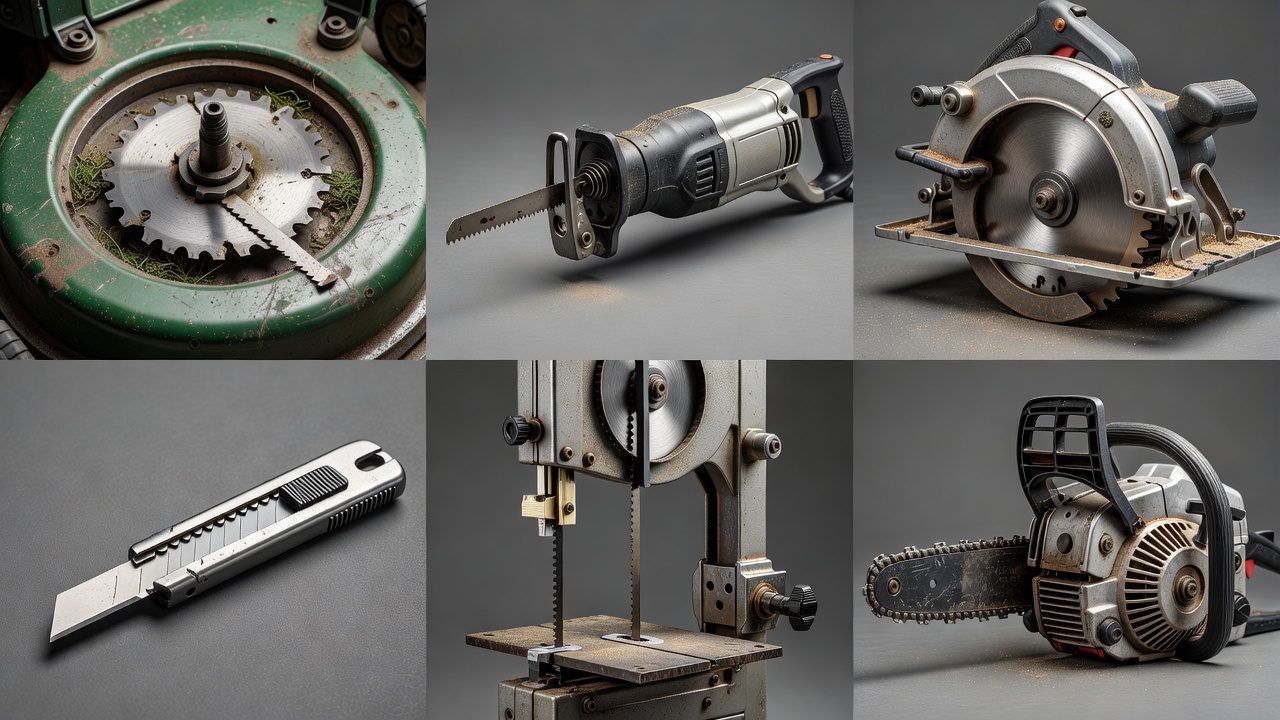
Blade replacement procedures vary dramatically depending on your equipment. Before starting any work, determine which category your tool falls into:
- Lawn mower blades: Typically bolt-mounted underneath the mower deck; single or dual-blade setups common
- Reciprocating saws: Usually feature quick-release chucks or push-fit blade holders at the front
- Circular saws and table saws: Blades mount on a central arbor with retaining nuts
- Utility knives and box cutters: May use snap-off blade segments or full blade cartridges
- Band saws: Blade forms a continuous loop around two wheels
- Chainsaws: Chain blade wraps around a guide bar
Locate your tool’s manual if available, it contains the exact procedure, torque specifications, and blade compatibility information specific to your model.
Safety Precautions Before Starting
Blade replacement injuries are common and preventable. Follow these precautions every time:
- Power off and unplug: For corded tools, unplug completely. For battery tools, remove the battery pack. For gas-powered equipment, allow the engine to cool and disable ignition
- Wait for the blade to stop: If the tool was recently used, wait 5 to 10 minutes for the blade to come to a complete stop and cool. Never assume a blade has stopped spinning
- Wear protective equipment: Wear cut-resistant gloves (leather or nitrile), safety glasses, and long sleeves. For high-speed tools, consider a face shield
- Secure the tool: Clamp or secure the equipment so it won’t shift or fall during blade removal. Use a workbench, vise, or blade-removal tool if available
- Keep hands clear: After removing fasteners, place them in a container to prevent loss. Never leave fasteners loose near the work area
- Check for damage: Inspect the blade mounting area for cracks, corrosion, or wear that might affect the new blade’s performance
General Blade Replacement Process
Most tools follow this universal framework, though specific steps vary by equipment:
Step 1: Locate the Fastening Mechanism
Find where the blade attaches to the tool. Common fasteners include:
- Bolts or screws: Use an appropriately sized wrench, socket, or screwdriver. Bolts on rotating equipment typically turn counterclockwise to loosen (left-hand thread)
- Arbor nuts: Central retaining nuts on saws often use reverse (left-hand) threads. Turn clockwise to loosen
- Quick-release levers or buttons: Press or flip to release without tools
- Collets or chucks: Rotating sleeves that grip the blade shaft; unscrew or press to release
Step 2: Remove the Old Blade
With the tool powered off and secured, carefully remove fasteners in reverse order if multiple fasteners exist. For bolted blades:
- Loosen fasteners incrementally (a quarter turn at a time) to avoid sudden blade movement
- Use a rag or cloth to handle the blade edge, never your bare fingers
- Support the blade with your other hand as the final fastener comes free to prevent it from falling
- Inspect the mounting area for debris, corrosion, or damage; clean with a dry brush if needed
Step 3: Install the New Blade
Check the new blade’s packaging for the correct orientation:
- Look for directional arrows: Most blades display an arrow indicating the direction of rotation or cutting. Align this with the tool’s rotation direction
- Check for teeth orientation: On saws, teeth typically point toward the handle for pull strokes or away from the handle for push strokes, depending on blade type
- Verify size and type: Confirm the new blade matches the tool’s specifications (diameter, bore size, tooth count, material)
- Insert the blade fully into its mounting seat, ensuring it sits flush without gaps
- Hand-tighten the first fastener to hold the blade in place while you insert other fasteners
Step 4: Tighten Fasteners Securely
Tighten all fasteners in a crisscross or alternating pattern (like tightening a car wheel) to ensure even pressure: For troubleshooting and reliability insights, consult our in-depth marshall stanmore iii vs harman kardon onyx studio 8 report.
- Use the correct tool size to avoid stripping bolts or nuts
- Tighten firmly but do not over-tighten, which can crack the blade, strip threads, or warp the mounting
- If your tool manual specifies torque values (measured in foot-pounds or newton-meters), use a torque wrench to achieve the exact specification
- Do a final visual check that the blade is centered and sits properly in its mounting
Tool-Specific Blade Replacement Procedures
Lawn Mower Blades
Type: Typically flat or slightly curved metal bars with sharpened cutting edges on both ends.
- Tip the mower on its side (engine/carburetor facing up on gas models to prevent oil leakage) or use wheel chocks to prevent rolling
- Locate the blade bolts underneath the deck; most mowers have one or two bolts per blade
- Use a socket wrench to loosen and remove bolts; place bolts in a labeled container
- Slide the old blade out and inspect the mounting bracket for damage
- Insert the new blade, ensuring the cutting edges face downward and match the original orientation
- Reinstall bolts and tighten in a crisscross pattern; do not over-tighten
- Verify the blade spins freely and does not wobble before starting the mower
Torque specification: Typically 35 to 90 foot-pounds depending on mower model; check your manual.
Reciprocating Saws (Sawzall-Type Tools)
Type: Straight blades that move back and forth; quick-release systems are standard. For complementary field maintenance guidelines, examine our breakdown of bissell crosswave hydrosteam vs shark stainforce.
- Ensure the tool is unplugged and the blade has stopped completely
- Locate the blade release lever or button near the blade holder (usually at the front or top of the chuck)
- Press or flip the release mechanism; the blade should slide out freely
- Slide the new blade into the holder until it clicks or seats fully
- Test by gently pulling the blade; it should not move if properly installed
- No fasteners or torque wrench needed; quick-release systems are tool-free
Circular Saws and Table Saws
Type: Flat circular blades with teeth around the perimeter; mounted on a central arbor.
- Unplug the tool completely and wait for the blade to stop
- Locate the arbor nut (large nut at the center of the blade); most use reverse (left-hand) threads
- Insert the arbor wrench or socket and turn clockwise to loosen the arbor nut
- Remove the arbor washer and old blade; inspect the arbor shaft for debris
- Slide the new blade onto the arbor, ensuring the directional arrow points in the correct rotation direction
- Reinstall the arbor washer and nut; tighten by turning counterclockwise until snug (do not over-tighten)
- For table saws, ensure the blade height and bevel angle are set correctly before operating
Note: Never use power to tighten or loosen arbor nuts; use hand tools only.
Utility Knives and Box Cutters
Type: Snap-off or replaceable blade cartridges; typically very sharp and handled differently from other tools.
Procedure for snap-off blades:
- Push the blade forward and snap off the dull section over a waste bin; the blade retreats automatically
- Repeat until you reach a sharp section or the entire blade needs replacement
- No fasteners or disassembly required; takes seconds
Procedure for full blade replacement:
- Locate the blade cartridge release button or screw on the knife handle
- Press the button or unscrew to open the handle
- Slide out the old blade cartridge and insert the new one, aligning grooves or tabs
- Close the handle and verify the blade extends and retracts smoothly
Chainsaws
Type: Serrated chains that wrap around a guide bar; require special removal tools.
- Turn off the engine and allow it to cool for at least 5 minutes
- Locate the spark plug wire and remove it to prevent accidental starting
- Use a wrench to loosen the nuts holding the guide bar (typically two nuts on the side of the engine housing)
- Lift the guide bar slightly and remove the old chain, sliding it off the bar
- Inspect the sprocket at the tip of the bar for wear or damage
- Position the new chain on the sprocket and guide bar, ensuring it sits properly in the bar groove
- Reinstall the guide bar and tighten the nuts; the chain should have slight give when pressed midway along the bar
- Adjust chain tension using the tensioning screw on the side of the engine until proper tension is achieved
Common Mistakes to Avoid
| Mistake | Consequence | How to Avoid |
|---|---|---|
| Installing the blade backward or upside-down | Poor cutting performance, potential blade breakage, injury risk | Always check the directional arrow on the blade before installation; consult the manual if unclear |
| Over-tightening fasteners | Stripped threads, blade warping, cracking, difficulty removing later | Tighten until snug, then stop; use a torque wrench if the manual specifies values |
| Under-tightening fasteners | Blade wobbles, slips, or flies off during use; severe injury risk | Ensure fasteners are tight enough that the blade does not move; verify by hand before operating |
| Forgetting to unplug or power off | Accidental blade rotation, severe cuts or amputation | Always unplug corded tools and remove battery packs before any blade work |
| Using the wrong blade type or size | Incompatibility with mounting, poor performance, tool damage | Match blade specifications exactly: diameter, bore size, tooth count, material; verify on tool nameplate |
| Not waiting for the blade to stop | Contact with spinning blade; severe laceration or amputation | Allow 5 to 10 minutes after use for the blade to cool and stop completely; do not assume it is stopped |
| Neglecting to wear protective equipment | Cuts, eye injuries, debris contact | Always wear cut-resistant gloves, safety glasses, and long sleeves; consider a face shield for high-speed tools |
When to Replace vs. Sharpen a Blade
Not every dull blade requires replacement. Understanding when to sharpen versus replace saves money and prevents safety issues:
Replace the Blade If:
- Teeth are chipped, broken, or missing: A damaged blade cannot cut properly and may scatter pieces
- The blade is cracked or warped: Structural damage compromises safety and performance
- The blade is bent or twisted: Bending causes vibration, poor cuts, and potential breakage
- The bore or mounting hole is damaged: If the center hole is cracked or enlarged, the blade cannot mount securely
- The blade has been used for materials outside its design range: Metal blades used on masonry or concrete may be permanently damaged
Sharpen the Blade If:
- Teeth are intact but dull: A blade that cuts slowly but without damage can be sharpened and reused
- The blade is relatively new: Sharpening a newer blade extends its life cost-effectively
- Damage is cosmetic: Light scratches or minor wear on the blade face do not affect performance
Sharpening options: Many hardware stores and tool rental shops offer professional blade sharpening services. Alternatively, if you frequently use a particular blade, a file or sharpening stone designed for the blade type allows home sharpening. Consult your blade manufacturer for recommended sharpening methods.
Frequently Asked Questions About How To Change The Blade
How often should I replace my blade?
Blade lifespan depends on the tool type, material being cut, and frequency of use. Lawn mower blades typically last one to two seasons; saw blades last 2 to 5 years with regular sharpening; utility knife blades last days to weeks depending on usage. Replace blades when they become dull despite sharpening or when you notice visible damage. As a general rule, if cutting takes noticeably more force or produces poor-quality cuts, it is time to sharpen or replace.
Can I use a blade from a different brand than my tool?
Yes, as long as the blade meets the exact specifications for your tool. The critical factors are bore size (center hole diameter), blade diameter, tooth count, and mounting system. Many third-party blades are compatible with standard tools and are often more affordable than brand-name blades. Always verify compatibility on the blade packaging or the tool manufacturer’s website before purchasing. Using an incompatible blade can result in poor performance or safety hazards.
What should I do if a bolt or nut breaks during blade removal?
If a bolt breaks while removing it, do not force the remaining portion. Instead, use a bolt extractor tool (available at hardware stores), which grips the broken bolt and allows you to unscrew it. If the bolt head is accessible, try a slightly larger wrench for better grip. For stuck nuts, apply penetrating oil (like WD-40) around the nut and wait 15 to 30 minutes, then try again. If you are unable to remove the broken fastener, take the tool to a professional repair service rather than risk damaging the mounting threads.
Why does my new blade vibrate or shake during use?
Vibration typically indicates the blade is not properly installed or secured. Check that the blade is fully seated in its mounting (no gaps), that all fasteners are tight, and that the blade is oriented correctly according to the directional arrow. Excessive vibration can also result from a bent blade or worn mounting components. If tightening fasteners does not resolve the vibration, inspect the blade for bending and replace it if damaged. Persistent vibration after installation suggests underlying tool wear; consult a professional repair service.
Final Safety Reminders
Blade replacement is straightforward when approached methodically, but even small oversights can result in serious injury. Always power off and unplug the tool, wait for moving parts to stop completely, wear protective equipment, and follow your specific tool’s manual for exact procedures. If you are uncomfortable with any step or encounter unexpected resistance or damage during removal, stop and seek professional assistance. A few minutes of caution prevents injuries that could affect you permanently.
Related Maintenance and Operating Guides
To keep your equipment running at peak operating efficiency, explore our related technical walkthroughs and maintenance tutorials:
- Consult our detailed breakdown on cordless stick vacuum buyer guide.
- Consult our detailed breakdown on robotic pool cleaner comparison guide.
- Consult our detailed breakdown on deep carpet cleaning machine reviews.
Swapping a Blade Safely
Whether the blade belongs to a mower, a trimmer, or another yard tool, swapping it should happen with the machine off and disconnected. Grip the edge with gloves or a rag, then confirm the new blade seats correctly. Anyone looking for general safety guidance on this kind of task can turn to American National Standards Institute (ANSI).









