Quick Answer: How to Change a Lawnmower Blade
Disconnect the spark plug wire, tip the walk-behind mower onto its side with the air filter facing up, wedge a wood block against the blade to stop it spinning, and loosen the arbor bolt (turn clockwise if it is reverse-threaded). Slide off the old blade, mount the new blade with the cutting edge facing down toward the ground and any lift fins curving upward into the deck, then torque the bolt to 35–50 ft-lb before reconnecting the spark plug wire.
Replace or Sharpen? How to Decide Before You Start
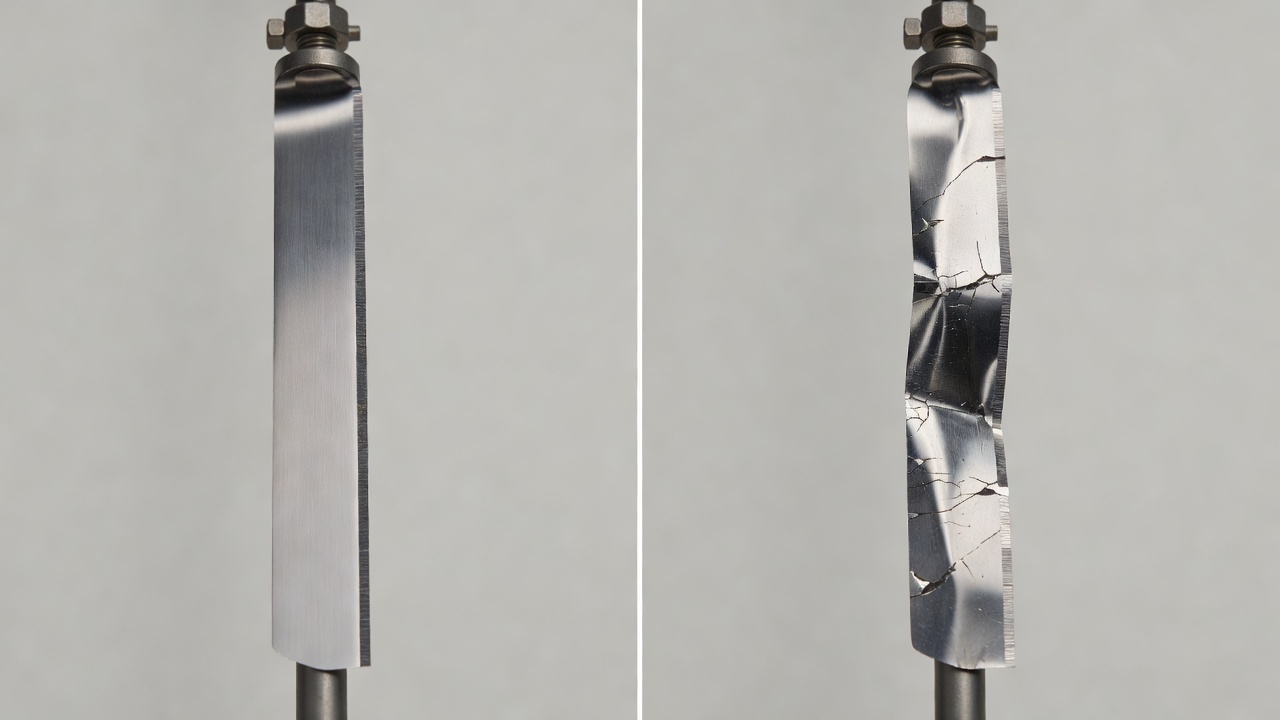
The two jobs share the same setup steps, but they have different end goals. Replacing takes priority in the situations below. Sharpening is the right call when the blade is structurally sound and simply dull.
Replace the blade if you see any of these signs
- Visible bends or warps. A bent blade cannot be safely straightened and must be replaced. Attempting to re-bend high-carbon steel creates stress fractures that can cause the blade to shatter at speed.
- Cracks, nicks deeper than ¼ inch, or chunks missing. Structural damage cannot be ground away.
- Blade thickness worn down significantly at the cutting edge after multiple sharpenings — typically after 3–4 sharpening cycles or one full season of heavy use.
- Excessive corrosion that has pitted through the blade body.
Sharpen the blade if
- The blade is straight and intact but leaving ragged, torn grass tips.
- There are only minor surface nicks that a file or bench grinder can remove.
If you are unsure, hold the blade at eye level and sight along its length. Any visible curve means replacement. Most manufacturers recommend inspecting blades every 25 hours of operation and replacing them at least once per season under normal residential use.
Tools and Parts You Need Before You Begin
Gathering everything before you start prevents stopping mid-job with the mower on its side and fuel at risk of spilling.
- Replacement blade — match the part number from your owner’s manual or the stamp on the existing blade. Measure the blade length and center-hole diameter before purchasing.
- Work gloves — heavy leather or cut-resistant gloves. Mower blades are sharp enough to cause serious lacerations even when the engine is off.
- Torque wrench — a click-type 3/8-inch or 1/2-inch drive wrench covering the 35–50 ft-lb range. Under-torquing is a leading cause of post-swap vibration.
- Socket set — typically 5/8-inch or 15/16-inch for the arbor bolt, but check your manual.
- Wood block or blade removal tool — a short 2×4 wedged between the blade and the inner deck wall is sufficient to prevent rotation. A dedicated blade removal tool grips the blade without requiring a block.
- Penetrating oil (optional) — spray on a corroded bolt 10–15 minutes before loosening.
- Wire brush and rag — clean the deck spindle before mounting the new blade.
Blade types explained
| Blade Type | Design Feature | Best Use |
|---|---|---|
| Flat-cut (standard) blade | Straight cutting edge, minimal lift | Dry conditions, bagging, side-discharge |
| Mulching blade | Curved body, multiple cutting edges, high fin | Mulching clippings back into the lawn |
| High-lift blade | Deep fin angle creates strong airflow | Tall or wet grass, bagging in heavy growth |
Use the blade type your mower deck was designed for. Swapping blade types without checking deck clearance can cause airflow problems or blade contact with the deck skirt.
Critical Safety Steps Before Touching the Blade
These steps are not optional. Skipping any one of them creates a risk of accidental engine start, oil contamination, or fuel spill.
1. Disconnect the spark plug wire
Pull the rubber boot off the spark plug tip and tuck it away from the plug so it cannot arc back into contact. This is the single most important safety step — it physically prevents the engine from firing if the blade is bumped or rotated during the job. Equipment safety authorities including the U.S. Consumer Product Safety Commission (CPSC) list spark plug disconnection as the mandatory first action before any blade work.
2. Let the engine cool completely
Allow at least 15–20 minutes after the last run. Hot engine components and residual heat near the fuel tank create burn and fire risk.
3. Handle fuel before tipping
If the tank is more than half full, run the engine until it uses down the fuel or use a hand pump to drain the tank into an approved fuel container. A full tank can leak from the cap or vents when the mower is tipped.
4. Tip the mower the correct direction
Always tip so the air filter and carburetor face upward. Tipping the carburetor side down allows oil to drain from the crankcase into the combustion chamber and air filter, causing a hydrolocked engine or heavy smoke on restart. On most walk-behind mowers, the air filter is on the same side as the fuel cap — verify before tipping.
5. Wear work gloves for all blade handling
Put gloves on before the mower goes on its side and keep them on until the bolt is fully torqued and the mower is upright.
Step-by-Step: How to Change a Walk-Behind Mower Blade
- Disconnect the spark plug wire. Pull the boot firmly off the spark plug. Set it aside where it cannot snap back onto the plug.
- Drain or reduce fuel. If the tank is more than half full, drain it to minimize spill risk when tipping.
- Tip the mower onto its side — air filter facing up. Place the mower on a flat, stable surface such as a driveway or garage floor. Grip the handle and roll it so the carburetor and air filter assembly face skyward.
- Wedge the wood block. Slide a short section of 2×4 between the blade and the inner lip of the mower deck to prevent the blade from spinning when you apply torque to the bolt.
-
Identify thread direction before loosening.
⚠ Reverse-thread warning: Many walk-behind mowers — including several Honda, Husqvarna, and Toro models — use a reverse-threaded (left-hand thread) arbor bolt. On these mowers, turning the bolt clockwise loosens it. Turning counterclockwise (the standard righty-loosey direction) will tighten it further and can strip the bolt or crack the blade hub. Check your owner’s manual before applying force. If the manual is unavailable, apply light clockwise pressure first — if the bolt moves, it is reverse-threaded. - Loosen and remove the arbor bolt. Use the correct socket (typically 5/8 in. or 15/16 in.). Apply penetrating oil first if the bolt is corroded. Remove the bolt and any washers, setting them in order on a clean surface so reassembly is straightforward.
- Slide off the old blade. Note which face is pointing toward the ground — this is the cutting-edge side. Compare it to the new blade before proceeding.
- Clean the spindle and deck mounting surface. Use a wire brush and rag to remove grass buildup, rust, and debris from the blade hub and spindle shaft. A clean seating surface is essential for the bolt to reach correct torque.
-
Mount the new blade with correct orientation.
- The cutting edge faces down toward the ground when the mower is upright.
- On mulching blades, the lift fins curve upward into the deck cavity. The stamped or painted side of the blade typically faces down; the raised fin side faces up. When in doubt, the blade’s center hole stamp or part number should face downward (toward the operator’s view when the mower is on its side).
- Align the blade’s center hole with the spindle and slide it flush onto the mounting hub.
- Replace washers and hand-tighten the arbor bolt. Install any washers in the original order. Thread the bolt by hand first to avoid cross-threading.
- Torque the bolt to specification. Use your torque wrench to tighten the bolt to the manufacturer’s specified torque — typically 35–50 ft-lb for walk-behind mowers, though some models fall outside this range. Honda walk-behind mowers commonly specify 36–43 ft-lb; Husqvarna and Toro models often call for 35–50 ft-lb. Confirm the exact figure in your model’s service documentation. Keep the wood block in place while torquing.
- Remove the wood block and return the mower upright. Carefully roll the mower back onto all four wheels.
- Reconnect the spark plug wire. Push the boot firmly onto the spark plug tip until it clicks or seats snugly. This is the final step before any attempt to start the engine.
Riding Mower and Zero-Turn Blade Changes: Key Differences
The safety principles are identical — spark plug wire first, protective gear throughout — but the physical access method differs significantly.
Deck access
Riding mowers and zero-turn mowers require raising the cutting deck rather than tipping the machine. Use a floor jack rated for the mower’s weight or a purpose-built mower lift to raise the front of the machine and gain clearance under the deck. Never crawl under a riding mower supported only by a floor jack without jack stands in place.
Multiple blades
Most riding mower decks carry two or three blades on separate spindles. Replace all blades as a set when one blade shows wear, so deck balance and cut quality remain consistent across the full cutting width.
Thread direction
Riding mower blade bolts are more commonly standard right-hand thread (counterclockwise to loosen) than walk-behind models, but exceptions exist. Check the service manual for each spindle — a multi-blade deck can have different thread directions on different spindles on some older Craftsman and Husqvarna models.
Torque specs
Riding mower blade bolts frequently require higher torque — commonly 70–90 ft-lb depending on deck size and engine displacement. Use a 1/2-inch drive torque wrench and confirm the specification in the service manual for your exact model.
DIY vs. shop
A zero-turn blade change is DIY-viable if you have a proper mower lift and the correct torque wrench. The task itself is not more technically complex than a walk-behind swap. The risk factor is the weight of the machine — improvised lifting methods on a zero-turn create serious crush risk. If you lack a rated lift, a dealer service visit is the safer call.
Common Mistakes and How to Avoid Them
- Installing the blade upside down. An upside-down blade carries the cutting edge facing into the deck instead of toward the grass. The mower will run but will stop cutting effectively and create extreme vibration as the blade fights the wrong airflow direction. Always confirm cutting-edge orientation before torquing.
- Turning the bolt the wrong direction. On reverse-threaded mowers, applying standard counterclockwise force to loosen the bolt actually tightens it. If you feel resistance immediately and no movement after 2–3 seconds of firm pressure, stop and try the opposite direction before stripping the bolt head.
- Skipping the spark plug disconnect. A blade that is manually rotated during removal or installation can turn the engine over. On a warm engine with residual compression, this can cause the engine to fire — a rare but documented cause of serious hand injuries.
- Under-torquing the arbor bolt. Hand-tight is not sufficient. A loose blade migrates on the spindle, causing severe vibration, uneven cuts, and eventual damage to the spindle bearings. Always use a torque wrench — not a standard ratchet judged by feel.
- Tipping the mower the wrong direction. Tipping the carburetor side down floods the air filter with oil, which requires a full air filter replacement and may require draining oil from the combustion chamber before the engine can restart safely.
- Using the wrong replacement blade. A blade that is too long, too short, or has the wrong center-hole diameter will not seat correctly and can contact the deck or fail to engage the spindle. Always match the OEM part number or verify length, width, and hole dimensions against the original blade.
- Mower vibrates after blade change. Causes include: under-torqued bolt, blade installed upside down, wrong blade for the deck, or a bent crankshaft (if the old blade hit a hard object). If vibration persists after confirming orientation and torque, have the crankshaft inspected before further use.
After the Swap: Testing and Ongoing Blade Maintenance
First-run safety check
- Move the mower to an open area clear of bystanders and obstacles.
- Start the engine and let it idle for 30 seconds — listen for any unusual vibration, rattling, or grinding.
- Engage the blade (blade brake / PTO lever) and run at full throttle for 60 seconds. Any persistent vibration or noise is a signal to shut down and recheck bolt torque and blade orientation before continuing.
- Make a single pass on grass and inspect the cut. Clean, even cuts across the full blade width confirm correct installation.
Ongoing maintenance schedule
- Every 25 hours of operation: Inspect the blade for nicks, bends, and wear. Check that the arbor bolt remains at specification torque.
- Once per season (or every 50 hours): Sharpen or replace the blade depending on condition. For most residential users, one blade change per mowing season is standard practice.
- After any strike on a hard object (rocks, roots, curbs): Stop immediately, disconnect the spark plug wire, and inspect the blade and crankshaft before the next use. A blade that has hit something hard at speed can bend invisibly at the hub, and a bent crankshaft will destroy the engine if the mower continues to run.
Keeping a replacement blade sharp longer
- Mow only when the lawn is free of debris — clear rocks, sticks, and toys before each mow.
- Keep blade height at the correct setting for the grass type. Scalping forces the blade into soil contact.
- Store blades in a dry location to prevent corrosion between seasons.
Frequently Asked Questions
Why do I have to disconnect the spark plug wire before changing the blade?
Manually rotating the blade during removal or installation rotates the engine crankshaft. If residual compression or a hot spot in the combustion chamber is present, the engine can fire without the ignition key. Disconnecting the spark plug wire eliminates the ignition circuit entirely, making an accidental start physically impossible.
How do I know if my blade bolt is reverse-threaded or standard?
Check your owner’s manual or model-specific service documentation first — this is the definitive source. In the absence of documentation, apply light clockwise pressure with your socket wrench. If the bolt moves, it is reverse-threaded (clockwise loosens). If it does not move clockwise, switch to counterclockwise. Never force the bolt more than a quarter turn in either direction without confirming movement, as stripped arbor bolts are expensive to extract.
What does it mean if my mower vibrates excessively after a blade change?
The four most common causes are: (1) the blade is installed upside down, (2) the arbor bolt is under-torqued, (3) the wrong blade was fitted and it is contacting the deck, or (4) the crankshaft was bent by the impact that damaged the previous blade. Recheck orientation and re-torque first. If vibration continues, inspect the crankshaft or take the mower to a service dealer before further operation — a bent crankshaft will damage the engine if run.
Can I change a lawnmower blade without a torque wrench?
A torque wrench is strongly recommended. The 35–50 ft-lb range is tighter than most people achieve by feel — under-torquing allows the blade to shift and vibrate, while over-torquing can crack the blade hub or make future removal nearly impossible. A basic click-type torque wrench costs less than a single service call and is reusable for many other household maintenance tasks.