

Direct Answer
Disconnect the spark plug wire first, tip the mower with the air filter side up, use a wood block to secure the blade, loosen the blade bolt counter-clockwise (verify your manual for reverse-thread bolts), remove the old blade, inspect the adapter for damage, install the new blade with the cutting edge facing downward, and torque the bolt to your manufacturer’s specification—typically 30–50 ft-lbs for most walk-behind gas mowers.

Pros
- Large-size design named in product title
- Sharpening and balancing functions listed
- Listed as a new upgraded version

Pros
- Adjustable 15-to-45-degree range in title
- Sharpening and balancing functions listed

Pros
- Sharpener and balancer functions in title
- 15-to-45-degree adjustable setting listed
- Built for lawn mower blade maintenance
Pros
- Includes replacement gaskets and a 98079-55846 spark plug
- Matches Honda HRR216 and HRS216 lawn mower models
- Designed around the 16100-Z8B-901 carburetor specification
Cons
- Restricted to select Honda GCV160 mower applications
- Installation requires basic mechanical tools and skills
Safety Checklist Before You Touch the Blade
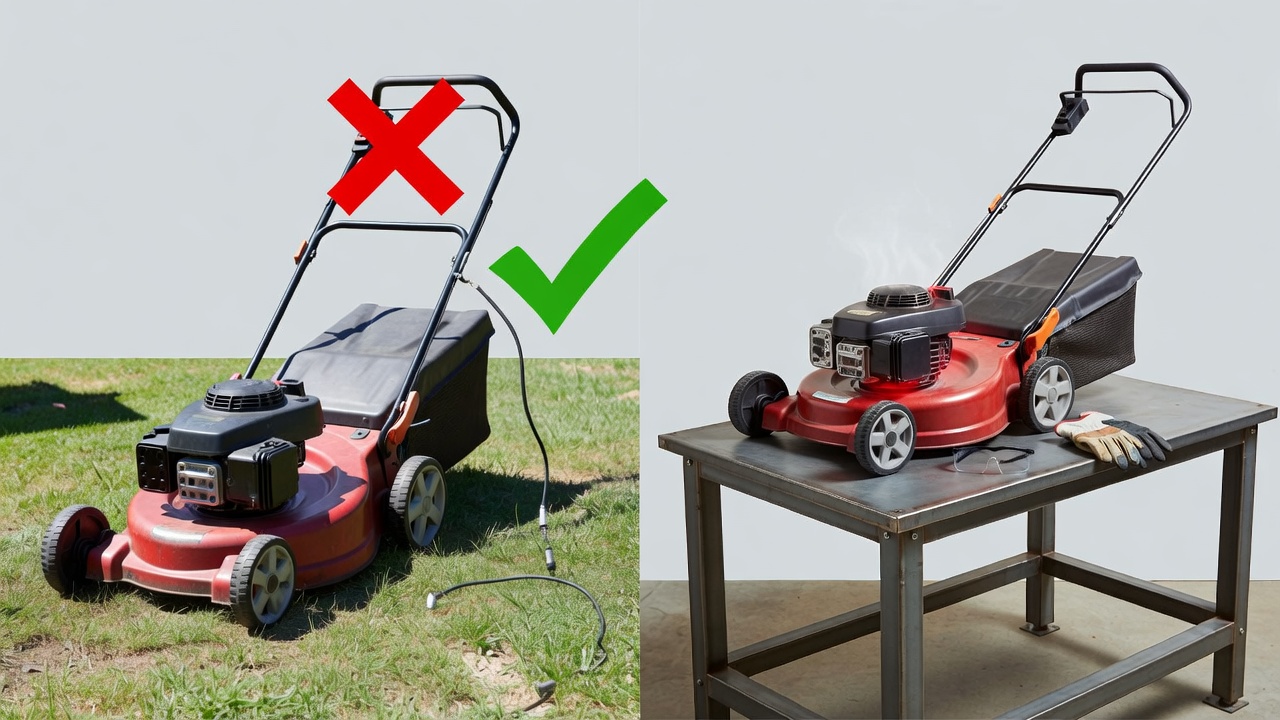
Mower blade injuries happen quickly and are preventable with basic pre-work preparation. Before you begin, follow these non-negotiable safety steps:
- Disconnect the spark plug wire: This is the single most critical step. Remove the spark plug wire boot from the spark plug terminal to prevent accidental engine start-up while you work. Do not rely on the kill switch alone.
- Allow the engine to cool: Wait at least 5–10 minutes after running the mower. Hot mufflers and engine components can cause burns.
- Drain fuel or position carefully: For gas mowers, either drain the tank or tip the mower with the carburetor and air filter side up to prevent fuel from leaking into the crankcase. Check your owner’s manual for tipping direction specific to your model.
- Wear work gloves and eye protection: Blade edges are sharp; wear heavy-duty work gloves and safety glasses to protect against cuts and debris.
- Work on a flat, stable surface: Place the mower on a level work bench or ground. Never work under a mower supported only by a jack or your body.
Tools and Parts You’ll Need
Gather everything before you start to avoid mid-task runs to the garage: For additional operational safety benchmarks, see our published testing notes on jbl partybox club 120 vs sony srs xv500.
- Socket wrench set (common sizes: 11/16″, 3/4″, or 13/16″ — check your manual)
- Wood block (2×4 or similar) to wedge against the blade
- Torque wrench (0–100 ft-lbs range recommended)
- Replacement blade (OEM or equivalent with matching part number)
- Work gloves and safety glasses
- Rag or wire brush for cleaning the blade adapter
- Owner’s manual for your specific mower model
Step-by-Step: How to Remove a Push Mower Blade
Step 1: Prepare and Position
Disconnect the spark plug wire and allow the engine to cool completely. Tip the mower on its side with the air filter and carburetor facing upward to prevent oil from entering the combustion chamber. Place the mower on a stable work surface. For additional operational safety benchmarks, see our published testing notes on jbl partybox club 120 vs sony srs xv500.
Step 2: Secure the Blade
Place a wood block against the blade to prevent it from rotating while you loosen the bolt. This is essential for safety and to prevent bolt stripping.
Step 3: Loosen the Blade Bolt
Using your socket wrench, turn the blade bolt counter-clockwise to loosen it. Important: Most push mowers use standard right-hand threads, but some models (particularly older Briggs & Stratton engines) use reverse-thread bolts that loosen clockwise. Check your owner’s manual to confirm the correct direction for your mower. If the bolt resists, apply penetrating oil and wait 5 minutes before trying again. To compare alternative configurations, check our hands-on review of z890 vs x870e motherboard.
Step 4: Remove the Blade
Once the bolt is loose, unscrew it completely and set it aside in a safe place. Carefully slide the blade off the shaft. Note the orientation of any washers or adapters—you’ll need to reinstall them in the same order.
Sharpen or Replace? How to Inspect Your Mower Blade
Before installing a new blade, inspect the old one and the blade adapter: Users looking for related component recommendations can explore our marshall stanmore iii vs harman kardon onyx studio 8 breakdown.
- Check for visible damage: Cracks, deep bends, or chunks missing from the blade require replacement. A bent blade cannot be safely straightened and will cause dangerous vibration during operation.
- Assess dullness: A dull blade tears grass instead of cutting it cleanly, promoting disease and poor lawn health. If the edge is rounded but the blade is straight and undamaged, sharpening may extend its life. If the blade is both dull and bent, replace it.
- Inspect the blade adapter: Look for cracks, bent mounting points, or corrosion on the metal adapter that holds the blade to the shaft. A damaged adapter must be replaced to prevent blade wobble and vibration.
- Check the shaft for straightness: Visually inspect the mower shaft for bending. A bent shaft requires professional service and cannot be corrected with a new blade alone.
How to Install the New Blade Correctly
Step 1: Clean the Shaft and Adapter
Wipe the mower shaft and blade adapter with a clean rag to remove grass, dirt, and corrosion. This ensures the new blade seats properly and torques evenly.
Step 2: Align the New Blade
Critical: Install the blade with the cutting edge facing downward toward the ground. Most blades have a lift fin (an angled edge) on the upper surface that generates upward air pressure during rotation—orienting the blade incorrectly will cause poor cutting performance and unsafe operation. If you’re installing a mulching blade, verify the orientation in your manual, as mulching blades may have asymmetrical designs. Before finalizing equipment decisions, refer to our comprehensive dyson v8 cyclone vs bissell featherweight stick comparison.
Step 3: Reinstall Washers and the Bolt
Slide the blade onto the shaft in the same order you removed it—washers first, then the blade, then any remaining washers. This maintains proper spacing and prevents the blade from contacting the mower deck.
Step 4: Secure and Torque
Place the wood block against the blade again to keep it stationary. Insert the bolt and hand-tighten it first. Then use your torque wrench to tighten to the manufacturer’s specification. For most gas walk-behind mowers, this is 30–50 ft-lbs; consult your owner’s manual for the exact value. Over-tightening can strip the bolt; under-tightening can cause the blade to slip during operation. For broader ecosystem context, read through our operational guide on bissell crosswave hydrosteam vs shark stainforce.
Changing Blades on Electric and Battery Push Mowers
Electric (corded) and battery-powered mowers follow the same removal and installation process, with one key safety difference:
- Battery-powered mowers: Remove the battery pack entirely before touching the blade. Do not rely on power-off alone.
- Corded electric mowers: Unplug the power cord from the outlet. Do not simply turn off the mower; physical disconnection from the power source is essential.
- Blade orientation and torque: Follow the same cutting-edge-down orientation and manufacturer torque spec as gas mowers. Most electric mower blade bolts use standard threads (counter-clockwise to loosen), but verify your manual.
Test Run and Post-Replacement Checks
After installation, perform a final verification before mowing:
- Reconnect the spark plug wire (or battery/power for electric mowers).
- Start the mower and let it run idle for 30 seconds in a clear area to verify smooth operation.
- Listen for unusual vibration or grinding sounds, which indicate improper blade installation or adapter damage.
- Mow a small test patch on your lawn to confirm cutting performance and smooth operation.
- If vibration occurs, shut down immediately, disconnect the spark plug, and recheck blade orientation and bolt torque.
Common Questions on How To Change A Blade On A Push Mower Answered
Which direction do you loosen a mower blade bolt—clockwise or counter-clockwise?
Most push mower blade bolts loosen counter-clockwise (the standard direction). However, some older Briggs & Stratton and Kohler engines use reverse-thread bolts that loosen clockwise. Always check your owner’s manual to confirm before applying force. Applying pressure in the wrong direction can strip the bolt or damage the shaft.
How tight should a mower blade bolt be?
Blade bolts should be torqued to your manufacturer’s specification, typically 30–50 ft-lbs for most walk-behind gas mowers. Toro, Honda, and Craftsman models often specify 35–45 ft-lbs. Over-tightening can crack the blade adapter; under-tightening allows the blade to slip, causing poor cutting and safety hazards. Use a torque wrench to apply the correct force, and refer to your owner’s manual for the exact value.
What happens if you install a mower blade upside down?
Installing a blade upside down (cutting edge facing up) will cause the lift fin to push air downward instead of upward, resulting in poor cutting performance, uneven grass height, and potential blade stalling. The mower will also create excessive vibration. The blade will not self-destruct, but your lawn will suffer poor results. Always install with the cutting edge facing downward.
How often should I replace a push mower blade?
Mower blades should be sharpened or replaced every 20–25 hours of mowing, or once per season for typical homeowner use. Dull blades cause disease-prone ragged cuts and force the engine to work harder, reducing efficiency. Inspect your blade monthly during the mowing season and sharpen or replace as needed.
Can I use any replacement blade or does it need to be OEM?
Replacement blades must match your mower’s blade length, bolt hole diameter, and cutting width. While aftermarket blades from reputable manufacturers often cost less than OEM parts, always verify the part number matches your manual. Using an incorrect blade can cause poor cutting, vibration, and safety hazards. When in doubt, order the OEM blade to ensure compatibility.
Why is my mower vibrating after I changed the blade?
Vibration after blade replacement typically indicates one of these issues: (1) the blade is installed upside down, (2) the bolt is under-torqued and the blade is slipping on the shaft, (3) the blade adapter is bent or damaged, or (4) the new blade is not balanced. Stop immediately, disconnect the spark plug, and recheck blade orientation and bolt torque. If vibration persists, the blade adapter or shaft may be damaged and require professional service.
Key Takeaways
Changing a push mower blade is a straightforward DIY task when you follow safety procedures and pay attention to blade orientation and torque specifications. Always disconnect the spark plug wire first, secure the blade with a wood block while loosening the bolt, and verify the correct bolt direction in your manual. Install the new blade with the cutting edge facing downward, torque to manufacturer specification, and test for vibration before mowing. For electric or battery mowers, remove the battery or unplug the cord instead of disconnecting a spark plug wire. If you encounter a bent shaft, damaged adapter, or persistent vibration, seek professional service rather than attempting repairs beyond blade replacement.
For more detailed testing breakdowns and top recommendations, check our in-depth guide to residential zero-turn lawn mower guide.
For more hands-on benchmarks and buying recommendations, consult our guides on heavy-duty chainsaw buyer guide, as well as high-CFM commercial leaf blower guide, as well as automated robotic lawn mower guide.
Mechanical safety standards, operational tolerances, and protective gear guidelines align with benchmark specifications established by the American National Standards Institute (ANSI).









