Safety First: Before You Start

Before you touch any part of your mower, establish a safe work environment. These precautions protect you from burns, cuts, and engine-related injuries.
- Warm the engine briefly (30 seconds): This thins the oil so it drains faster and more completely. Do not let it run long—you only want warm oil, not hot oil that could cause burns.
- Let the engine cool slightly: After turning off the mower, wait 2–3 minutes. Hot oil can cause severe burns, but slightly warm oil drains better than cold oil.
- Disconnect the spark plug wire: This prevents accidental engine startup while you’re working underneath the mower.
- Work on a level, stable surface: Place the mower on flat ground or a jack with proper support. Never work under a mower held only by a jack.
- Wear protective equipment: Use gloves to protect your hands from oil and sharp metal edges. Safety glasses protect your eyes from splashes and debris.
- Ensure proper ventilation: Do not perform an oil change in an enclosed space. Fumes from warming oil and exhaust can accumulate quickly.
Gather Required Materials and Tools
Having everything ready before you begin makes the job faster and prevents interruptions. Here’s what you’ll need:
| Item | Purpose | Notes |
|---|---|---|
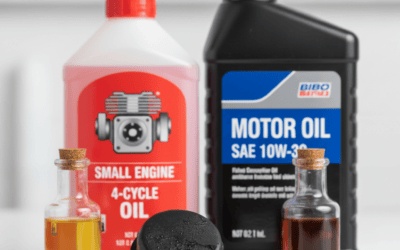
| Replacement oil (correct grade and quantity) | Engine lubrication | Check your manual for SAE grade (typically SAE 30 or 10W-30) and capacity (usually 0.6–1.5 quarts) |
| Oil drain pan | Catch old oil | Use a shallow pan with at least 2-quart capacity to prevent spills |
| Wrench or socket set | Remove drain plug | Size varies by model; typically 10mm to 15mm. Have adjustable wrench as backup |
| Oil filter wrench (if applicable) | Remove oil filter | Not all push mowers have filters; riding mowers typically do. Use the correct size to avoid damaging the filter |
| Oil filter (replacement, if equipped) | Engine protection | Replace every oil change or as recommended by Toro manual |
| Funnel | Pour new oil without spilling | Essential for safe refilling |
| Rags or paper towels | Wipe spills and check levels | Keep extras on hand for cleanup |
Identify Your Toro Mower Type and Oil Specifications
The exact oil change procedure varies slightly depending on your mower type. Understanding which you own and its specifications is critical to doing the job correctly.
Push Mowers vs. Riding Mowers
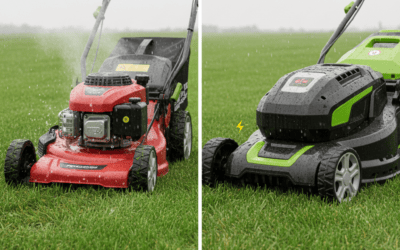
- Push mowers (walk-behind): These are simpler and often do not have oil filters. The drain plug is typically located at the lowest point under the mower deck. Oil capacity is usually 0.6–1.0 quart. Access to the drain plug requires tilting the mower, which you must do carefully to avoid fuel spills (see troubleshooting section).
- Riding mowers and zero-turn mowers: These have larger engines with separate oil filters, typically accessed from the side or top of the engine. Oil capacity is usually 1.2–2.5 quarts depending on model. Drain plugs are easier to access due to higher ground clearance.
Finding Your Mower’s Oil Specifications
Locate your mower’s model number (usually on a sticker attached to the chassis or engine) and refer to your owner’s manual. If you no longer have the manual, Toro’s website allows you to search by model number and download PDF manuals. Key specifications you need:
- Oil capacity: Measured in quarts or liters; do not overfill or underfill.
- Oil viscosity grade: Typically SAE 30 for warm climates or 10W-30 for variable temperatures. Some models specify synthetic oil; follow your manual’s recommendation.
- Filter part number (if applicable): Ensures you buy the correct replacement filter.
Step-by-Step Oil Change Process
Step 1: Prepare Your Workspace
Position your mower on a flat, level surface. Ensure the area is well-ventilated. For push mowers, you may need to tip the mower slightly to access the drain plug; check your manual’s recommended angle (typically 15–30 degrees toward the carburettor side to prevent fuel leakage).
Step 2: Warm the Engine and Disconnect the Spark Plug
Start your mower and let it run for approximately 30 seconds. This warms the oil without overheating it. Turn off the engine and wait 2–3 minutes for it to cool slightly. Disconnect the spark plug wire by grasping the rubber boot and twisting gently, then pulling away from the plug. This ensures the mower cannot accidentally start while you work.
Step 3: Locate and Remove the Drain Plug
Position your drain pan directly beneath the drain plug. On push mowers, this is usually a bolt at the lowest point of the engine. On riding mowers, it’s typically on the side of the engine block. Using the correct-sized wrench, turn the drain plug counterclockwise slowly at first to ensure it’s not seized. Once loose, you can unscrew it by hand (with gloves on to protect from sharp threads). Let the old oil drain completely into the pan—this typically takes 5–10 minutes. Once drainage slows to a drip, wipe the drain plug and its surrounding area with a rag.
Step 4: Replace the Oil Filter (If Equipped)
If your mower has an oil filter, locate it on the engine (check your manual for its position). Place a shallow pan or rag underneath to catch any residual oil. Using an oil filter wrench, turn the filter counterclockwise until it breaks free, then unscrew it by hand. Wipe the filter mounting surface with a clean rag to remove any debris or old gasket material. Apply a thin layer of fresh oil to the rubber gasket of the new filter, then screw it on by hand until the gasket contacts the engine. Tighten an additional 3/4 turn—do not over-tighten, as this can damage the gasket and cause leaks.
Step 5: Reinstall the Drain Plug
Wipe the drain plug with a clean rag. If it has a crush washer (a soft metal ring), replace it with a new one from your Toro parts kit to ensure a proper seal. Screw the drain plug back into the engine by hand first to avoid cross-threading, then tighten firmly with your wrench—typically 15–25 foot-pounds of torque, though do not over-tighten as this can strip the threads. Wipe away any spilled oil.
Step 6: Refill with Fresh Oil
Place your funnel in the oil filler cap (located on top of the engine) and slowly pour in the new oil. Use the correct type and grade from your manual. Fill to the maximum line on the dipstick if your mower has one, or fill to the recommended capacity and then check the level with the dipstick. Do not overfill—excess oil can cause foaming, reduce engine performance, and create smoke during operation.
Step 7: Check the Oil Level and Reconnect the Spark Plug
Insert the dipstick fully, then pull it out to read the level. The oil should reach the “Full” mark. If it’s low, add small amounts of oil and recheck. Once the level is correct, reattach the spark plug wire by pushing the rubber boot firmly onto the spark plug terminal until you hear a click.
Step 8: Start the Engine and Verify
Start the mower and let it run for 30 seconds at idle. Check underneath and around the drain plug for leaks. If you see drips, turn off the engine, let it cool, and tighten the drain plug slightly. After 5–10 minutes of operation, turn off the mower, wait a few minutes, and check the oil level one final time. Top up if needed.
Proper Disposal of Old Oil
Never pour old oil down the drain or into the ground—it’s harmful to the environment and often illegal. Instead, store the old oil in a sealed container and take it to a local recycling center, service station, or auto parts retailer. Many locations, including Walmart and AutoZone, accept used oil for free. Some municipalities also have hazardous waste collection events. Toro dealers often accept old oil from customers who purchase oil and filters from them.
Troubleshooting Common Oil Change Problems
Stuck or Stripped Drain Plug
If the drain plug won’t budge, apply a penetrating oil (such as WD-40) and let it sit for 15–30 minutes, then try again with a properly fitted wrench. Use a longer wrench or breaker bar for extra leverage, but apply steady pressure to avoid breaking the plug. If the threads are stripped, consult a Toro dealer about a replacement plug or a helicoil repair kit.
Tight Oil Filter Access
Some mower designs place the oil filter in a cramped space. If your filter wrench doesn’t fit, try a different style wrench (band wrench instead of cap wrench) or use a rubber grip pad to gain traction. As a last resort, carefully puncture the filter with a nail and use the nail as leverage to unscrew it—this method is messier but effective. Always have extra rags ready.
Accidentally Overfilled Oil
If you add too much oil, do not run the engine—drain the excess immediately. Place your drain pan under the mower, remove the drain plug, and let excess oil drip out until the level is correct. Then reinstall the drain plug and recheck. Overfilled engines can produce blue-gray smoke, cause loss of power, and damage seals over time.
Fuel Mixing with Oil (Push Mowers)
When tilting a push mower to access the drain plug, fuel can run into the oil. To prevent this, tilt the mower toward the carburettor side (ask your manual or check online), as this keeps fuel away from the oil drain area. If fuel does enter the oil, the fresh oil change will dilute the contamination, but you may need to change oil again after 5–10 hours of operation to remove all fuel residue.
Maintenance Schedule and Best Practices
How Often to Change Oil
Toro recommends changing oil:
- Every 50 operating hours for push mowers (typically once per season for residential use)
- Every 100 operating hours for riding mowers, or annually, whichever comes first
- After every 20–30 hours of heavy use (commercial or dense lawn mowing)
- At the start of each mowing season (spring) and after winter storage
Signs It’s Time for an Oil Change
- Dark or dirty oil on the dipstick: Clean oil is amber or light brown; dark brown or black oil indicates contamination and age.
- Low oil level: Check monthly during the mowing season. Low oil reduces engine lubrication and increases wear.
- Engine running roughly or producing blue smoke: These can signal old oil, but also check for other issues like a clogged air filter.
- Mower hasn’t run in several months: Old oil sitting in the engine becomes acidic and less effective. Fresh oil protects the engine during storage season transitions.
Complementary Maintenance Tasks
An oil change is a perfect time to perform other quick maintenance checks:
- Inspect the air filter: A clogged air filter restricts airflow and reduces engine performance. Replace if it looks gray or brown with visible debris.
- Check spark plug condition: Replace spark plugs annually or if they appear fouled (black or wet).
- Clean or replace the fuel filter: If your mower has one, inspect it for debris and replace if clogged.
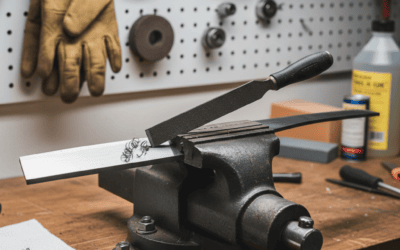
- Inspect blade sharpness and balance: A sharp blade cuts cleanly; a dull blade tears grass and stresses the engine.
- Check tire pressure (riding mowers): Properly inflated tires ensure even cutting and reduce strain on the transmission.
Frequently Asked Questions
Q: Can I use car oil in my Toro lawn mower?
A: Generally, yes, if it’s the correct SAE viscosity grade (SAE 30 or 10W-30, depending on your model and climate). However, lawn mower engines are smaller and run hotter than car engines, so they benefit from oil specifically formulated for small engines, which have different additive packages. Check your owner’s manual—if it specifies small-engine oil, use that. Car oil will work in an emergency, but small-engine oil is the safer choice for long-term engine health.
Q: Do all Toro mowers have oil filters?
A: No. Most push mowers (walk-behind) do not have replaceable oil filters. Riding mowers and commercial-grade mowers almost always have oil filters. Check your manual or look at the engine—if you see a cylindrical canister on the side or top, it’s likely an oil filter and should be replaced with each oil change. Some older push mowers may have a foam air filter that traps oil; this should be cleaned or replaced, not treated as an oil filter.
Q: How do I know if I’m tilting my push mower in the correct direction?
A: Check your mower’s manual for the recommended tilt direction. Most Toro push mowers should be tilted with the carburettor (air filter housing) facing upward to prevent fuel from entering the oil. Tilting the wrong direction can contaminate your oil with gasoline. When in doubt, check Toro’s website for your specific model number.
Q: Can I change oil in cold weather?
A: Yes, but cold oil is thicker and drains more slowly. Warm the engine for 30 seconds to 1 minute to thin the oil, which speeds drainage. Avoid working in temperatures below 50°F if possible, as cold oil can take 20–30 minutes to drain fully. If you must work in cold weather, place a heat lamp near (but not too close to) the drain area to slightly warm the oil and speed the process.