Quick Answer: How to Change a Weed Eater String
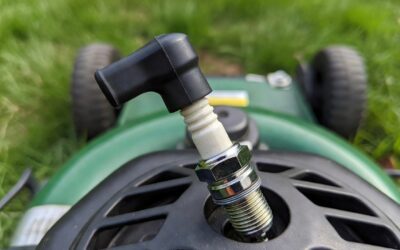
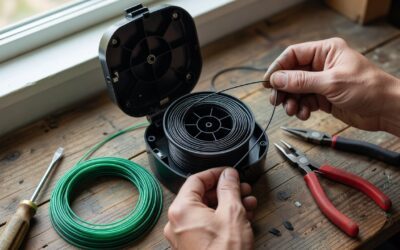
To change a weed eater string, first disconnect the spark plug wire for safety. Remove the trimmer head by twisting it counterclockwise or pressing release tabs (depending on your model). Remove the spool, take off the old line, and wind new trimmer string onto the spool in the direction indicated by the arrow on the spool—typically counterclockwise. Insert the line into the notches on the spool edge, leaving 4–6 inches free on each side, then reassemble the head. Test the automatic advance or manually bump the head on the ground to feed new line.
Safety Precautions Before Starting
Before you begin changing your weed eater string, take these critical safety steps:
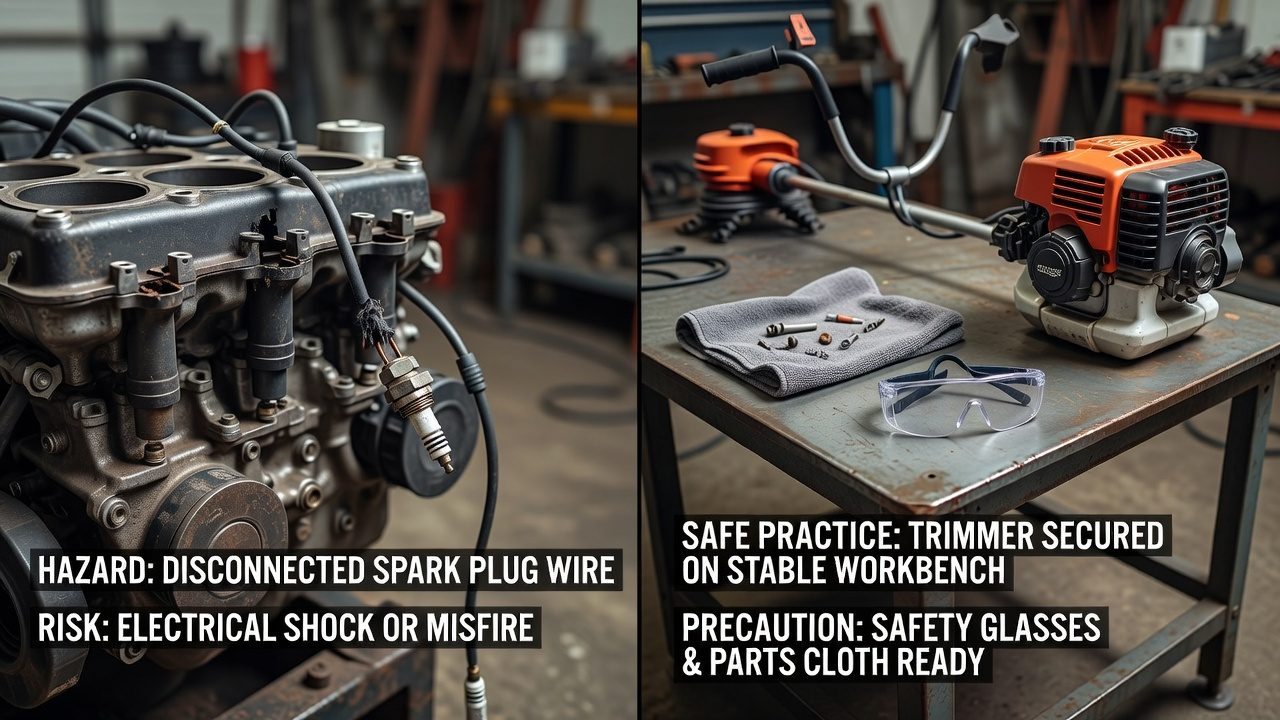
- Disconnect the spark plug wire. This is the most important step. Removing the wire prevents accidental engine start while you work on the trimmer head, eliminating the risk of the spinning blade or string causing injury.
- Allow the engine to cool. If you’ve been using the trimmer, wait 5–10 minutes before handling the trimmer head. Hot engines and metal components can cause burns.
- Work on a flat, stable surface. Place the trimmer on a workbench or table so both hands are free to manipulate the head and spool.
- Wear safety glasses. Small metal springs and components can fly off during disassembly.
- Have a clean workspace. Lay out a cloth to catch small parts and prevent them from rolling away.
Understanding Your Trimmer Type
Not all weed eaters are identical. Before you start, identify your trimmer’s design:
Trimmer Head Type
Twist-Off Head: The entire head unscrews by turning it counterclockwise. This design is common on Ryobi, Dewalt, and many Echo models. Look for a seam around the middle of the head.
Press-Release Head: The head has one or more tabs or buttons you press to release clips, which pop the head off. This design is typical on Makita and some professional-grade trimmers.
Feeding System
Automatic Feed: The trimmer automatically advances new line when you tap the head on the ground (bump-feed). This is the most common residential design and requires less user intervention.
Manual Feed: You manually pull line out and cut it to length. Less common on residential models but found on some commercial trimmers.
Trimmer Line Gauge
Check your trimmer’s manual or the spool label for the correct line gauge. Most residential trimmers use one of these sizes:
- 0.065″ (1.6 mm)—lightweight trimmers, thin grass
- 0.080″ (2.0 mm)—standard residential trimmers
- 0.095″ (2.4 mm)—heavy-duty trimmers, tougher vegetation
Using the wrong gauge can cause feeding problems or damage to the trimmer head.
Accessing and Removing the Trimmer Head
For Twist-Off Heads
- Secure the trimmer so the head doesn’t rotate. You can hold the shaft steady or place it in a vise with a rubber pad to avoid damaging the plastic.
- Locate the directional arrow or logo on the head—this indicates the direction to turn.
- Turn the head counterclockwise (opposite to how you’d tighten a screw) until it separates from the shaft.
- Remove the head and set it on your work surface.
For Press-Release Heads
- Locate the release tabs or buttons on the head—typically on the sides or bottom.
- Press or squeeze the tabs while gently pulling the head away from the shaft.
- Once the head releases, the internal cartridge or spool may come free automatically.
Removing the Spool
Once the head is off, you’ll see the spool inside. If it doesn’t fall out, look for a center bolt or clip:
- Bolt Type: Use a wrench or screwdriver to remove the center bolt. Be careful not to lose the washer underneath.
- Clip Type: Press or pull the center clip outward; the spool should pop out.
Removing Old String and Preparing the Spool
With the spool removed, clear away any old line:
- Pull out any remaining string wrapped around the spool.
- Use a brush or cloth to wipe away grass clippings, dirt, and debris.
- Check the spool for cracks or damage. If the spool is cracked, you’ll need to replace it.
- Look for the directional arrow or winding indicator on the spool. This arrow shows the direction the line should wind. It’s critical—winding in the wrong direction is the most common cause of feeding failure.
Winding New Trimmer String Correctly
This is where precision matters. Improper winding causes the trimmer to fail to feed line or jam.
Step-by-Step Winding Instructions
- Prepare your new string. Cut a length of trimmer line 15–20 feet long. Specialty trimmer string is sold in spools at hardware and lawn equipment stores.
- Find the starting notch. Most spools have a notch or groove at the edge where the line begins. This is your anchor point.
- Insert the line into the starting notch. Push about 1 inch of line into the notch so it’s held securely.
- Wind in the direction of the arrow. Hold the spool with the arrow pointing toward you. Begin winding the line around the spool, wrapping it in the direction the arrow indicates (almost always counterclockwise when viewed from above). Keep the line parallel to the spool edge—don’t let it cross over itself or bunch up.
- Wind tightly but not excessively. The line should be snug but not stretched to its limit. Over-tightened line can jam the spool and strip the gears inside the trimmer head.
- Wind until the spool is nearly full. Leave about 1/2 inch of empty space on the spool. Overfilling prevents the spool from turning freely.
- Leave free ends for the cutting notches. Once the spool is full, you should have two free ends of line. Cut these so each is 4–6 inches long. These ends will feed out through the cutting notches in the trimmer head when you’re ready to use it.
Common Winding Mistakes to Avoid
- Winding in the wrong direction: The line will tangle and refuse to feed. Always follow the directional arrow.
- Overlapping or crossing the line: This causes jams and feeding failures. Keep each wrap parallel to the one before.
- Winding too tightly: Excessive tension can damage the spool mechanism and make the line difficult to advance.
- Not securing the starting end: If the line slips out of the anchor notch, the entire spool will unwind.
Securing Line in Notches and Reassembling
Positioning the Free Ends
After winding, the two free 4–6 inch ends of line must be positioned correctly:
- Locate the two cutting notches on the trimmer head. These are small grooves in the outer edge of the head where line passes through.
- Insert one free end into each notch. Push the line into the notch so it won’t slip out during assembly.
- The line should sit snugly in the notches without kinks or twists.
Reassembling the Trimmer Head
For Twist-Off Heads:
- Replace the spool inside the head and secure any center bolts or clips.
- Align the spool so the free line ends pass through the cutting notches.
- Twist the head clockwise onto the shaft until it’s snug. Don’t over-tighten—stop when you feel firm resistance.
For Press-Release Heads:
- Reinsert the spool or cartridge into the head.
- Align the line ends with the cutting notches.
- Press the head onto the shaft until the release tabs click or lock into place.
Testing and Troubleshooting Initial Operation
Testing the Trimmer
Before using the trimmer in your yard, test it in a safe area:
- Reconnect the spark plug wire you disconnected earlier.
- Start the trimmer and let it run for 30 seconds at low throttle.
- Gently tap the trimmer head on the ground (for automatic feed systems) to advance new line.
- Check that line extends evenly from both sides of the head.
Why Your Trimmer Might Not Feed Line
Line doesn’t advance when you bump the head: The line was wound in the wrong direction, or it slipped out of the anchor notch. Rewind the spool following the directional arrow.
Line is tangled or kinked: This indicates overlapping wraps during winding. Remove the head and rewind, keeping each wrap parallel.
Spool spins but line doesn’t feed: The line ends may not be positioned in the cutting notches. Remove the head and reposition them.
One side of line feeds but the other doesn’t: Check that both free ends are inserted fully into their respective cutting notches.
Frequently Asked Questions
How often should I change my weed eater string?
The frequency depends on how often you trim and the terrain. If you trim weekly during growing season, you’ll likely need to change the string every 2–4 weeks. Rocky or sandy areas where the trimmer contacts debris will consume string faster than open grass. You’ll know it’s time when the trimmer becomes noticeably less effective or only one short strand remains.
Can I use any trimmer line, or does it need to match my specific trimmer?
The gauge (thickness) must match your trimmer’s specifications—using the wrong gauge can cause feeding problems or damage the head. However, you don’t need the exact brand. Most 0.080″ line, for example, works across different brands. Check your trimmer manual or the spool label for the correct gauge before buying replacement line.
What if I wind the string on the spool but it still won’t feed?
The most common cause is winding in the wrong direction. Double-check the directional arrow on the spool and rewind if necessary. Other causes include the line slipping out of the anchor notch during winding, overlapping wraps creating jams, or the free ends not being seated properly in the cutting notches. If you’ve ruled out these issues, the spool mechanism itself may be damaged.
Is it necessary to disconnect the spark plug wire, or can I just turn off the engine?
You should do both for maximum safety. Turning off the engine stops it from running, but disconnecting the spark plug wire prevents accidental start if someone pulls the cord while you’re working. It’s a simple extra step that eliminates a serious injury risk.
Key Takeaways
- Always disconnect the spark plug wire and allow the engine to cool before working on the trimmer head.
- Identify whether your trimmer head is twist-off or press-release to know how to remove it.
- The directional arrow on the spool is critical—winding in the wrong direction is the most common cause of feeding failure.
- Keep your winding tight but not over-tensioned, and keep wraps parallel to avoid crossing and jamming.
- Leave 4–6 inch free ends on each side and seat them properly in the cutting notches before reassembling.
- Test the trimmer in a safe area before using it in your yard to confirm the line feeds correctly.