Direct Answer: How to Change Weed Eater String
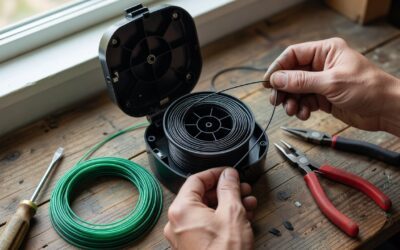
To change the string on a weed eater, disconnect the power source, access the spool head by twisting or unclipping the cover, remove the old trimmer line, and wind new line onto the spool in the correct direction (usually counterclockwise when viewed from above). Reinstall the spool, thread the string through the eyelets, and test the feed. The exact steps vary by trimmer type—automatic-feed heads, bump-feed models, and fixed-head designs each have slightly different procedures.
Safety First: Before You Start
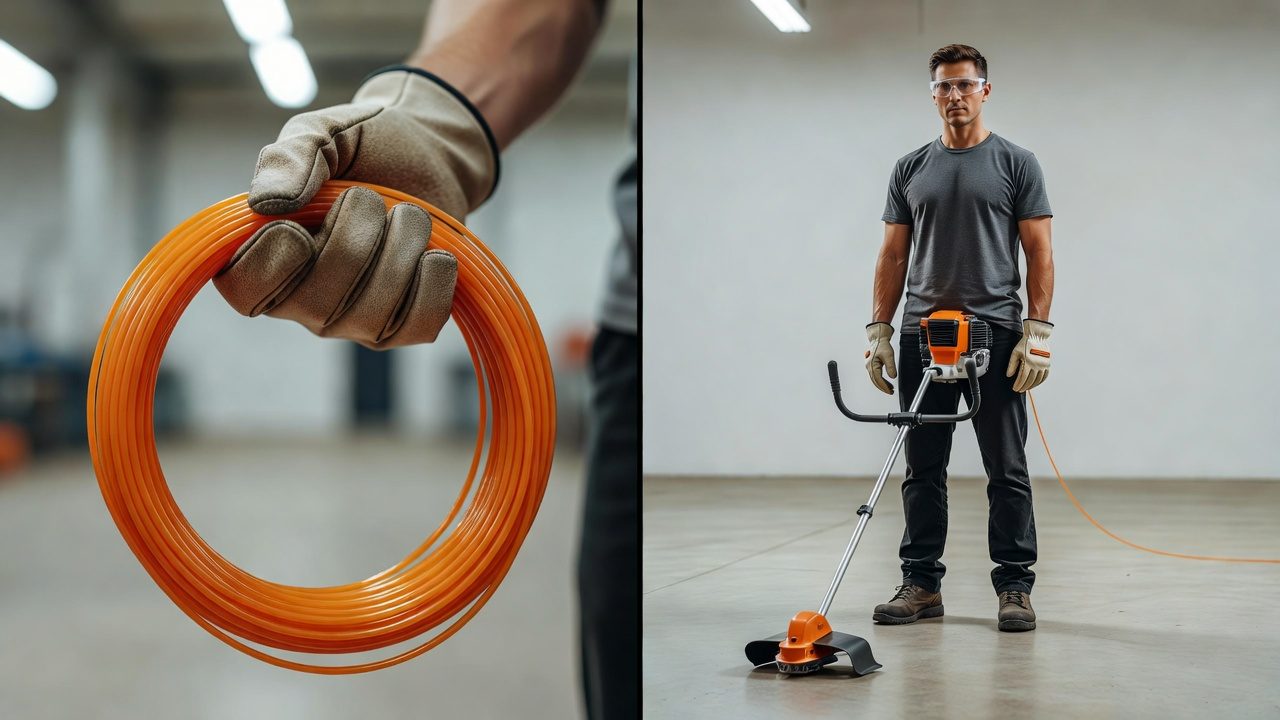
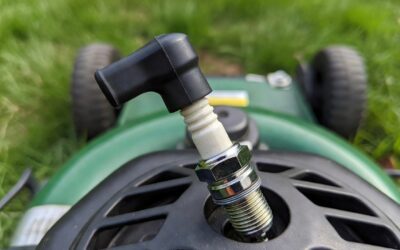
Before touching any part of your weed eater, always disconnect the power source. For gas-powered trimmers, remove the spark plug wire to prevent accidental starting. For electric trimmers, unplug the cord or remove the battery. Wear work gloves to protect your hands from sharp trimmer line edges, and consider wearing safety glasses in case line pieces snap during handling.
Allow gas-powered engines to cool for at least 5–10 minutes before working on the head assembly, as metal components can retain heat and cause burns.
Identify Your Weed Eater Type
Weed eaters use three main types of string-feed systems, and knowing which one you have is essential for changing the string correctly.
- Automatic-Feed Head: Advances new string automatically as the cutting head spins. You load the spool once, and the trimmer feeds line without manual intervention. These are common on modern electric and some gas trimmers.
- Bump-Feed Head: Requires you to tap the spool head on the ground during operation to advance a preset length of new string. These are popular on gas-powered trimmers because they are durable and low-maintenance.
- Fixed-Head (Manual-Feed): Older design where you manually pull out and cut string to your desired length. Rarely found on new models but still present on some basic trimmers.
Check your trimmer’s user manual or look at the head assembly. If it has a spring-loaded mechanism under the spool cover, it’s likely automatic-feed. If the spool is a solid disk with no visible mechanism, it’s usually bump-feed or fixed.
How to Access the Spool Head
The method for accessing your spool depends on the trimmer design, but most consumer models follow one of two approaches.
Twist-Off Head (Most Common)
Many trimmers have a head that unscrews counterclockwise when viewed from above:
- Hold the shaft of the trimmer steady with one hand.
- Use your other hand to grip the spool head and turn it counterclockwise.
- Once loose, unscrew it by hand until it separates from the shaft.
- The spool and internal spring mechanism (if present) will come free.
Clip-On Head
Some electric and lightweight trimmers use a snap-on design:
- Locate the clips or tabs on the sides of the head assembly—usually two or three.
- Press inward on the clips while gently pulling the head away from the shaft.
- The head should slide off without tools.
Consult your manual if you’re unsure; forcing the wrong direction can damage the assembly. Most trimmers do not require special tools for head removal.
Removing Old Trimmer Line
Once the spool head is removed, extracting the old string is straightforward.
- Unwind by hand: Grasp the end of the old trimmer line and pull gently while turning the spool counterclockwise. Most string unwinds easily.
- If line is stuck: Soak the spool in warm water for 5–10 minutes to soften dried-on nylon. Use a plastic scraper or old credit card to pry up the edge of the wound string, then unwind.
- Check the spool: Inspect it for cracks or damage. If you see splits or the spool is warped, replace it (usually $10–20) rather than rewinding.
- Clean the head: While the spool is out, wipe the head assembly with a dry cloth to remove dirt and debris.
Winding New String onto the Spool
This is where most users make mistakes. Winding in the wrong direction is the most common cause of string feed failure.
Determine Wind Direction
Look at the spool for directional arrows or markings. Most spools have an arrow molded into the plastic indicating the correct wind direction. If there is no arrow:
- Gas-powered and bump-feed trimmers: Wind counterclockwise when the spool is held with the eyelet facing you.
- Electric trimmers: Check your manual, as some wind clockwise.
- When in doubt, wind counterclockwise—it is the most common standard.
Load the Spool
- Cut a length of new trimmer line. Most spools hold 15–25 feet, but check your manual for the exact length. Start with about 20 feet if unsure.
- Locate the loading eyelet or slot on the spool. There is usually a small notch or hole where you insert the string end.
- Insert one end of the trimmer line into the eyelet and hold it in place with your thumb and finger.
- Begin winding the line onto the spool in the direction indicated by the arrow or marked as correct for your model. Wind firmly and evenly, keeping tension on the line so it does not bunch or overlap.
- Continue winding until you have loaded most of the string, leaving about 6 inches free.
- Tuck the free end into the hold-down groove or notch on the spool to secure it.
Thread Through the Eyelets
Most spool heads have one or two eyelets (small holes or slots) through which the cutting line extends. After winding:
- Pull the retained end of the string free from the hold-down notch.
- Route it through the eyelet(s) on the head assembly. If there are two eyelets, use both.
- The string should extend evenly from both sides (if dual eyelets) or from one side (if single eyelet).
Reinstalling the Spool and Testing
With the new string wound and threaded, reassemble the head and test function.
Reinstall the Spool Head
- Align the spool with the shaft. For twist-on heads, screw clockwise (opposite the removal direction) until snug. Do not over-tighten; hand-tight is sufficient.
- For clip-on heads, slide the assembly onto the shaft and press the clips until they snap into place.
- Verify that the string is still routed through the eyelet(s) and is not pinched under the head.
Test the Trimmer
- Reconnect the power (plug in, insert battery, or reattach spark plug wire).
- In a safe outdoor area away from people and objects, start the trimmer at low speed.
- Observe the string. It should rotate smoothly and remain centered in the eyelets. If it wobbles or the eyelets catch the line, stop and adjust.
- For automatic-feed models, you should see no visible change in string length as the trimmer runs (the feed mechanism only advances under load).
- For bump-feed models, tap the head lightly on the ground. A small amount of new string should advance into cutting position.
Trimmer Line Selection: Gauge and Material
Using the correct line type and thickness ensures proper performance and prevents breakage.
String Gauge (Thickness)
Trimmer line is measured in inches. Common gauges are:
- 0.065 inch (1.6 mm): Lightweight, best for light grass and electric trimmers. Breaks easily on thick weeds.
- 0.080 inch (2.0 mm): Standard for most residential gas and electric trimmers. Balances durability and cutting speed.
- 0.095 inch (2.4 mm): Heavy-duty, used on commercial trimmers and high-powered gas models. Slower cut but more durable.
- 0.105 inch and larger: Professional-grade, for brush cutters and heavy vegetation.
Check your trimmer manual or the spool itself for the recommended gauge. Using line that is too thick can strain the motor; too thin will break frequently and reduce cutting efficiency.
Material and Design
Most trimmer line is made of nylon, but construction varies:
- Round nylon: Most common, affordable, smooth cutting on grass.
- Twisted or spiral nylon: Increased surface area cuts thicker weeds and brush better; more expensive and slightly slower.
- Serrated edge: Rare; marketed for cutting power but not widely recommended for general use.
Round line is suitable for most homeowners. Upgrade to twisted only if you frequently trim thick weeds or brush.
Troubleshooting Common Issues After String Change
String Is Not Feeding (Automatic-Feed Models)
If the string does not advance when the trimmer is running:
- Check that the string is threaded through the eyelet correctly and is not pinched.
- Verify that the spool head is fully seated and screwed/clipped in place. A loose head will not engage the feed mechanism.
- Ensure the spool rotates freely by hand. If it is stuck, rewind the string—it may be over-tensioned or tangled.
- If the internal spring or pawl (feed mechanism) is broken, you may need to replace the entire head assembly ($20–40).
String Keeps Breaking
Frequent breakage indicates wrong gauge, incorrect installation, or debris:
- Confirm you are using the gauge specified in your manual.
- Check that the string is wound evenly and not overlapping itself on the spool.
- Inspect the eyelets for burrs or cracks. Sand down rough edges with fine-grit sandpaper (220–320 grit).
- Clear any grass or debris from the cutting head; buildup can snag the line.
- Avoid cutting into hard objects (rocks, concrete, metal) which will snap the string instantly.
String Is Loose or Misaligned
If the string wobbles or spins off-center:
- Remove the head and rewind the string, ensuring each wrap is snug and level.
- Check that you are winding in the correct direction. Winding backward causes the line to unravel.
- Verify that the spool sits flat and centered on the shaft. A tilted spool will cause misalignment.
Trimmer Head Spins but String Does Not Cut
This usually means the string is wound backward or is caught under the spool head:
- Stop immediately and access the head to verify that the string is routed through the eyelets and not trapped beneath the spool cover.
- If routing is correct, the string may be wound in the wrong direction. Remove the head, unwind, and rewind counterclockwise (or as indicated for your model).
Frequently Asked Questions
How often should you change weed eater string?
String does not need regular replacement on a schedule; it degrades with use. Replace it when the trimmer head stops cutting efficiently, when you notice frequent breakage, or when the eyelet pulls the line down to a very short stub. For regular homeowner use, expect to rewind or replace string every 2–4 weeks during mowing season, or once or twice per year for occasional users.
Can you use any trimmer line on any weed eater?
Not exactly. You must use the gauge specified for your model; using line that is too thick or too thin can damage the trimmer or cause poor performance. Brand does not matter much—most aftermarket trimmer line is compatible—but gauge and material (round vs. twisted) do. Always verify the gauge in your manual before buying.
What if your weed eater string keeps breaking immediately?
Immediate breakage usually means you are cutting into hard objects, using the wrong gauge (too thin), or have sharp burrs in the eyelets. Check that you are not hitting rocks, concrete, or roots. Verify the gauge is correct for your model. Inspect the eyelets for damage and sand smooth if necessary. If the eyelet has cracks, the head may need replacement.
Do you have to completely empty the spool to change the string?
For a complete string change (new roll of line), yes—unwind all the old line. However, if your spool still has usable line and you just want to reload more efficiently, you can carefully unwind excess, keeping some on the spool, and wind new line on top (though a full replacement is cleaner and more reliable).