To create a mulch bed, clear the area of weeds and debris, define the bed’s shape with a spade or edging tool, lay a weed barrier (optional, such as landscape fabric or cardboard), spread 2–4 inches of mulch evenly over the area, and water it in to settle the mulch. Refresh the mulch layer annually or as needed to maintain depth. This straightforward process enhances your landscape, suppresses weeds, retains soil moisture, and improves the overall health of your plants.
Planning and Site Preparation
Before you break ground, thoughtful planning ensures your mulch bed serves its purpose effectively. Start by selecting a location that complements your landscape. Consider factors such as sunlight exposure, existing vegetation, drainage, and the visual impact you want to achieve. A mulch bed can frame a garden, line a walkway, surround trees, or create a focal point in your yard. Observe the area over a day to note how water flows and where sunlight hits—this helps you choose plants (if any) and mulch type later.
Once you have chosen the location, decide on the size and shape. Use a garden hose, spray paint, or string to outline the bed. Curved, flowing edges often look more natural, while straight lines suit formal designs. Keep in mind that larger beds are easier to maintain and provide better weed suppression than narrow strips. A bed width of at least 3 feet allows for comfortable access and effective mulching. After marking the outline, it is time to clear the area. Remove all existing grass, weeds, and debris. For grassy areas, you can use a sod cutter, a sharp spade, or a shovel to slice through the turf. Dig out the roots of perennial weeds to prevent them from growing back through the mulch.
If the area is heavily overgrown, consider using a herbicide or solarization (covering with clear plastic for several weeks) to kill stubborn vegetation, but these methods require more time and may not align with organic gardening preferences. For most home landscapes, manual removal is sufficient. Rake the surface smooth and remove stones, branches, and other debris. This prep work creates a clean canvas for your mulch bed and reduces the risk of pests and diseases that can hide in organic matter.
Defining Bed Borders
Creating distinct, clean borders is essential for a professional-looking mulch bed and for keeping mulch contained. The simplest method is to use a spade or half-moon edger to cut a sharp edge along your outline. Cut the edge at a slight angle, about 2 to 4 inches deep, creating a trench that separates the bed from the adjacent lawn. This trench acts as a barrier, preventing grass roots from creeping into the bed and mulch from spilling onto the grass. The trench also makes mowing easier because you can run the mower wheel along the edge without scalping the lawn.
For a more permanent solution, you can install physical edging materials such as metal, plastic, stone, brick, or concrete. Metal edging is durable and easy to install, while brick or stone adds a decorative touch. When installing edging, ensure it sits flush with the ground or slightly above to contain the mulch. If you use plastic edging, be aware that it can become brittle over time and may heave in freeze-thaw cycles. For stone or brick, you will need to dig a shallow trench, set the stones level, and backfill with soil. Whichever method you choose, the goal is to define the bed clearly and minimize maintenance.
Depth of the edge trench depends on your mulch depth and the root structure of nearby grass. A 3- to 4-inch-deep trench is typically sufficient. If you use physical edging, follow the manufacturer’s recommendations for depth. After edging, remove any grass or soil clods from the bed area to ensure a smooth surface. This border not only improves aesthetics but also serves as a practical barrier against weed invasion from surrounding turf.
Weed Control Options: Fabric, Cardboard, or None
One of the primary benefits of a mulch bed is weed suppression, but the effectiveness depends on whether you use a barrier beneath the mulch. You have three main options: landscape fabric, cardboard, or no barrier at all. Each has pros and cons that influence your choice based on budget, longevity, and environmental considerations.
Landscape fabric is a woven or non-woven synthetic material that allows water and air to pass through while blocking sunlight, thus preventing weed growth. It is durable and can last several years, making it a good choice for large beds and long-term projects. However, fabric can become exposed as mulch decomposes, and weeds can eventually grow on top of the fabric if organic material accumulates. Also, installation requires cutting holes for planting and careful overlapping of seams. Fabric is effective but not maintenance-free.
Cardboard is an increasingly popular, eco-friendly alternative. When laid down in layers (at least two sheets thick) and overlapped, cardboard smothers weeds by blocking light and then decomposes over time, adding organic matter to the soil. It is inexpensive and often free, and it breaks down to attract earthworms, improving soil structure. The downside is that it degrades within a season or two, so it is not a permanent solution. You will need to wet the cardboard thoroughly after laying it to help it conform to the ground and hold it in place with a thin layer of soil or mulch.
If you choose to skip a barrier altogether, you will need to rely on a deeper mulch layer—at least 3 to 4 inches—to prevent weed seeds from germinating. This method is simpler and cheaper initially, but it requires more frequent weeding and mulch replenishment. Some gardeners prefer this approach because it allows the mulch to integrate with the soil naturally, adding nutrients as it breaks down. The choice depends on your tolerance for maintenance and your long-term goals for the bed.
Selecting the Right Mulch
The mulch you choose affects the bed’s appearance, function, and longevity. Mulches fall into two broad categories: organic and inorganic. Organic mulches include wood chips, bark nuggets, shredded bark, pine straw, compost, leaf mold, and straw. They decompose over time, improving soil fertility, and they are generally more aesthetically pleasing. Inorganic mulches include gravel, pebbles, rubber mulch, and landscape glass. They do not break down, so they require less frequent replacement, but they do not add nutrients and can be more expensive.
For most ornamental beds, shredded hardwood bark or wood chips are popular choices because they decompose slowly and have a natural, dark color that contrasts well with plants. Pine bark nuggets are lighter in color and last longer but can float away in heavy rain. Cedar and cypress mulches have natural oils that repel some insects and resist decay, making them long-lasting options. Pine straw is light, easy to spread, and common in areas with pine trees, but it can be acidic and may not suit all plants.
When selecting organic mulch, consider the source and any potential contaminants. Some mulches may contain weed seeds or pathogens if not properly processed. It is advisable to purchase from reputable suppliers. For vegetable gardens or areas where you will be planting edibles, choose well-aged compost or straw that is free from herbicides. Inorganic mulches like rubber or gravel are ideal for pathways, play areas, or xeriscaping because they do not degrade, but they can retain heat and may not be suitable for all plants. Ultimately, the best mulch depends on your climate, soil type, plant needs, and aesthetic preference.
Applying Mulch: Depth and Technique
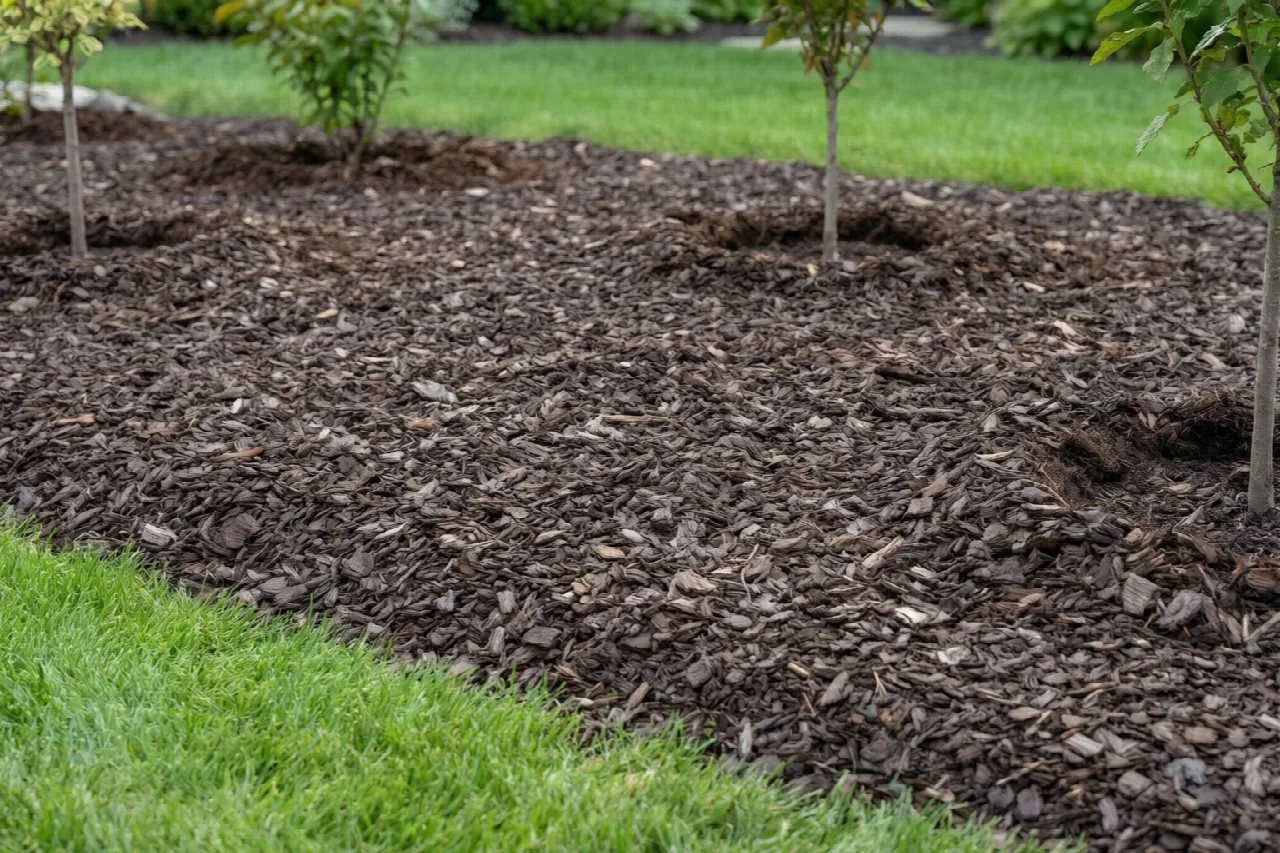
Proper application is critical to reap the benefits of your mulch bed. The ideal depth is generally 2 to 4 inches. A layer thinner than 2 inches may not suppress weeds effectively, while a layer thicker than 4 inches can suffocate plant roots, retain too much moisture, and encourage fungal diseases. For coarse mulches like wood chips, a 3- to 4-inch depth is suitable; for fine mulches like compost or shredded leaves, 2 to 3 inches is adequate.
Spread the mulch evenly using a rake, shovel, or your hands. Start by dumping piles of mulch around the bed and then distribute them to a uniform thickness. Avoid piling mulch against the base of trees or shrubs—this is known as “volcano mulching” and is harmful because it can trap moisture against the bark, leading to rot and pest issues. Keep the mulch at least 2 to 3 inches away from woody stems and tree trunks. Similarly, do not cover the crowns of herbaceous plants; leave a small gap around each plant to allow air circulation.
After spreading, water the mulch thoroughly to settle it and remove air pockets. This also helps the mulch stay in place and reduces the risk of it blowing away. If you used a cardboard barrier, wetting activates the cardboard to soften and conform to the ground. Over the next few days, check the bed and redistribute any mulch that has shifted. If you notice bare spots, add more mulch to maintain the consistent depth.
Maintaining and Refreshing the Mulch Bed
A mulch bed is not a “set it and forget it” feature. Organic mulches decompose over time, typically losing 1 to 2 inches of depth annually. To keep the bed effective and looking fresh, plan to refresh the mulch every year or every other year. The best time to top up is in spring, before weeds become established, or in fall after the growing season. When adding fresh mulch, you do not need to remove the old layer entirely; simply add enough to bring the total depth back to the recommended 2 to 4 inches. If you notice the old mulch has become matted, compacted, or water-repellent, you may need to turn it over or break it up before adding new material.
Regular maintenance includes occasional weeding, especially at the edges and near plant bases where the barrier may be thin. Hand-pull weeds before they set seed. If you use landscape fabric, inspect it periodically to ensure it is not exposed; if it is, cover it with additional mulch. Inorganic mulches require less frequent attention but may need to be raked to level them, and they can become discolored over time. For all types, keep the bed well-defined by recutting the edge trench once a year to prevent grass encroachment.
Consider the environmental impact of your mulch choices. Sourcing locally produced mulch reduces transportation emissions, and using organic materials supports a sustainable cycle. If you have the space, you can even make your own compost or wood chips from yard waste. By following these maintenance practices, your mulch bed will remain a vibrant, low-maintenance asset to your landscape for many years.